How to Use Adafruit SPI Flash SD Card: Examples, Pinouts, and Specs
Introduction
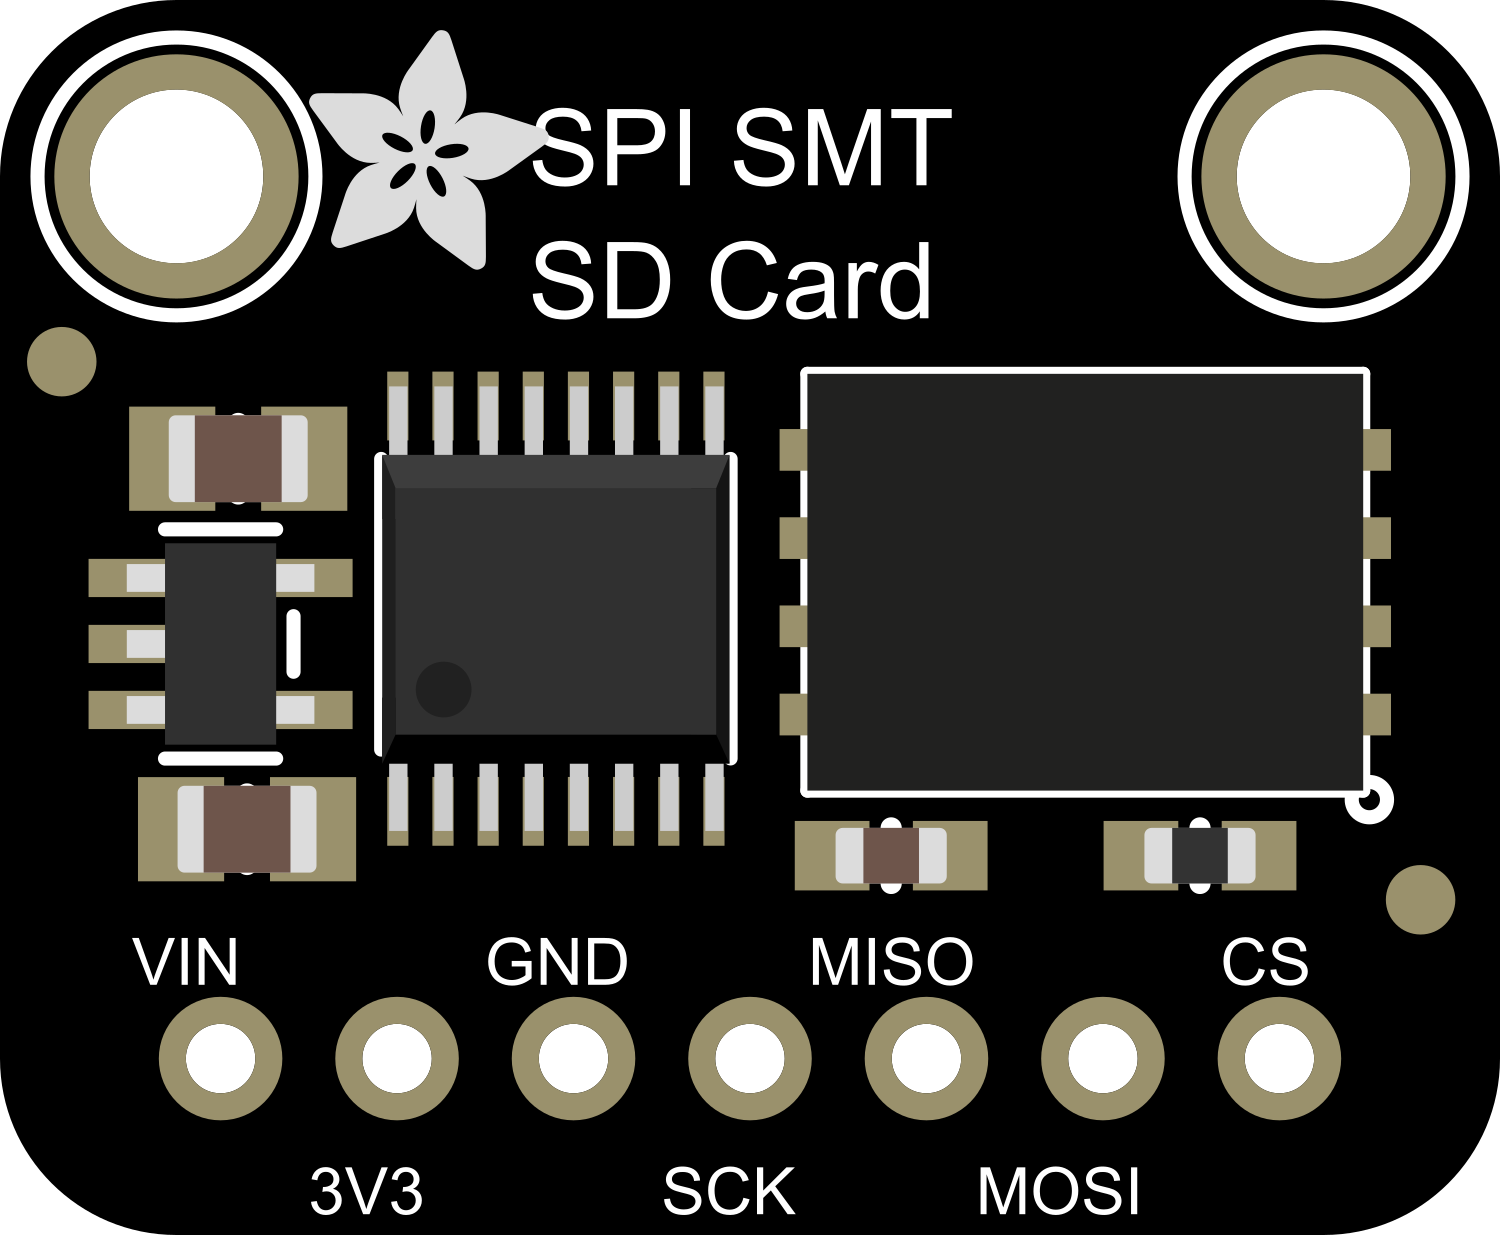
The Adafruit SPI Flash SD Card is a versatile breakout board designed for data storage and retrieval using SPI (Serial Peripheral Interface) communication. This component is ideal for projects requiring external memory, such as data logging, audio recording, or firmware updates. It is compatible with both 3.3V and 5V microcontrollers, including popular platforms like Arduino, ESP8266, and Raspberry Pi.
Explore Projects Built with Adafruit SPI Flash SD Card
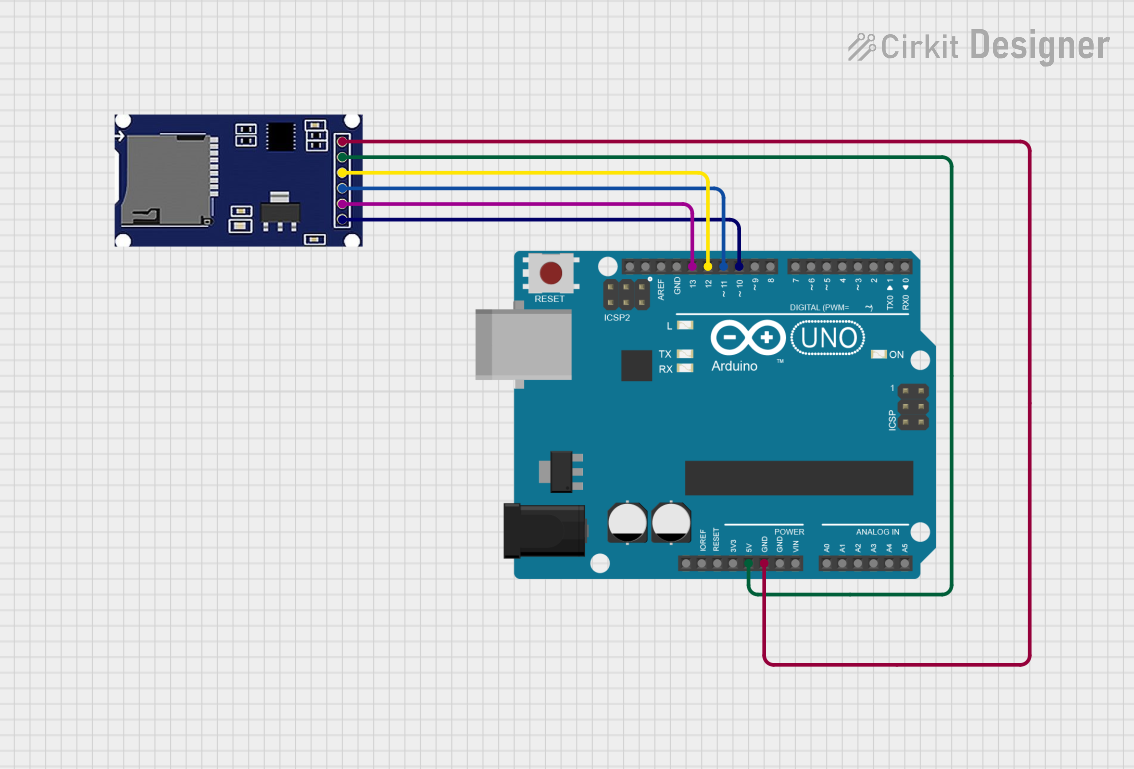

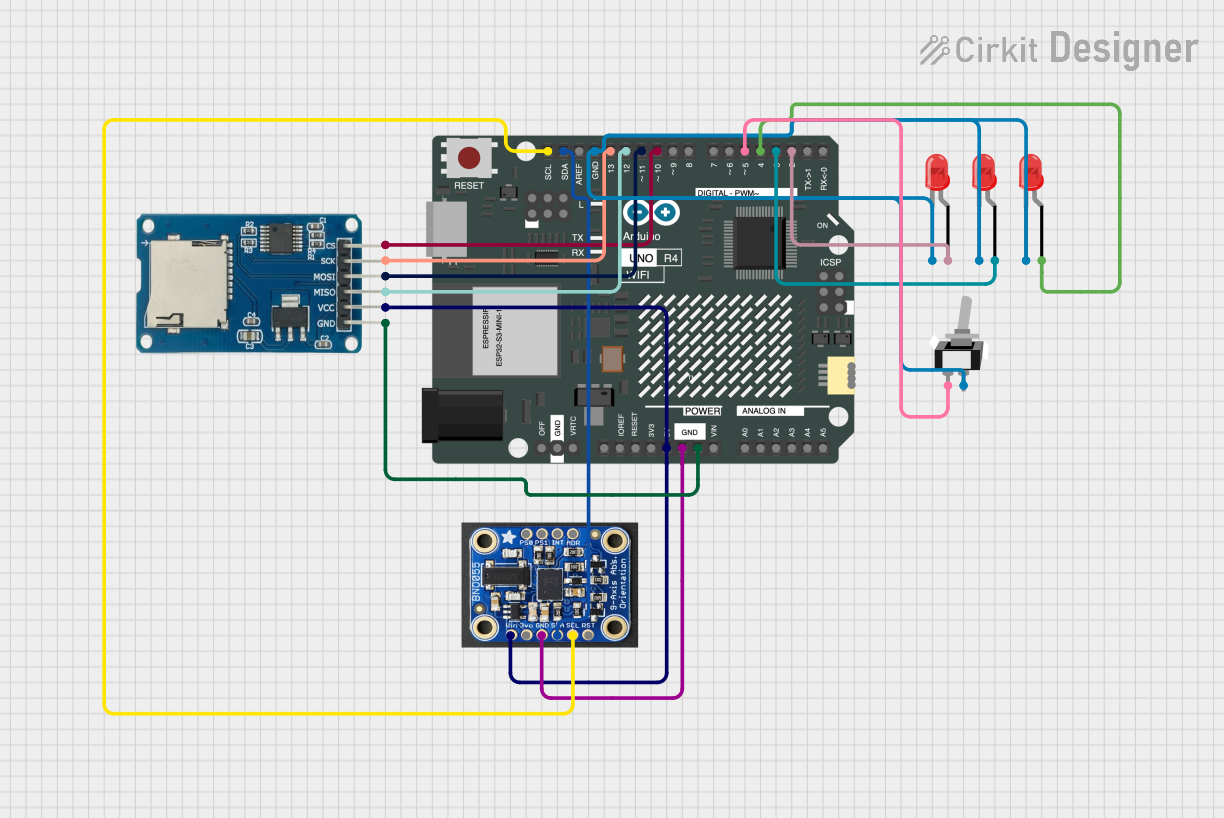
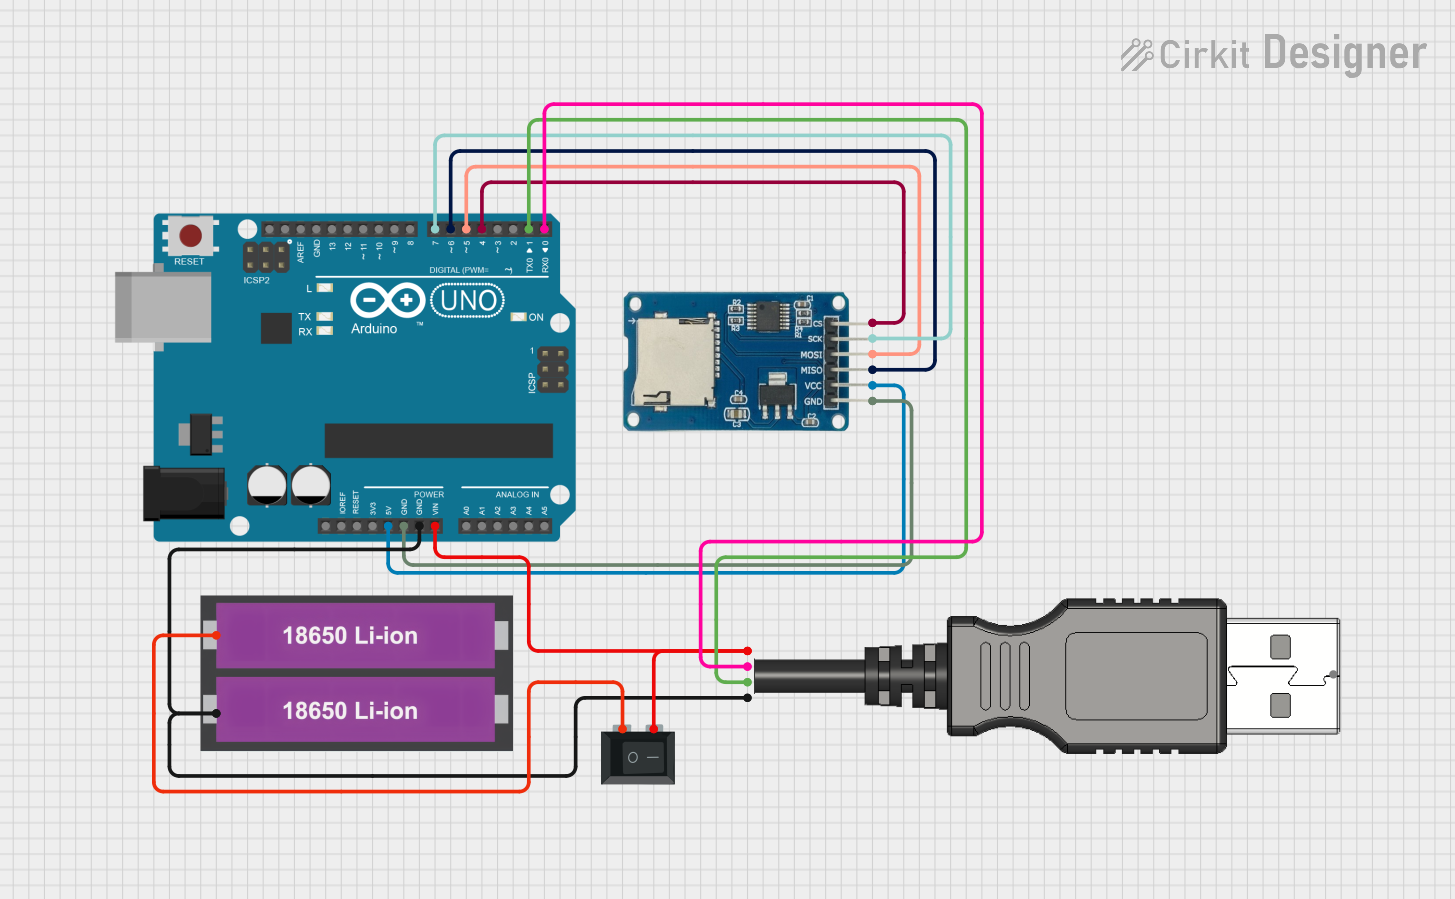
Explore Projects Built with Adafruit SPI Flash SD Card
Common Applications and Use Cases
- Data logging for sensors
- Audio file storage and playback
- Storing configuration or firmware files
- IoT devices requiring external memory
Technical Specifications
Key Technical Details
- Operating Voltage: 3.3V to 5V (with onboard level shifters)
- Memory Capacity: Depends on the microSD card used (supports SD, SDHC, and SDXC)
- SPI Flash Memory Chip: Typically ranges from 512KB to 16MB
- Interface: SPI (Serial Peripheral Interface)
- Logic Level: 3.3V (5V tolerant with level shifters)
Pin Configuration and Descriptions
| Pin Number | Pin Name | Description |
|---|---|---|
| 1 | CS | Chip Select for the SPI flash memory |
| 2 | SCK | Serial Clock for SPI communication |
| 3 | MISO | Master In Slave Out for SPI communication |
| 4 | MOSI | Master Out Slave In for SPI communication |
| 5 | GND | Ground connection |
| 6 | VCC | Power supply (3.3V to 5V) |
| 7 | CS_SD | Chip Select for the microSD card |
| 8 | CD | Card Detect for the microSD card |
Usage Instructions
How to Use the Component in a Circuit
- Connect the VCC pin to the power supply (3.3V or 5V, depending on your microcontroller).
- Connect the GND pin to the ground of your power supply.
- Connect the SCK, MISO, and MOSI pins to the corresponding SPI pins on your microcontroller.
- Connect the CS pin to a digital pin on your microcontroller for the SPI flash memory chip.
- Connect the CS_SD pin to a different digital pin on your microcontroller for the microSD card.
- Optionally, connect the CD pin to a digital pin to detect when a card is inserted.
Important Considerations and Best Practices
- Always power off your circuit before inserting or removing the microSD card.
- Format the microSD card to FAT32 for best compatibility.
- Use a high-quality microSD card to ensure reliable data storage.
- Keep the SPI lines as short as possible to reduce noise and improve signal integrity.
- Use pull-up resistors on the CS lines if you experience intermittent connectivity.
Example Code for Arduino UNO
#include <SPI.h>
#include <SD.h>

const int chipSelectSD = 10; // Chip Select pin for SD card

void setup() {
  Serial.begin(9600);
  while (!Serial) {
    ; // Wait for serial port to connect.
  }

  Serial.print("Initializing SD card...");
  if (!SD.begin(chipSelectSD)) {
    Serial.println("initialization failed!");
    return;
  }
  Serial.println("initialization done.");
}

void loop() {
  // Open a new file to write to it.
  File dataFile = SD.open("datalog.txt", FILE_WRITE);

  // If the file is available, write to it.
  if (dataFile) {
    dataFile.println("Data log entry");
    dataFile.close();
    Serial.println("Data written to datalog.txt");
  } else {
    // If the file isn't open, pop up an error.
    Serial.println("error opening datalog.txt");
  }
}
Troubleshooting and FAQs
Common Issues Users Might Face
- MicroSD card not recognized: Ensure the card is properly inserted and formatted to FAT32.
- Data not writing to the card: Check the chip select pin connection and ensure it's correctly defined in the code.
- Corrupted data: Use a high-quality microSD card and ensure power supply stability.
Solutions and Tips for Troubleshooting
- Double-check wiring, especially the SPI connections and chip select pins.
- Make sure the microSD card is not locked (write-protected).
- Use the
SD.cardType()function to verify the SD card type and ensure compatibility. - Check the serial monitor for error messages that can provide insight into the issue.
FAQs
Q: Can I use this breakout board with a 5V microcontroller? A: Yes, the board includes level shifters to interface with both 3.3V and 5V microcontrollers.
Q: What is the maximum size of the microSD card that I can use? A: The breakout board supports SD, SDHC, and SDXC cards, typically up to 2TB, depending on the SD card specifications.
Q: How do I select between the SPI flash and the microSD card? A: You control which memory is active by setting the corresponding chip select (CS) pin LOW. Only one CS pin should be LOW at a time to communicate with the desired memory.
This documentation provides a comprehensive guide to using the Adafruit SPI Flash SD Card breakout board. For further assistance, consult the Adafruit forums or the community resources available online.