Cirkit Designer Logo
Cirkit Designer
Your all-in-one circuit design IDE
Home / 
Component Documentation

How to Use Capacitive Soil Moisture Sensor: Examples, Pinouts, and Specs

Image of Capacitive Soil Moisture Sensor
Cirkit Designer LogoDesign with Capacitive Soil Moisture Sensor in Cirkit Designer

Introduction

The Capacitive Soil Moisture Sensor (Manufacturer Part ID: SEN0193/SEN0308) by DFRobot is a reliable and non-invasive sensor designed to measure the volumetric water content in soil. Unlike resistive soil moisture sensors, this capacitive sensor detects changes in soil capacitance, making it less prone to corrosion and ensuring a longer lifespan. It is ideal for applications requiring accurate and durable soil moisture monitoring.

Explore Projects Built with Capacitive Soil Moisture Sensor

Use Cirkit Designer to design, explore, and prototype these projects online. Some projects support real-time simulation. Click "Open Project" to start designing instantly!
ESP32-Based Wi-Fi Connected Soil Moisture Monitoring System
Image of 2: A project utilizing Capacitive Soil Moisture Sensor in a practical application
This circuit consists of an ESP32 microcontroller connected to a capacitive soil moisture sensor. The ESP32 provides power to the sensor and reads the analog output from the sensor to monitor soil moisture levels.
Cirkit Designer LogoOpen Project in Cirkit Designer
ESP32-Based Smart Soil Moisture and Temperature Monitoring System with Solar Power
Image of THEISISSSSSS POWERBANK: A project utilizing Capacitive Soil Moisture Sensor in a practical application
This circuit is a soil moisture and environmental monitoring system using an ESP32 microcontroller. It integrates multiple capacitive soil moisture sensors and a DHT22 temperature and humidity sensor to collect data, which can be processed or transmitted by the ESP32. The system is powered by a solar charger power bank, ensuring sustainable operation.
Cirkit Designer LogoOpen Project in Cirkit Designer
Arduino Pro Mini Based Soil Moisture Monitoring System with Sleep Mode
Image of Moisture Meter: A project utilizing Capacitive Soil Moisture Sensor in a practical application
This circuit is designed to monitor soil moisture levels using a capacitive soil moisture sensor interfaced with an Arduino Pro Mini. It indicates the moisture level through three LEDs (red for dry, yellow for moderate, and green for wet) and outputs readings to a serial monitor. The system also features a pushbutton to activate the device and a sleep mode function to conserve power when not in use.
Cirkit Designer LogoOpen Project in Cirkit Designer
Arduino UNO Based Soil Moisture Monitoring System
Image of capacitive sensor: A project utilizing Capacitive Soil Moisture Sensor in a practical application
This circuit consists of an Arduino UNO microcontroller connected to a Capacitive Soil Moisture Sensor V1.2. The Arduino is programmed to read the moisture levels from the sensor and categorize the soil moisture content as 'Very Wet', 'Wet', or 'Dry', which is then output through the serial port. The sensor is powered by the Arduino's 5V supply, and its output is read by the Arduino's analog pin A0.
Cirkit Designer LogoOpen Project in Cirkit Designer

Explore Projects Built with Capacitive Soil Moisture Sensor

Use Cirkit Designer to design, explore, and prototype these projects online. Some projects support real-time simulation. Click "Open Project" to start designing instantly!
Image of 2: A project utilizing Capacitive Soil Moisture Sensor in a practical application
ESP32-Based Wi-Fi Connected Soil Moisture Monitoring System
This circuit consists of an ESP32 microcontroller connected to a capacitive soil moisture sensor. The ESP32 provides power to the sensor and reads the analog output from the sensor to monitor soil moisture levels.
Cirkit Designer LogoOpen Project in Cirkit Designer
Image of THEISISSSSSS POWERBANK: A project utilizing Capacitive Soil Moisture Sensor in a practical application
ESP32-Based Smart Soil Moisture and Temperature Monitoring System with Solar Power
This circuit is a soil moisture and environmental monitoring system using an ESP32 microcontroller. It integrates multiple capacitive soil moisture sensors and a DHT22 temperature and humidity sensor to collect data, which can be processed or transmitted by the ESP32. The system is powered by a solar charger power bank, ensuring sustainable operation.
Cirkit Designer LogoOpen Project in Cirkit Designer
Image of Moisture Meter: A project utilizing Capacitive Soil Moisture Sensor in a practical application
Arduino Pro Mini Based Soil Moisture Monitoring System with Sleep Mode
This circuit is designed to monitor soil moisture levels using a capacitive soil moisture sensor interfaced with an Arduino Pro Mini. It indicates the moisture level through three LEDs (red for dry, yellow for moderate, and green for wet) and outputs readings to a serial monitor. The system also features a pushbutton to activate the device and a sleep mode function to conserve power when not in use.
Cirkit Designer LogoOpen Project in Cirkit Designer
Image of capacitive sensor: A project utilizing Capacitive Soil Moisture Sensor in a practical application
Arduino UNO Based Soil Moisture Monitoring System
This circuit consists of an Arduino UNO microcontroller connected to a Capacitive Soil Moisture Sensor V1.2. The Arduino is programmed to read the moisture levels from the sensor and categorize the soil moisture content as 'Very Wet', 'Wet', or 'Dry', which is then output through the serial port. The sensor is powered by the Arduino's 5V supply, and its output is read by the Arduino's analog pin A0.
Cirkit Designer LogoOpen Project in Cirkit Designer

Common Applications

  • Smart irrigation systems
  • Agricultural automation
  • Gardening and horticulture
  • Environmental monitoring
  • DIY electronics and IoT projects

Technical Specifications

Below are the key technical details for the Capacitive Soil Moisture Sensor:

Parameter Value
Operating Voltage 3.3V - 5.5V
Output Signal Analog voltage (0-3.0V typical)
Current Consumption < 20mA
Measurement Range 0% - 100% soil moisture
Interface Type Analog
Dimensions 98mm x 23mm x 3mm
Cable Length 200mm
Operating Temperature -40°C to 85°C

Pin Configuration

The sensor has a 3-pin interface for easy connection. The pinout is as follows:

Pin Name Description
1 VCC Power supply input (3.3V - 5.5V)
2 GND Ground connection
3 AOUT Analog output signal proportional to soil moisture
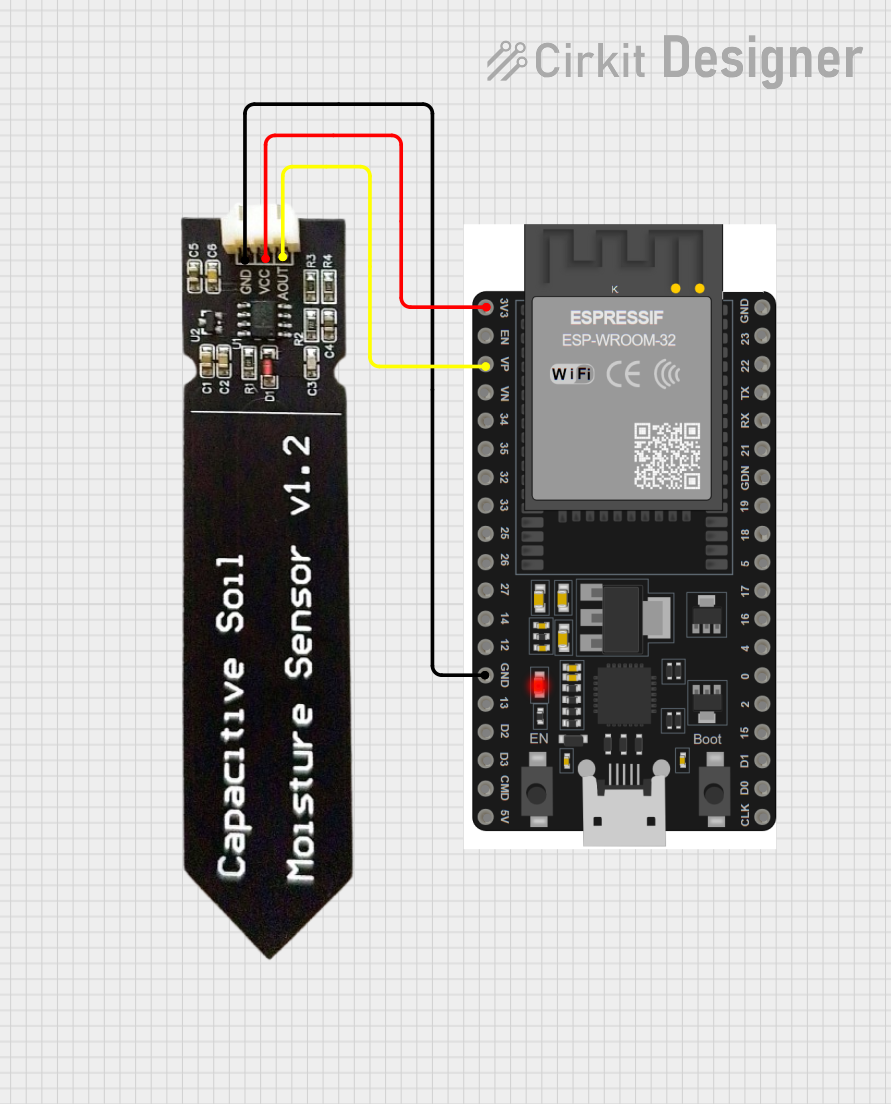
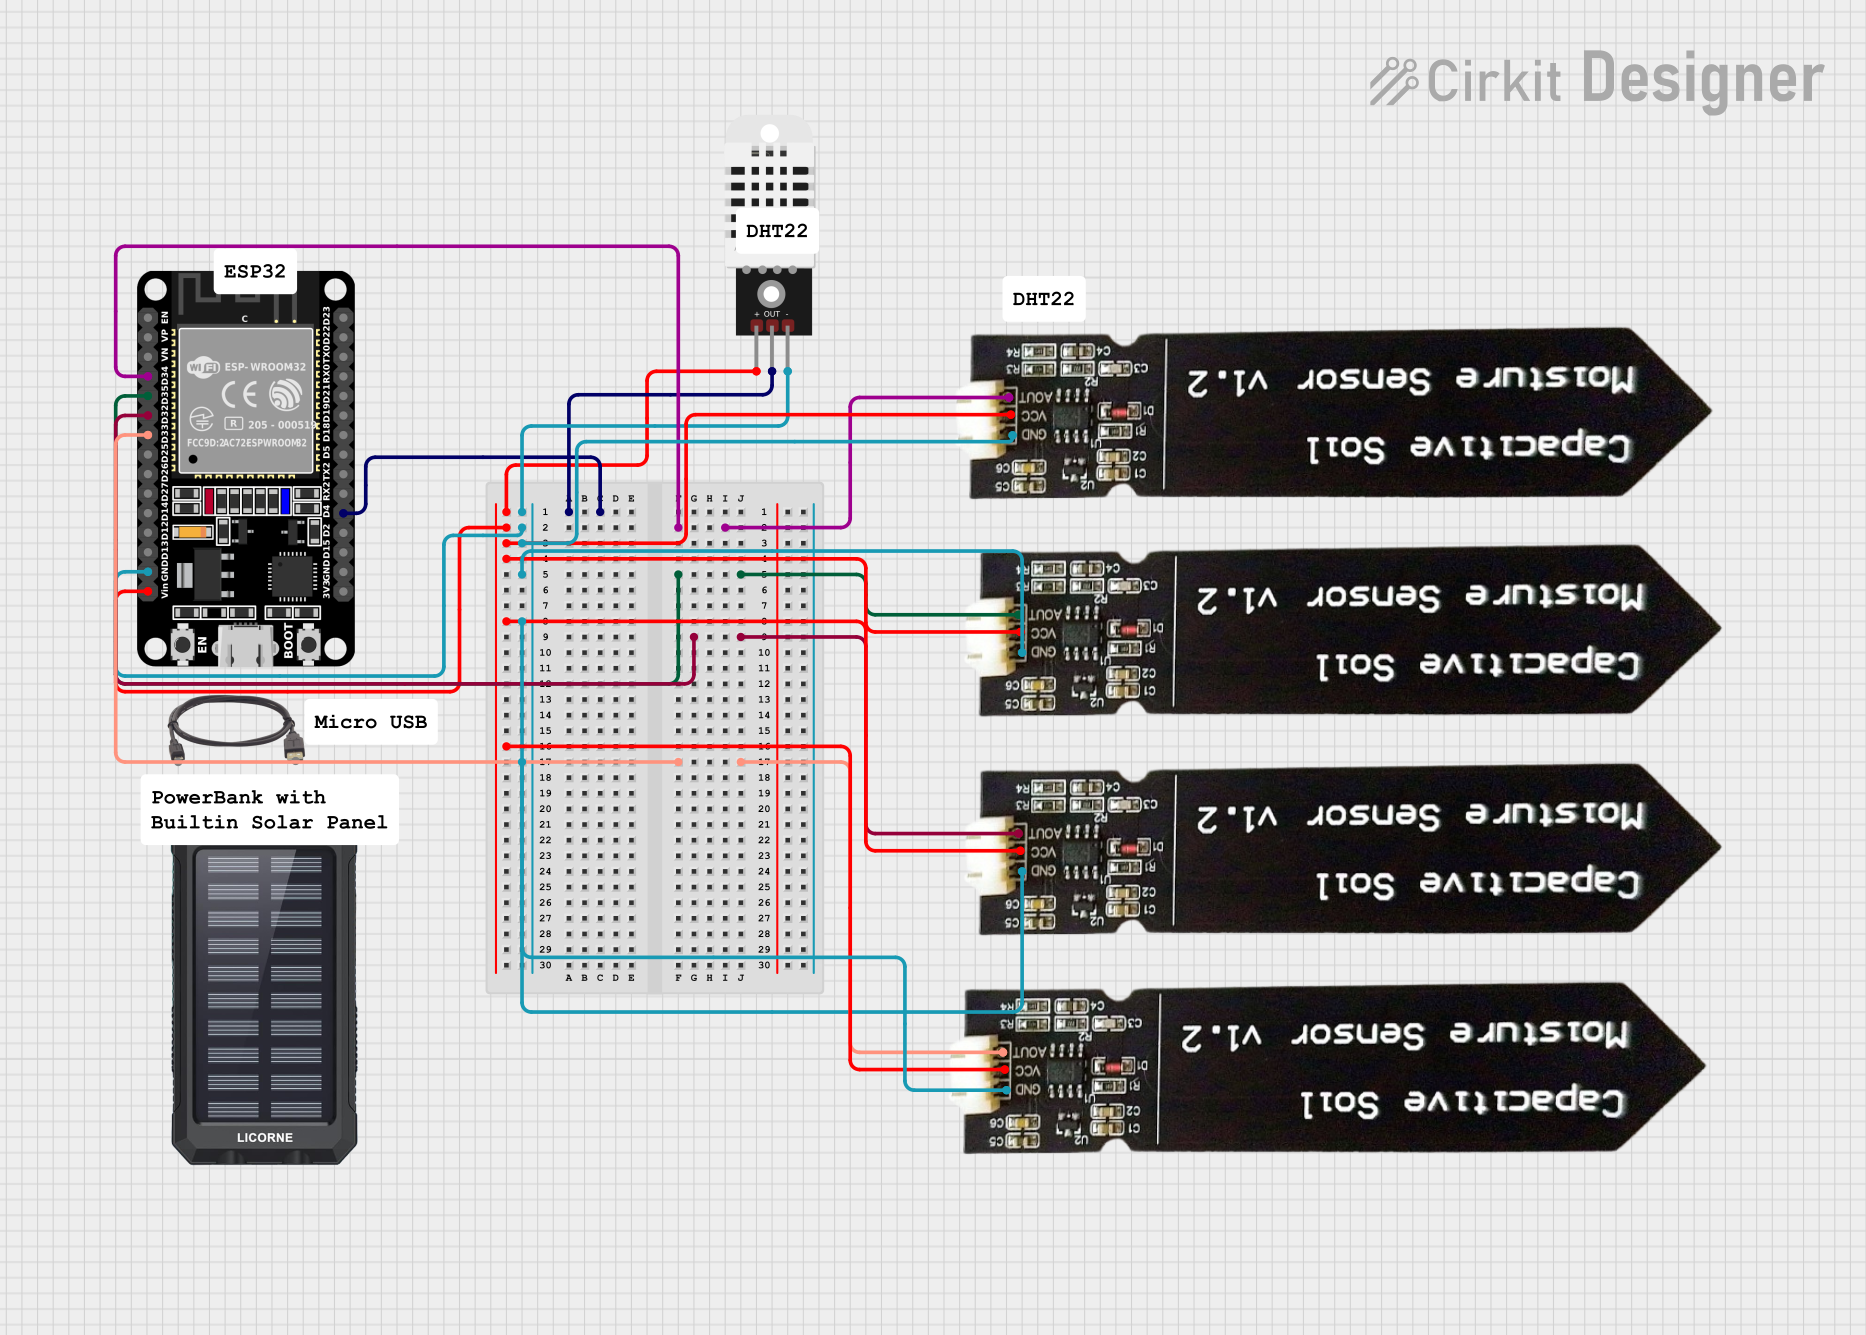
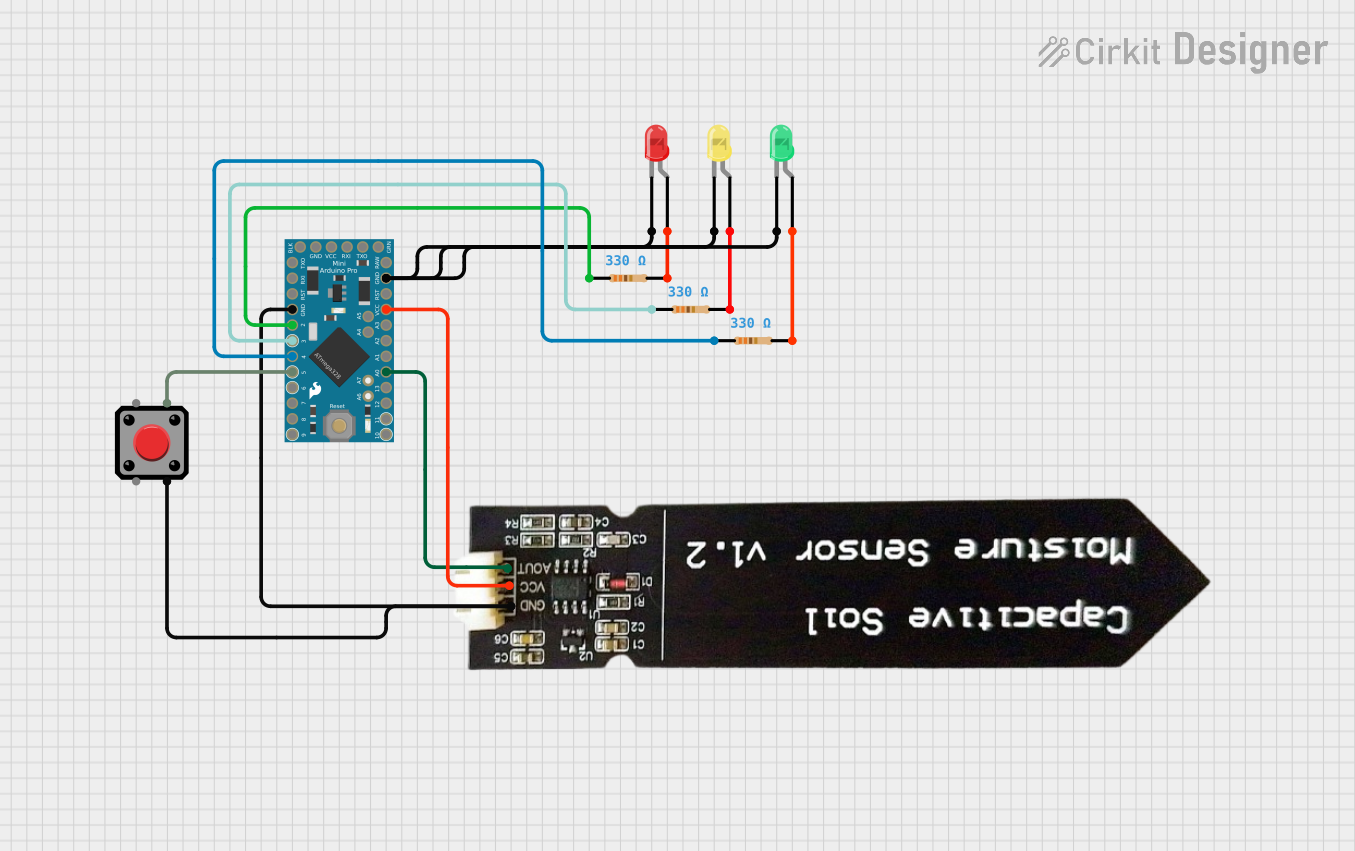
Usage Instructions

Connecting the Sensor

  1. Power Supply: Connect the VCC pin to a 3.3V or 5V power source, depending on your microcontroller.
  2. Ground: Connect the GND pin to the ground of your circuit.
  3. Analog Output: Connect the AOUT pin to an analog input pin on your microcontroller (e.g., Arduino).
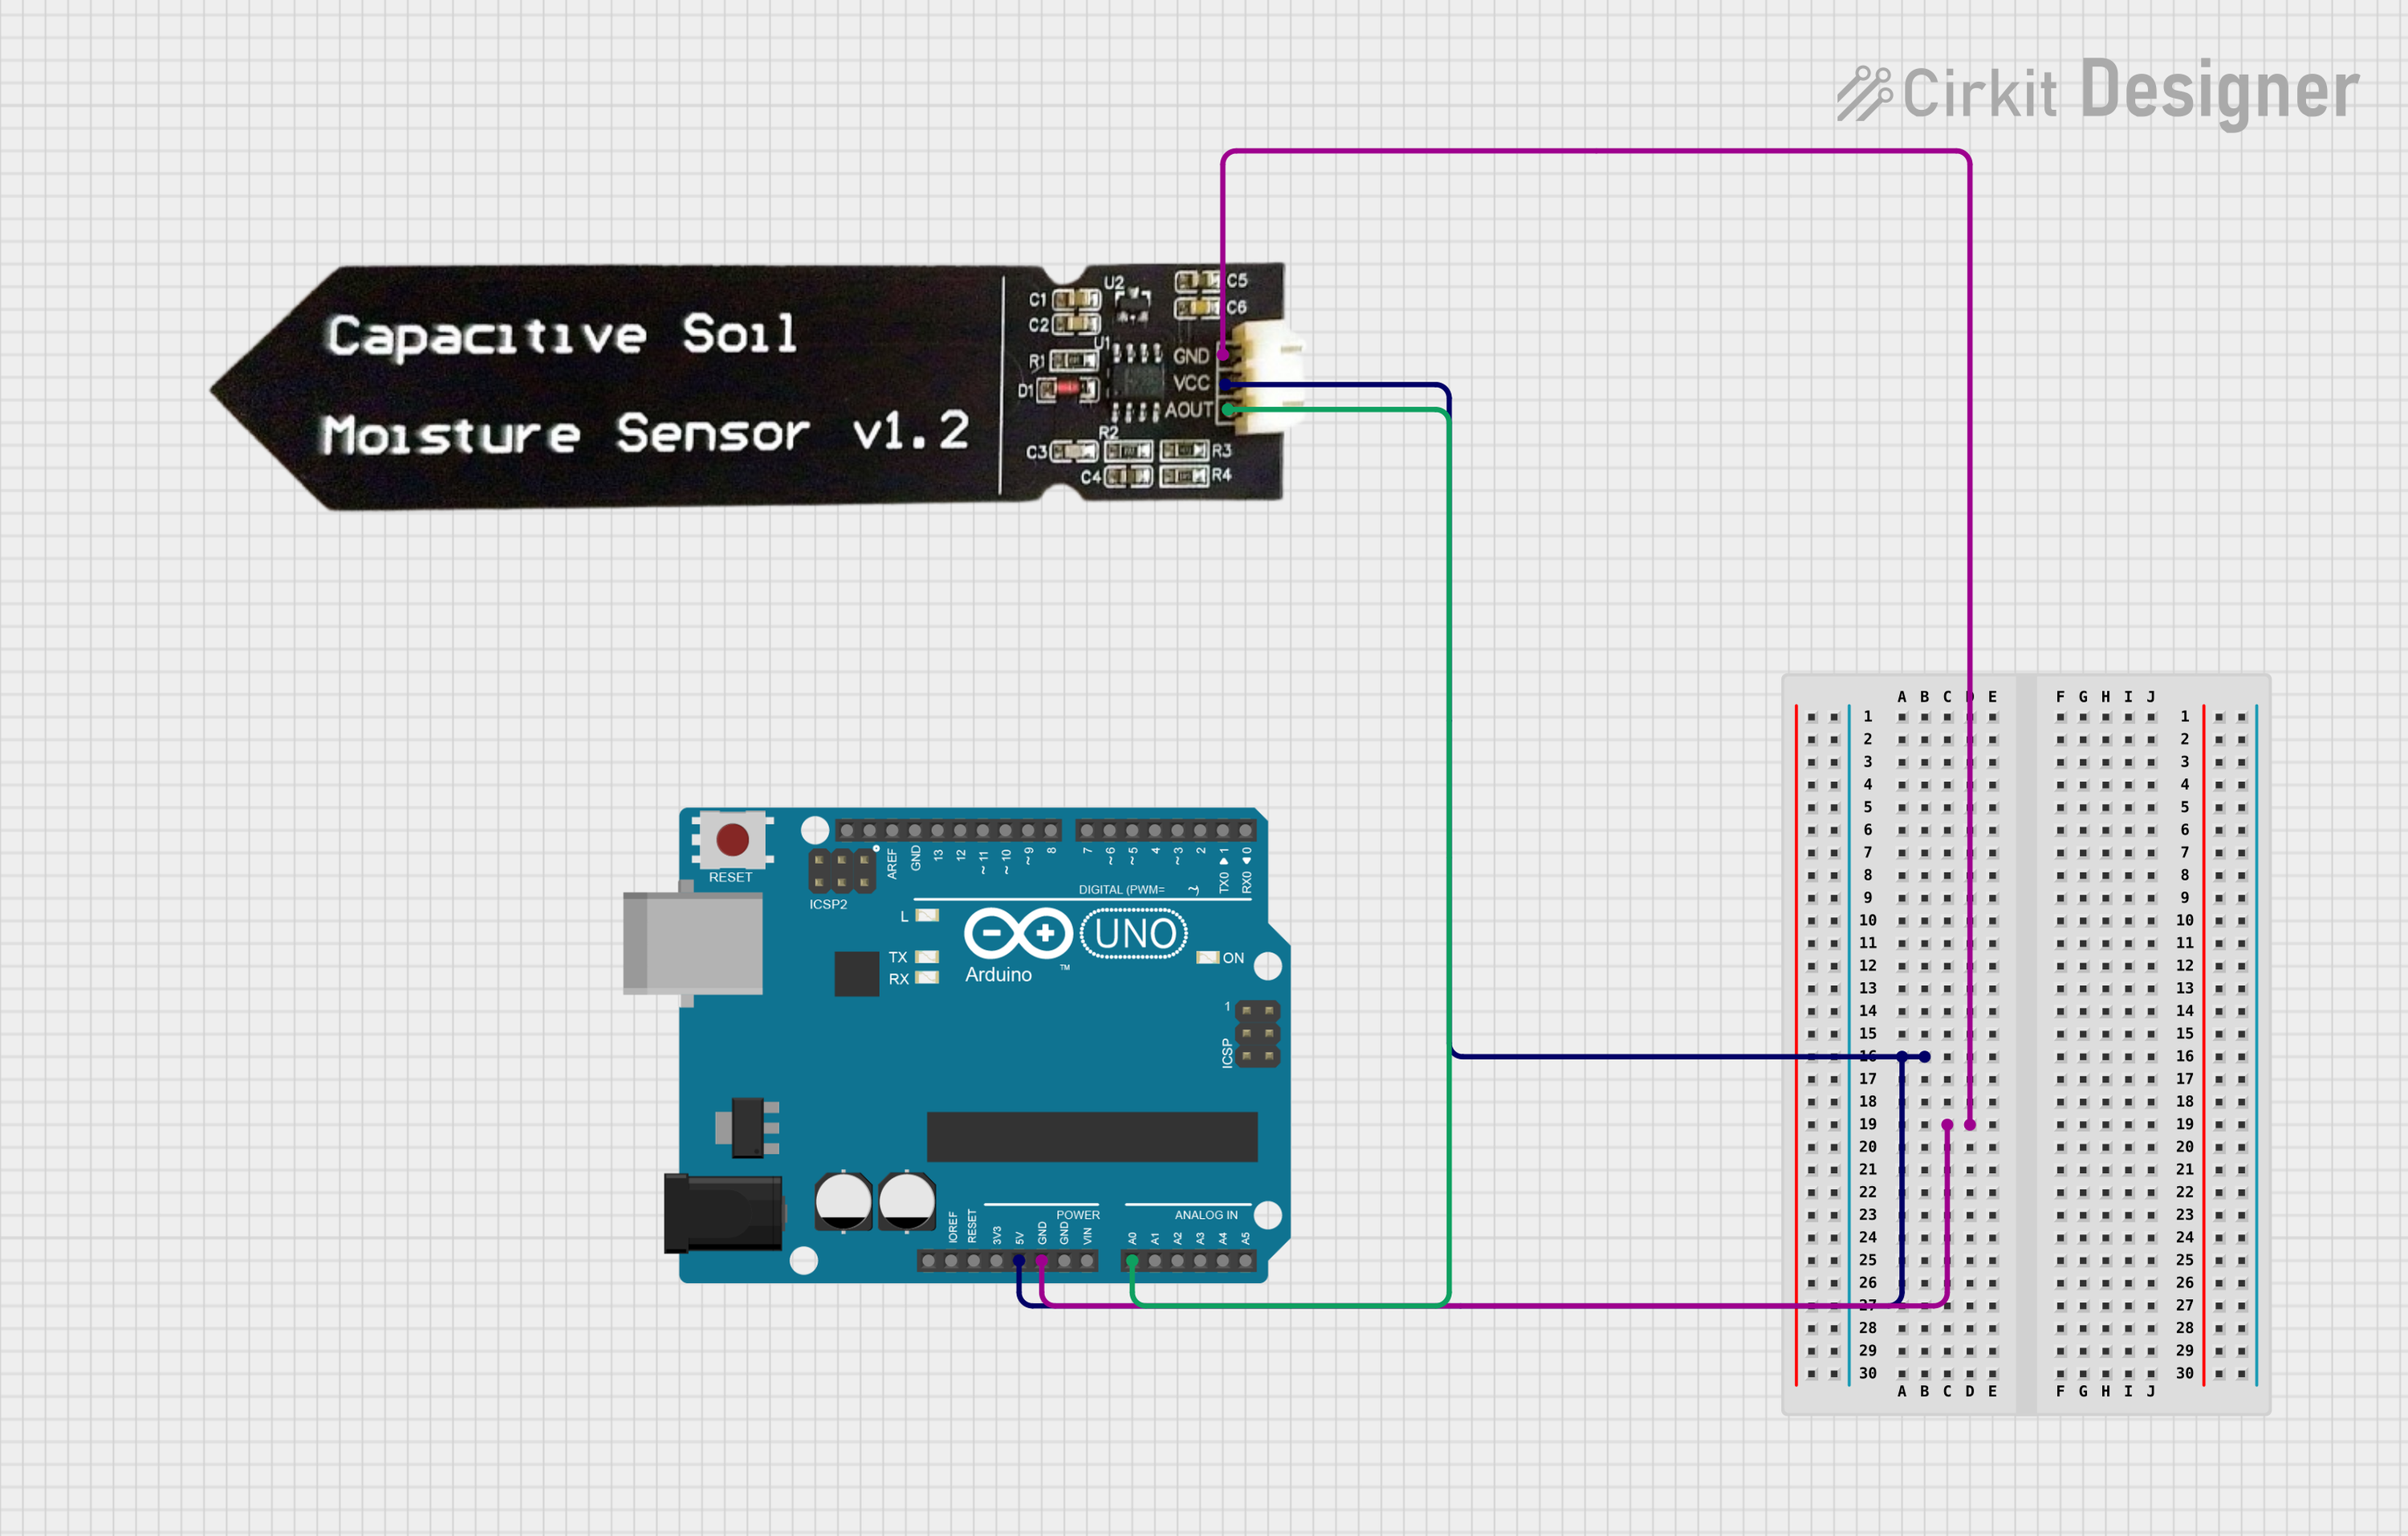
Example Circuit

Below is an example of how to connect the sensor to an Arduino UNO:

  • VCC → 5V pin on Arduino
  • GND → GND pin on Arduino
  • AOUT → A0 pin on Arduino

Sample Arduino Code

The following code reads the analog output from the sensor and converts it into a soil moisture percentage:

// Define the analog pin connected to the sensor
const int sensorPin = A0;

// Variable to store the sensor reading
int sensorValue = 0;

void setup() {
  // Initialize serial communication for debugging
  Serial.begin(9600);
}

void loop() {
  // Read the analog value from the sensor
  sensorValue = analogRead(sensorPin);

  // Map the sensor value to a percentage (0% to 100%)
  // Adjust the range (e.g., 0-1023) based on your sensor's calibration
  int moisturePercent = map(sensorValue, 0, 1023, 0, 100);

  // Print the moisture percentage to the Serial Monitor
  Serial.print("Soil Moisture: ");
  Serial.print(moisturePercent);
  Serial.println("%");

  // Wait for 1 second before the next reading
  delay(1000);
}

Important Considerations

  • Calibration: The sensor's output may vary depending on soil type. Calibrate the sensor for your specific soil by testing it in dry and saturated conditions.
  • Placement: Insert the sensor into the soil vertically, ensuring the sensing area is fully covered by soil for accurate readings.
  • Power Supply: Use a stable power source to avoid fluctuations in the analog output.
  • Waterproofing: While the sensor is corrosion-resistant, avoid submerging the entire sensor in water. Only the sensing area should contact the soil.

Troubleshooting and FAQs

Common Issues

  1. Inconsistent Readings:

    • Cause: Unstable power supply or loose connections.
    • Solution: Ensure all connections are secure and use a regulated power source.
  2. No Output Signal:

    • Cause: Incorrect wiring or damaged sensor.
    • Solution: Double-check the wiring and test the sensor with a multimeter.
  3. Output Always at Maximum or Minimum:

    • Cause: Sensor not properly inserted into the soil or soil too dry/wet.
    • Solution: Ensure the sensor is fully inserted into the soil and test in different moisture conditions.

FAQs

Q: Can this sensor be used outdoors?
A: Yes, the sensor is designed for outdoor use, but ensure the connections are protected from water and weather.

Q: How do I calibrate the sensor?
A: Measure the sensor's output in completely dry soil (0% moisture) and fully saturated soil (100% moisture). Use these values to map the sensor's output range in your code.

Q: Can I use this sensor with a 3.3V microcontroller?
A: Yes, the sensor operates within a voltage range of 3.3V to 5.5V, making it compatible with 3.3V systems like ESP32 or Raspberry Pi.

Q: Is the sensor affected by soil type?
A: Yes, different soil types may affect the sensor's readings. Calibration is recommended for accurate results.