Cirkit Designer
Your all-in-one circuit design IDE
Home /
Component Documentation
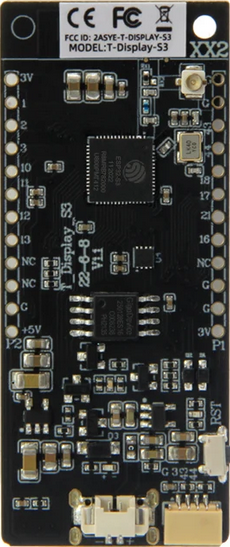
How to Use T-Display-S3: Examples, Pinouts, and Specs
Introduction
The T-Display-S3 by Lilygo is a compact display module featuring a 1.14-inch TFT screen, powered by the ESP32-S3 microcontroller. This versatile module is designed for projects requiring graphical output, making it ideal for IoT devices, portable displays, and embedded systems. With its built-in Wi-Fi and Bluetooth capabilities, the T-Display-S3 is well-suited for applications such as smart home devices, wearable technology, and data visualization.
Explore Projects Built with T-Display-S3
ESP32-S3 Powered Tri-Color E-Ink Display Demo

This circuit integrates an ESP32-S3 microcontroller with a 2.9" Tri-Color E-Ink display, enabling the microcontroller to control the display for rendering graphics and text. The ESP32-S3 communicates with the display using SPI protocol, allowing for dynamic visual output such as animations and text updates in red, black, and white.
ESP32-S3 and ILI9488 TFT LCD Display for Interactive Graphics

This circuit features an ESP32-S3 microcontroller connected to an ILI9488 TFT LCD display. The ESP32-S3 initializes and controls the display, demonstrating basic graphics and text rendering using the TFT_eSPI library.
T-Display S3 and HX711-Based Load Cell Measurement System with Audio Alert
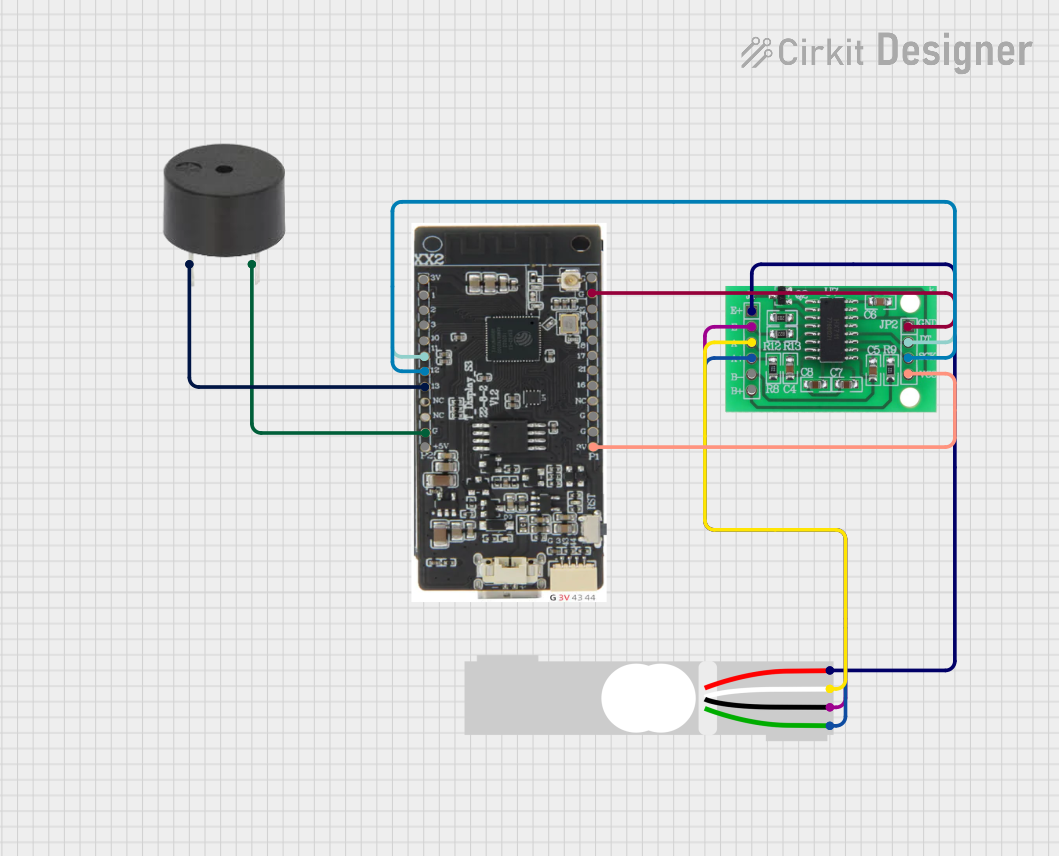
This circuit is designed to measure weight using a load cell and process the data with an HX711 bridge sensor interface. The T-Display-S3 microcontroller is connected to the HX711 to receive the weight data and control a buzzer. The load cell interfaces with the HX711, which in turn communicates with the T-Display-S3 for data processing and potential alerting through the buzzer based on specific weight measurements.
ESP32-S3 Wi-Fi Enabled ILI9341 Display for HTTP(S) Status Monitoring
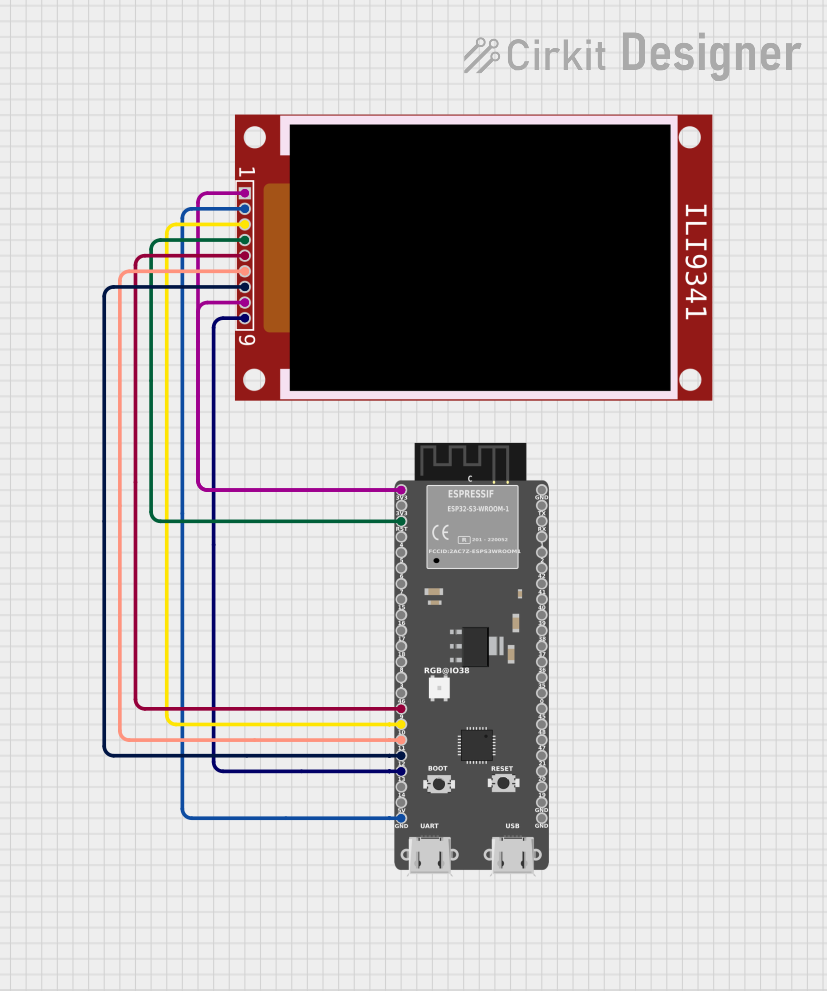
This circuit integrates an ESP32-S3 microcontroller with an ILI9341 TFT display to create a Wi-Fi enabled device that fetches and displays HTTP(S) response data. The ESP32-S3 handles the network communication and controls the display, allowing for real-time visualization of data retrieved from a specified URL.
Explore Projects Built with T-Display-S3
ESP32-S3 Powered Tri-Color E-Ink Display Demo
This circuit integrates an ESP32-S3 microcontroller with a 2.9" Tri-Color E-Ink display, enabling the microcontroller to control the display for rendering graphics and text. The ESP32-S3 communicates with the display using SPI protocol, allowing for dynamic visual output such as animations and text updates in red, black, and white.
ESP32-S3 and ILI9488 TFT LCD Display for Interactive Graphics
This circuit features an ESP32-S3 microcontroller connected to an ILI9488 TFT LCD display. The ESP32-S3 initializes and controls the display, demonstrating basic graphics and text rendering using the TFT_eSPI library.
T-Display S3 and HX711-Based Load Cell Measurement System with Audio Alert
This circuit is designed to measure weight using a load cell and process the data with an HX711 bridge sensor interface. The T-Display-S3 microcontroller is connected to the HX711 to receive the weight data and control a buzzer. The load cell interfaces with the HX711, which in turn communicates with the T-Display-S3 for data processing and potential alerting through the buzzer based on specific weight measurements.
ESP32-S3 Wi-Fi Enabled ILI9341 Display for HTTP(S) Status Monitoring
This circuit integrates an ESP32-S3 microcontroller with an ILI9341 TFT display to create a Wi-Fi enabled device that fetches and displays HTTP(S) response data. The ESP32-S3 handles the network communication and controls the display, allowing for real-time visualization of data retrieved from a specified URL.
Common Applications
- IoT dashboards and monitoring systems
- Wearable devices with graphical interfaces
- Portable data loggers and visualizers
- Educational and prototyping projects
- Smart home control panels
Technical Specifications
Key Technical Details
| Parameter | Specification |
|---|---|
| Microcontroller | ESP32-S3 |
| Display | 1.14-inch TFT LCD (ST7789 driver) |
| Resolution | 135 x 240 pixels |
| Communication Interfaces | SPI, I2C |
| Wi-Fi | 802.11 b/g/n |
| Bluetooth | BLE 5.0 |
| Operating Voltage | 3.3V |
| Power Supply | USB-C (5V input) |
| Flash Memory | 16MB |
| PSRAM | 8MB |
| GPIO Pins | 14 (configurable) |
| Dimensions | 51mm x 25mm |
Pin Configuration and Descriptions
| Pin Name | Pin Number | Description |
|---|---|---|
| GND | - | Ground |
| 3V3 | - | 3.3V power output |
| GPIO0 | 0 | General-purpose I/O |
| GPIO1 | 1 | General-purpose I/O |
| GPIO2 | 2 | General-purpose I/O |
| GPIO3 | 3 | General-purpose I/O |
| GPIO4 | 4 | General-purpose I/O |
| GPIO5 | 5 | General-purpose I/O |
| GPIO6 | 6 | General-purpose I/O |
| GPIO7 | 7 | General-purpose I/O |
| GPIO8 | 8 | General-purpose I/O |
| GPIO9 | 9 | General-purpose I/O |
| GPIO10 | 10 | General-purpose I/O |
| GPIO11 | 11 | General-purpose I/O |
Usage Instructions
How to Use the T-Display-S3 in a Circuit
- Powering the Module: Connect the USB-C port to a 5V power source or use the 3.3V pin for external power.
- Connecting to a Microcontroller: Use the SPI or I2C interface to communicate with the display. Ensure proper pin connections for data, clock, and chip select.
- Programming: The T-Display-S3 can be programmed using the Arduino IDE or ESP-IDF. Install the necessary libraries for the ESP32-S3 and the ST7789 display driver.
Important Considerations and Best Practices
- Voltage Levels: Ensure all GPIO pins operate at 3.3V logic levels to avoid damage.
- Heat Management: The ESP32-S3 may generate heat during operation. Ensure proper ventilation or heat dissipation if used in enclosed spaces.
- Library Compatibility: Use the latest versions of libraries like
TFT_eSPIfor optimal performance. - Pin Multiplexing: Some GPIO pins may have specific functions (e.g., SPI, I2C). Refer to the ESP32-S3 datasheet for details.
Example Code for Arduino UNO
Below is an example of how to display text on the T-Display-S3 using the Arduino IDE:
#include <TFT_eSPI.h> // Include the TFT library

TFT_eSPI tft = TFT_eSPI(); // Create an instance of the display

void setup() {
  tft.init(); // Initialize the display
  tft.setRotation(1); // Set display orientation
  tft.fillScreen(TFT_BLACK); // Clear the screen with black color

  tft.setTextColor(TFT_WHITE, TFT_BLACK); // Set text color and background
  tft.setTextSize(2); // Set text size

  tft.setCursor(10, 10); // Set cursor position
  tft.println("Hello, T-Display-S3!"); // Print text to the display
}

void loop() {
  // Add your code here for dynamic updates
}
Notes:
- Install the
TFT_eSPIlibrary from the Arduino Library Manager. - Configure the
User_Setup.hfile in theTFT_eSPIlibrary to match the T-Display-S3's pin configuration.
Troubleshooting and FAQs
Common Issues
Display Not Turning On:
- Ensure the module is powered correctly (check USB-C or 3.3V input).
- Verify the SPI or I2C connections are secure and correctly configured.
No Output on the Display:
- Check the
TFT_eSPIlibrary configuration inUser_Setup.h. - Ensure the correct pins are defined for SPI communication.
- Check the
Flickering or Artifacts on the Screen:
- Verify the power supply is stable and sufficient.
- Check for loose or poor-quality connections.
ESP32-S3 Not Detected by Arduino IDE:
- Install the ESP32 board package in the Arduino IDE.
- Ensure the correct COM port and board type are selected.
Solutions and Tips for Troubleshooting
- Use a multimeter to verify power and signal levels.
- Update the ESP32-S3 firmware and libraries to the latest versions.
- Test the module with example sketches from the
TFT_eSPIlibrary to confirm functionality. - If issues persist, consult the Lilygo documentation or community forums for additional support.