Cirkit Designer
Your all-in-one circuit design IDE
Home /
Component Documentation
How to Use water pump: Examples, Pinouts, and Specs

Introduction
The water pump is an essential device used to move water from one location to another. It is commonly employed in various applications such as cooling systems, irrigation, and water supply systems. This documentation provides a comprehensive guide to understanding, using, and troubleshooting a water pump in electronic circuits.
Explore Projects Built with water pump
Arduino Mega 2560-Based Smart Water Pump System with Bluetooth Control
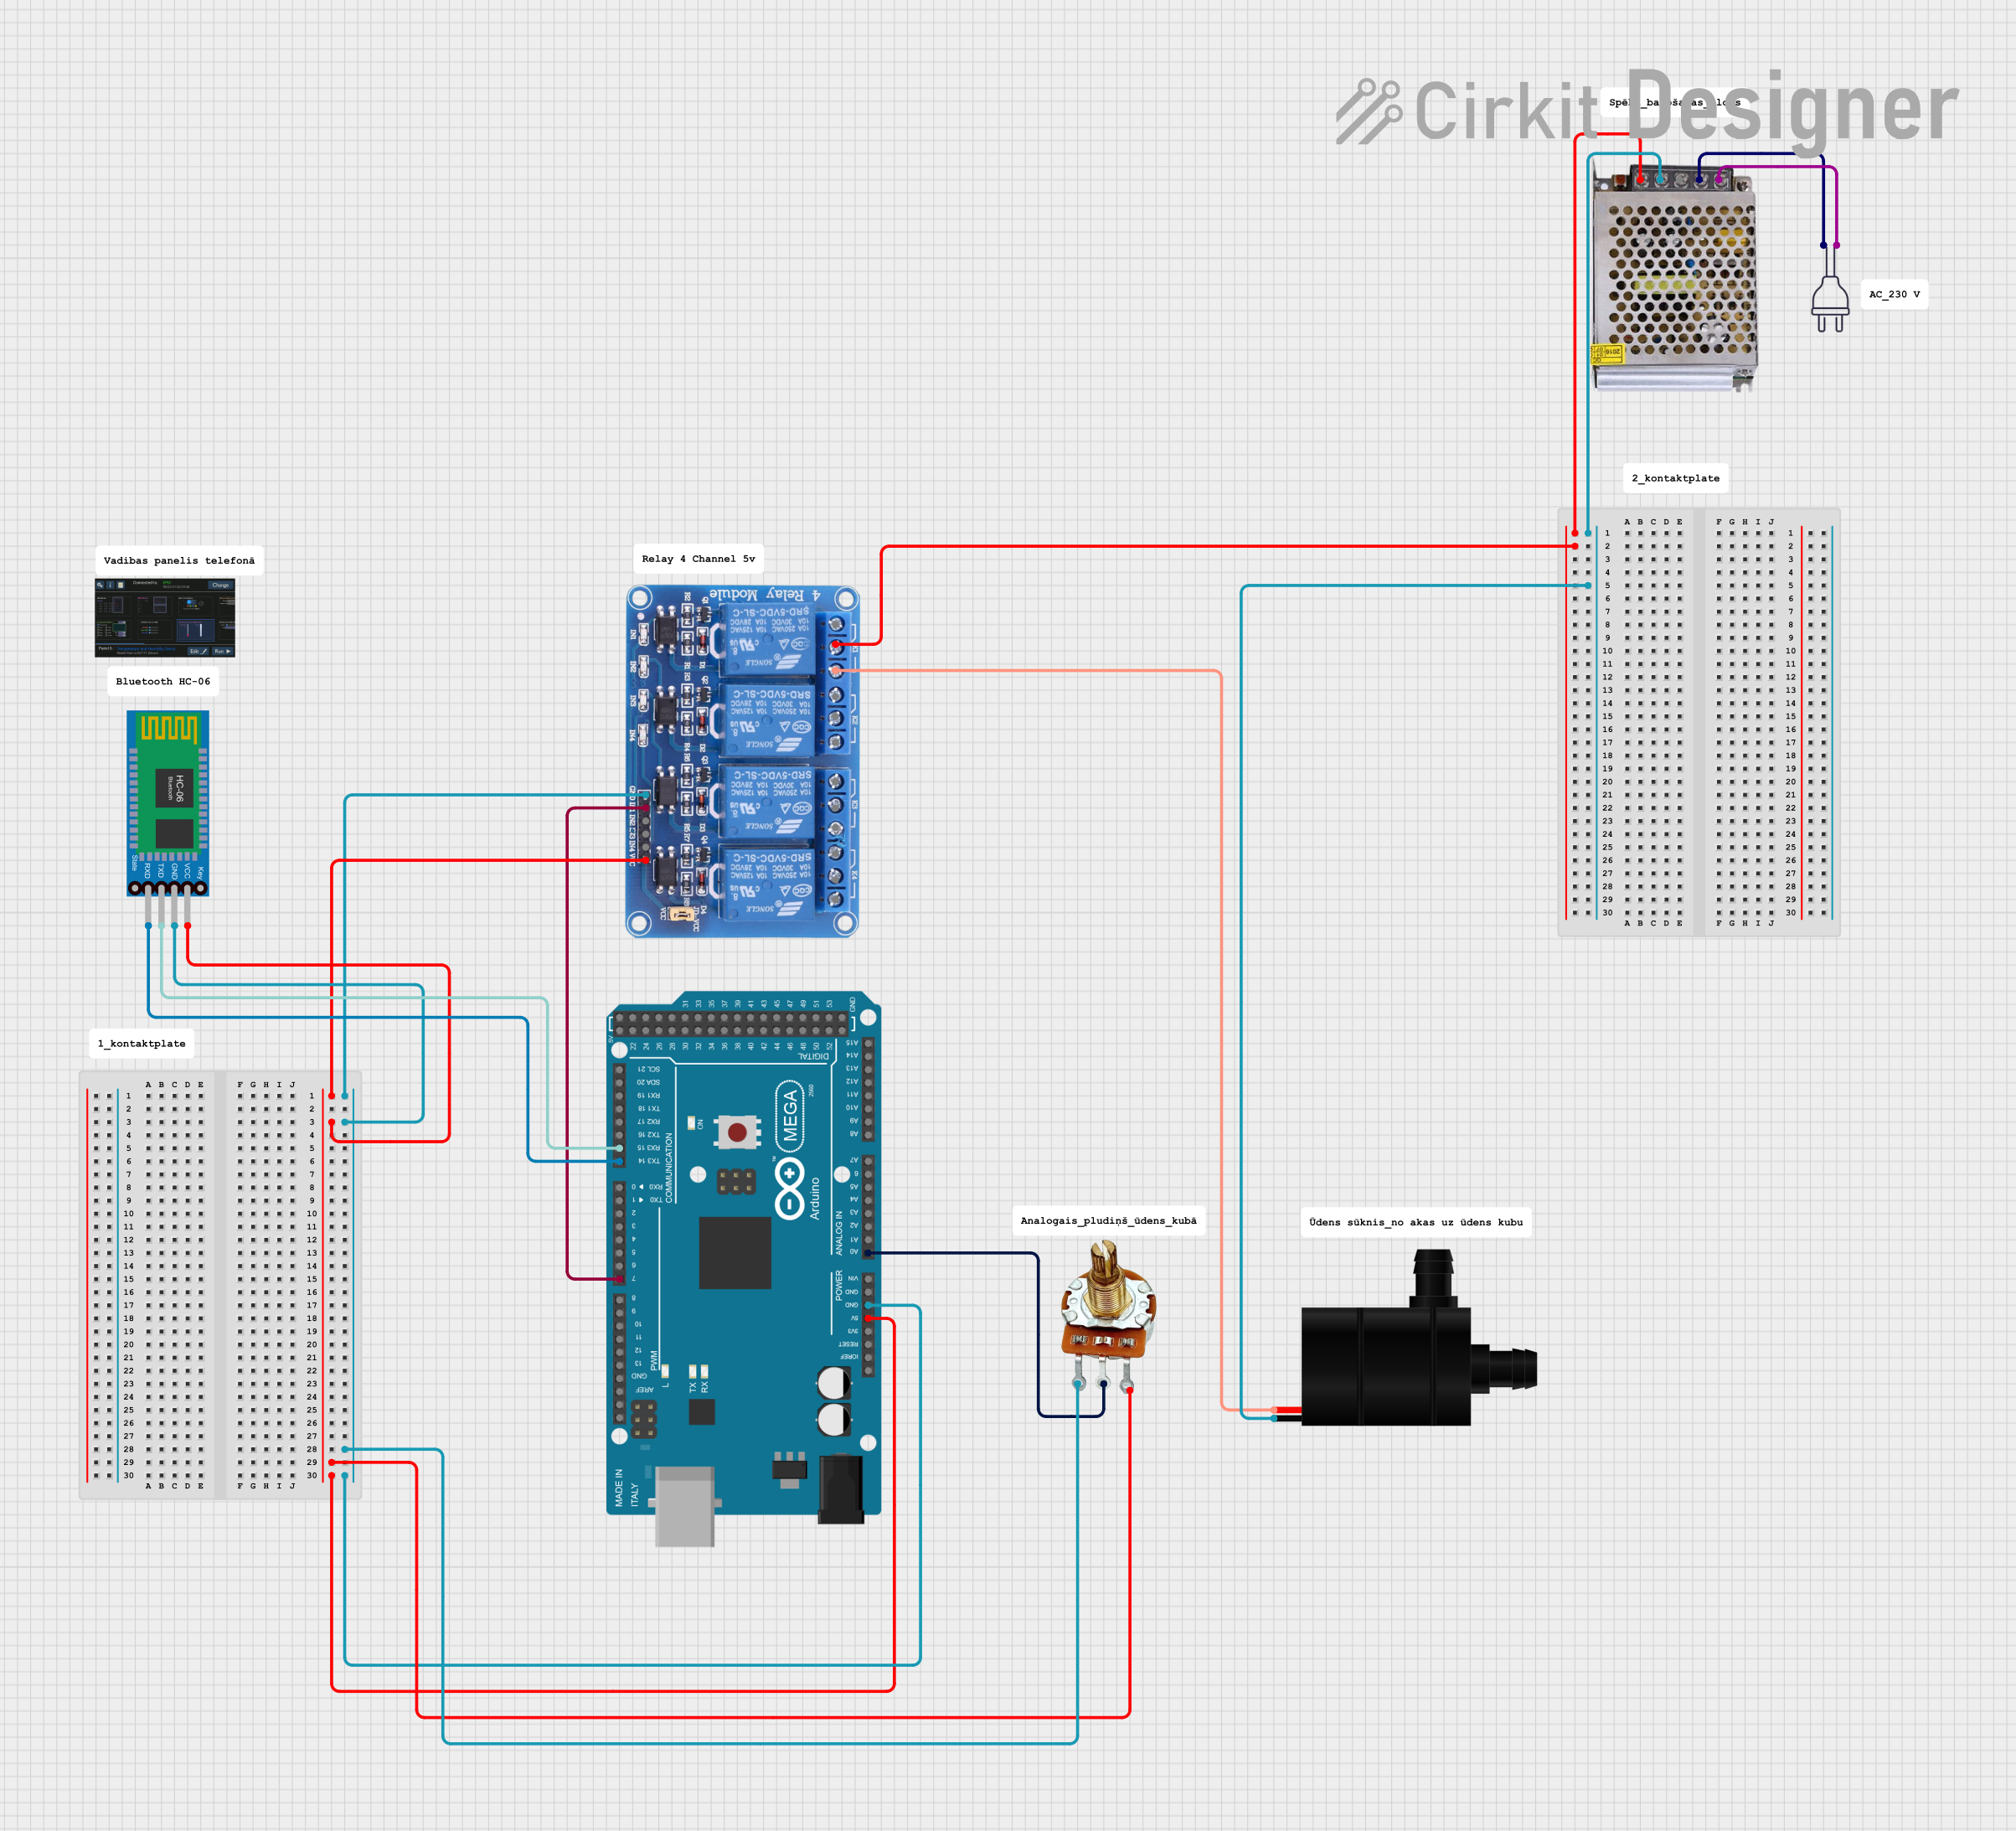
This circuit is a remotely controlled water pump system using an Arduino Mega 2560. The Arduino controls a 4-channel relay module to switch the water pump on and off, based on input from a rotary potentiometer and commands received via a Bluetooth HC-06 module. The system is powered by a 12V power supply.
ESP32-Based Automated Water Pump System with RTC and Wi-Fi Control
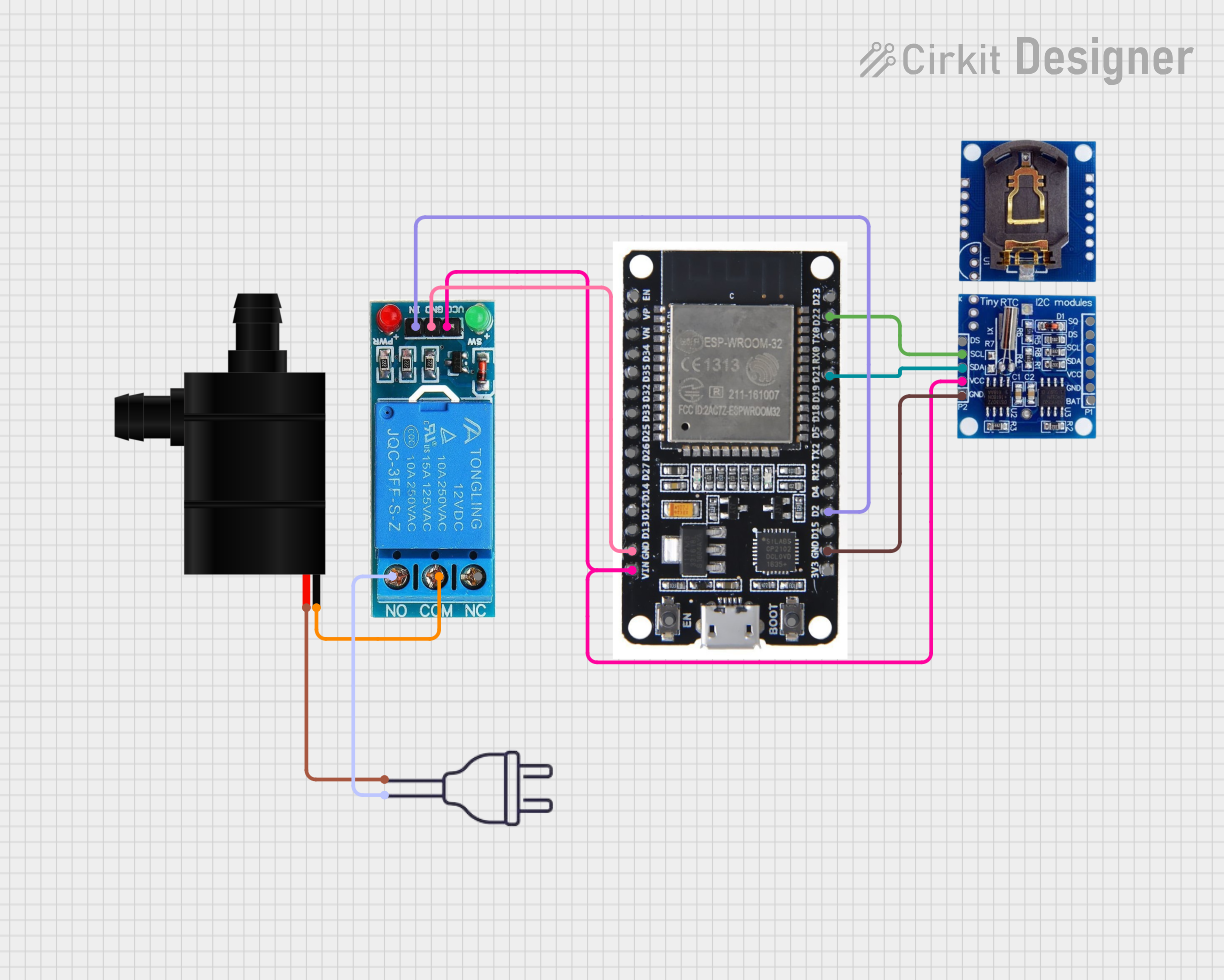
This circuit is an automated water pump control system using an ESP32 microcontroller, an RTC DS1307 for timekeeping, and a 12V single channel relay to switch the water pump. The system activates the pump every 3 hours based on the RTC time and integrates with Blynk for remote monitoring and control via WiFi.
12V Battery-Powered Water Pump and Solenoid Valve Control Circuit with Timer Switch
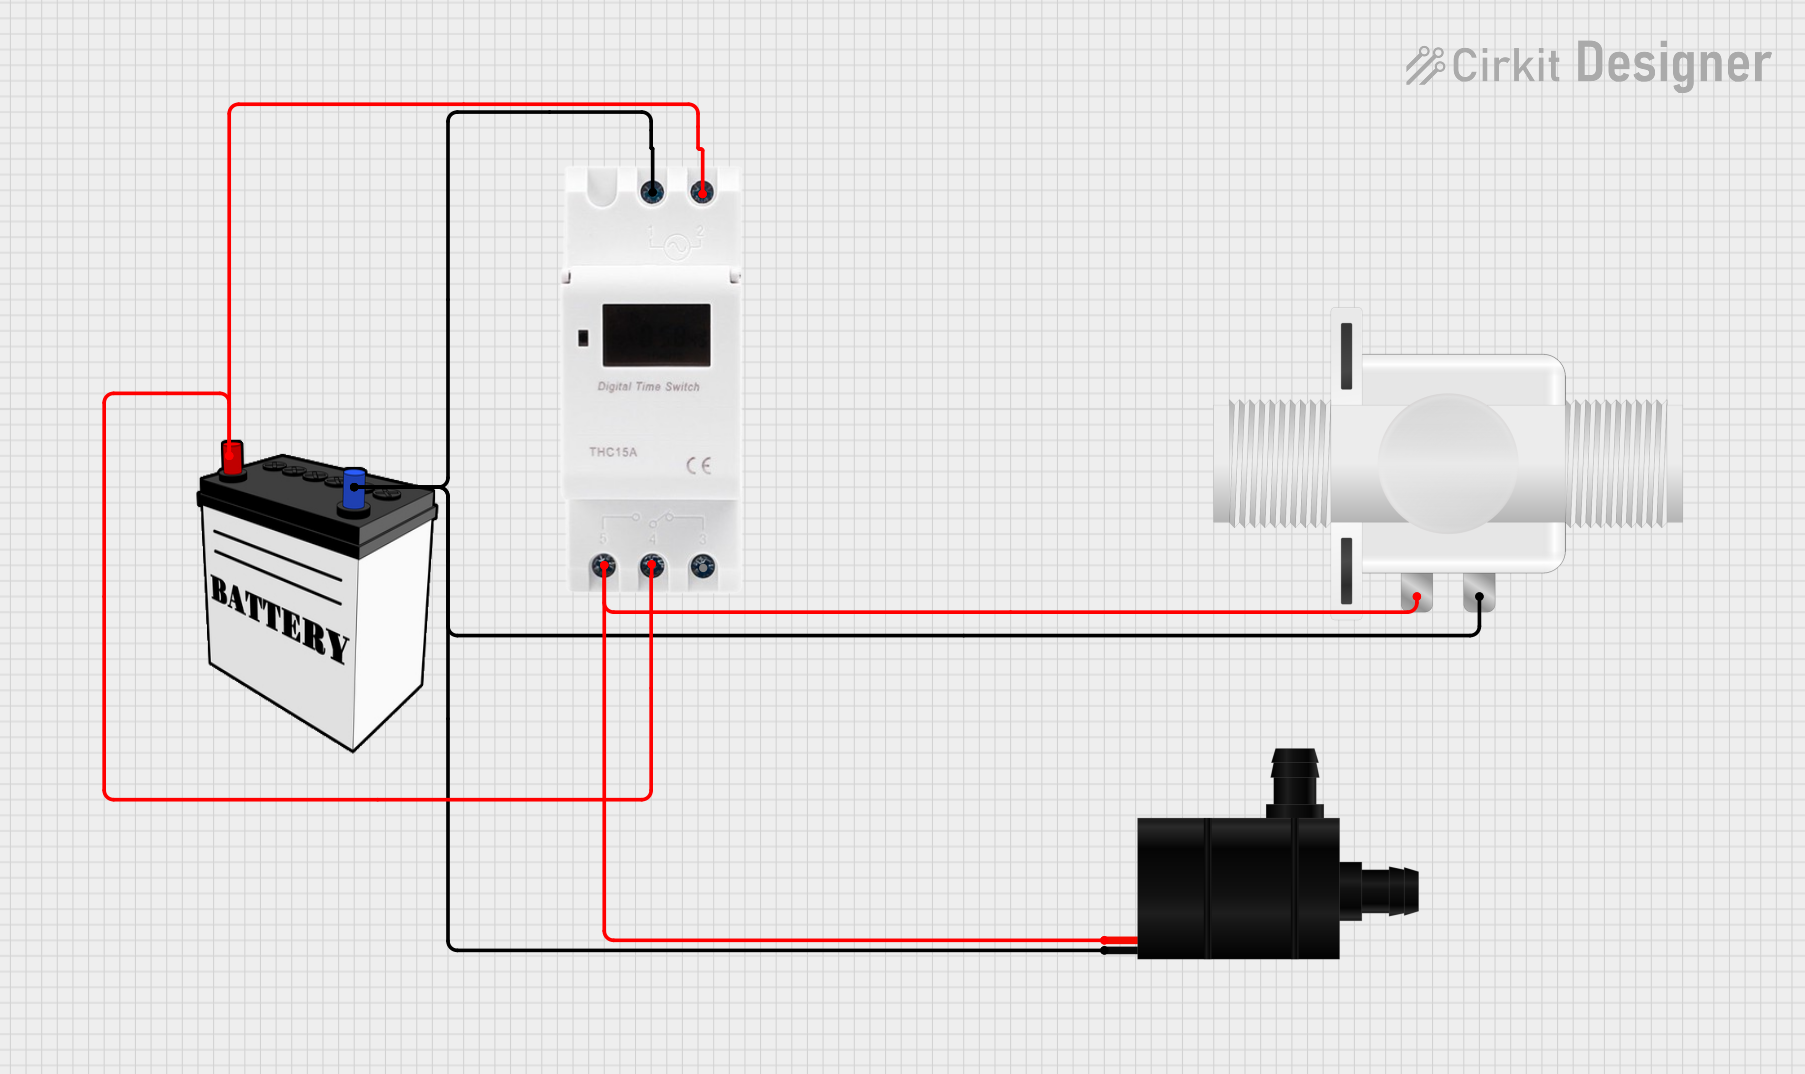
This circuit consists of a water pump and a plastic solenoid valve, both of which are controlled by a timer switch. The timer switch is powered by a 12V battery and is responsible for providing power to the pump and valve at timed intervals. There is no microcontroller code involved, indicating that the timing functions are likely handled by the timer switch hardware.
ESP32-Based Automated pH Monitoring and Water Pump Control System
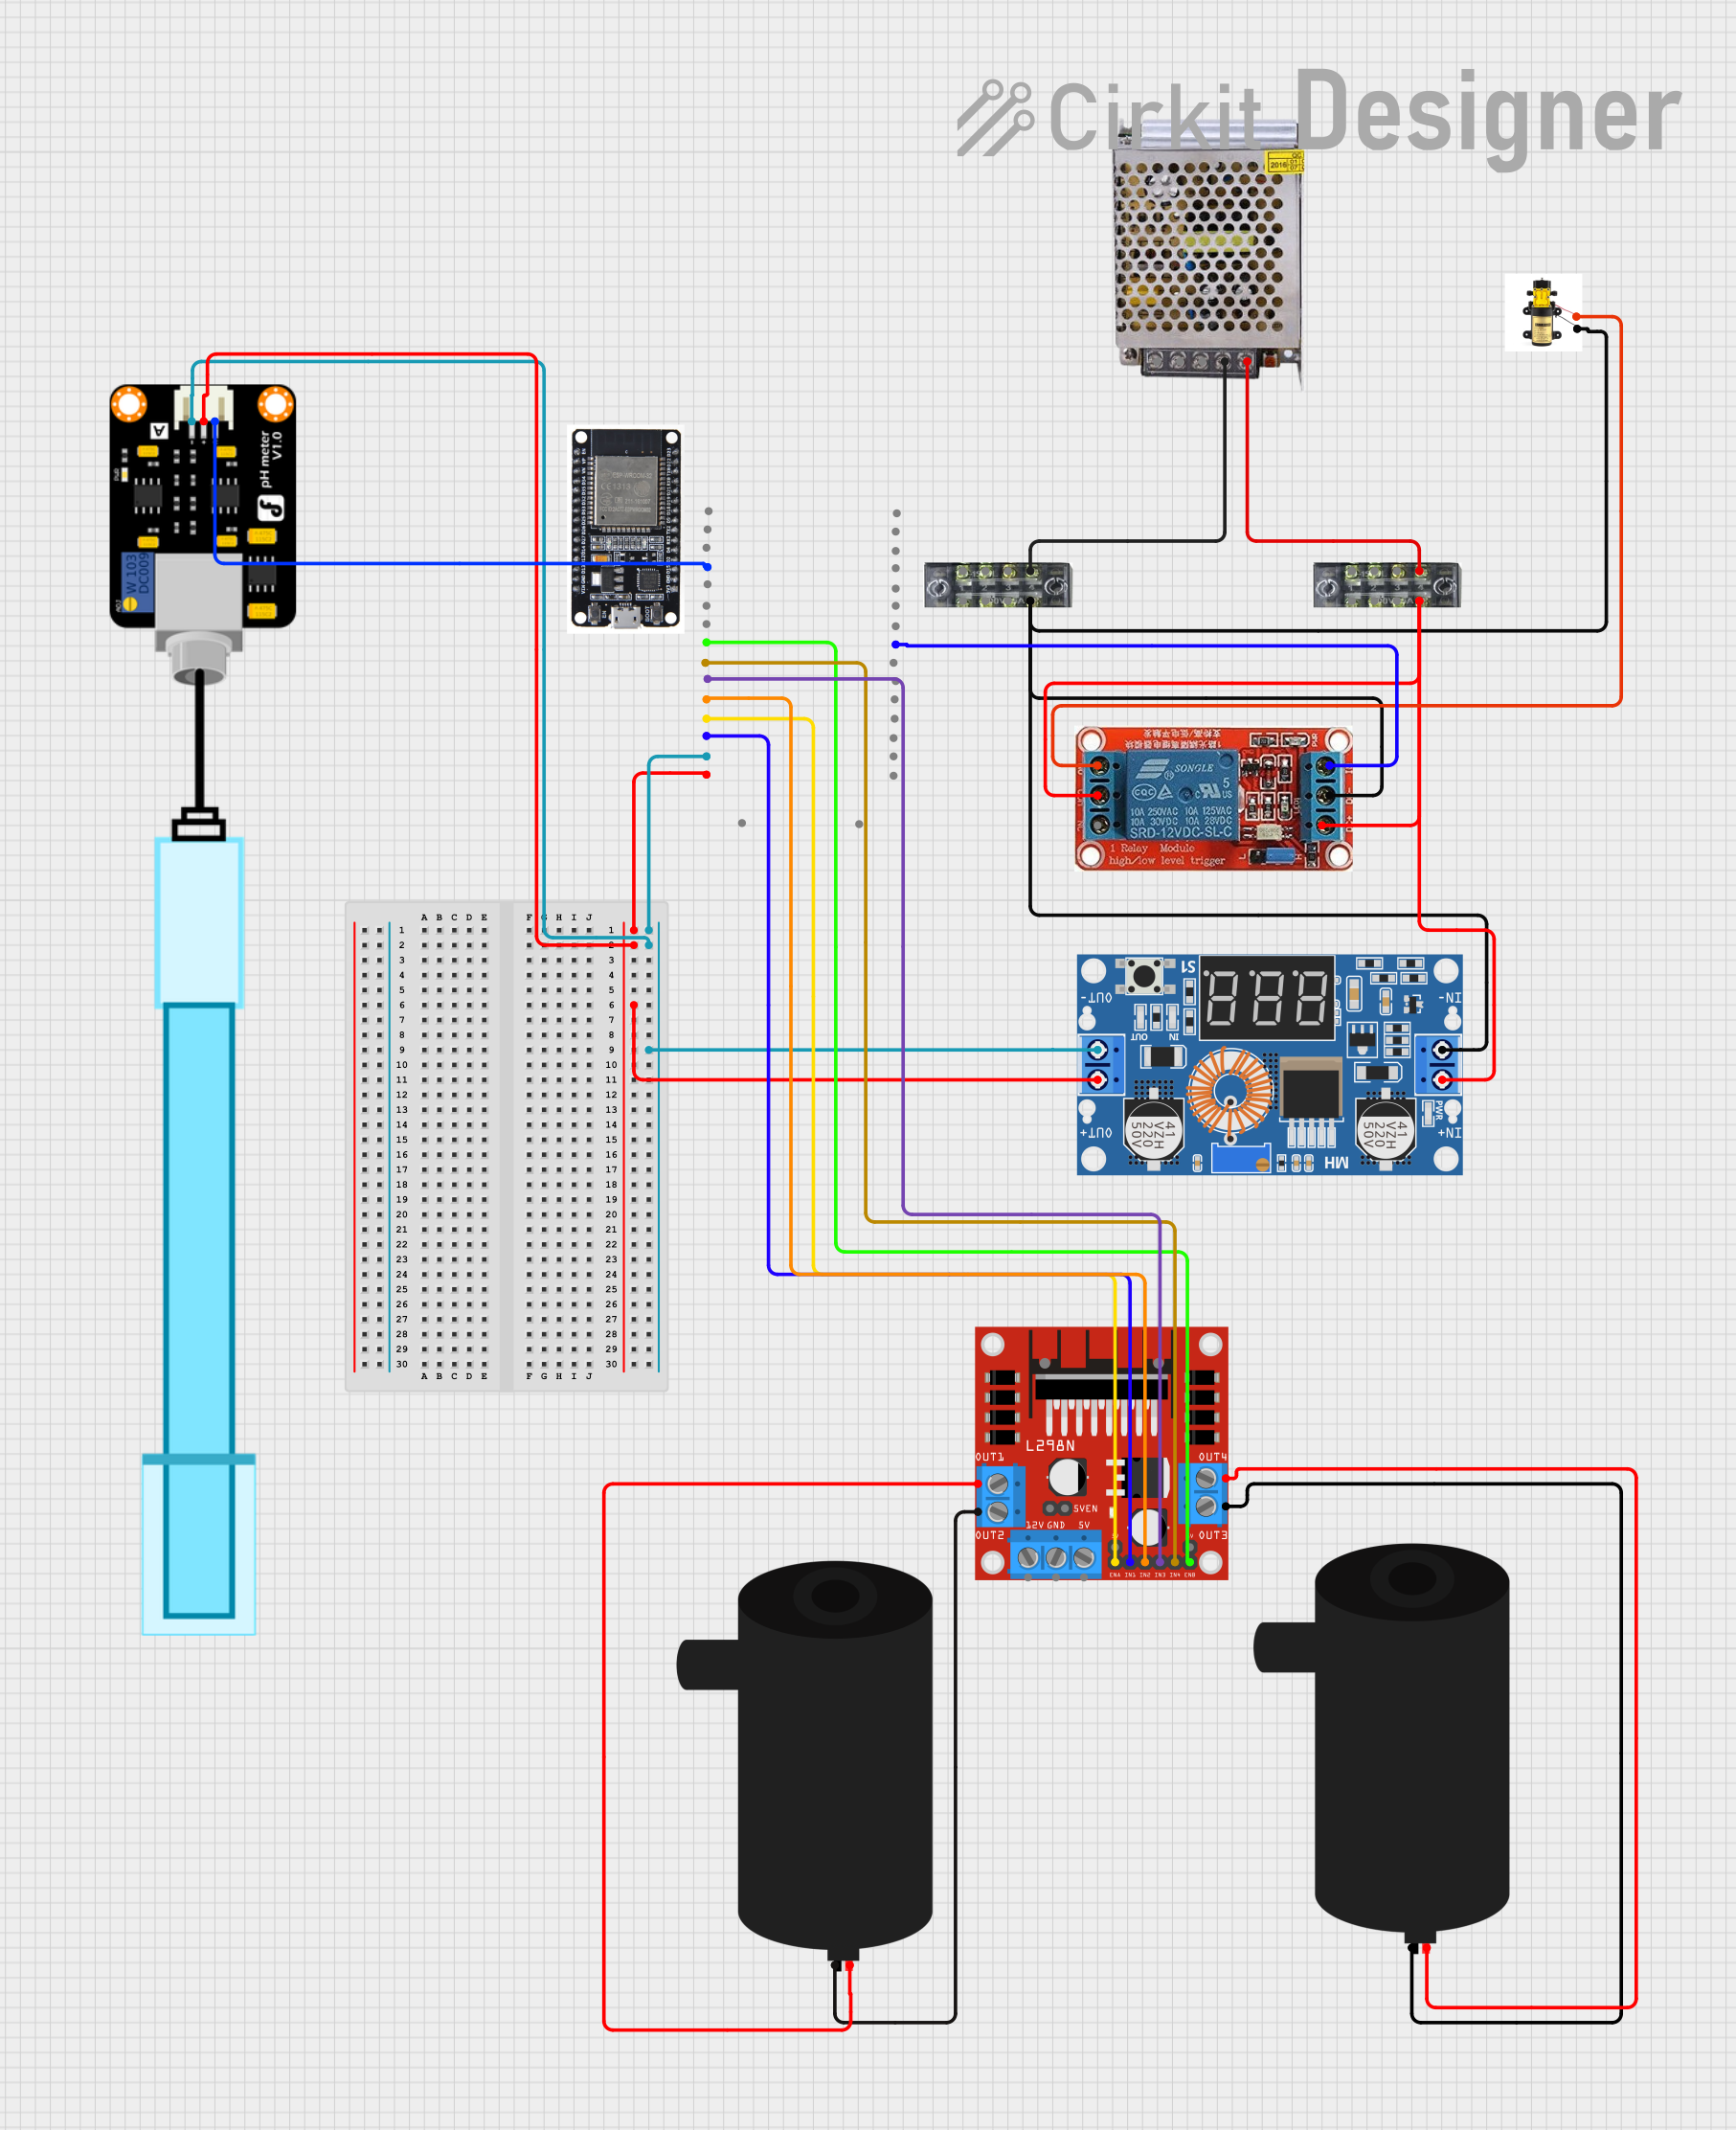
This circuit is a water management system controlled by an ESP32 microcontroller. It includes a pH meter for monitoring water quality, a relay to control a pump, and an L298N motor driver to manage multiple water pumps. The system is powered by a 5V power supply and uses a DC buck converter to step down voltage as needed.
Explore Projects Built with water pump
Arduino Mega 2560-Based Smart Water Pump System with Bluetooth Control
This circuit is a remotely controlled water pump system using an Arduino Mega 2560. The Arduino controls a 4-channel relay module to switch the water pump on and off, based on input from a rotary potentiometer and commands received via a Bluetooth HC-06 module. The system is powered by a 12V power supply.
ESP32-Based Automated Water Pump System with RTC and Wi-Fi Control
This circuit is an automated water pump control system using an ESP32 microcontroller, an RTC DS1307 for timekeeping, and a 12V single channel relay to switch the water pump. The system activates the pump every 3 hours based on the RTC time and integrates with Blynk for remote monitoring and control via WiFi.
12V Battery-Powered Water Pump and Solenoid Valve Control Circuit with Timer Switch
This circuit consists of a water pump and a plastic solenoid valve, both of which are controlled by a timer switch. The timer switch is powered by a 12V battery and is responsible for providing power to the pump and valve at timed intervals. There is no microcontroller code involved, indicating that the timing functions are likely handled by the timer switch hardware.
ESP32-Based Automated pH Monitoring and Water Pump Control System
This circuit is a water management system controlled by an ESP32 microcontroller. It includes a pH meter for monitoring water quality, a relay to control a pump, and an L298N motor driver to manage multiple water pumps. The system is powered by a 5V power supply and uses a DC buck converter to step down voltage as needed.
Technical Specifications
Key Technical Details
| Parameter | Value |
|---|---|
| Operating Voltage | 6V - 12V |
| Current Rating | 0.5A - 1.5A |
| Power Rating | 3W - 18W |
| Flow Rate | 100 - 500 liters per hour |
| Maximum Lift | 1.5 - 3 meters |
| Inlet/Outlet Size | 6mm - 10mm |
Pin Configuration and Descriptions
| Pin Number | Pin Name | Description |
|---|---|---|
| 1 | VCC | Power supply (6V - 12V) |
| 2 | GND | Ground |
| 3 | IN | Control signal input (PWM compatible) |
Usage Instructions
How to Use the Component in a Circuit
- Power Supply: Connect the VCC pin to a power source within the operating voltage range (6V - 12V). Ensure the power supply can provide sufficient current (0.5A - 1.5A) for the pump's operation.
- Ground Connection: Connect the GND pin to the ground of the circuit.
- Control Signal: The IN pin can be connected to a microcontroller (e.g., Arduino) to control the pump. This pin is PWM compatible, allowing for variable speed control.
Example Circuit with Arduino UNO
// Define the pin connected to the pump control signal
const int pumpPin = 9;

void setup() {
  // Set the pump pin as an output
  pinMode(pumpPin, OUTPUT);
}

void loop() {
  // Turn the pump on
  digitalWrite(pumpPin, HIGH);
  delay(5000); // Pump runs for 5 seconds

  // Turn the pump off
  digitalWrite(pumpPin, LOW);
  delay(5000); // Pump is off for 5 seconds
}
Important Considerations and Best Practices
- Power Supply: Ensure the power supply voltage and current ratings match the pump's requirements.
- Heat Dissipation: Prolonged use may cause the pump to heat up. Ensure proper ventilation or cooling mechanisms are in place.
- Waterproofing: If the pump is used in a wet environment, ensure all electrical connections are properly insulated to prevent short circuits.
- Flow Rate Control: Use PWM signals to control the flow rate of the pump for precise applications.
Troubleshooting and FAQs
Common Issues Users Might Face
Pump Not Starting:
- Solution: Check the power supply connections and ensure the voltage is within the specified range. Verify that the control signal is correctly applied.
Low Flow Rate:
- Solution: Ensure there are no blockages in the inlet or outlet. Check the power supply to ensure it can provide sufficient current.
Overheating:
- Solution: Ensure proper ventilation around the pump. If the pump is running continuously, consider adding a cooling mechanism.
Noisy Operation:
- Solution: Check for any debris in the pump. Ensure the pump is securely mounted to reduce vibrations.
FAQs
Q1: Can I use the water pump with a 5V power supply?
- A1: No, the water pump requires a minimum of 6V to operate correctly. Using a 5V supply may result in insufficient performance or failure to start.
Q2: How can I control the speed of the water pump?
- A2: You can control the speed of the water pump using PWM (Pulse Width Modulation) signals from a microcontroller like Arduino. Adjust the duty cycle of the PWM signal to vary the pump speed.
Q3: Is the water pump submersible?
- A3: It depends on the specific model of the water pump. Check the manufacturer's specifications to determine if the pump is designed for submersible use.
Q4: Can I run the water pump continuously?
- A4: While the pump can run continuously, it is important to monitor its temperature and ensure proper cooling to prevent overheating.
By following this documentation, users can effectively integrate and troubleshoot a water pump in their electronic projects, ensuring reliable and efficient operation.