How to Use Adafruit USB DC Solar LiPo Charger: Examples, Pinouts, and Specs
Introduction
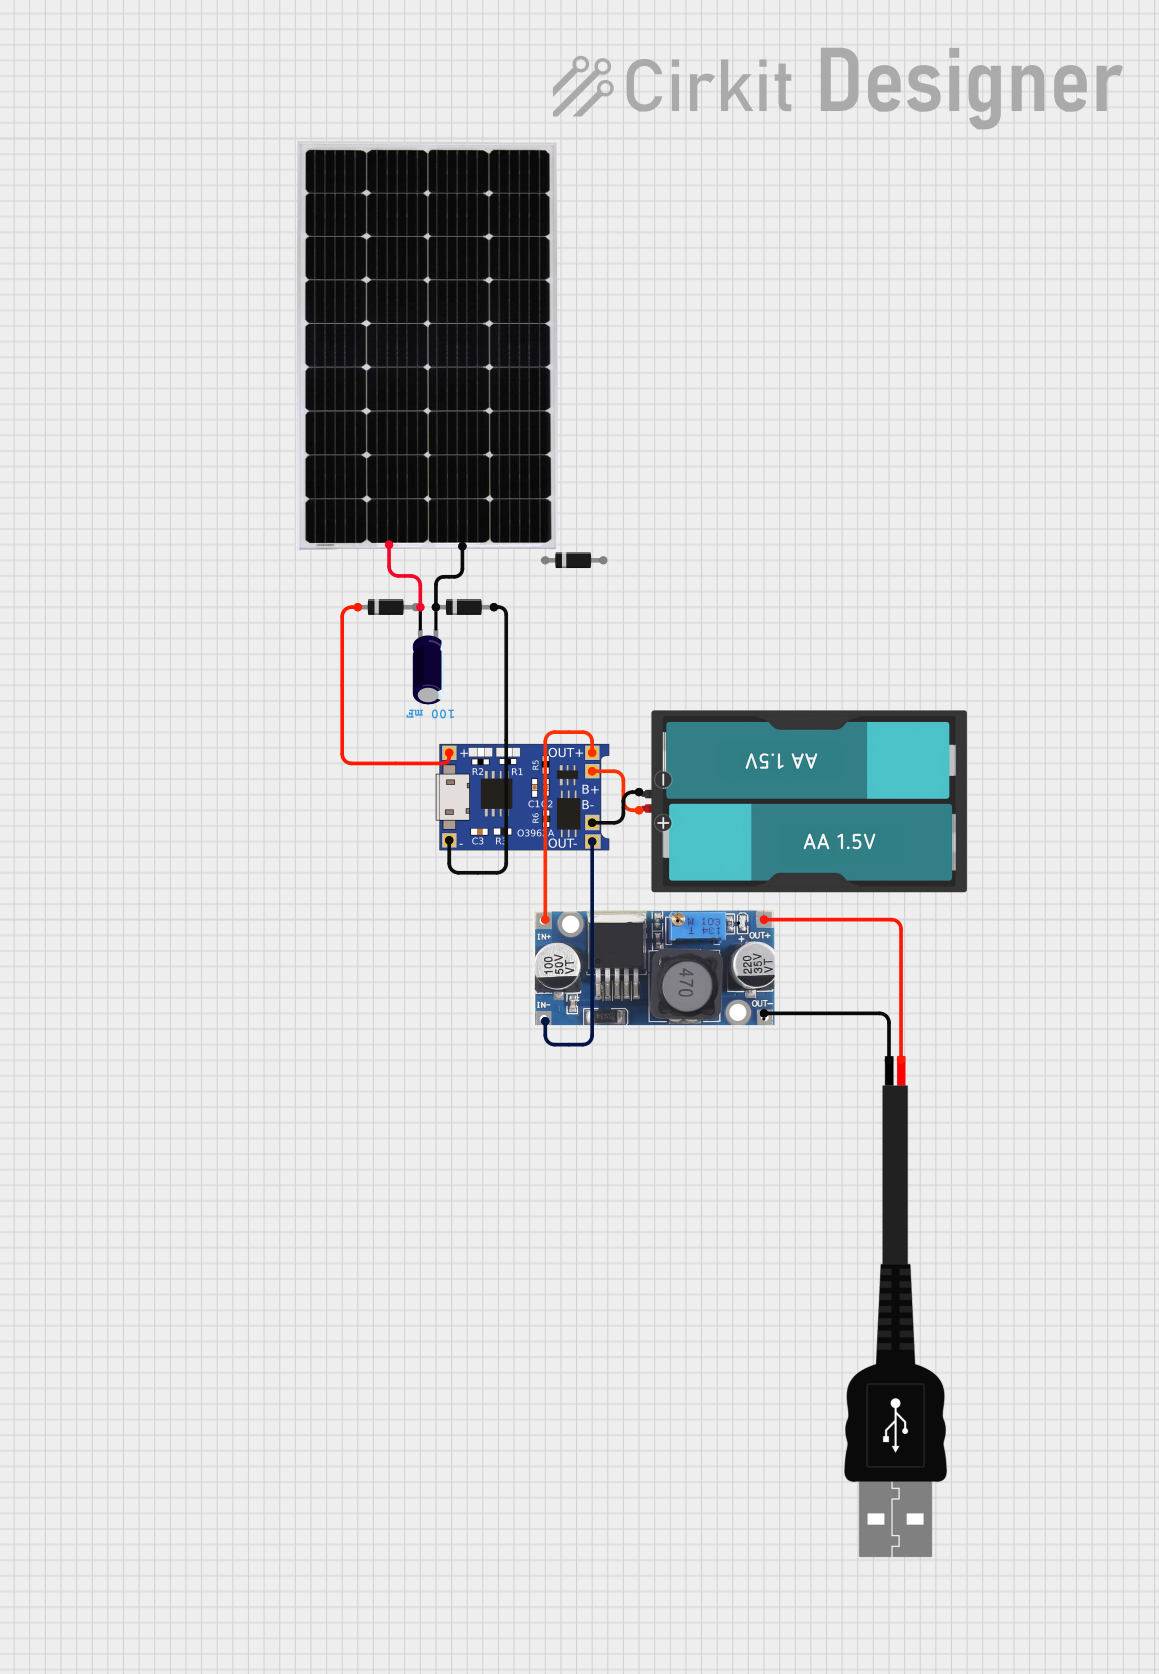
The Adafruit USB DC Solar LiPo Charger is a compact and versatile charging module designed to charge lithium polymer (LiPo) batteries efficiently. It features dual input options: a USB port and a solar panel input, making it ideal for portable, renewable energy projects. The built-in charging circuitry ensures safe and efficient energy management, making it a popular choice for powering low-power electronics in off-grid or mobile applications.
Explore Projects Built with Adafruit USB DC Solar LiPo Charger
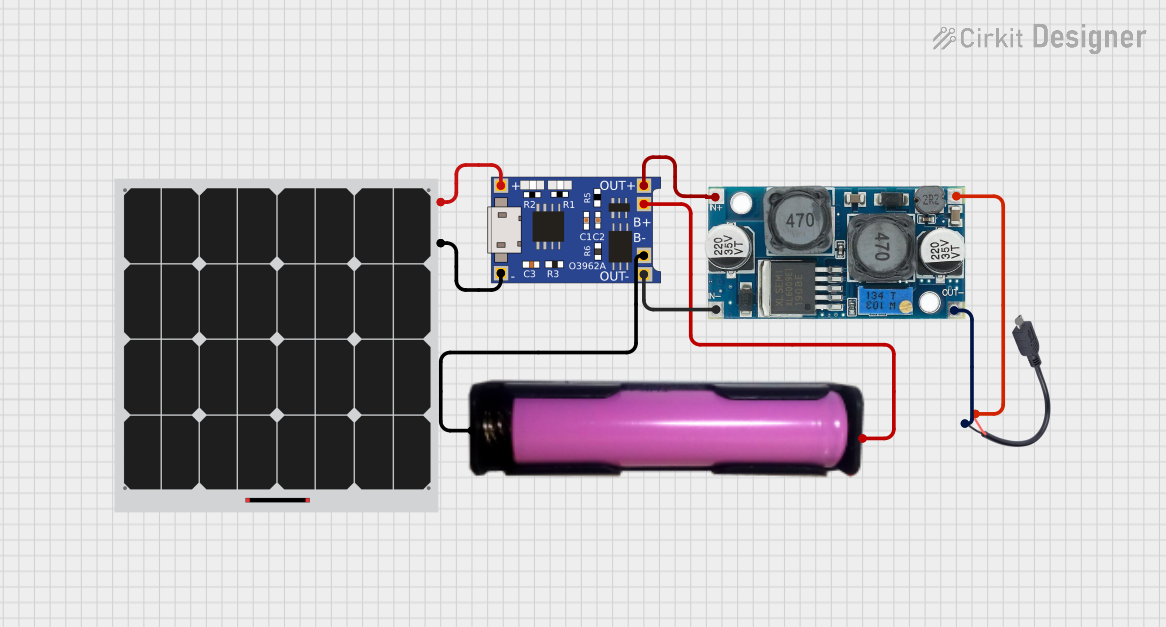
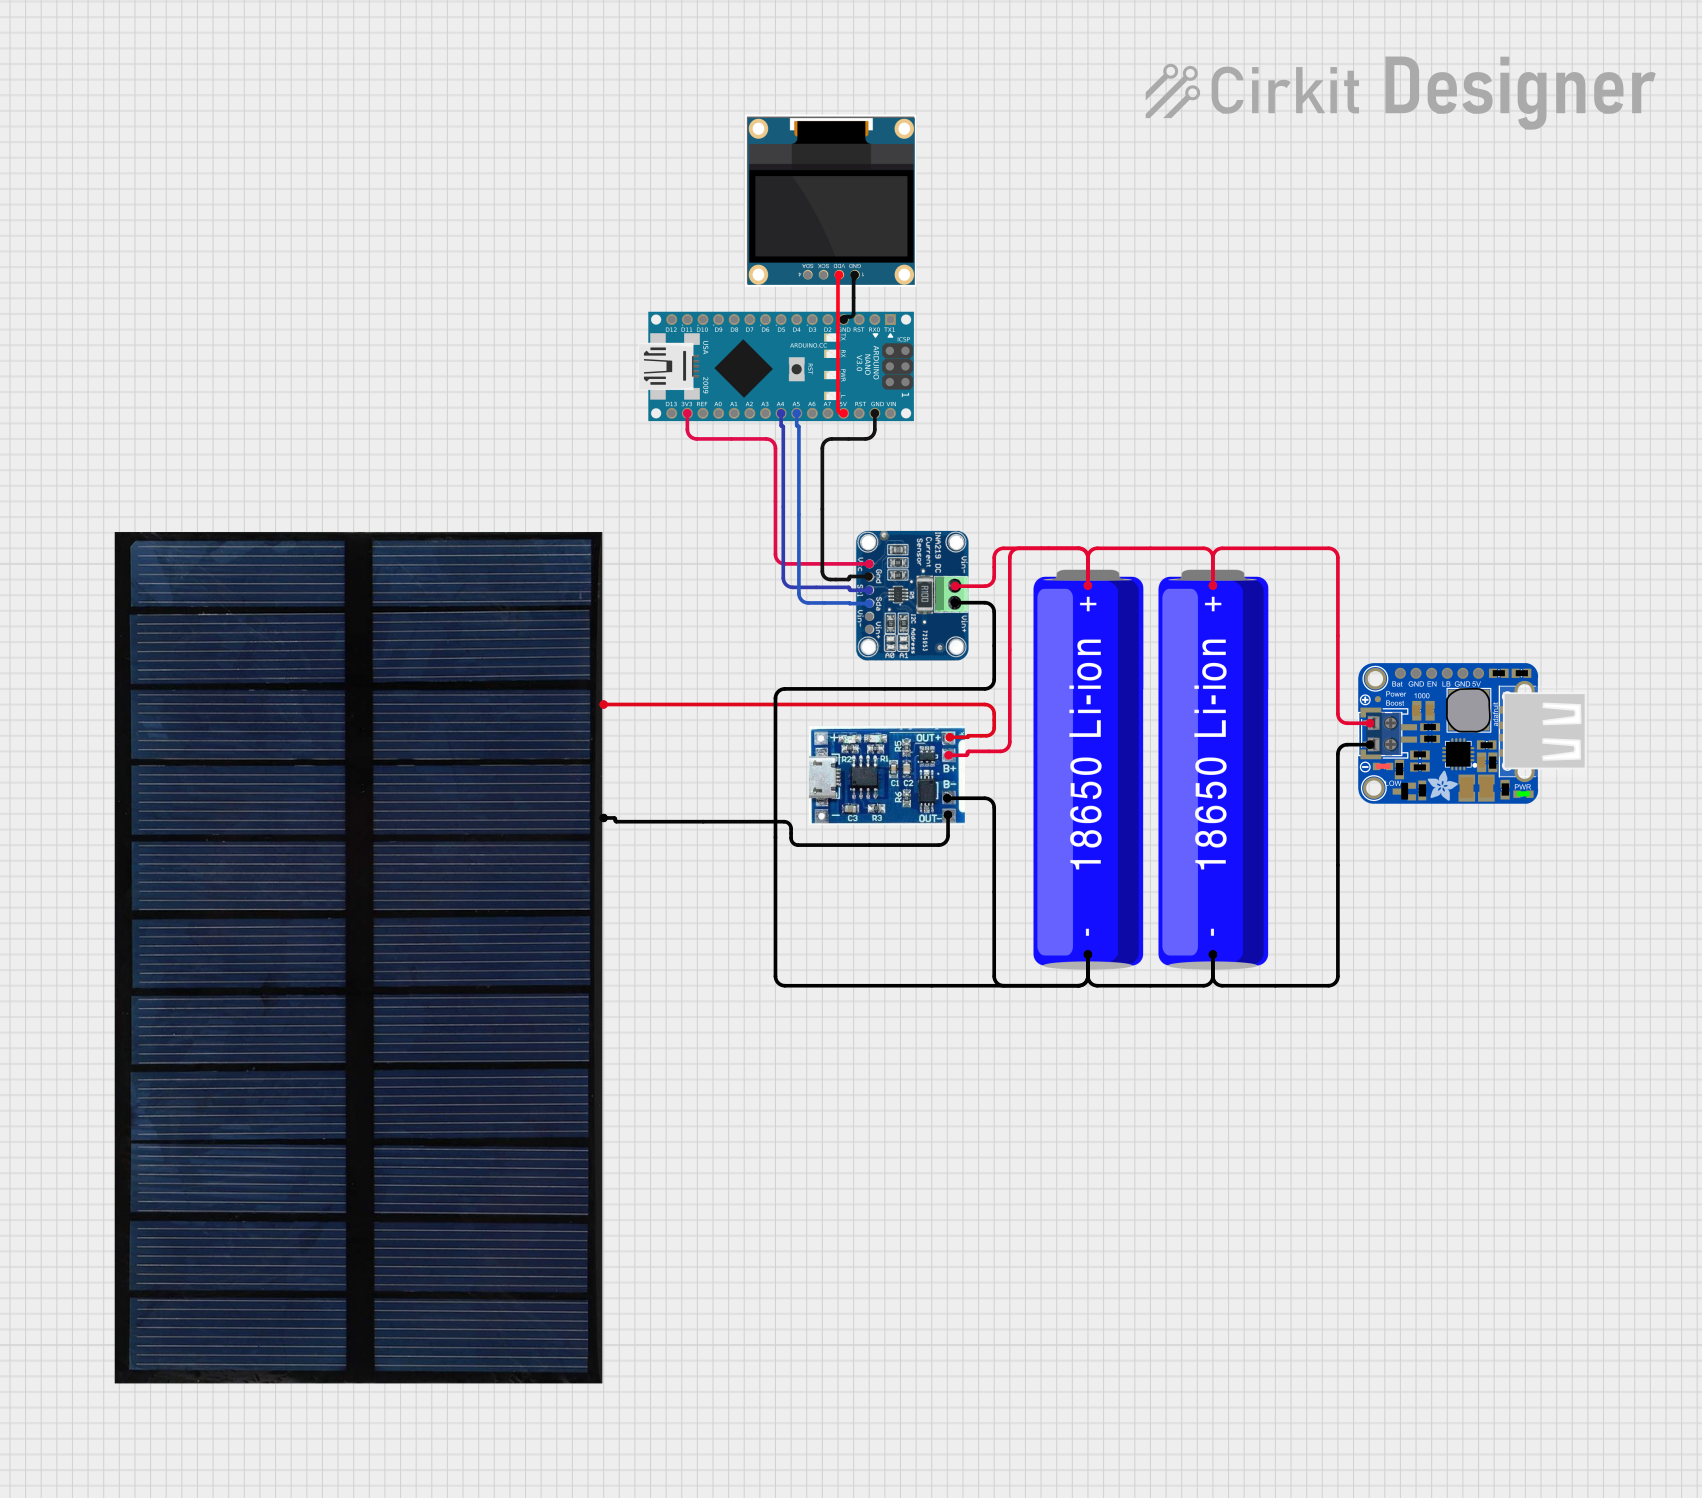
Explore Projects Built with Adafruit USB DC Solar LiPo Charger
Common Applications and Use Cases
- Solar-powered IoT devices
- Portable battery-powered projects
- Environmental monitoring systems
- Wearable electronics
- Educational and DIY renewable energy projects
Technical Specifications
The Adafruit USB DC Solar LiPo Charger is designed to provide reliable and efficient charging for LiPo batteries. Below are its key technical details:
General Specifications
| Parameter | Value |
|---|---|
| Input Voltage (USB) | 5V DC |
| Input Voltage (Solar) | 4.4V to 6V DC |
| Charging Current | 500mA (default, adjustable up to 1A) |
| Battery Compatibility | Single-cell LiPo/Li-ion (3.7V nominal) |
| Output Voltage | 3.7V to 4.2V (regulated by battery) |
| Efficiency | Up to 90% (depending on input source) |
| Dimensions | 25mm x 30mm x 5mm |
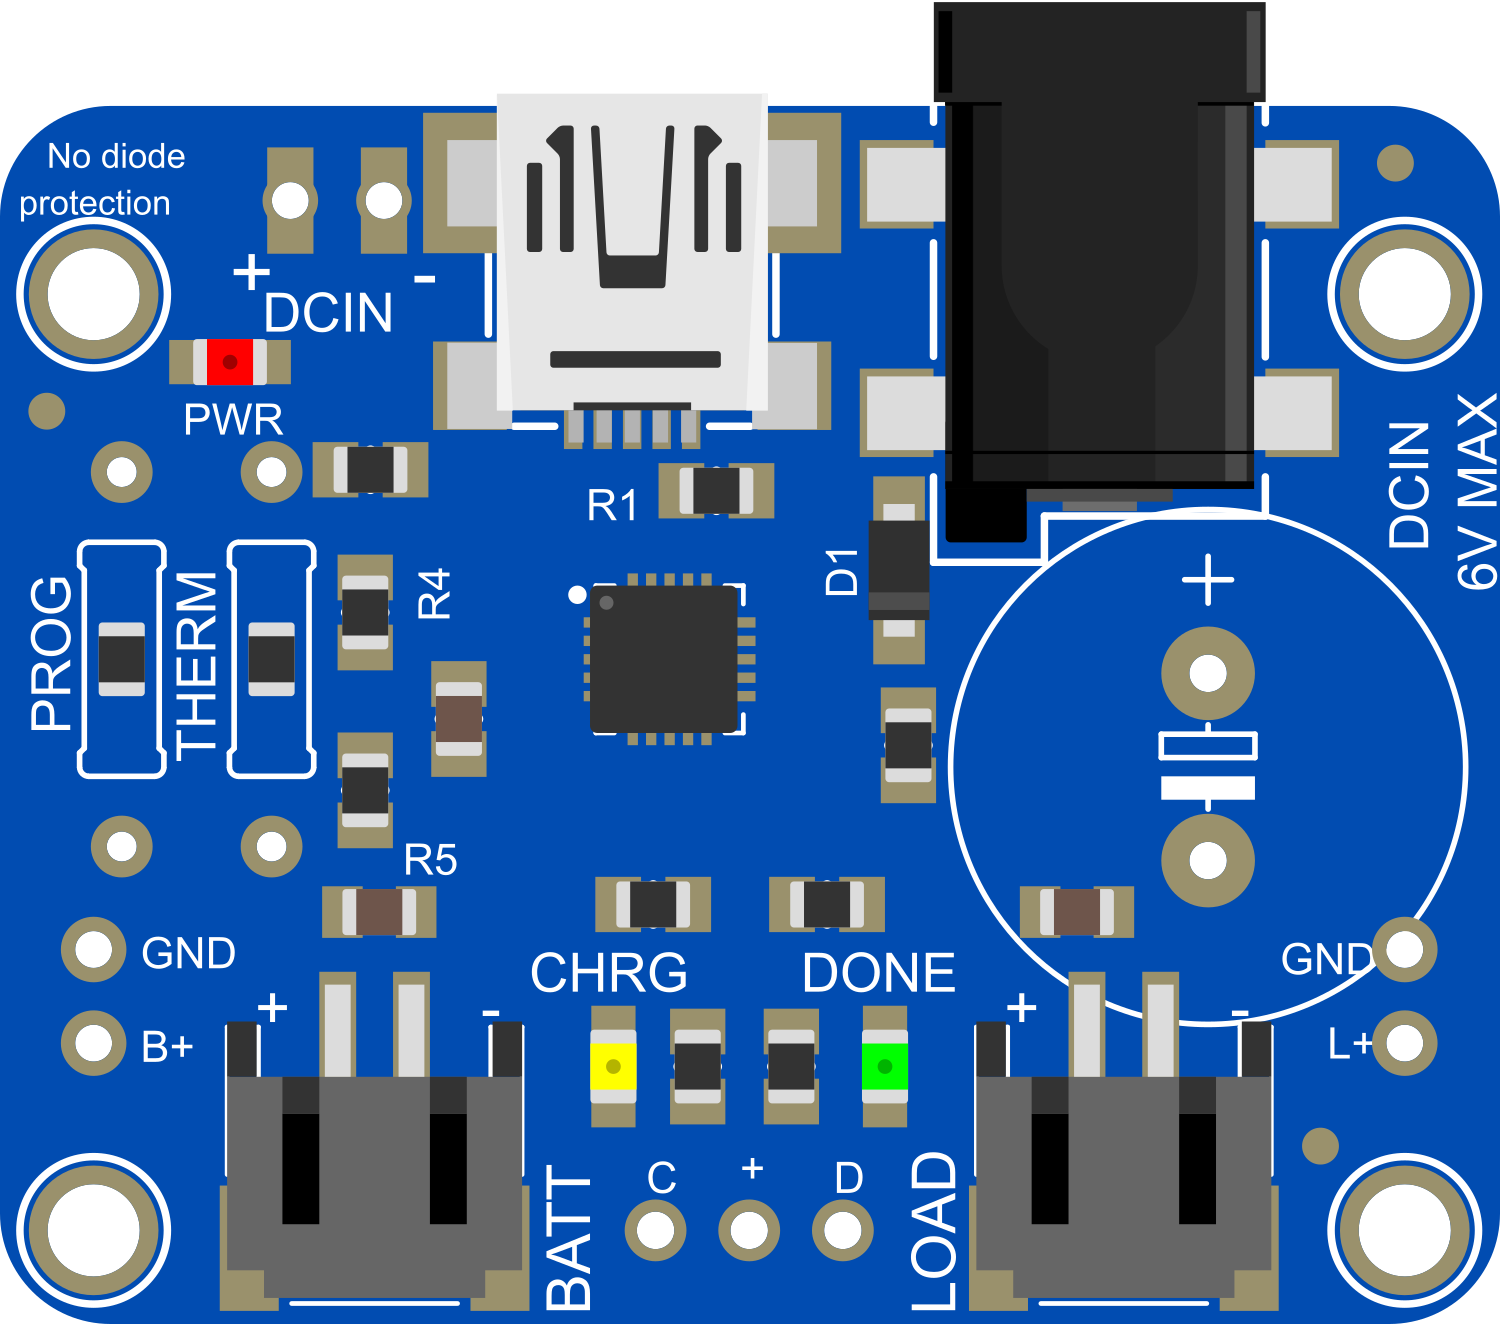
Pin Configuration and Descriptions
| Pin Name | Description |
|---|---|
| BAT | Connects to the positive terminal of the LiPo battery. |
| GND | Ground connection for the battery and input sources. |
| LOAD | Output terminal for powering external devices. |
| USB | Micro-USB input for charging via a USB power source. |
| DC IN | Input terminal for connecting a solar panel or other DC power source. |
| PROG | Solder pad for adjusting the charging current (default: 500mA). |
| STAT | Status pin that indicates charging state (low = charging, high = charged). |
Usage Instructions
How to Use the Component in a Circuit
- Connect the Battery: Attach a single-cell LiPo battery to the
BATandGNDpins. Ensure correct polarity to avoid damage. - Choose an Input Source:
- For USB charging, connect a 5V USB power source to the
USBport. - For solar charging, connect a solar panel (4.4V to 6V) to the
DC INpin.
- For USB charging, connect a 5V USB power source to the
- Power External Devices: Connect your load (e.g., microcontroller, sensors) to the
LOADandGNDpins. The charger will regulate power delivery to the load while charging the battery. - Monitor Charging Status: Use the
STATpin to monitor the charging state. You can connect an LED or microcontroller to this pin for visual or digital feedback.
Important Considerations and Best Practices
- Solar Panel Selection: Use a solar panel with an open-circuit voltage (Voc) between 4.4V and 6V for optimal performance.
- Charging Current Adjustment: To change the charging current, solder a resistor to the
PROGpad. Refer to the datasheet for resistor values corresponding to different currents. - Heat Management: Avoid placing the charger in enclosed spaces without ventilation, as it may generate heat during operation.
- Battery Safety: Only use single-cell LiPo batteries with built-in protection circuits to prevent overcharging or over-discharging.
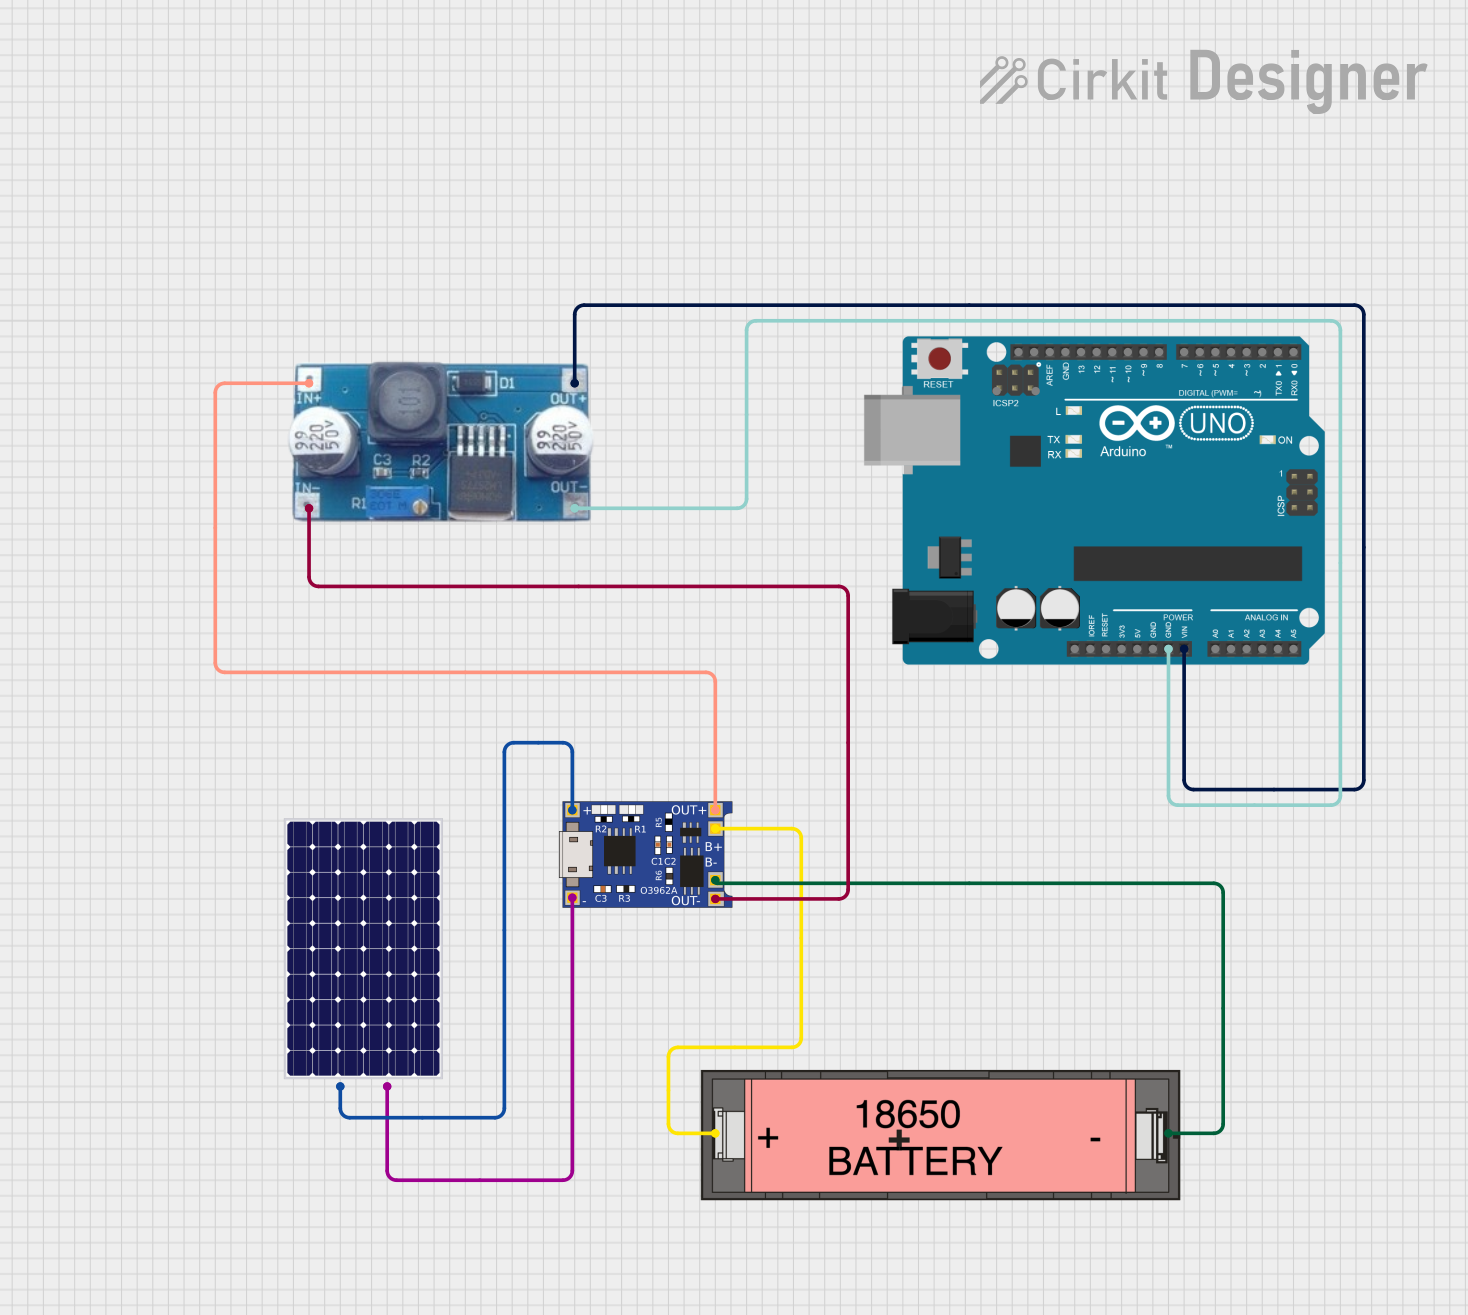
Example: Using with an Arduino UNO
The Adafruit USB DC Solar LiPo Charger can power an Arduino UNO via its LOAD output. Below is an example of how to monitor the charging status using the STAT pin:
// Example code to monitor charging status using the STAT pin
const int statPin = 2; // Connect STAT pin to digital pin 2 on Arduino

void setup() {
  pinMode(statPin, INPUT); // Set STAT pin as input
  Serial.begin(9600);      // Initialize serial communication
}

void loop() {
  int chargingStatus = digitalRead(statPin); // Read the STAT pin state

  if (chargingStatus == LOW) {
    Serial.println("Battery is charging...");
  } else {
    Serial.println("Battery is fully charged or no charging source connected.");
  }

  delay(1000); // Wait for 1 second before checking again
}
Troubleshooting and FAQs
Common Issues and Solutions
Battery Not Charging:
- Ensure the battery is properly connected to the
BATandGNDpins. - Verify that the input source (USB or solar) is providing sufficient voltage and current.
- Check the
PROGresistor value if the charging current needs adjustment.
- Ensure the battery is properly connected to the
Overheating:
- Ensure adequate ventilation around the charger.
- Reduce the charging current by adjusting the
PROGresistor if necessary.
Load Not Powering:
- Confirm that the load is connected to the
LOADandGNDpins. - Check the battery voltage to ensure it is not depleted.
- Confirm that the load is connected to the
Solar Panel Not Working:
- Verify that the solar panel's open-circuit voltage is within the 4.4V to 6V range.
- Ensure the solar panel is receiving sufficient sunlight.
FAQs
Q: Can I use this charger with a multi-cell LiPo battery?
A: No, this charger is designed for single-cell (3.7V nominal) LiPo batteries only.
Q: How do I increase the charging current?
A: Solder a resistor to the PROG pad. Refer to the datasheet for the appropriate resistor value for your desired current.
Q: Can I charge the battery and power a load simultaneously?
A: Yes, the charger supports simultaneous charging and load powering. However, ensure the input source can handle the combined current demand.
Q: What happens if the input voltage exceeds 6V?
A: Exceeding 6V may damage the charger. Always use input sources within the specified voltage range.