
How to Use TFT 2.8 Touch Screen: Examples, Pinouts, and Specs
 Design with TFT 2.8 Touch Screen in Cirkit Designer
Introduction
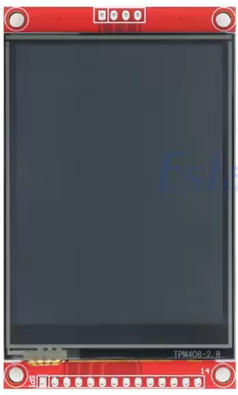
The TFT 2.8 Touch Screen (Manufacturer: Estardyn, Part ID: ILI9341) is a 2.8-inch thin-film transistor (TFT) display with integrated touch sensitivity. This component is designed to provide a vibrant graphical interface for embedded systems, offering a resolution of 240x320 pixels and 65K color depth. Its touch functionality enables user interaction through gestures, making it ideal for projects requiring a graphical user interface (GUI).
Explore Projects Built with TFT 2.8 Touch Screen
 Open Project in Cirkit Designer
 Open Project in Cirkit Designer
 Open Project in Cirkit Designer
 Open Project in Cirkit Designer
Explore Projects Built with TFT 2.8 Touch Screen
Open Project in Cirkit DesignerOpen Project in Cirkit DesignerOpen Project in Cirkit DesignerOpen Project in Cirkit DesignerCommon Applications
- Embedded systems with graphical interfaces
- DIY projects such as smart home controllers
- Industrial control panels
- Educational tools and interactive displays
- Portable devices with touch-based navigation
Technical Specifications
Below are the key technical details for the TFT 2.8 Touch Screen:
| Parameter | Specification |
|---|---|
| Display Type | TFT LCD |
| Screen Size | 2.8 inches |
| Resolution | 240 x 320 pixels |
| Color Depth | 65K colors |
| Touch Type | Resistive or Capacitive (varies) |
| Driver IC | ILI9341 |
| Operating Voltage | 3.3V (logic) |
| Backlight Voltage | 3.3V to 5V |
| Communication Protocol | SPI (Serial Peripheral Interface) |
| Operating Temperature | -20°C to 70°C |
Pin Configuration
The TFT 2.8 Touch Screen typically has the following pinout:
TFT Display Pins
| Pin Name | Description |
|---|---|
| VCC | Power supply (3.3V or 5V for backlight) |
| GND | Ground |
| CS | Chip Select (active low) |
| RESET | Reset signal (active low) |
| DC (RS) | Data/Command control |
| SDI (MOSI) | SPI Master Out Slave In (data input) |
| SCK | SPI Clock |
| LED | Backlight control (connect to 3.3V or 5V) |
| T_CLK | Touch screen SPI clock |
| T_CS | Touch screen chip select |
| T_DIN | Touch screen SPI data input |
| T_DO | Touch screen SPI data output |
| T_IRQ | Touch screen interrupt (active low) |
Usage Instructions
Connecting the TFT 2.8 Touch Screen to an Arduino UNO
To use the TFT 2.8 Touch Screen with an Arduino UNO, follow these steps:
Wiring the Display: Connect the pins of the TFT screen to the Arduino UNO as shown below:
- VCC → 5V
- GND → GND
- CS → Pin 10
- RESET → Pin 9
- DC (RS) → Pin 8
- SDI (MOSI) → Pin 11
- SCK → Pin 13
- LED → 3.3V or 5V (for backlight)
- T_CS → Pin 4
- T_CLK → Pin 13
- T_DIN → Pin 11
- T_DO → Pin 12
- T_IRQ → Pin 2
Install Required Libraries:
- Install the
Adafruit_GFXandAdafruit_ILI9341libraries from the Arduino Library Manager. - For touch functionality, install the
Adafruit_STMPE610library if using a resistive touch screen.
- Install the
Upload Example Code: Use the following example code to test the display and touch functionality:
#include <Adafruit_GFX.h>       // Graphics library
#include <Adafruit_ILI9341.h>   // Driver for ILI9341
#include <SPI.h>

// Define TFT pins
#define TFT_CS   10  // Chip Select
#define TFT_DC   8   // Data/Command
#define TFT_RST  9   // Reset

// Initialize the TFT display
Adafruit_ILI9341 tft = Adafruit_ILI9341(TFT_CS, TFT_DC, TFT_RST);

void setup() {
  tft.begin();  // Initialize the display
  tft.setRotation(1);  // Set screen orientation (1 = landscape)
  tft.fillScreen(ILI9341_BLACK);  // Clear screen with black color

  // Display a message
  tft.setTextColor(ILI9341_WHITE);  // Set text color
  tft.setTextSize(2);  // Set text size
  tft.setCursor(10, 10);  // Set cursor position
  tft.println("Hello, TFT!");  // Print message
}

void loop() {
  // Add your code here for dynamic updates
}
Important Considerations
- Voltage Levels: Ensure the logic voltage matches the display's requirements (3.3V). Use level shifters if necessary.
- Backlight Control: The backlight pin (LED) can be connected to a PWM pin for brightness control.
- Touch Calibration: If the touch screen is not responsive or accurate, you may need to calibrate it using a library-provided example.
Troubleshooting and FAQs
Common Issues
Blank Screen:
- Verify all connections are secure and correct.
- Ensure the
tft.begin()function is called in the setup. - Check the power supply voltage (3.3V or 5V as required).
Touch Not Working:
- Confirm the touch-related pins (T_CS, T_CLK, T_DIN, T_DO, T_IRQ) are correctly connected.
- Ensure the correct touch library is installed and initialized.
Distorted or Incorrect Colors:
- Check the SPI connections (MOSI, SCK, CS, DC).
- Verify the screen orientation using
tft.setRotation().
Slow Performance:
- Use hardware SPI for faster communication.
- Optimize your code by reducing unnecessary screen updates.
FAQs
Q: Can I use this display with a 5V microcontroller?
A: Yes, but you must use level shifters for the logic pins to avoid damaging the display.
Q: How do I control the backlight brightness?
A: Connect the LED pin to a PWM-capable pin on your microcontroller and use analogWrite() to adjust brightness.
Q: Is this display compatible with Raspberry Pi?
A: Yes, the ILI9341 driver is supported on Raspberry Pi, but you may need to use a different library such as fbtft.
Q: How do I calibrate the touch screen?
A: Use the calibration example provided in the touch library to generate calibration values, then apply them in your code.
This concludes the documentation for the TFT 2.8 Touch Screen. For further assistance, refer to the manufacturer's datasheet or community forums.