How to Use Potentiometer: Examples, Pinouts, and Specs
Introduction
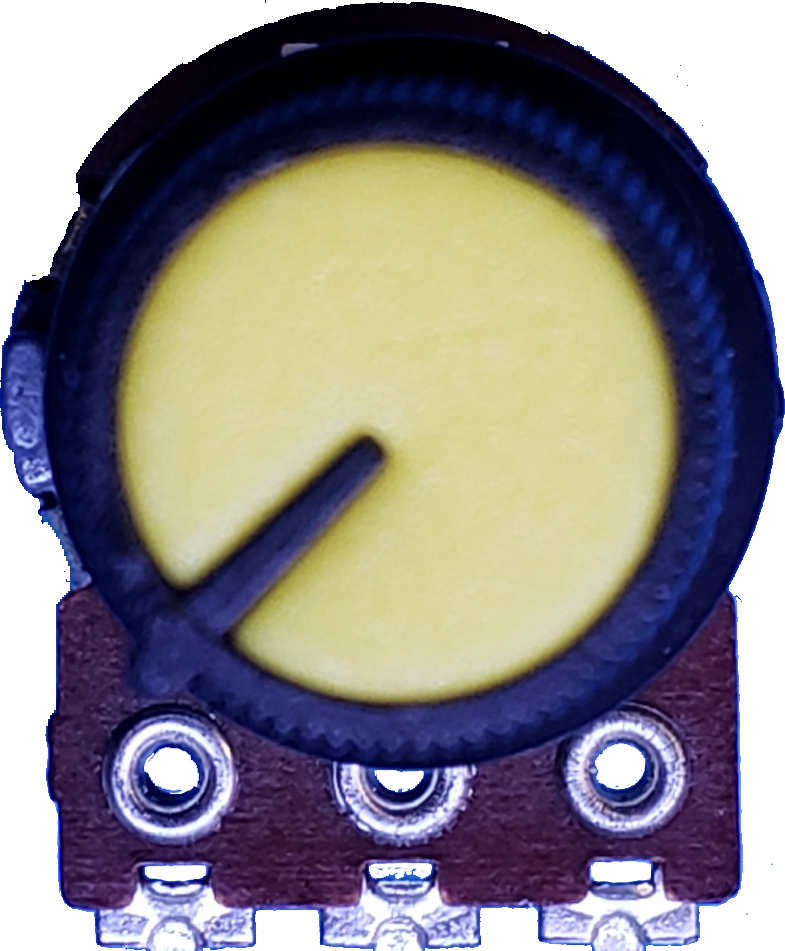
A potentiometer, commonly referred to as a "pot," is a three-terminal variable resistor where the resistance is manually adjustable by turning a knob or sliding a fader. It is widely used in electronics to vary the voltage and control the current in a circuit. Potentiometers are often utilized for adjusting settings such as volume in audio systems, brightness in lighting applications, and calibration in measurement devices.
Explore Projects Built with Potentiometer
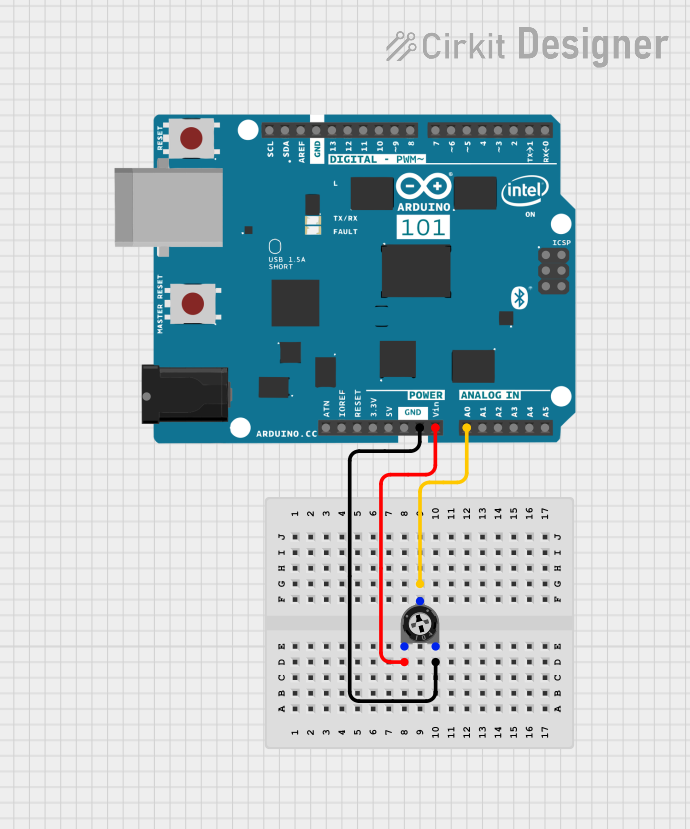
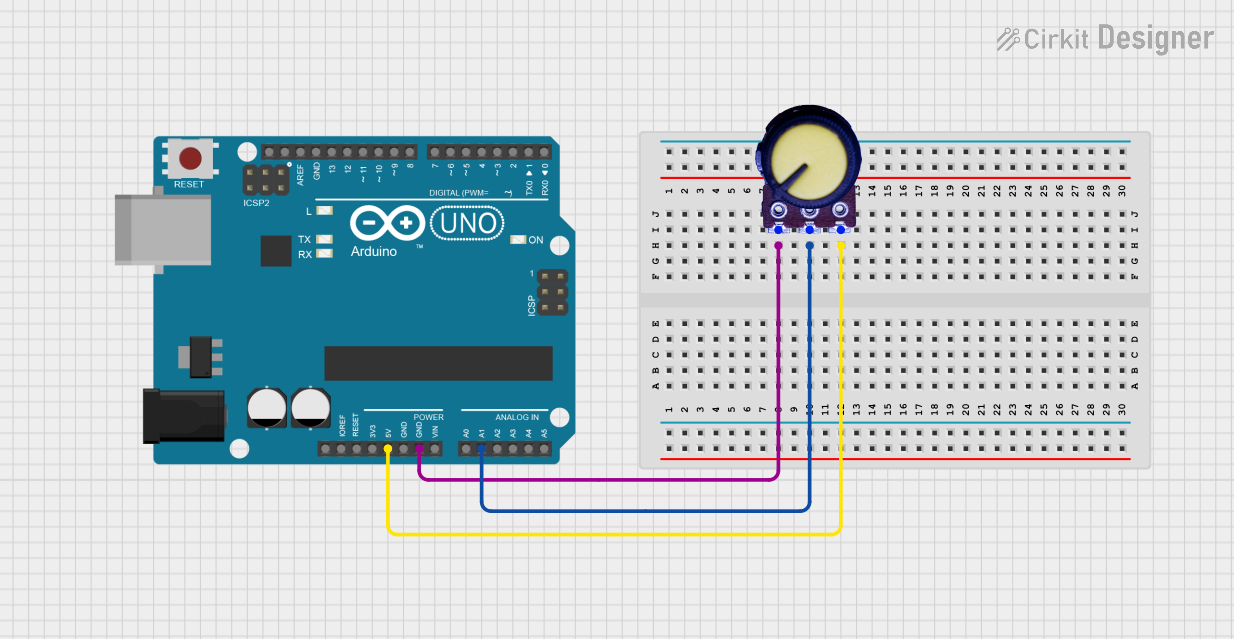
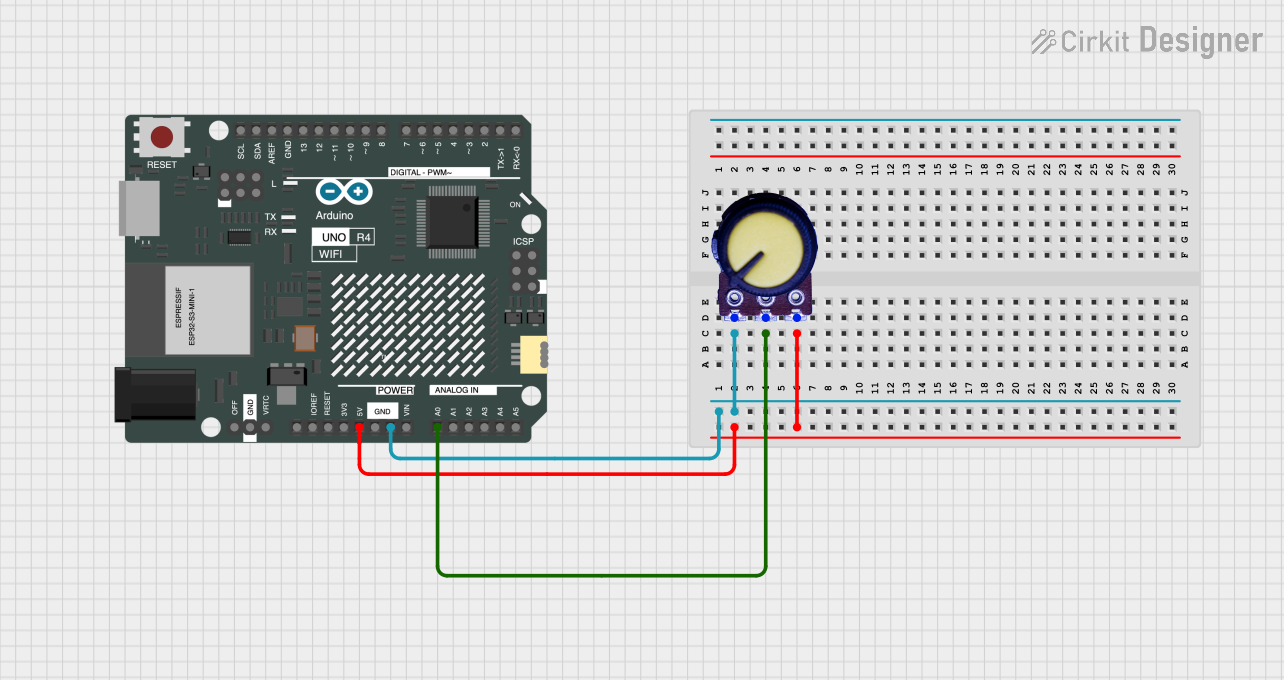
Explore Projects Built with Potentiometer
Technical Specifications
Key Technical Details
- Resistance Range: Typically from 1 ohm to 1 megaohm
- Tolerance: ±10% to ±20% of nominal resistance
- Power Rating: Usually between 0.1W to 0.5W for standard pots
- Voltage Rating: Dependent on the material and design, often up to a few hundred volts
- Temperature Coefficient: Varies with material, typically around ±100 ppm/°C
- Linear or Logarithmic Taper: Determines how the resistance changes as the pot is turned
Pin Configuration and Descriptions
| Pin Number | Description |
|---|---|
| 1 | Counter-clockwise terminal (CCW) |
| 2 | Wiper terminal (the adjustable output) |
| 3 | Clockwise terminal (CW) |
Usage Instructions
Incorporating into a Circuit
To use a potentiometer in a circuit:
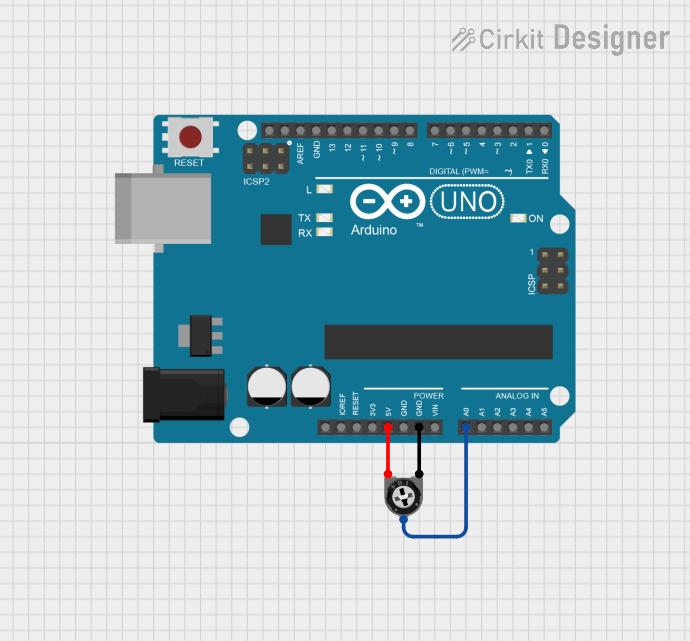
- Voltage Divider: Connect pin 1 to the higher voltage, pin 3 to the lower voltage (often ground), and pin 2 will provide a variable voltage output between these two levels.
- Variable Resistor: Connect pin 2 to one of the outer pins (1 or 3), leaving the other outer pin unconnected. This creates a two-terminal variable resistor.
Best Practices
- Avoid Exceeding Ratings: Do not exceed the voltage and power ratings to prevent damage.
- Clean Environment: Use in a clean environment to avoid dust and dirt affecting the wiper contact.
- Mounting: Ensure secure mounting to prevent mechanical stress that could affect performance.
- End Stops: Do not force the knob beyond its end stops to avoid mechanical damage.
Example Code for Arduino UNO
The following example demonstrates how to read the analog value from a potentiometer connected to an Arduino UNO.
// Define the pin connected to the potentiometer wiper (middle terminal)
const int potPin = A0;

void setup() {
  // Initialize serial communication at 9600 bits per second:
  Serial.begin(9600);
}

void loop() {
  // Read the value from the potentiometer
  int potValue = analogRead(potPin);
  // Convert the reading (which goes from 0 - 1023) to a voltage (0 - 5V):
  float voltage = potValue * (5.0 / 1023.0);
  // Print out the value in volts
  Serial.println(voltage);
  // Delay for a bit to get stable readings
  delay(250);
}
Troubleshooting and FAQs
Common Issues
- Inconsistent Output: If the output voltage is erratic, check for dirt or wear in the potentiometer track.
- Crackling Noise in Audio Applications: This could be due to a dirty wiper contact. Try using a contact cleaner.
- No Variation in Output: Ensure that all connections are secure and that the potentiometer is not damaged.
FAQs
Q: Can I use a potentiometer to control the speed of a motor? A: Yes, but ensure the potentiometer can handle the current required by the motor.
Q: How do I choose between a linear and logarithmic potentiometer? A: Use a linear potentiometer when you need a uniform change in resistance. Use a logarithmic potentiometer for audio applications where the human ear perceives sound logarithmically.
Q: What is the difference between a potentiometer and a rheostat? A: A rheostat is a two-terminal variable resistor used for high-power applications, while a potentiometer is a three-terminal device used for lower power applications and provides a variable voltage output.
Q: How do I clean a potentiometer? A: Use a non-conductive cleaner specifically designed for electronic components. Apply it to the track and rotate the wiper across its full range several times.