How to Use Solar panel: Examples, Pinouts, and Specs
Introduction
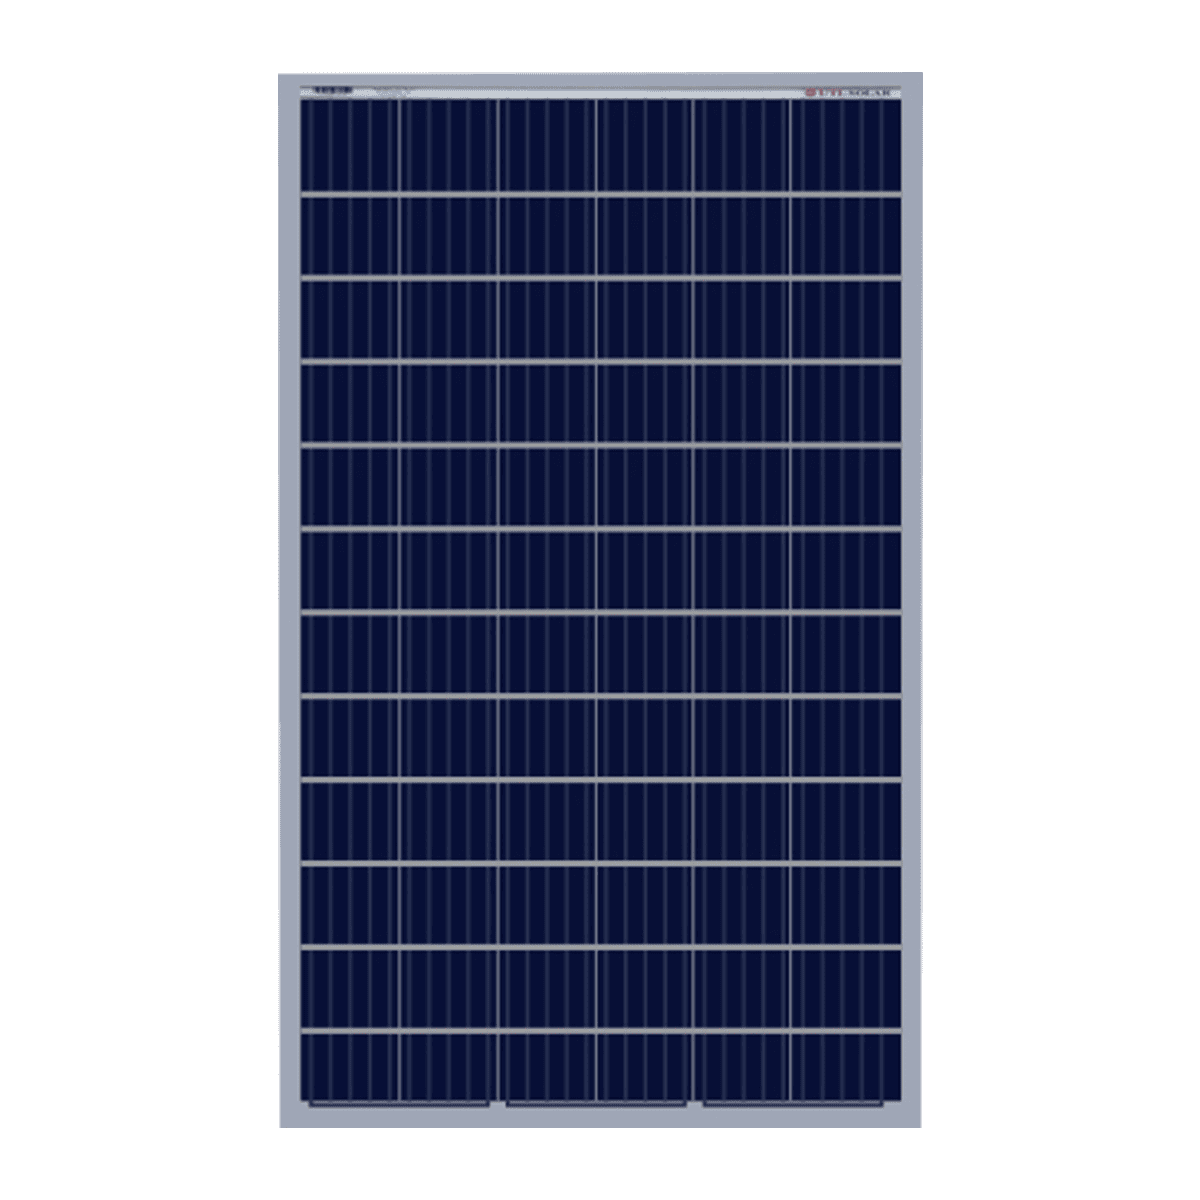
The JinkoSolar Panel is a high-efficiency solar panel designed to convert sunlight into electrical energy using advanced photovoltaic (PV) cell technology. This component is ideal for renewable energy systems, offering a sustainable and eco-friendly solution for power generation. Its robust design ensures reliable performance in various environmental conditions.
Explore Projects Built with Solar panel

Explore Projects Built with Solar panel
Common Applications and Use Cases
- Residential and commercial solar power systems
- Off-grid power generation for remote locations
- Solar-powered devices and appliances
- Integration with battery storage systems
- Educational projects and prototyping with microcontrollers (e.g., Arduino)
Technical Specifications
The following table outlines the key technical details of the JinkoSolar Panel:
| Parameter | Value |
|---|---|
| Manufacturer | JinkoSolar |
| Part ID | Panel |
| Technology | Photovoltaic (Monocrystalline) |
| Maximum Power (Pmax) | 300 W |
| Voltage at Pmax (Vmp) | 32.6 V |
| Current at Pmax (Imp) | 9.2 A |
| Open Circuit Voltage (Voc) | 40.1 V |
| Short Circuit Current (Isc) | 9.8 A |
| Efficiency | 20.4% |
| Operating Temperature | -40°C to +85°C |
| Dimensions | 1650 mm x 992 mm x 35 mm |
| Weight | 18.5 kg |
Pin Configuration and Descriptions
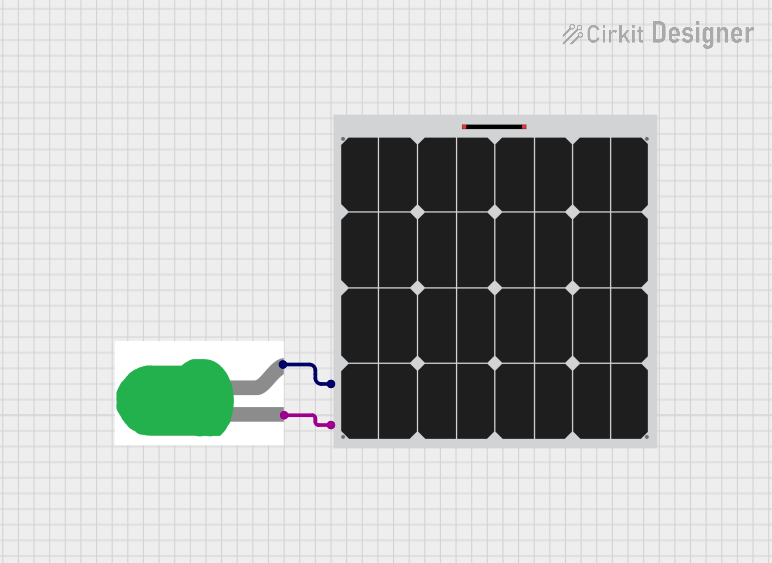
The JinkoSolar Panel does not have traditional pins but instead features two output terminals for electrical connections. These terminals are typically labeled as follows:
| Terminal | Description |
|---|---|
| Positive (+) | Positive output terminal for DC power |
| Negative (-) | Negative output terminal for DC power |
Usage Instructions
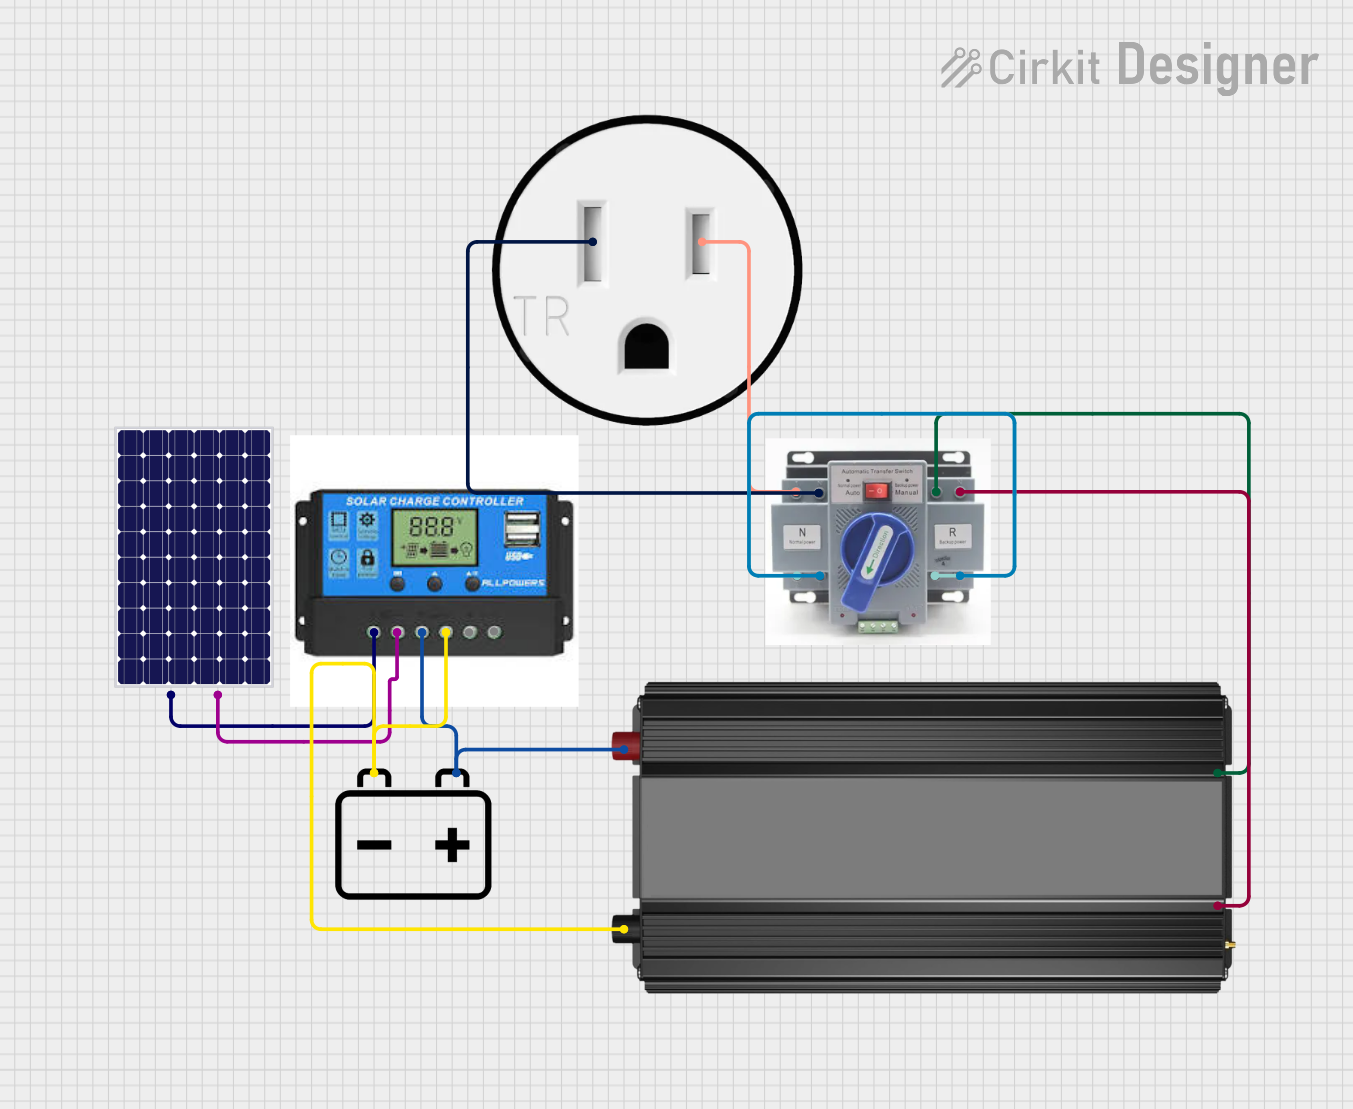
How to Use the Solar Panel in a Circuit
- Positioning the Panel: Place the solar panel in a location with maximum sunlight exposure. Ensure the panel is angled correctly to optimize sunlight capture based on your geographic location.
- Connecting the Terminals:
- Connect the positive terminal (+) of the panel to the positive input of your load or charge controller.
- Connect the negative terminal (-) of the panel to the negative input of your load or charge controller.
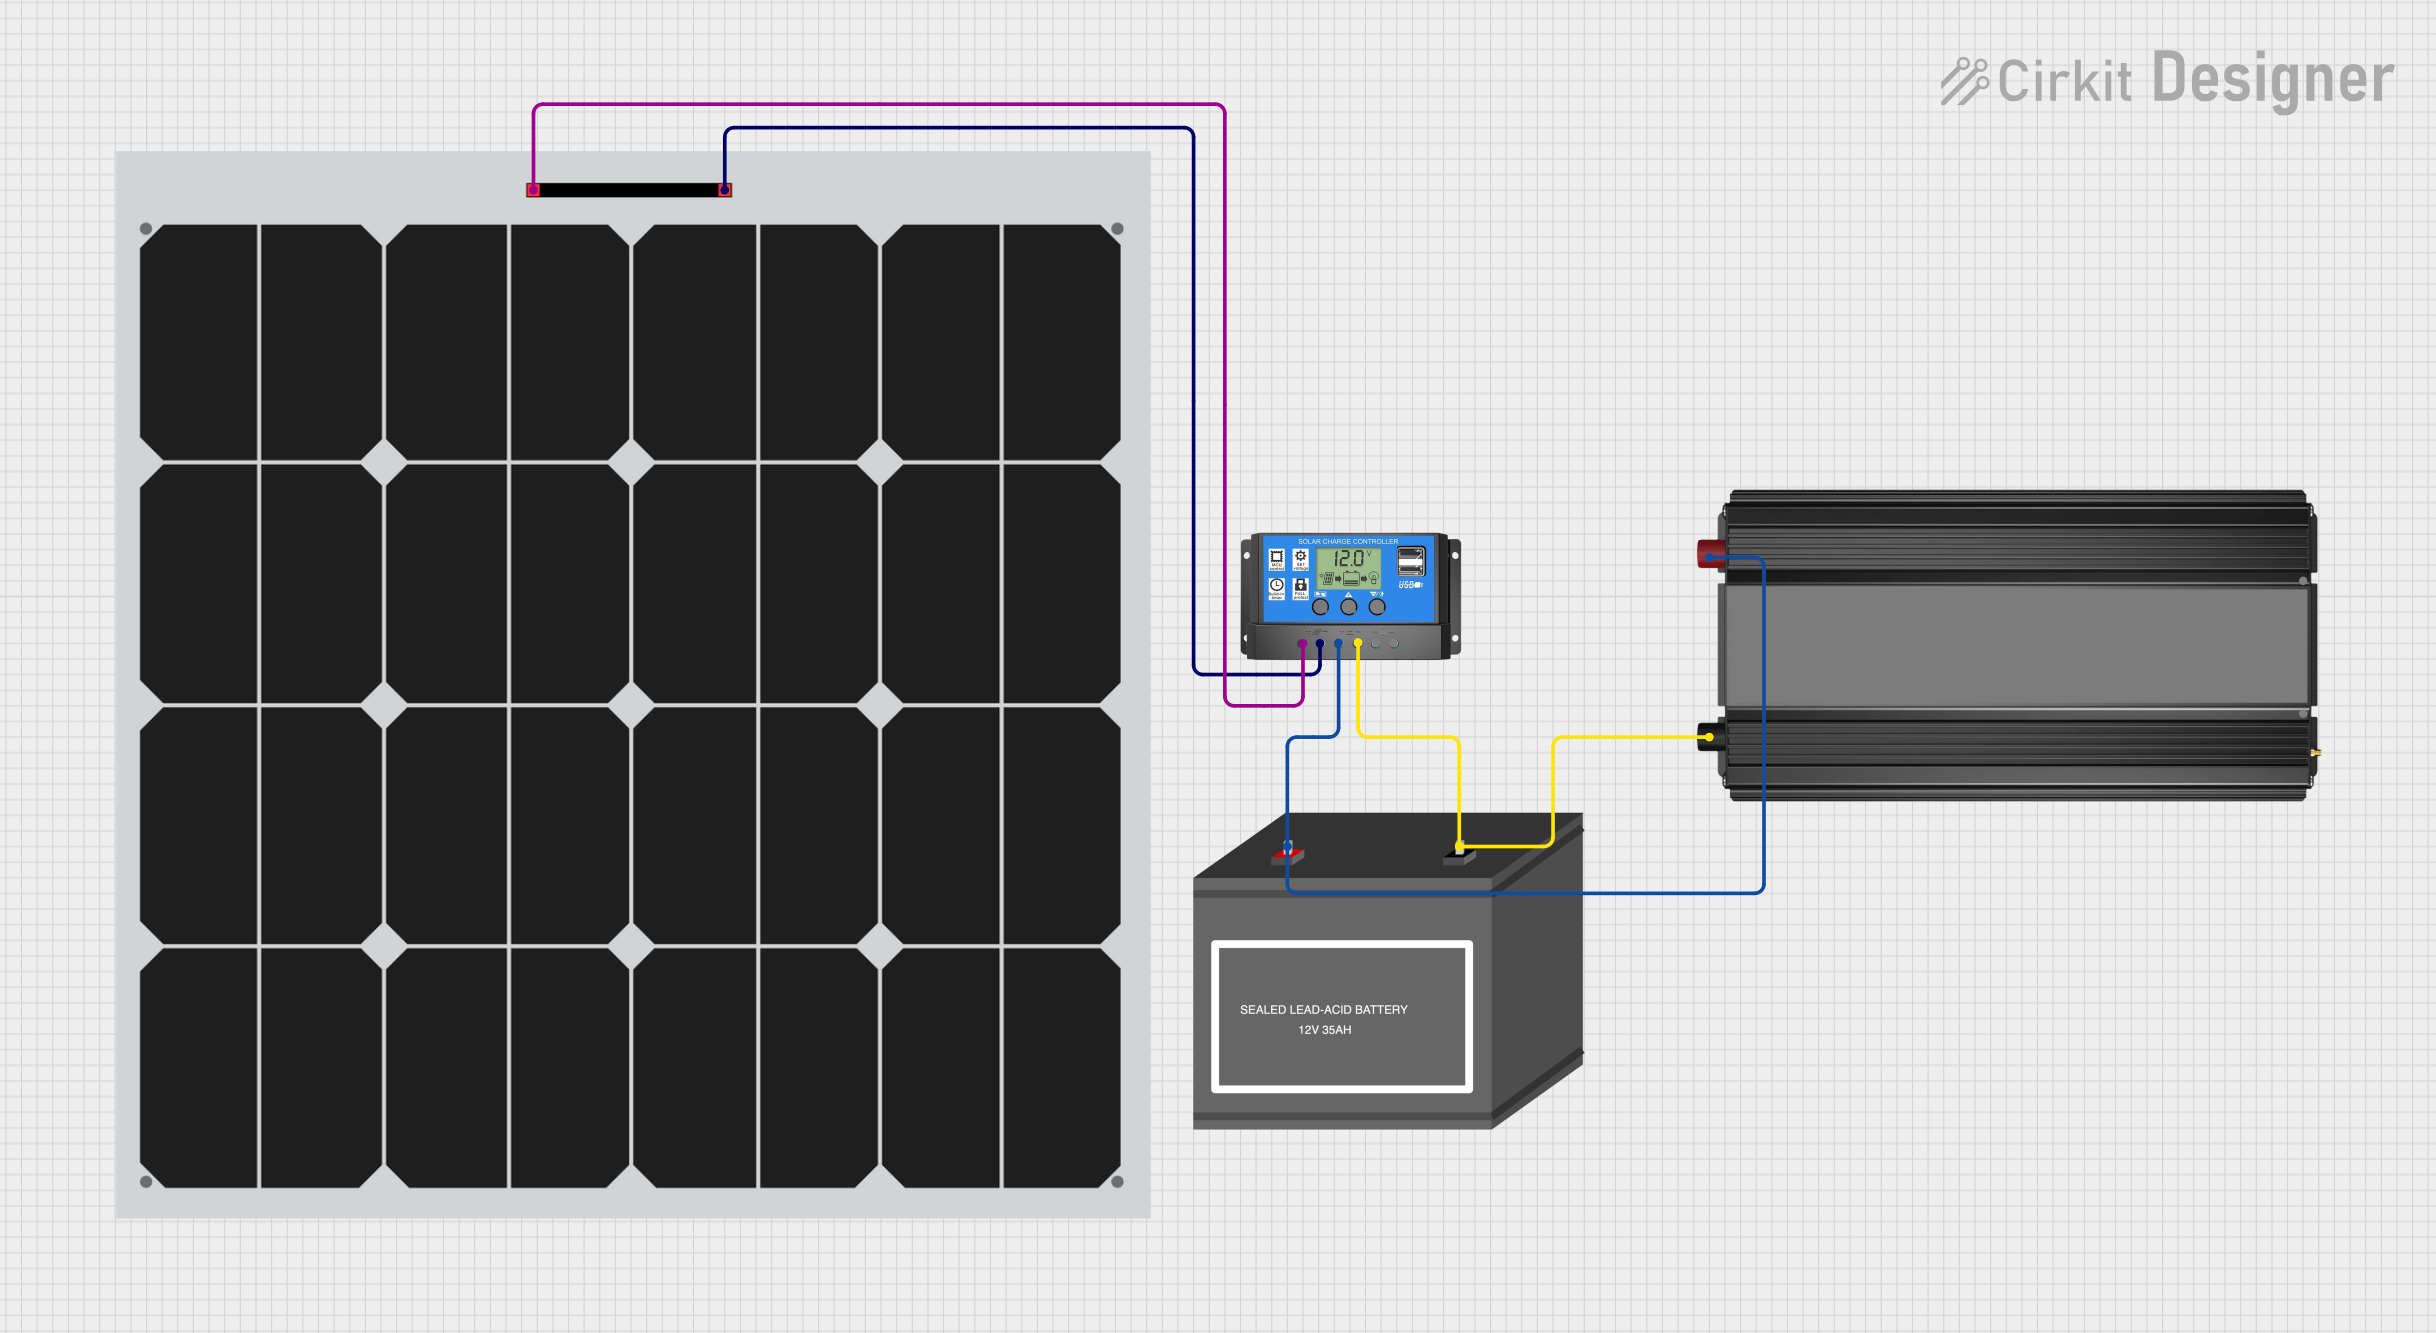
- Using a Charge Controller: If charging a battery, always use a charge controller to regulate the voltage and current from the panel to prevent overcharging or damage to the battery.
- Load Connection: Connect your load (e.g., appliances, microcontroller, or inverter) to the output of the charge controller or battery system.
Important Considerations and Best Practices
- Avoid Shading: Even partial shading of the panel can significantly reduce its efficiency.
- Use Proper Cables: Ensure the cables used can handle the current output of the panel to prevent overheating.
- Overvoltage Protection: Use a charge controller or voltage regulator to protect connected devices from overvoltage.
- Cleaning: Regularly clean the panel surface to remove dust, dirt, or debris that may block sunlight.
- Mounting: Secure the panel with a sturdy mounting system to withstand wind and other environmental factors.
Example: Connecting to an Arduino UNO
To use the solar panel with an Arduino UNO, you can connect it to a battery and a charge controller. Below is an example of Arduino code to monitor the battery voltage using the Arduino's analog input:
// Define the analog pin connected to the battery voltage divider
const int voltagePin = A0;

// Define the reference voltage of the Arduino (5V for most boards)
const float referenceVoltage = 5.0;

// Define the voltage divider ratio (adjust based on your resistor values)
const float voltageDividerRatio = 5.0; // Example: 10k and 40k resistors

void setup() {
  Serial.begin(9600); // Initialize serial communication
}

void loop() {
  int sensorValue = analogRead(voltagePin); // Read the analog input
  // Calculate the battery voltage
  float batteryVoltage = (sensorValue * referenceVoltage / 1023.0) * voltageDividerRatio;

  // Print the battery voltage to the Serial Monitor
  Serial.print("Battery Voltage: ");
  Serial.print(batteryVoltage);
  Serial.println(" V");

  delay(1000); // Wait for 1 second before the next reading
}
Note: Use a voltage divider circuit to step down the battery voltage to a safe level for the Arduino's analog input (0-5V).
Troubleshooting and FAQs
Common Issues and Solutions
Low Power Output:
- Cause: Insufficient sunlight or shading.
- Solution: Ensure the panel is in direct sunlight and free from obstructions.
Overheating Cables:
- Cause: Using cables with insufficient current rating.
- Solution: Use cables rated for the panel's maximum current output (e.g., 10 A or higher).
No Output Voltage:
- Cause: Loose or incorrect connections.
- Solution: Check all connections and ensure proper polarity.
Battery Not Charging:
- Cause: Faulty charge controller or incorrect settings.
- Solution: Verify the charge controller is functioning correctly and configured for the battery type.
FAQs
Q: Can I connect the solar panel directly to a battery?
A: It is not recommended. Always use a charge controller to prevent overcharging and damage to the battery.Q: How do I calculate the energy output of the panel?
A: Multiply the panel's power rating (Pmax) by the number of sunlight hours per day. For example, a 300 W panel with 5 hours of sunlight produces 1.5 kWh/day.Q: Can the panel be used indoors?
A: Solar panels are designed for outdoor use. Indoor use will result in significantly reduced efficiency due to limited light intensity.Q: How do I clean the panel?
A: Use a soft cloth or sponge with water and mild soap. Avoid abrasive materials that could scratch the surface.
By following this documentation, you can effectively integrate the JinkoSolar Panel into your projects and maximize its performance.