How to Use FLEXI SOFT: Examples, Pinouts, and Specs
Introduction
FLEXI SOFT is a flexible, soft circuit material designed for use in wearable electronics and flexible devices. Its unique properties allow it to conform to various shapes and surfaces, making it ideal for applications where traditional rigid circuit boards are unsuitable. FLEXI SOFT is lightweight, durable, and capable of integrating seamlessly into textiles, medical devices, and other innovative technologies.
Explore Projects Built with FLEXI SOFT


Explore Projects Built with FLEXI SOFT
Common Applications and Use Cases
- Wearable electronics, such as smart clothing and fitness trackers
- Medical devices, including flexible sensors and health monitoring patches
- Flexible displays and e-paper technologies
- Robotics and soft actuators
- Prototyping for flexible and stretchable circuits
Technical Specifications
Below are the key technical details for FLEXI SOFT:
| Parameter | Specification |
|---|---|
| Material Composition | Conductive polymer with flexible substrate |
| Thickness | 0.1 mm to 0.5 mm |
| Operating Voltage Range | 0.5 V to 12 V |
| Maximum Current Capacity | 100 mA/cm² |
| Operating Temperature | -20°C to 85°C |
| Bend Radius | Minimum 5 mm |
| Stretchability | Up to 20% elongation |
| Adhesion Compatibility | Compatible with textiles, plastics, and silicone |
Pin Configuration and Descriptions
FLEXI SOFT does not have traditional pins like rigid components. Instead, it features conductive traces that can be connected using soldering, conductive adhesives, or connectors. Below is a table describing the typical connection points:
| Connection Point | Description |
|---|---|
| Power (+) | Positive voltage input for powering the circuit |
| Ground (-) | Ground connection for completing the circuit |
| Signal Traces | Conductive paths for data or control signals |
| Sensor Pads | Optional pads for integrating sensors or inputs |
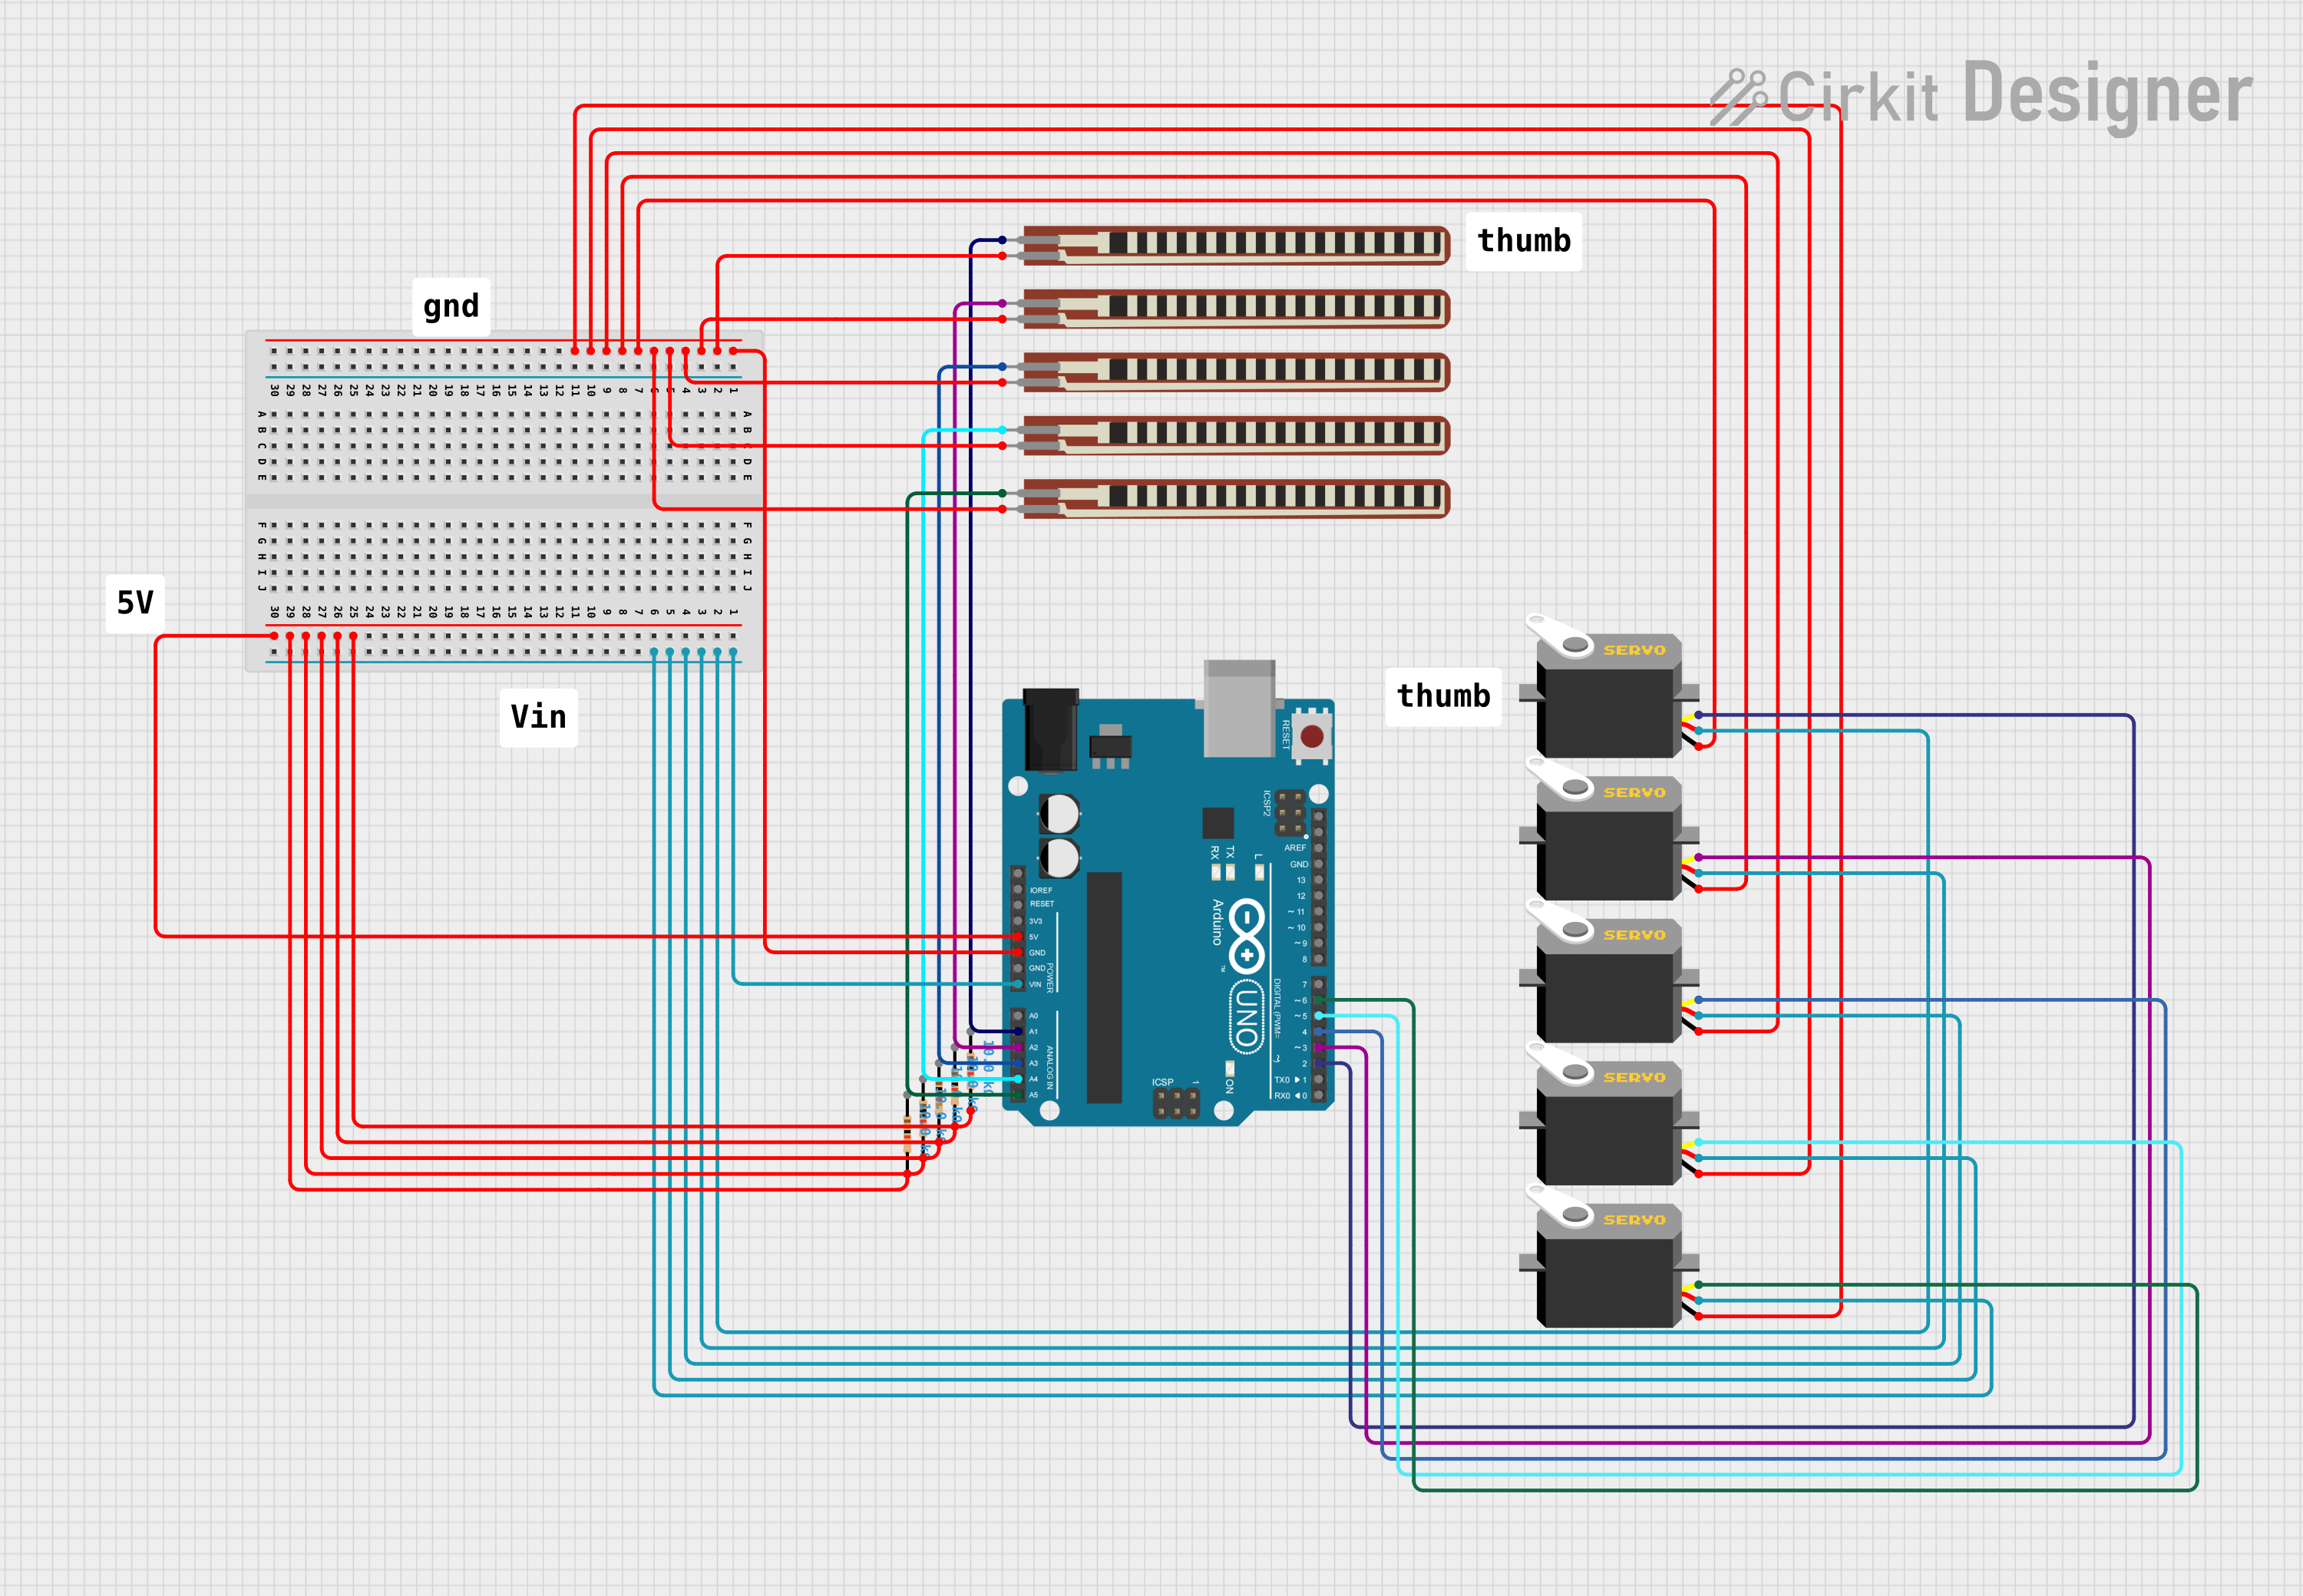
Usage Instructions
How to Use FLEXI SOFT in a Circuit
- Cutting and Shaping: FLEXI SOFT can be cut to the desired shape using scissors or precision cutting tools. Ensure clean edges to avoid short circuits.
- Connecting to Power and Signals:
- Use conductive adhesives or soldering to attach wires or connectors to the designated traces.
- Ensure proper insulation between adjacent traces to prevent short circuits.
- Mounting:
- FLEXI SOFT can be adhered to textiles, plastics, or other surfaces using fabric glue, double-sided tape, or heat bonding.
- For wearable applications, ensure the material is securely attached to prevent movement or damage.
- Testing:
- Verify connections using a multimeter before powering the circuit.
- Gradually apply power and test functionality to ensure proper operation.
Important Considerations and Best Practices
- Avoid excessive stretching beyond the specified 20% elongation to prevent damage to the conductive traces.
- Do not expose FLEXI SOFT to sharp objects or abrasive surfaces that could damage the material.
- When soldering, use a low-temperature soldering iron (below 250°C) to avoid damaging the flexible substrate.
- For Arduino UNO or other microcontroller integration, ensure proper voltage and current levels are maintained.
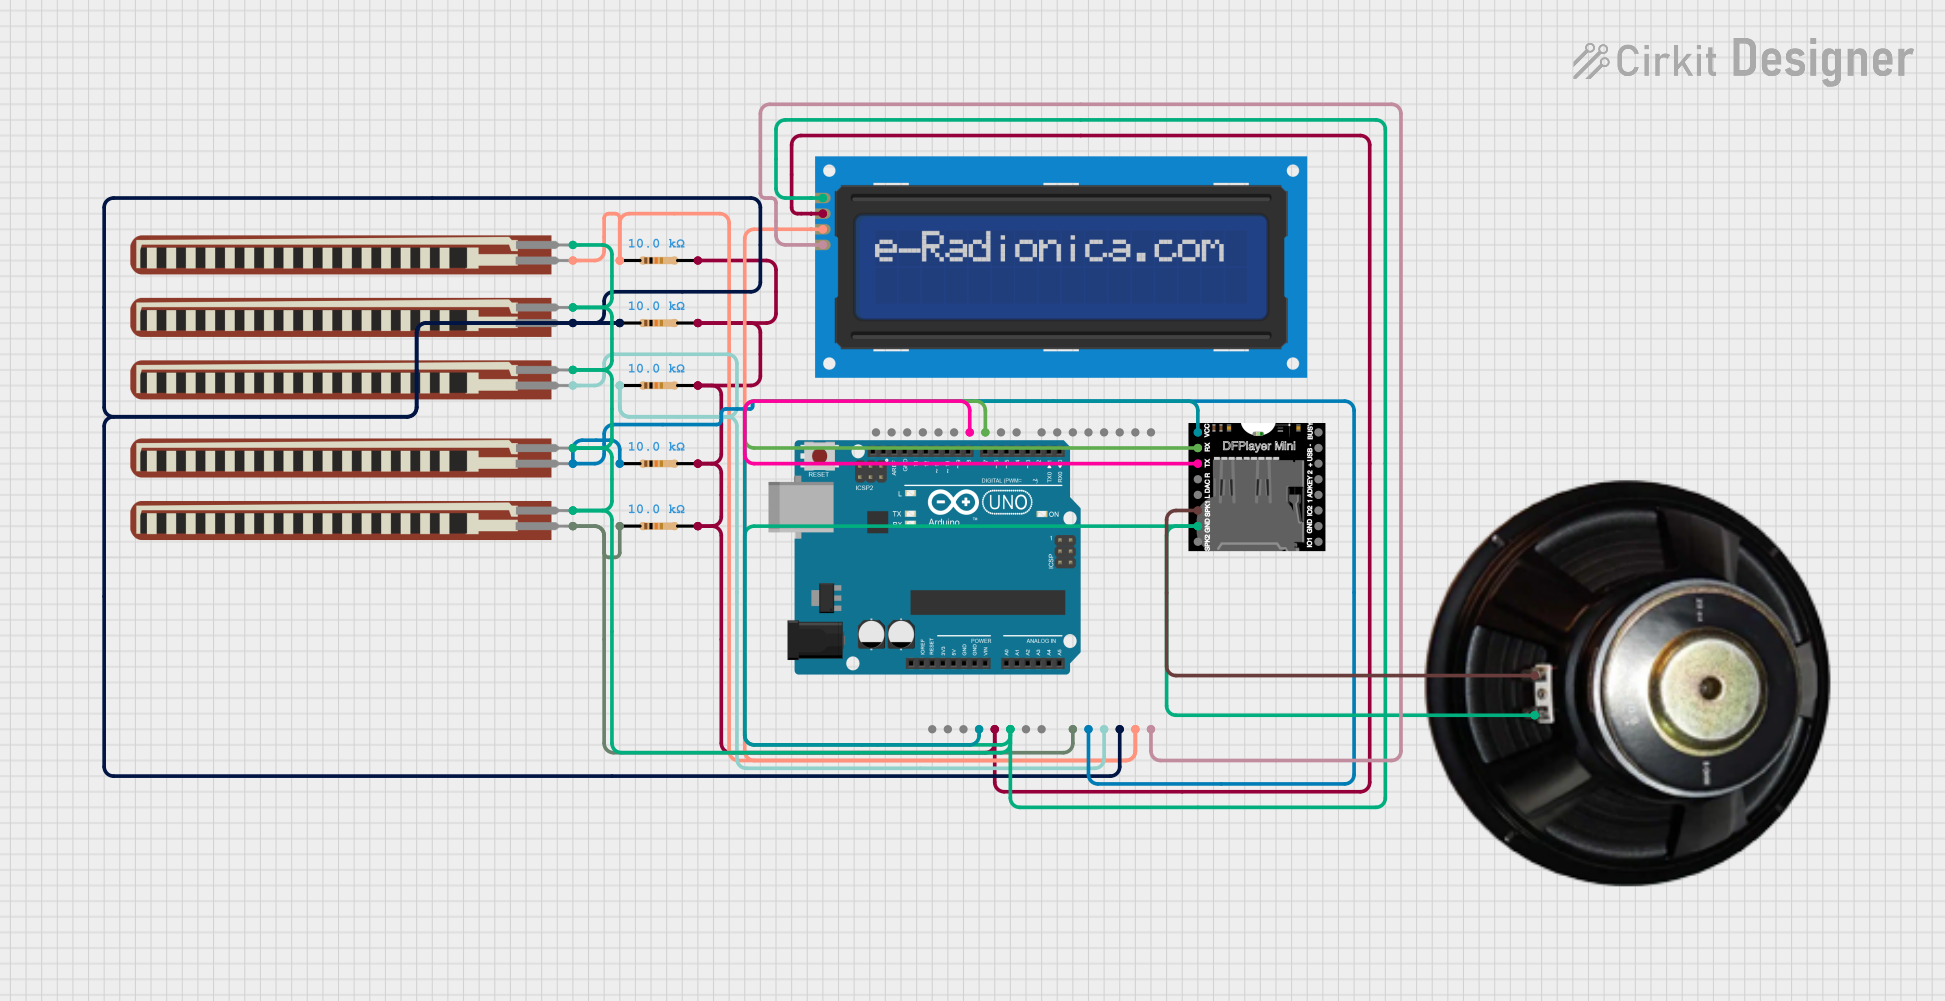
Example: Connecting FLEXI SOFT to an Arduino UNO
Below is an example of how to use FLEXI SOFT with an Arduino UNO to create a simple touch sensor:
// Example: Using FLEXI SOFT as a touch sensor with Arduino UNO

const int touchPin = A0;  // FLEXI SOFT connected to analog pin A0
int touchValue = 0;       // Variable to store sensor reading

void setup() {
  Serial.begin(9600);     // Initialize serial communication
  pinMode(touchPin, INPUT); // Set the touch pin as input
}

void loop() {
  touchValue = analogRead(touchPin); // Read the sensor value
  Serial.print("Touch Value: ");
  Serial.println(touchValue);       // Print the value to the Serial Monitor

  // Add logic to trigger actions based on touch value
  if (touchValue > 500) {
    Serial.println("Touch detected!");
  }

  delay(100); // Small delay for stability
}
Troubleshooting and FAQs
Common Issues and Solutions
Issue: No response from the circuit.
- Solution: Check all connections for continuity using a multimeter. Ensure power and ground connections are secure.
Issue: Short circuits between traces.
- Solution: Inspect the material for accidental overlaps or damage. Use insulating tape or coating to separate traces.
Issue: FLEXI SOFT is not adhering to the surface.
- Solution: Clean the surface thoroughly before applying adhesive. Use a compatible adhesive for the material.
Issue: Damage to the material during soldering.
- Solution: Use a low-temperature soldering iron and minimize contact time. Alternatively, use conductive adhesives.
FAQs
Q: Can FLEXI SOFT be washed if used in clothing?
A: Yes, but it must be properly insulated and protected. Use waterproof coatings or enclosures to safeguard the circuitry.
Q: Can I use FLEXI SOFT for high-power applications?
A: No, FLEXI SOFT is designed for low-power applications. Exceeding the maximum current capacity (100 mA/cm²) may damage the material.
Q: How do I repair damaged traces on FLEXI SOFT?
A: Use conductive ink or tape to repair broken traces. Ensure the repair is secure and insulated.
Q: Is FLEXI SOFT compatible with all adhesives?
A: FLEXI SOFT is compatible with most adhesives, but testing is recommended for specific applications to ensure proper bonding.
This documentation provides a comprehensive guide to using FLEXI SOFT effectively in your projects. For further assistance, consult the manufacturer’s datasheet or support resources.