How to Use hibiscus sense: Examples, Pinouts, and Specs
Introduction
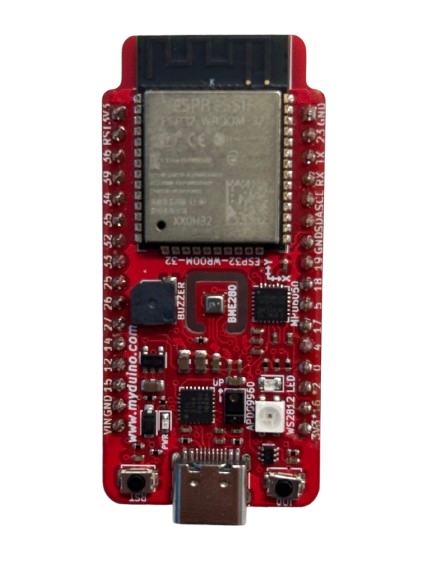
The Hibiscus Sense is a versatile environmental sensor device manufactured by Myduino Malaysia (Part ID: hibiscus sense). It is specifically designed for monitoring environmental conditions, making it an ideal choice for smart gardening applications. The device integrates multiple sensors to measure soil moisture, ambient temperature, and light intensity, enabling users to optimize plant growth and automate gardening tasks.
Explore Projects Built with hibiscus sense
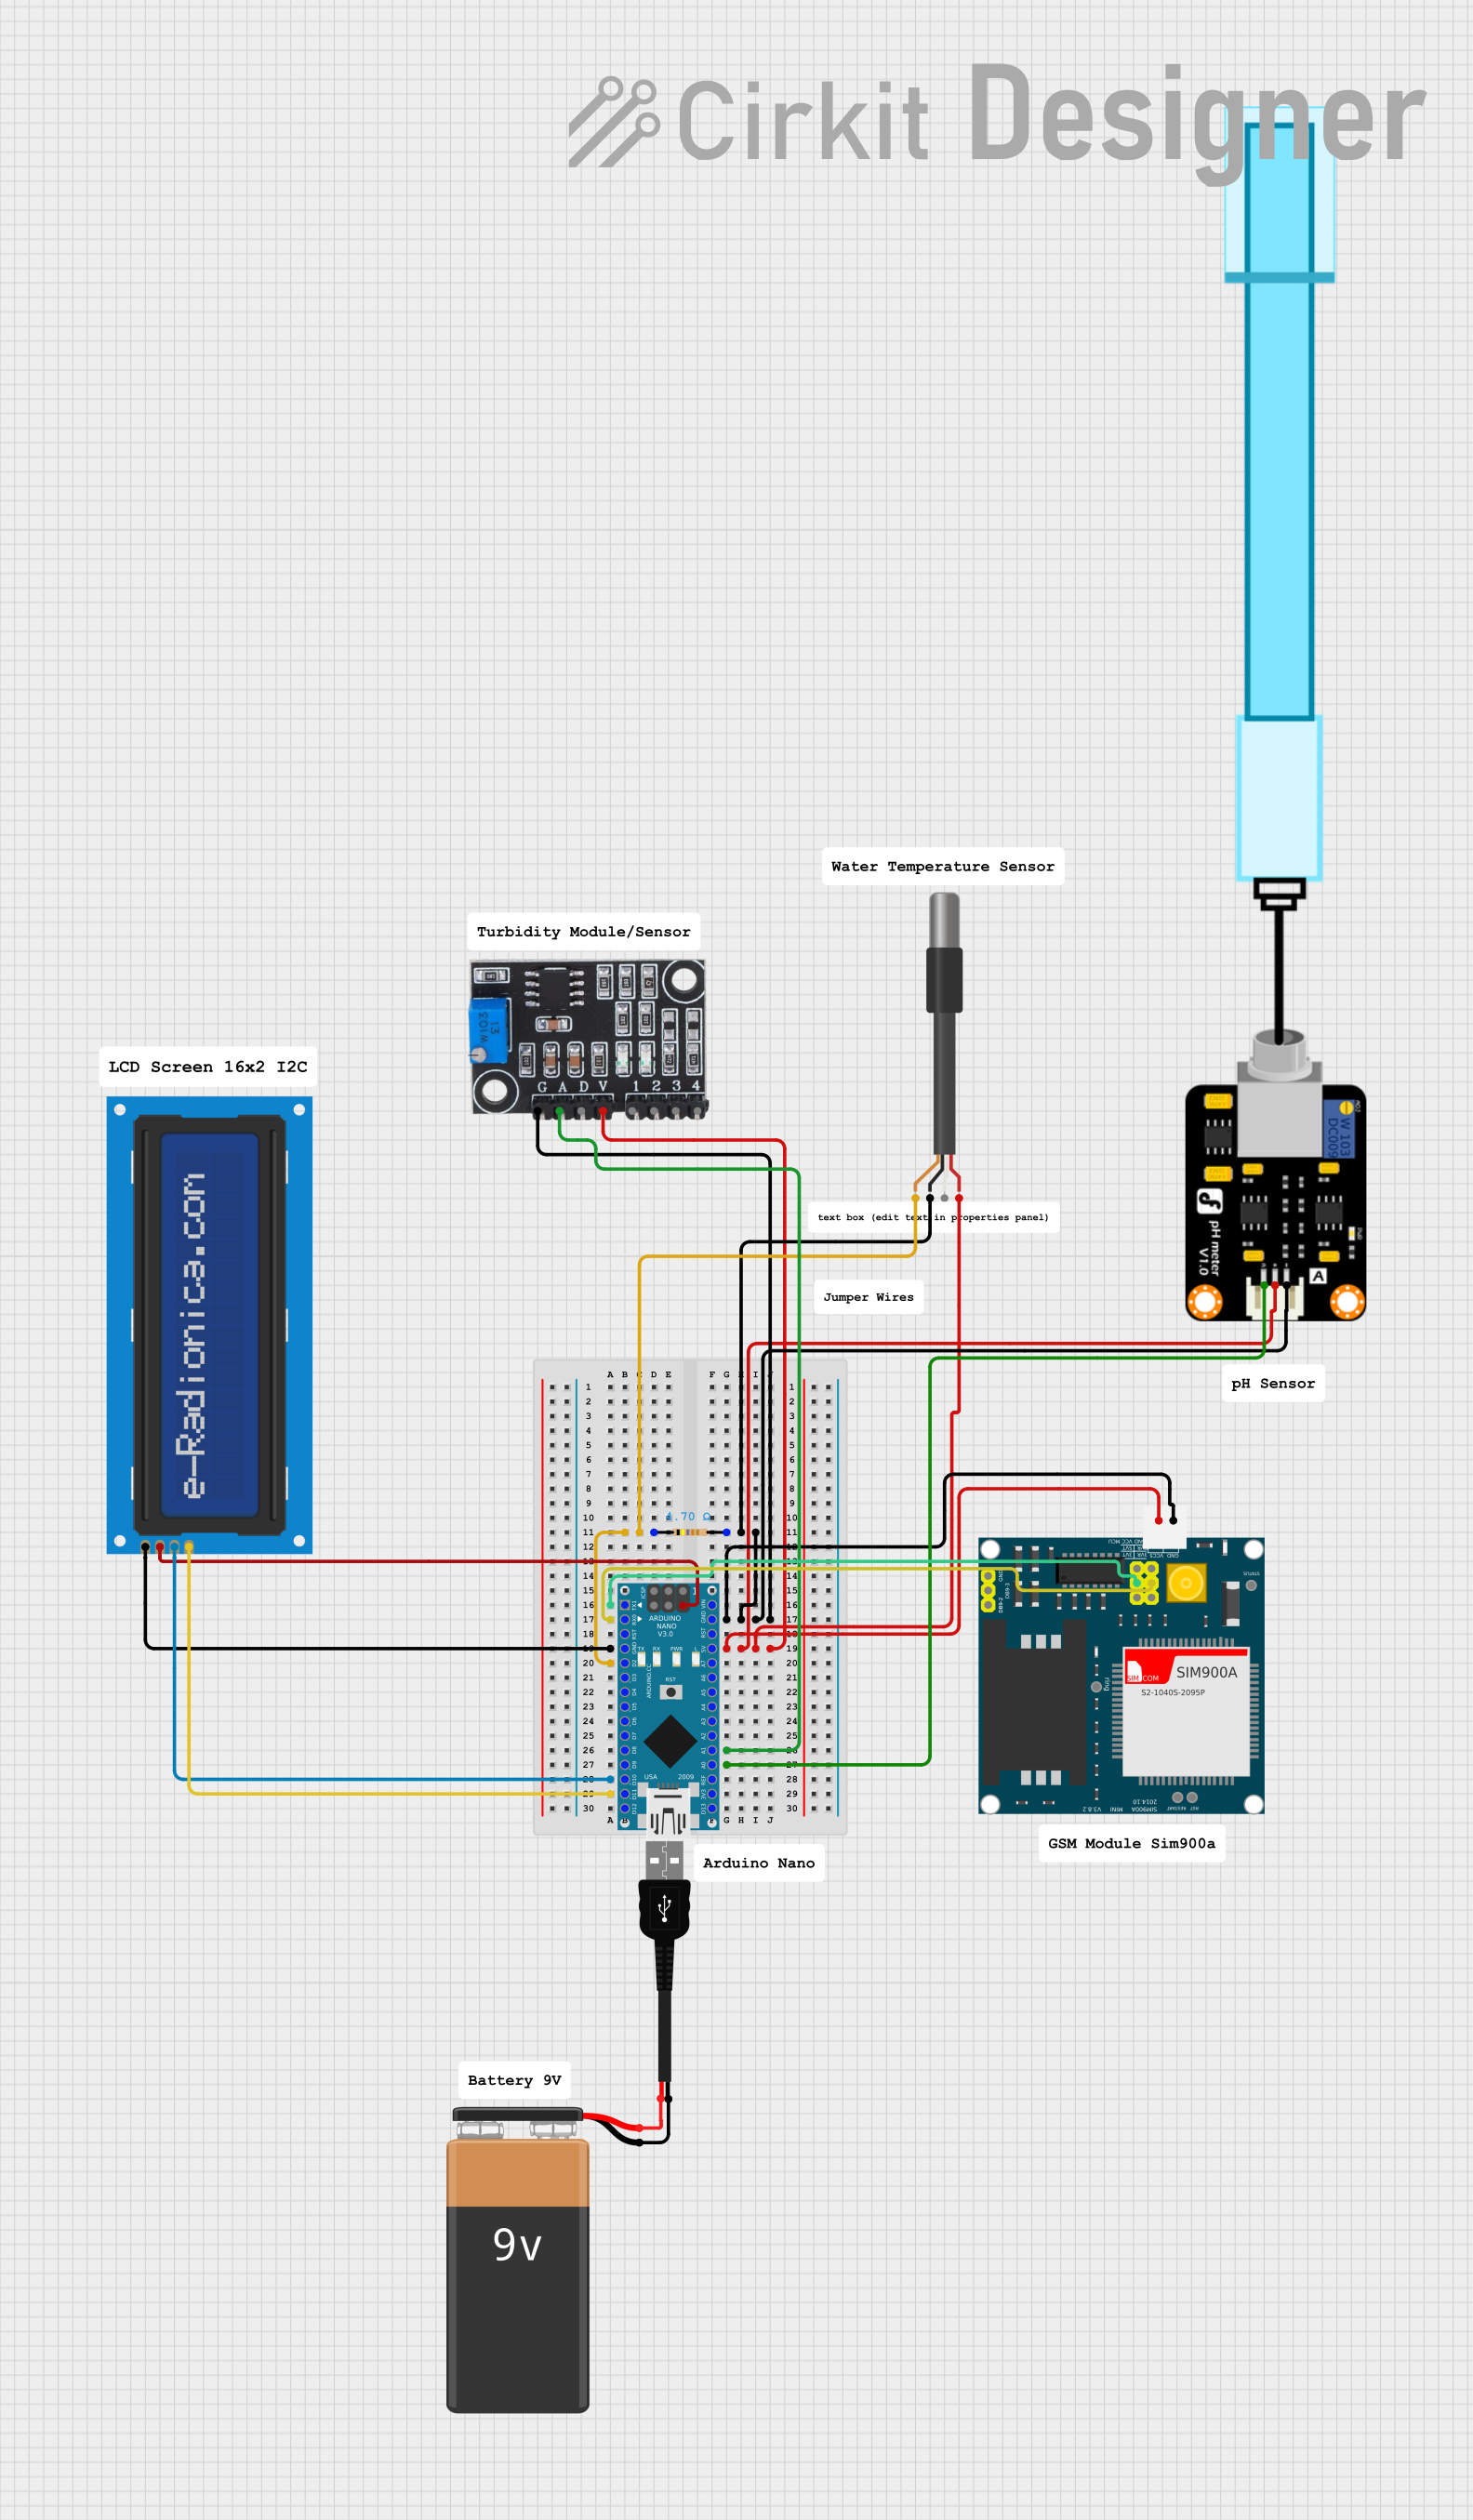
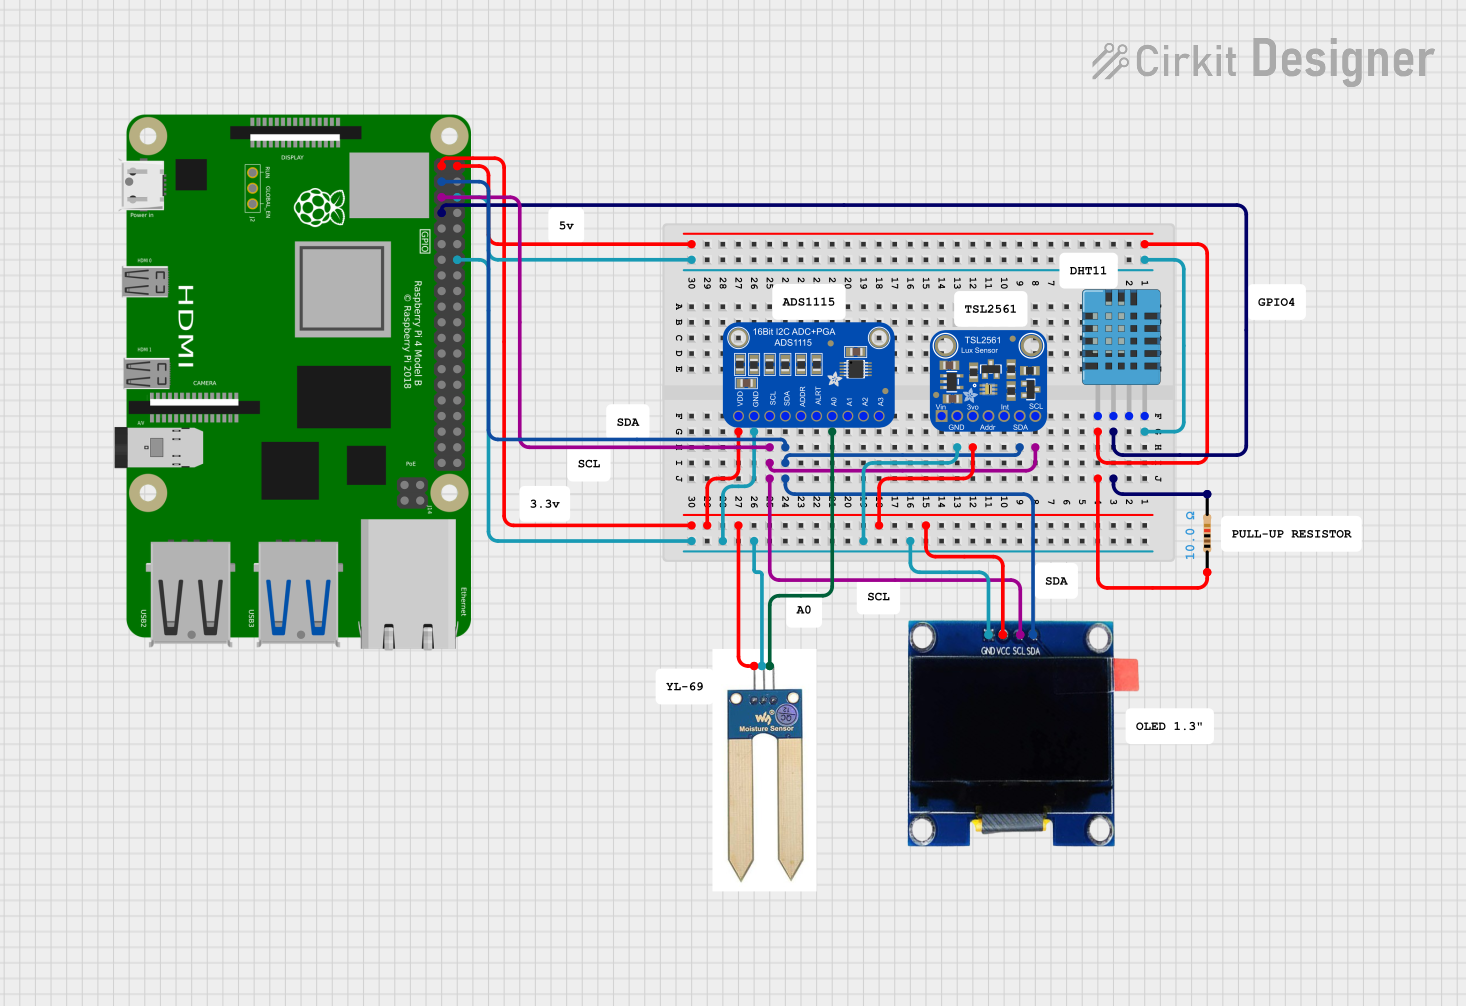
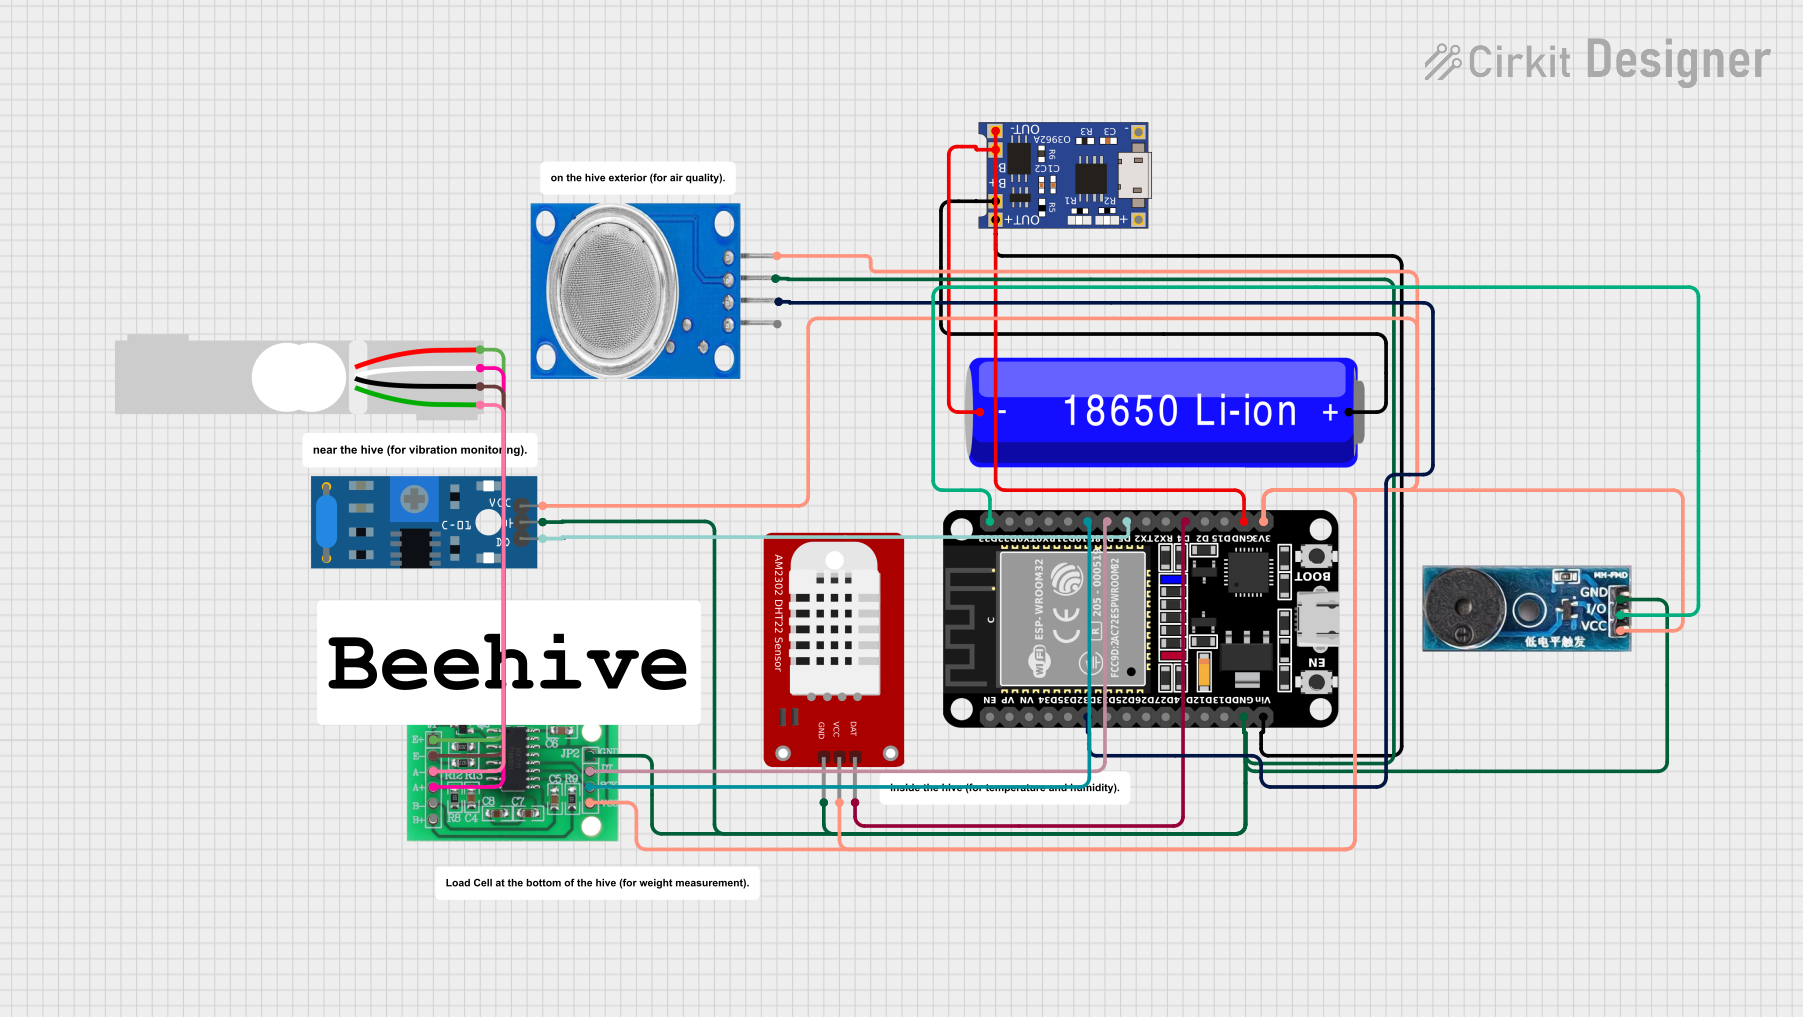

Explore Projects Built with hibiscus sense
Common Applications and Use Cases
- Smart gardening systems for monitoring plant health
- Automated irrigation systems based on soil moisture levels
- Environmental monitoring in greenhouses
- Educational projects involving IoT and environmental sensing
- DIY home automation projects
Technical Specifications
The following table outlines the key technical details of the Hibiscus Sense:
| Parameter | Specification |
|---|---|
| Operating Voltage | 3.3V to 5V |
| Operating Current | 20mA (typical) |
| Communication Protocol | I2C |
| Soil Moisture Range | 0% to 100% |
| Temperature Range | -40°C to 85°C |
| Light Intensity Range | 0 to 100,000 lux |
| Dimensions | 50mm x 25mm x 10mm |
Pin Configuration and Descriptions
The Hibiscus Sense has a 4-pin interface for easy integration into circuits. The pinout is as follows:
| Pin Name | Pin Number | Description |
|---|---|---|
| VCC | 1 | Power supply input (3.3V to 5V) |
| GND | 2 | Ground connection |
| SDA | 3 | I2C data line |
| SCL | 4 | I2C clock line |
Usage Instructions
How to Use the Hibiscus Sense in a Circuit
- Power the Device: Connect the VCC pin to a 3.3V or 5V power source and the GND pin to the ground.
- I2C Communication: Connect the SDA and SCL pins to the corresponding I2C pins on your microcontroller (e.g., Arduino UNO).
- Install Required Libraries: If using an Arduino, install the necessary libraries for I2C communication and sensor data processing.
- Read Sensor Data: Use the provided I2C address (default:
0x40) to communicate with the device and retrieve sensor readings.
Important Considerations and Best Practices
- Ensure the operating voltage matches the device's specifications to avoid damage.
- Avoid exposing the sensor to water or extreme conditions beyond its rated ranges.
- Use pull-up resistors (typically 4.7kΩ) on the SDA and SCL lines if not already present in your circuit.
- Calibrate the sensor for accurate readings, especially for soil moisture measurements.
Example Code for Arduino UNO
Below is an example Arduino sketch to read data from the Hibiscus Sense:
#include <Wire.h>

// I2C address of the Hibiscus Sense
#define HIBISCUS_SENSE_ADDR 0x40

void setup() {
  Wire.begin(); // Initialize I2C communication
  Serial.begin(9600); // Start serial communication for debugging
  Serial.println("Hibiscus Sense Initialization...");
}

void loop() {
  Wire.beginTransmission(HIBISCUS_SENSE_ADDR); // Start communication
  Wire.write(0x00); // Request data from the sensor
  Wire.endTransmission();

  Wire.requestFrom(HIBISCUS_SENSE_ADDR, 6); // Request 6 bytes of data
  if (Wire.available() == 6) {
    int soilMoisture = Wire.read() << 8 | Wire.read(); // Read soil moisture
    int temperature = Wire.read() << 8 | Wire.read(); // Read temperature
    int lightLevel = Wire.read() << 8 | Wire.read(); // Read light intensity

    // Print the sensor readings
    Serial.print("Soil Moisture: ");
    Serial.print(soilMoisture);
    Serial.println("%");

    Serial.print("Temperature: ");
    Serial.print(temperature / 100.0); // Convert to Celsius
    Serial.println("°C");

    Serial.print("Light Intensity: ");
    Serial.print(lightLevel);
    Serial.println(" lux");
  } else {
    Serial.println("Error: No data received from Hibiscus Sense.");
  }

  delay(1000); // Wait 1 second before the next reading
}
Troubleshooting and FAQs
Common Issues and Solutions
No Data Received from the Sensor
- Cause: Incorrect I2C address or wiring.
- Solution: Verify the I2C address (default:
0x40) and ensure proper connections for SDA and SCL.
Inaccurate Sensor Readings
- Cause: Calibration not performed or environmental interference.
- Solution: Calibrate the sensor in a controlled environment and ensure it is not exposed to extreme conditions.
Device Not Powering On
- Cause: Insufficient power supply or loose connections.
- Solution: Check the power source and ensure secure connections to the VCC and GND pins.
FAQs
Q: Can the Hibiscus Sense be used with a 3.3V microcontroller?
A: Yes, the device supports both 3.3V and 5V operating voltages.
Q: Is the sensor waterproof?
A: The sensor is not fully waterproof. Avoid submerging it in water and protect it from excessive moisture.
Q: How do I extend the I2C cable length?
A: Use shielded cables and lower the I2C clock speed to reduce noise and ensure reliable communication.
Q: Can I use multiple Hibiscus Sense devices on the same I2C bus?
A: Yes, but you will need to configure unique I2C addresses for each device. Refer to the datasheet for address configuration instructions.