How to Use MPPT Charge Controller: Examples, Pinouts, and Specs
Introduction
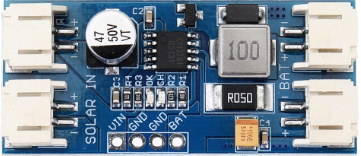
The CN3791 is a Maximum Power Point Tracking (MPPT) charge controller manufactured by Shanghai Consonance Electronics Incorporated. It is designed to optimize the power output from solar panels by dynamically adjusting the electrical operating point of the modules. This ensures maximum energy harvest and efficient charging of batteries, making it ideal for renewable energy systems.
Explore Projects Built with MPPT Charge Controller


Explore Projects Built with MPPT Charge Controller
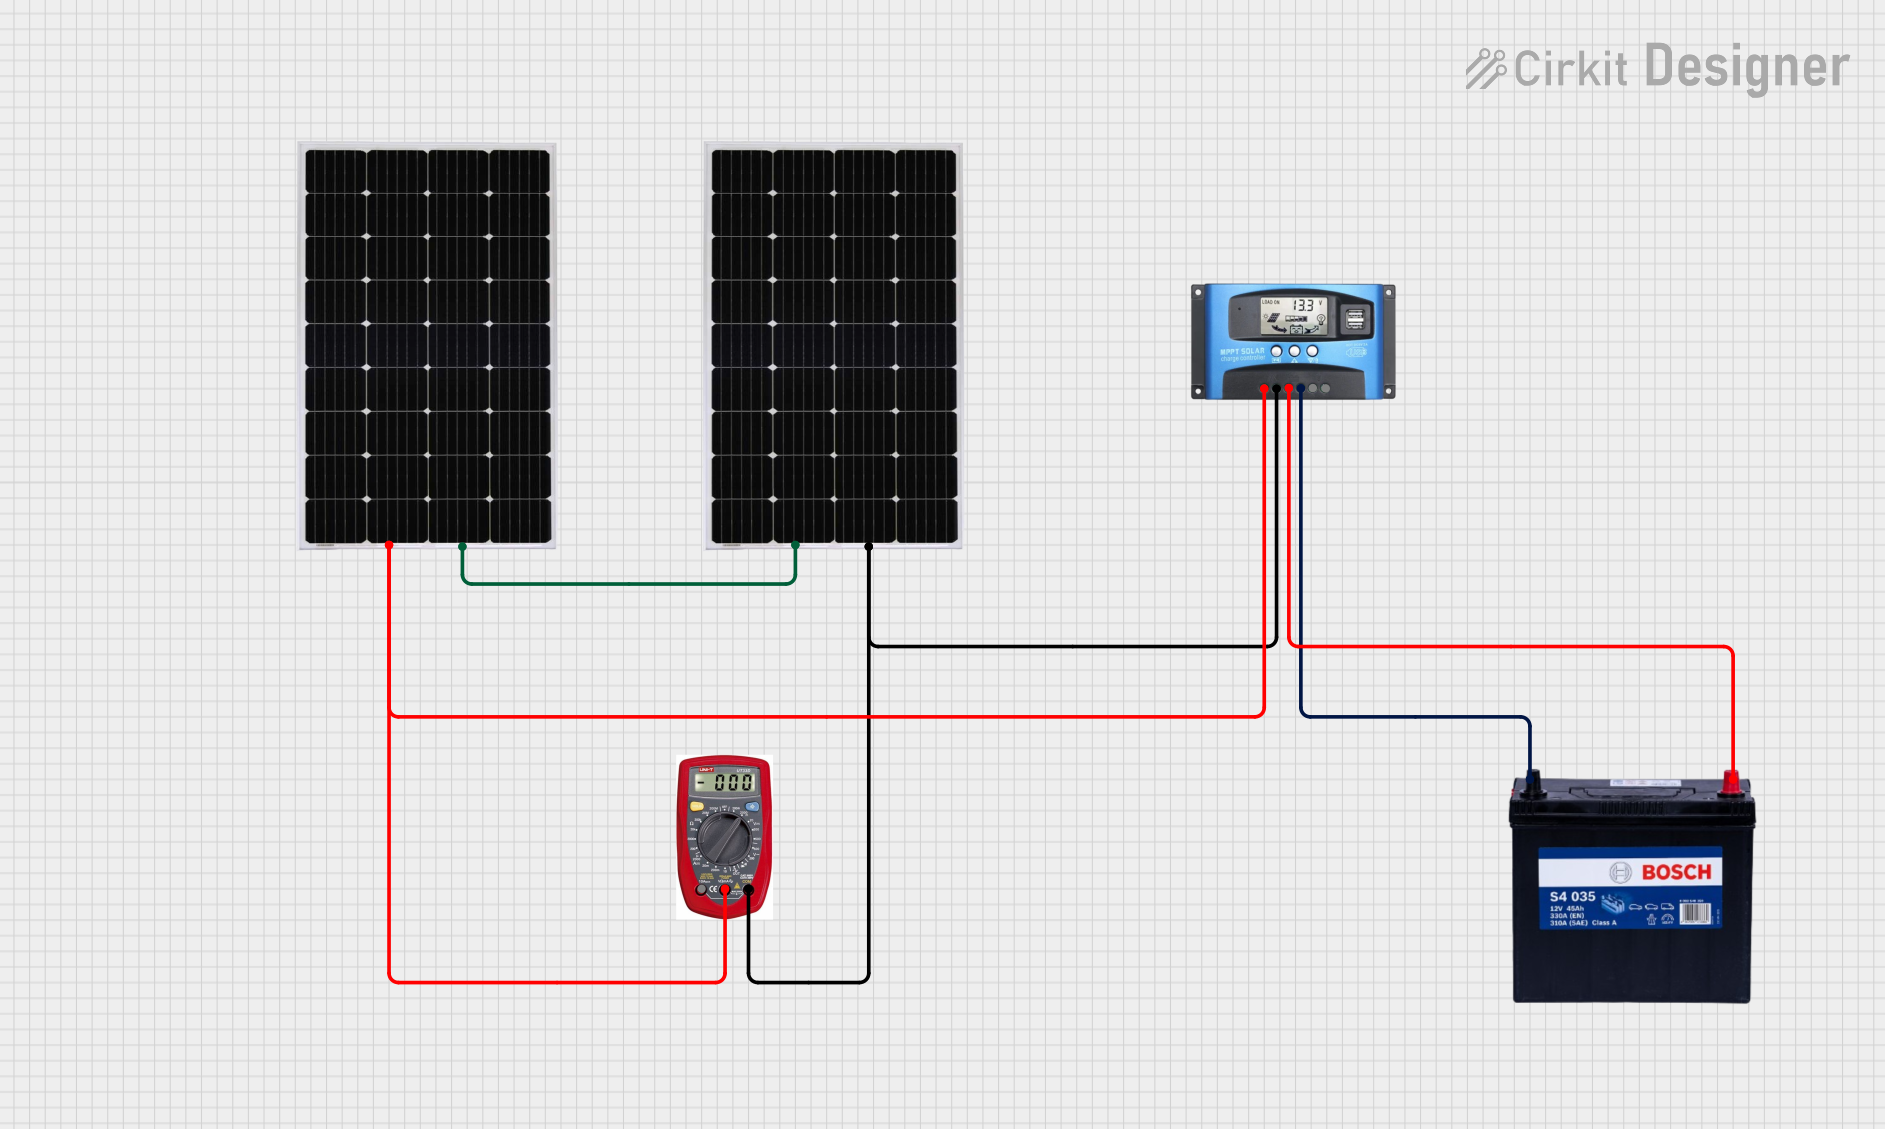
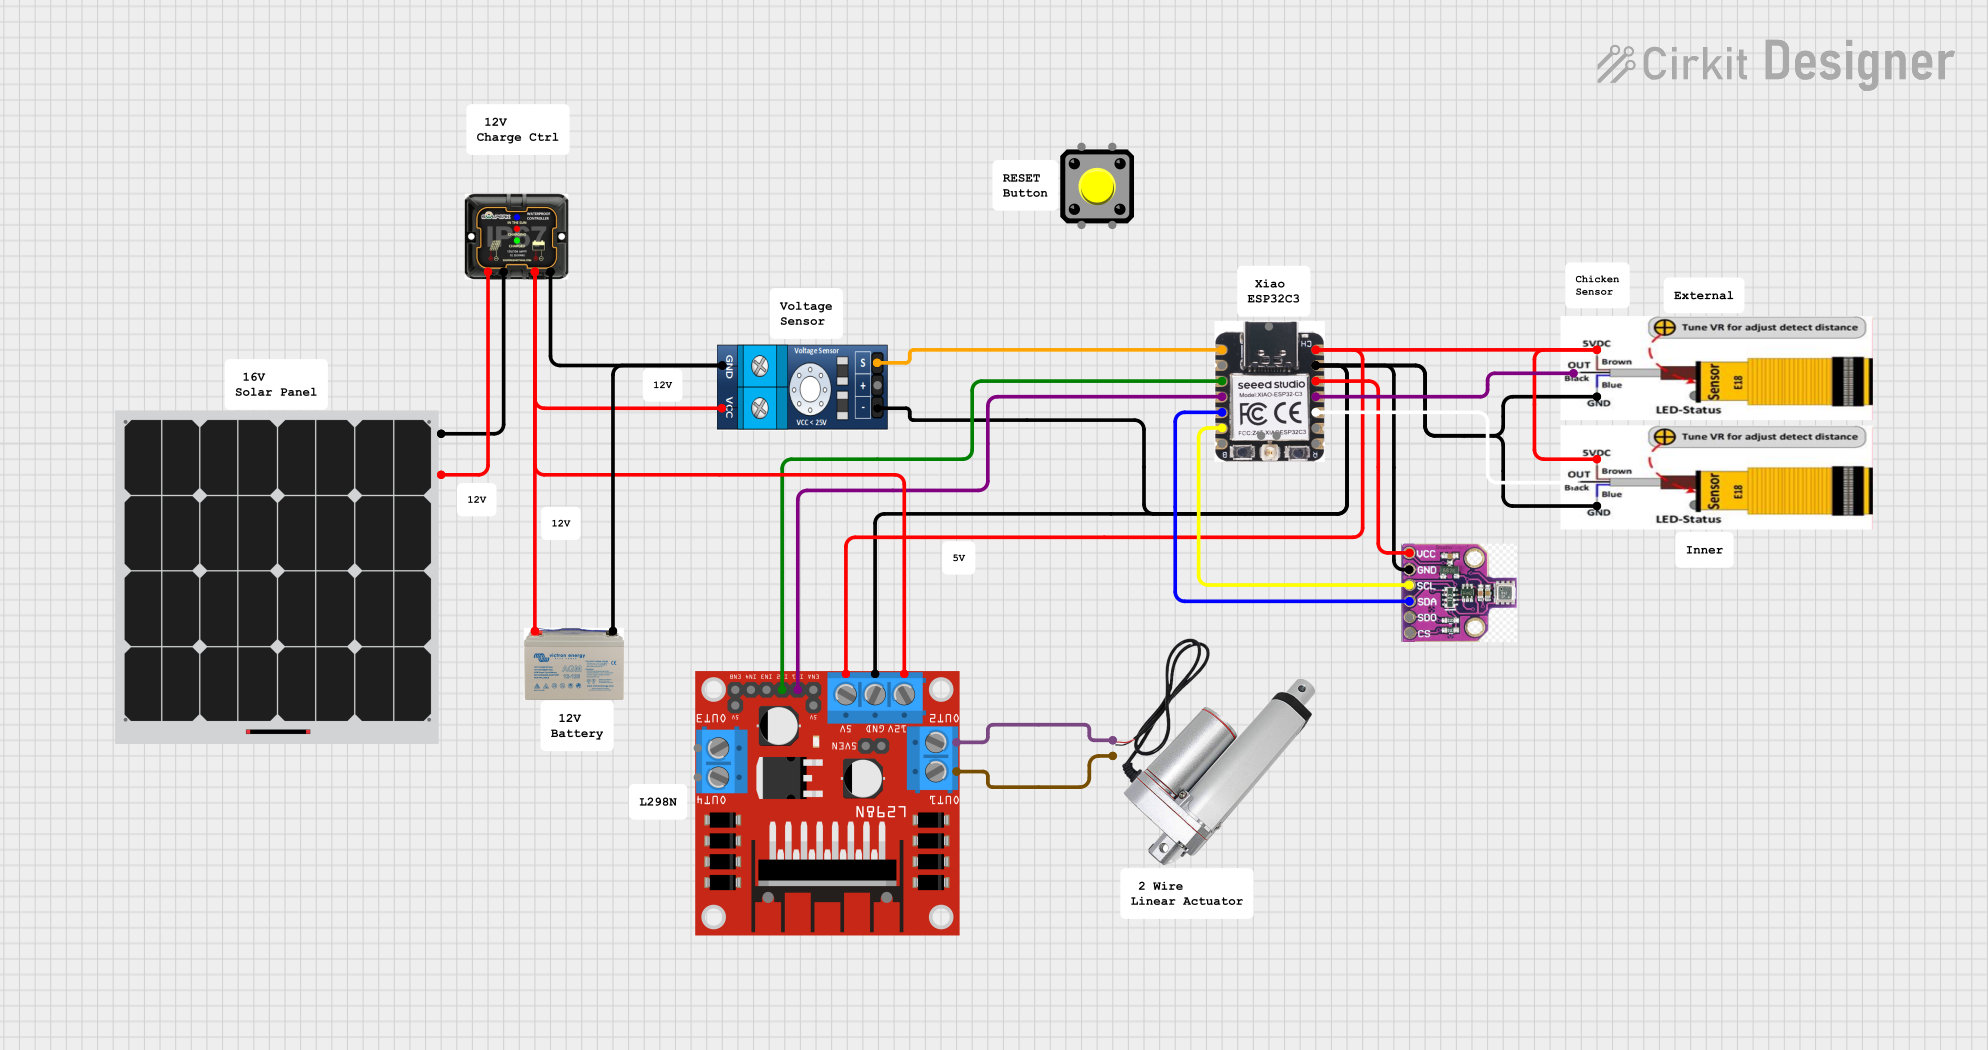
Common Applications and Use Cases
- Solar-powered battery charging systems
- Off-grid renewable energy setups
- Portable solar chargers
- IoT devices powered by solar energy
- Small-scale solar energy storage systems
Technical Specifications
The CN3791 is a highly efficient MPPT charge controller with the following key specifications:
| Parameter | Value |
|---|---|
| Input Voltage Range | 4.5V to 28V |
| Output Voltage Range | Adjustable (up to 28V) |
| Maximum Charging Current | 3A |
| MPPT Efficiency | Up to 98% |
| Battery Types Supported | Lithium-ion, LiFePO4, Lead-acid |
| Operating Temperature Range | -40°C to +85°C |
| Package Type | SOP-8 |
Pin Configuration and Descriptions
The CN3791 comes in an 8-pin SOP package. Below is the pin configuration:
| Pin Number | Pin Name | Description |
|---|---|---|
| 1 | VIN | Input voltage from the solar panel |
| 2 | GND | Ground connection |
| 3 | BAT | Battery connection for charging |
| 4 | VCC | Internal power supply pin |
| 5 | MPPT | MPPT control pin; connect a resistor divider to set the maximum power point |
| 6 | PROG | Charging current programming pin; connect a resistor to set the charging current |
| 7 | STAT | Status indicator pin; indicates charging status |
| 8 | TEMP | Temperature sensing pin for battery protection |
Usage Instructions
How to Use the CN3791 in a Circuit
- Connect the Solar Panel: Attach the positive terminal of the solar panel to the VIN pin and the negative terminal to the GND pin.
- Connect the Battery: Connect the positive terminal of the battery to the BAT pin and the negative terminal to GND.
- Set the MPPT Voltage: Use a resistor divider network on the MPPT pin to set the maximum power point voltage of the solar panel.
- Program the Charging Current: Attach a resistor to the PROG pin to set the desired charging current. Refer to the datasheet for resistor value calculations.
- Monitor Charging Status: Use the STAT pin to monitor the charging status. This pin can be connected to an LED for visual indication.
- Temperature Protection: Connect a thermistor to the TEMP pin for battery temperature monitoring and protection.
Important Considerations and Best Practices
- Ensure the input voltage from the solar panel is within the specified range (4.5V to 28V).
- Use appropriately rated resistors for the MPPT and PROG pins to avoid overcharging or undercharging the battery.
- Place decoupling capacitors close to the VIN and BAT pins to reduce noise and improve stability.
- If using a lithium-ion battery, ensure the battery has a built-in protection circuit to prevent overcharging or deep discharge.
- Avoid exposing the CN3791 to temperatures outside its operating range (-40°C to +85°C).
Example: Connecting the CN3791 to an Arduino UNO
The CN3791 can be used with an Arduino UNO to monitor the charging status. Below is an example code snippet:
// Example code to monitor the charging status of the CN3791 using Arduino UNO

const int statusPin = 2; // Connect the STAT pin of CN3791 to Arduino pin 2
const int ledPin = 13;   // Built-in LED on Arduino for status indication

void setup() {
  pinMode(statusPin, INPUT); // Set STAT pin as input
  pinMode(ledPin, OUTPUT);   // Set LED pin as output
  Serial.begin(9600);        // Initialize serial communication
}

void loop() {
  int chargingStatus = digitalRead(statusPin); // Read the STAT pin

  if (chargingStatus == LOW) {
    // STAT pin LOW indicates charging
    digitalWrite(ledPin, HIGH); // Turn on LED
    Serial.println("Battery is charging...");
  } else {
    // STAT pin HIGH indicates charging complete or no charging
    digitalWrite(ledPin, LOW);  // Turn off LED
    Serial.println("Battery is fully charged or not charging.");
  }

  delay(1000); // Wait for 1 second before checking again
}
Troubleshooting and FAQs
Common Issues and Solutions
No Charging Occurs
- Cause: Input voltage is too low or outside the specified range.
- Solution: Verify the solar panel's output voltage and ensure it is within 4.5V to 28V.
Overheating of the CN3791
- Cause: Excessive input current or poor heat dissipation.
- Solution: Ensure the input current does not exceed the maximum rating. Use a heatsink or improve ventilation.
Battery Not Fully Charging
- Cause: Incorrect resistor values on the PROG or MPPT pins.
- Solution: Recalculate and use the correct resistor values as per the datasheet.
STAT Pin Not Responding
- Cause: Faulty connection or damaged pin.
- Solution: Check the wiring and ensure the STAT pin is properly connected.
FAQs
Q: Can the CN3791 charge multiple batteries in series?
A: No, the CN3791 is designed to charge a single battery or a single battery pack. For multiple batteries in series, use a charge controller designed for higher voltages.
Q: What type of solar panels are compatible with the CN3791?
A: The CN3791 is compatible with solar panels that provide an output voltage within the range of 4.5V to 28V.
Q: Is the CN3791 suitable for outdoor use?
A: The CN3791 itself is not weatherproof. If used outdoors, it must be enclosed in a weatherproof housing.
Q: How do I calculate the resistor value for the PROG pin?
A: Refer to the CN3791 datasheet for the formula to calculate the resistor value based on the desired charging current.
By following this documentation, users can effectively integrate the CN3791 MPPT charge controller into their solar energy systems for efficient and reliable battery charging.