An AC (Alternating Current) bulb is a light-emitting device designed to operate on alternating current electrical power. The bulb converts electrical energy into light and sometimes heat, through various technologies such as incandescent, fluorescent, or LED (Light Emitting Diode). AC bulbs are widely used in residential, commercial, and industrial settings for illumination purposes.
Explore Projects Built with AC Bulb
Use Cirkit Designer to design, explore, and prototype these projects online. Some projects support real-time simulation. Click "Open Project" to start designing instantly!
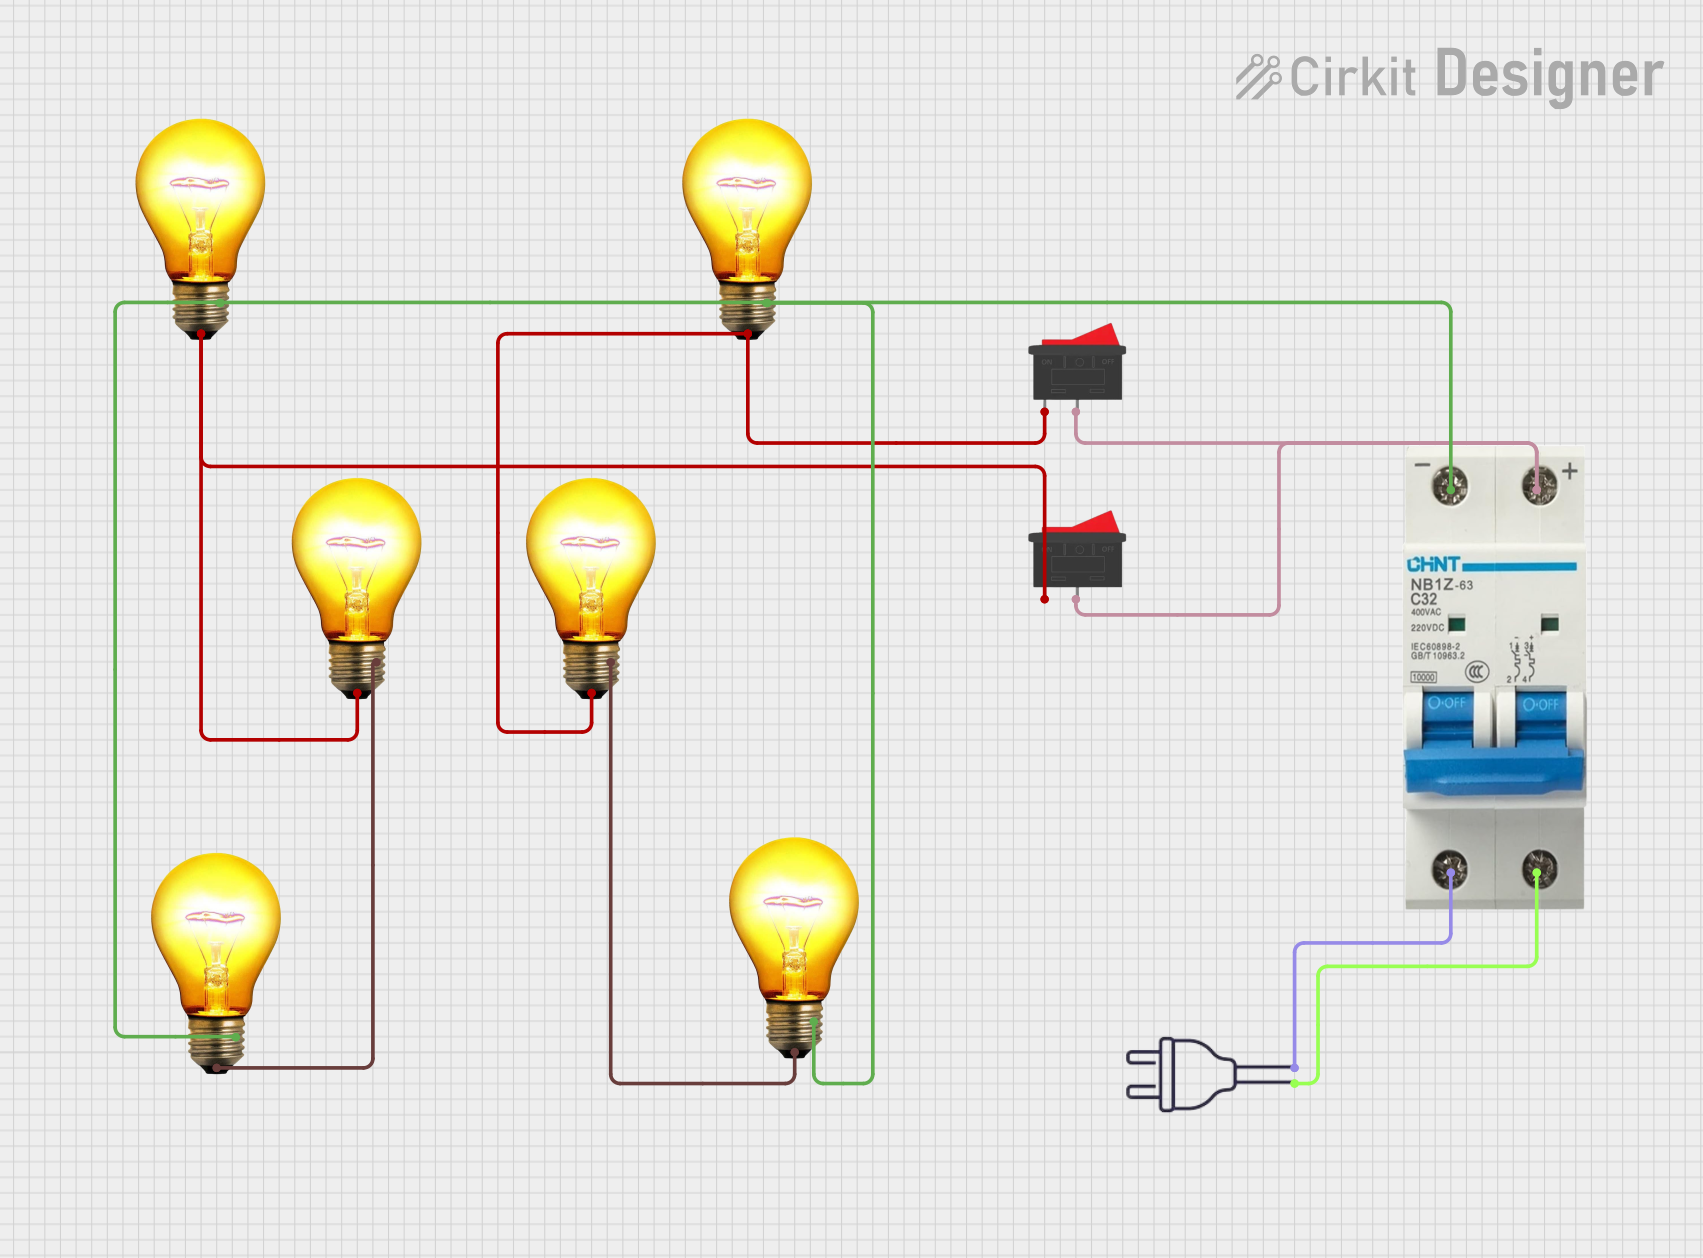
This circuit is designed to control multiple AC bulbs using two rocker switches and a circuit breaker for safety. The circuit is powered by a 220V AC source, with the circuit breaker providing protection and the rocker switches allowing selective control of the connected bulbs.
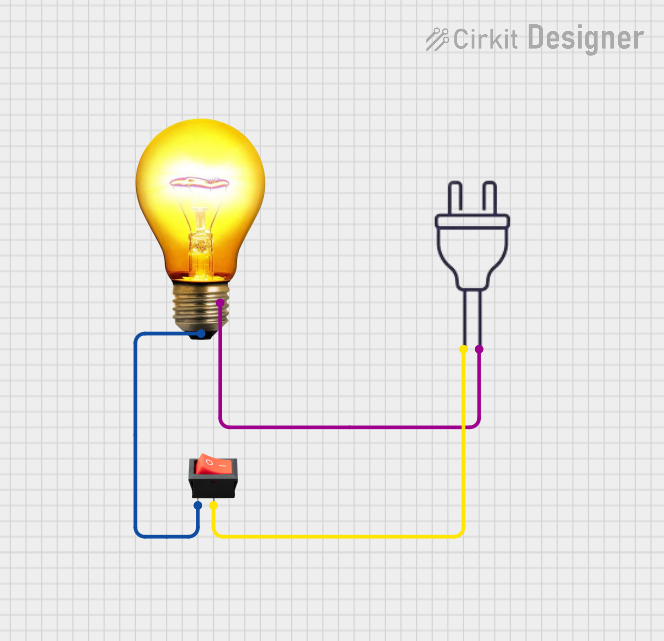
This circuit is a simple AC power control circuit designed to power an AC bulb using a 220V power source. It includes a rocker switch that acts as an on/off control for the bulb. When the switch is closed, it completes the circuit allowing current to flow through the bulb, thus turning it on.
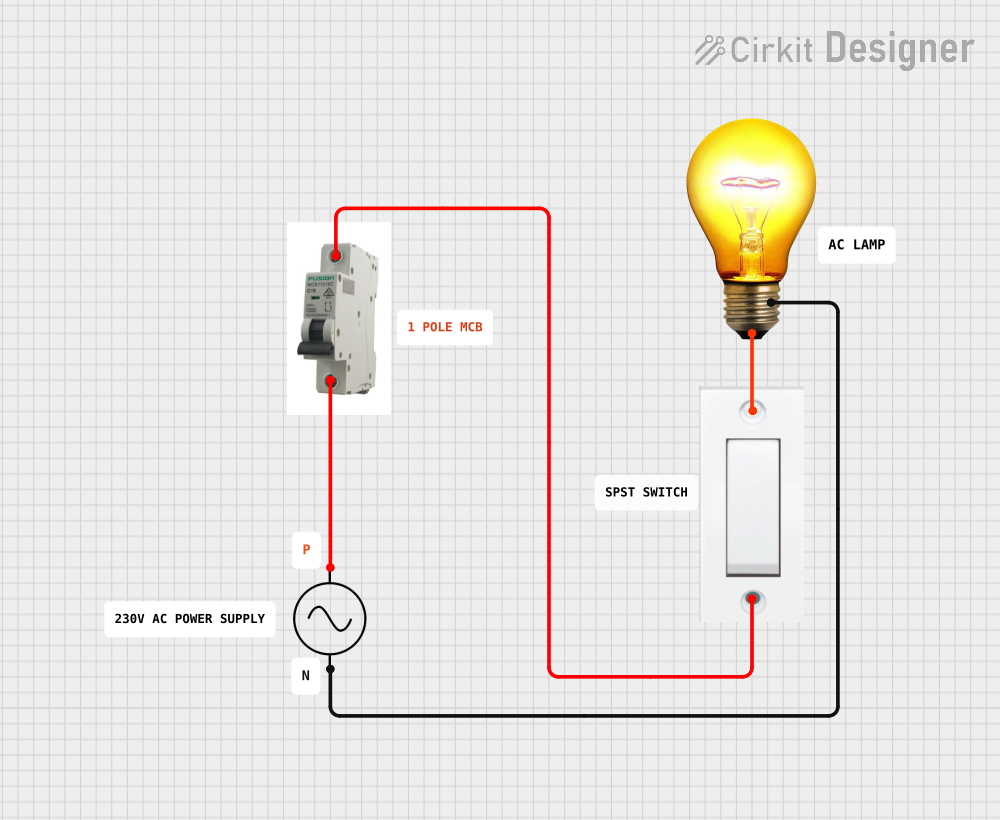
This circuit is designed to control an AC bulb using a flush switch. The AC power supply is connected through an MCB (Miniature Circuit Breaker) for protection, and the flush switch acts as an on/off control for the bulb. There is no microcontroller or embedded code involved in this simple power control circuit.
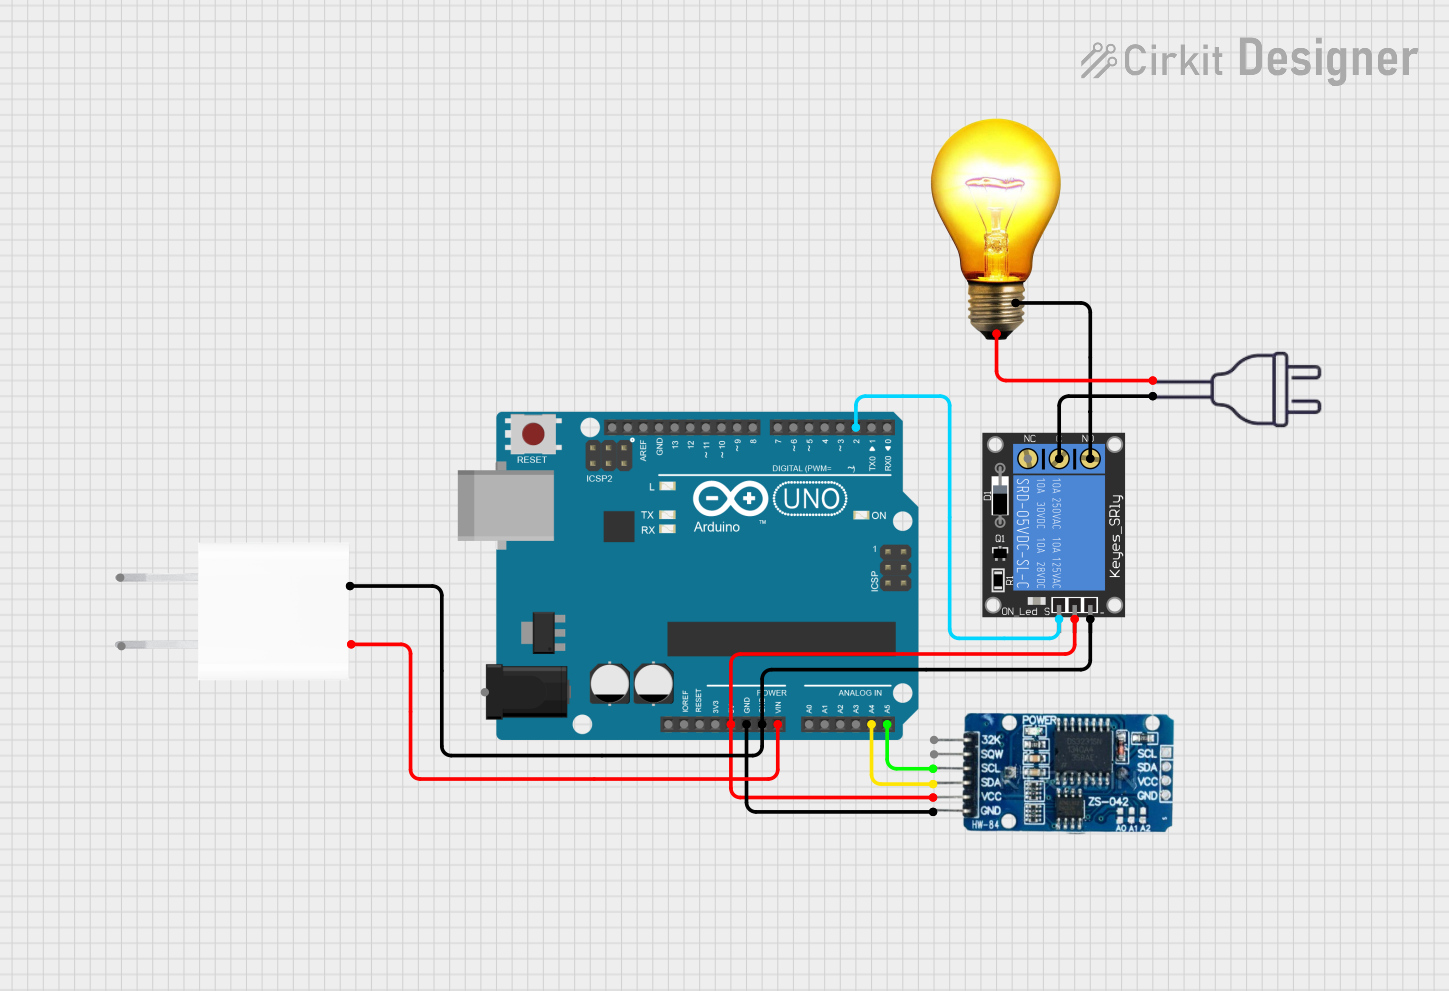
This circuit is designed to control an AC bulb using a 1-Channel Relay, which is interfaced with an Arduino UNO microcontroller. The Arduino is programmed to switch the relay, which in turn powers the bulb on or off. Additionally, the circuit includes an RTC DS3231 module for real-time clock capabilities, which suggests that the bulb's power state could be controlled based on time.
Voltage Rating: Typically ranges from 110V to 240V, depending on the region.
Current Rating: Varies with the power rating and technology of the bulb.
Power Rating: Commonly from 5W (watts) to 100W or more.
Base Type: E26/E27 (standard), B22 (bayonet), GU10 (bi-pin twist lock), etc.
Luminous Efficacy: Measured in lumens per watt (lm/W), varies by technology.
Color Temperature: Measured in Kelvin (K), ranges from warm (2700K) to cool (6500K).
Pin Configuration and Descriptions:
Since AC bulbs typically screw into a socket, they do not have a pin configuration in the traditional sense. Instead, they have contact points that connect to the power source:
Contact Point
Description
Base Contact
The bottom tip of the bulb that connects to the live wire in the socket.
Shell Contact
The threaded metal exterior that connects to the neutral wire in the socket.
Usage Instructions
How to Use the Component in a Circuit:
Ensure Power Compatibility: Verify that the bulb's voltage rating is compatible with the supply voltage.
Select Proper Socket: Use a socket that matches the bulb's base type and can handle its power rating.
Install the Bulb: Screw the bulb into the socket until it is snug. Do not over-tighten.
Power On: Turn on the power switch to illuminate the bulb.
Important Considerations and Best Practices:
Safety: Always turn off the power before installing or removing a bulb.
Heat Dissipation: Ensure adequate ventilation around the bulb to prevent overheating.
Dimming: Use dimmable bulbs if you require adjustable light levels.
Disposal: Follow local regulations for the disposal of bulbs, especially those containing hazardous materials like mercury.
Troubleshooting and FAQs
Common Issues Users Might Face:
Flickering Light: This could be due to a loose connection, voltage fluctuations, or a defective bulb.
No Light Emission: Check if the bulb is properly installed, the power supply is on, and the bulb is not burnt out.
Dim Light: The bulb may be nearing the end of its lifespan or there may be voltage drops in the circuit.
Solutions and Tips for Troubleshooting:
Ensure the bulb is screwed in properly and the power switch is on.
Replace the bulb if it is defective or at the end of its lifespan.
Check for any loose connections in the socket or the circuit.
If the bulb is flickering, try a different bulb or consult an electrician to check for wiring issues.
FAQs:
Q: Can I use an AC bulb with a dimmer switch?
A: Yes, but ensure the bulb is labeled as dimmable and the dimmer switch is compatible with the bulb's technology.
Q: How do I know when to replace my AC bulb?
A: Replace the bulb if it no longer emits light, flickers excessively, or has visible damage.
Q: Are LED AC bulbs more efficient than incandescent bulbs?
A: Yes, LED bulbs are generally more energy-efficient and have a longer lifespan than incandescent bulbs.
Q: Can I use a higher wattage bulb than recommended for my fixture?
A: No, using a bulb with a higher wattage than the fixture is rated for can cause overheating and pose a fire risk.
Example Code for Arduino-Controlled AC Bulb
Below is an example of how to control an AC bulb using an Arduino UNO and a relay module. The relay acts as an electrically operated switch that allows the low-power Arduino to control the high-power AC bulb circuit.
// Define the pin connected to the relay module
const int relayPin = 2;

void setup() {
  // Set the relay pin as an output
  pinMode(relayPin, OUTPUT);
}

void loop() {
  // Turn on the AC bulb by setting the relay to LOW
  digitalWrite(relayPin, LOW);
  delay(5000); // Keep the bulb on for 5 seconds

  // Turn off the AC bulb by setting the relay to HIGH
  digitalWrite(relayPin, HIGH);
  delay(5000); // Keep the bulb off for 5 seconds
}
Note: When working with AC power, extreme caution must be taken to avoid the risk of electric shock. It is recommended to have a qualified electrician review and implement any high-voltage connections. The above code is for illustrative purposes and should only be implemented with proper safety measures in place.

 Open Project in Cirkit Designer