How to Use Neurosky Sensor: Examples, Pinouts, and Specs
Introduction
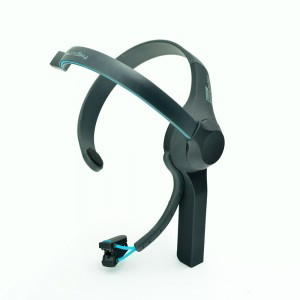
The Neurosky Sensor, manufactured by Pantech Solutions with the part ID SENSOR004, is a sophisticated bio-sensor designed to measure brainwave activity. It provides a non-invasive method to capture electroencephalography (EEG) signals, which are then processed to output data related to attention and meditation levels. This sensor is commonly used in applications such as brain-computer interfaces, mental health monitoring, educational tools, and entertainment products.
Explore Projects Built with Neurosky Sensor

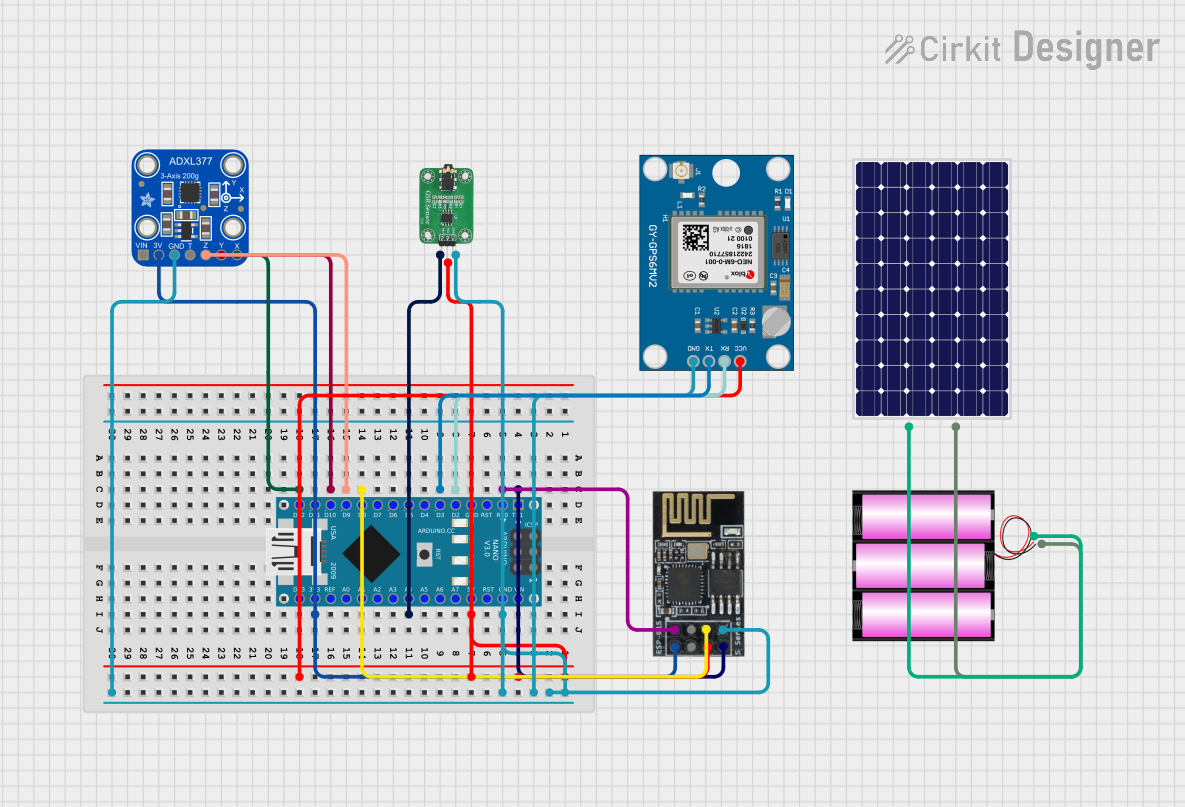
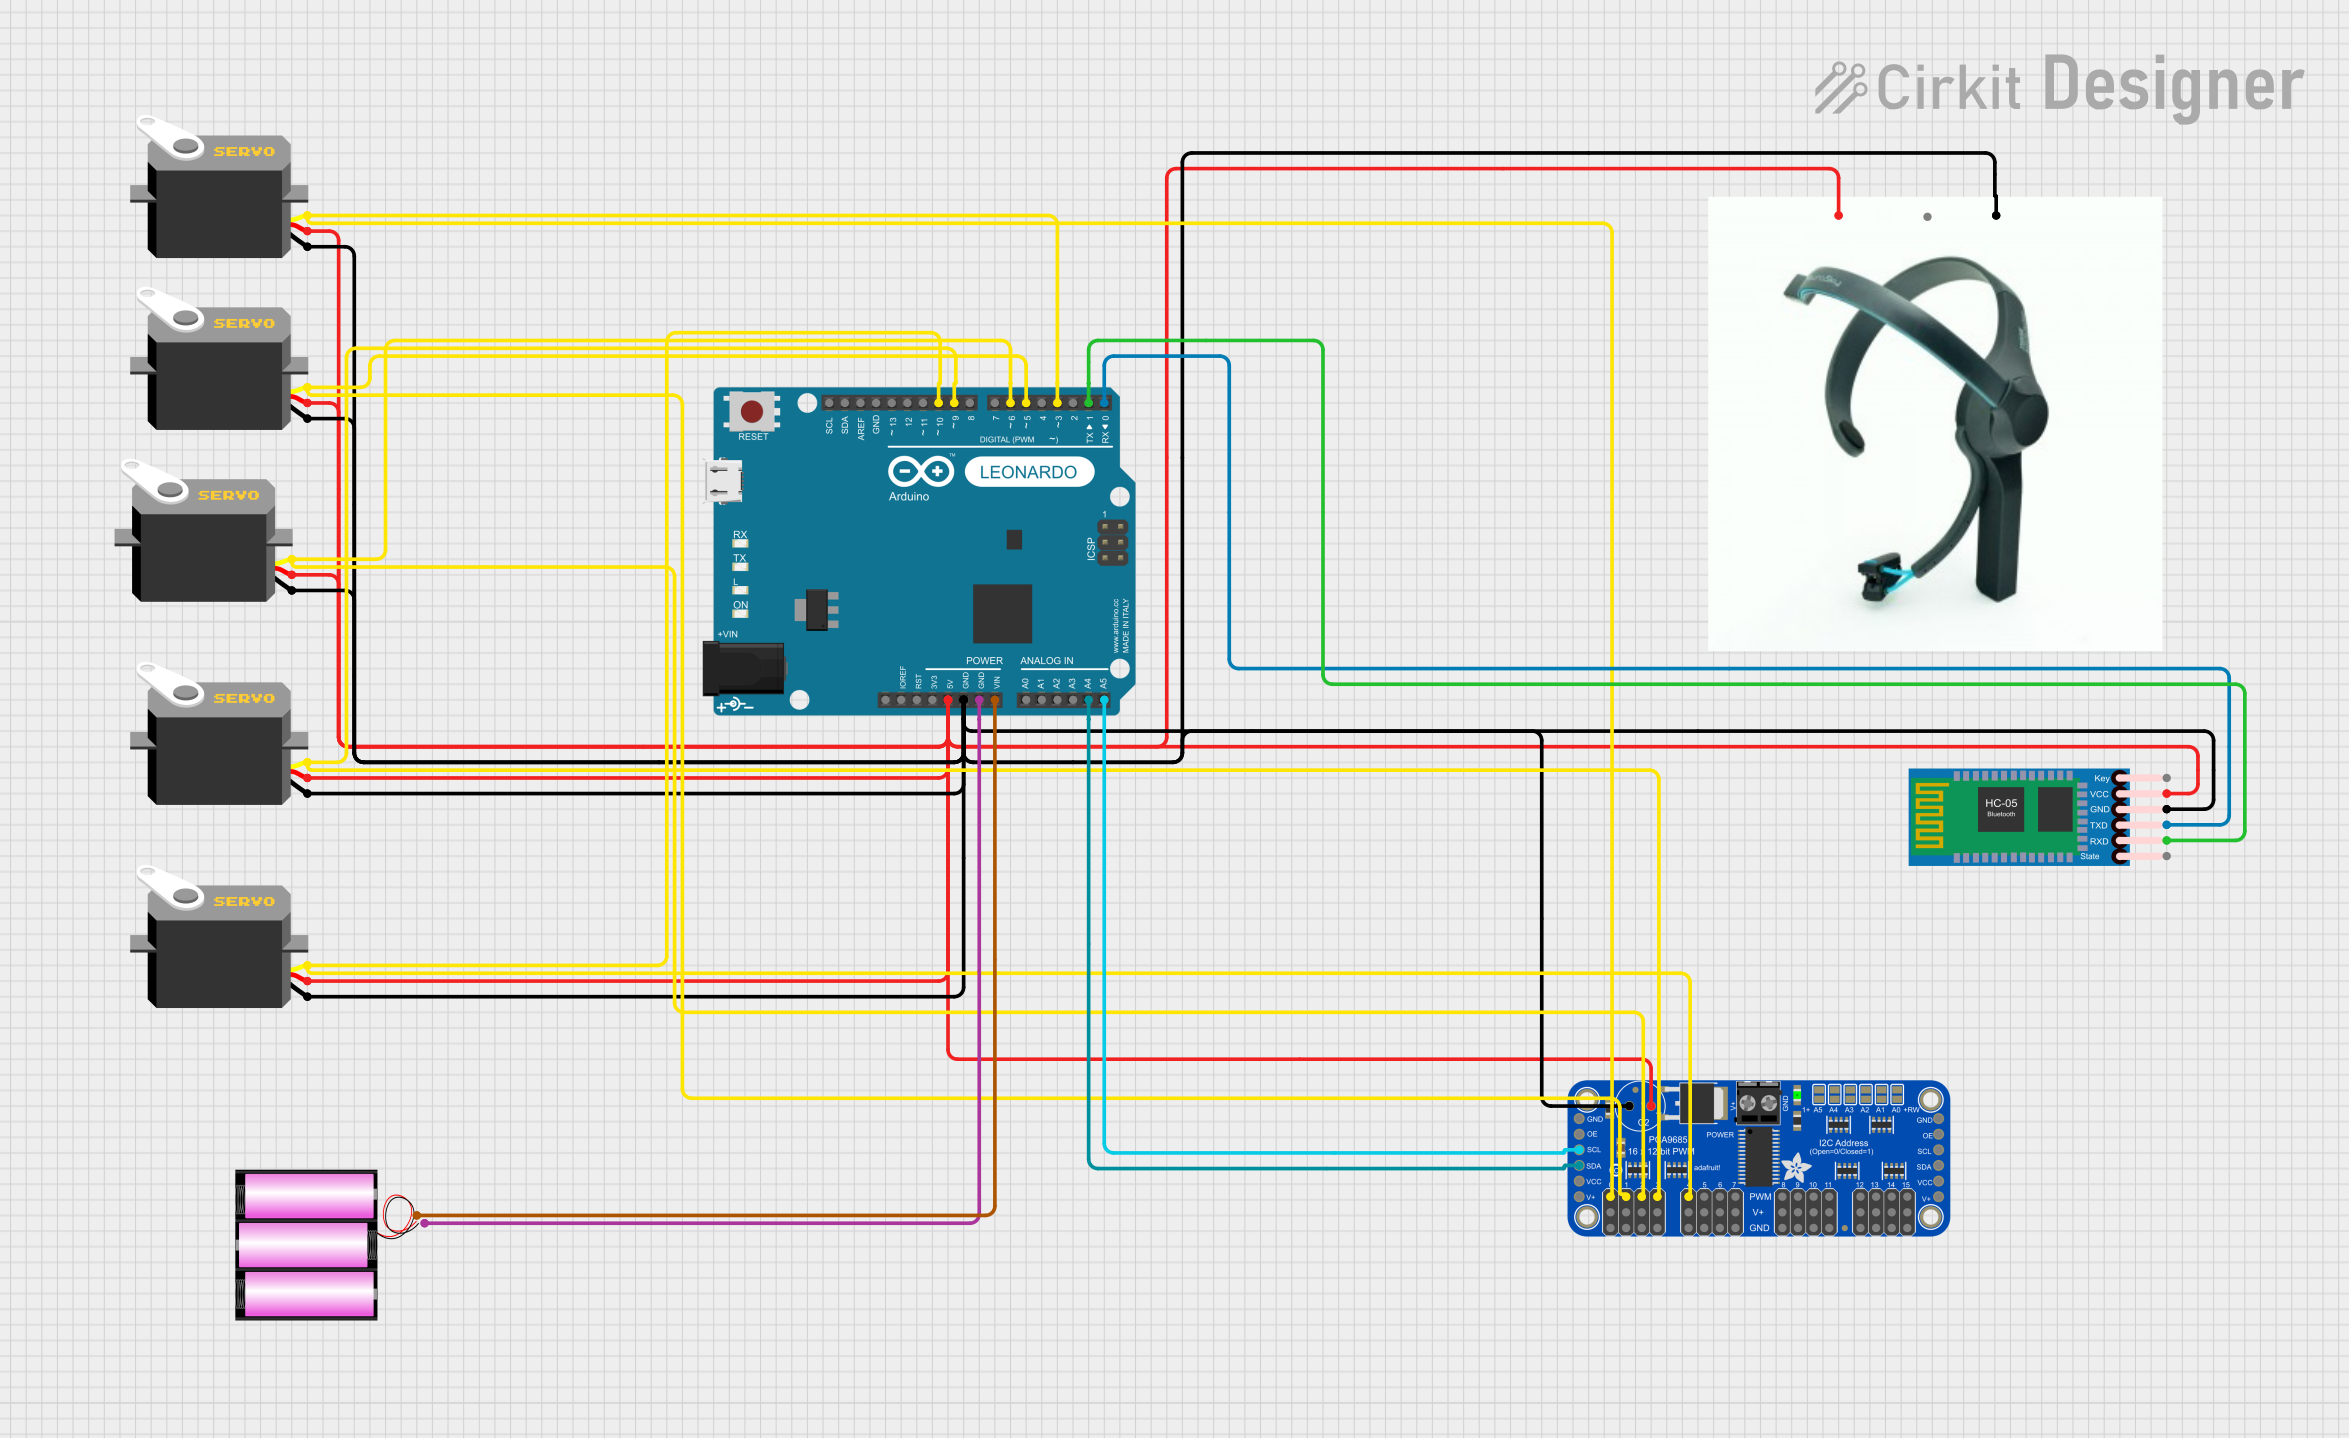
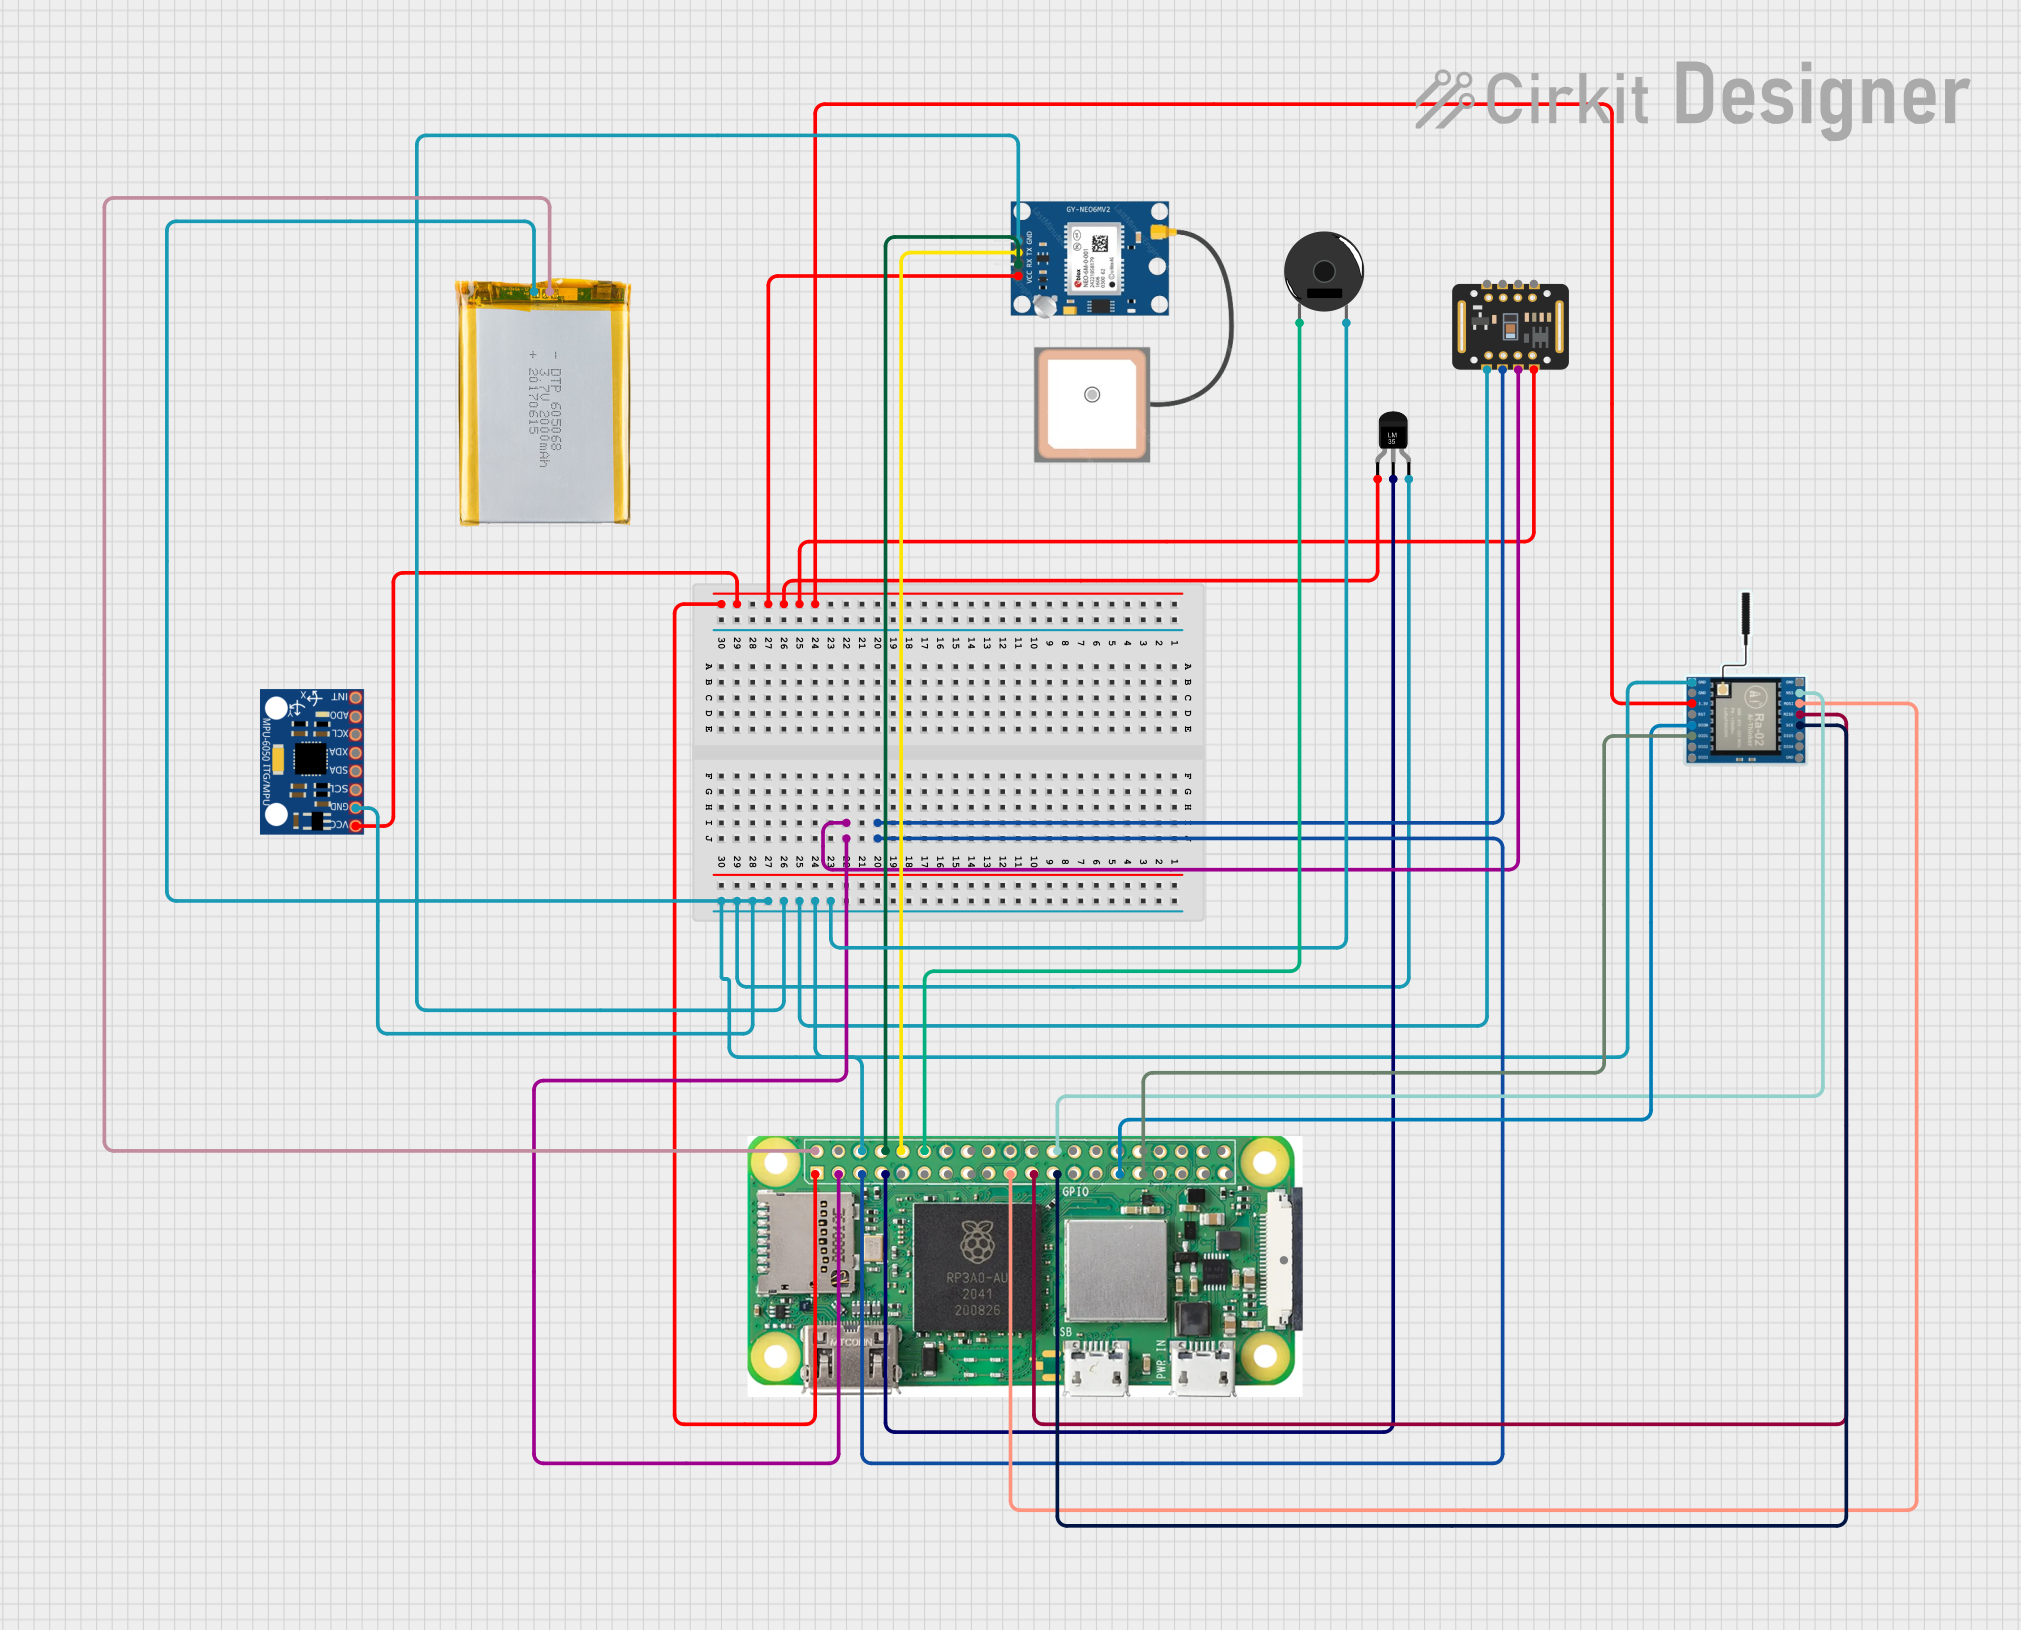
Explore Projects Built with Neurosky Sensor
Technical Specifications
Key Technical Details
- Operating Voltage: 3.3V - 5V
- Current Consumption: Typically 10mA
- Output: Serial UART (57,600 baud rate)
- Signal Output: Attention and Meditation values
- Connectivity: TGAM1 module with single dry electrode
- Operating Temperature: 0°C to 60°C
Pin Configuration and Descriptions
| Pin Number | Name | Description |
|---|---|---|
| 1 | GND | Ground connection |
| 2 | VCC | Power supply (3.3V - 5V) |
| 3 | T/R | UART Transmit/Receive |
| 4 | DOUT | Digital Output (Serial Data) |
| 5 | RST | Reset pin |
Usage Instructions
Integration with a Circuit
To use the Neurosky Sensor in a circuit:
- Connect the GND pin to the ground of your power supply.
- Connect the VCC pin to a 3.3V - 5V power source.
- Connect the T/R pin to the receive pin (RX) of your microcontroller if you need to send commands to the sensor.
- Connect the DOUT pin to the transmit pin (TX) of your microcontroller to receive data from the sensor.
- The RST pin can be connected to a digital pin on your microcontroller if you wish to reset the sensor programmatically.
Best Practices
- Ensure the sensor is placed correctly on the forehead for accurate readings.
- Avoid using the sensor in environments with electrical noise, as it may interfere with signal quality.
- Use shielded cables for connections to minimize interference.
- Do not bend or apply excessive force to the sensor's electrode.
Example Code for Arduino UNO
#include <SoftwareSerial.h>

SoftwareSerial neuroSerial(10, 11); // RX, TX

void setup() {
  // Start the hardware serial port
  Serial.begin(9600);
  // Start the software serial port
  neuroSerial.begin(57600);
}

void loop() {
  if (neuroSerial.available()) {
    byte brainData = neuroSerial.read(); // Read data from the sensor
    Serial.write(brainData); // Send data to the main serial port
  }
}
This example code sets up a software serial connection on pins 10 and 11 of the Arduino UNO to communicate with the Neurosky Sensor. The data received from the sensor is then sent to the main serial port for monitoring.
Troubleshooting and FAQs
Common Issues
- No Data Output: Ensure the sensor is powered correctly and the electrode is placed properly on the forehead.
- Erratic Values: Check for electrical interference in the environment or loose connections.
- Sensor Not Responding: Try resetting the sensor using the RST pin.
FAQs
Q: Can the Neurosky Sensor be used with other microcontrollers besides Arduino? A: Yes, as long as the microcontroller supports UART communication and operates within the voltage range of the sensor.
Q: How do I interpret the attention and meditation values? A: The values are proprietary algorithms of Neurosky, typically ranging from 0 to 100, indicating the level of mental states.
Q: Is it necessary to use the RST pin? A: The RST pin is optional. It is used to reset the sensor, but it will also reset automatically upon power-up.
For further assistance, please refer to the manufacturer's support resources or contact technical support.