How to Use RushFPV 1.2G 1.3G 4W V2 VTX: Examples, Pinouts, and Specs
Introduction
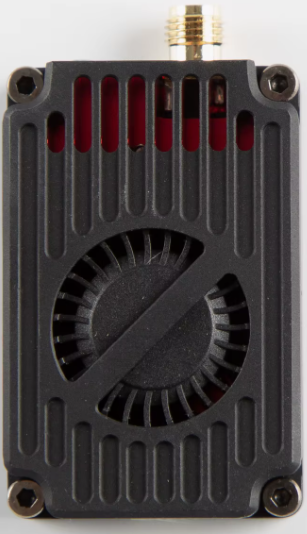
The RushFPV 1.2G 1.3G 4W V2 VTX is a high-performance video transmitter (VTX) designed for FPV (First Person View) applications. Operating in the 1.2GHz and 1.3GHz frequency bands, this VTX delivers a powerful 4-watt output, ensuring extended range and superior signal quality. It is ideal for long-range FPV flights, professional drone racing, and other applications requiring reliable video transmission over large distances.
Explore Projects Built with RushFPV 1.2G 1.3G 4W V2 VTX


Explore Projects Built with RushFPV 1.2G 1.3G 4W V2 VTX
Common Applications and Use Cases
- Long-range FPV drone flights
- Professional drone racing
- Remote-controlled vehicles and aircraft
- Aerial photography and videography
- Industrial and research applications requiring high-quality video transmission
Technical Specifications
The following table outlines the key technical specifications of the RushFPV 1.2G 1.3G 4W V2 VTX:
| Parameter | Specification |
|---|---|
| Frequency Bands | 1.2GHz, 1.3GHz |
| Output Power | 4W (4000mW) |
| Input Voltage | 7V - 28V (2S to 6S LiPo compatible) |
| Current Consumption | ~1.5A @ 12V (varies with power output) |
| Video Input Format | NTSC/PAL |
| Antenna Connector | SMA |
| Dimensions | 80mm x 50mm x 20mm |
| Weight | 120g |
| Operating Temperature | -10°C to 60°C |
Pin Configuration and Descriptions
The RushFPV 1.2G 1.3G 4W V2 VTX features a straightforward pinout for easy integration into FPV systems. Below is the pin configuration:
| Pin | Label | Description |
|---|---|---|
| 1 | VIN | Power input (7V - 28V) |
| 2 | GND | Ground connection |
| 3 | VIDEO IN | Analog video signal input |
| 4 | AUDIO IN | Optional audio signal input |
| 5 | CH+ | Channel selection button (short press to change) |
| 6 | LED Display | Displays current channel and frequency information |
Usage Instructions
How to Use the Component in a Circuit
- Power Connection: Connect the VIN pin to a power source within the range of 7V to 28V. Ensure the power source can supply sufficient current (at least 2A) to avoid voltage drops.
- Video Input: Connect the VIDEO IN pin to the video output of your FPV camera. Ensure the camera is compatible with NTSC or PAL formats.
- Antenna Installation: Attach a compatible SMA antenna to the VTX before powering it on. Operating the VTX without an antenna can damage the device.
- Channel Selection: Use the CH+ button to cycle through available channels. The LED display will indicate the current channel and frequency.
- Audio Input (Optional): If audio transmission is required, connect an audio source to the AUDIO IN pin.
Important Considerations and Best Practices
- Cooling: The VTX generates significant heat during operation, especially at 4W output. Ensure proper airflow or use a heatsink to prevent overheating.
- Antenna Matching: Use a high-quality SMA antenna designed for the 1.2GHz or 1.3GHz frequency bands to maximize performance.
- Legal Compliance: Check local regulations regarding the use of high-power VTX devices, as 4W output may exceed legal limits in some regions.
- Power Supply: Use a stable power source to avoid video signal interference caused by voltage fluctuations.
Arduino UNO Integration
While the RushFPV 1.2G 1.3G 4W V2 VTX is not typically used with microcontrollers like the Arduino UNO, it is possible to control the VTX's channel selection using a digital output pin. Below is an example code snippet for toggling the CH+ button using an Arduino:
// Define the pin connected to the CH+ button
const int chPlusPin = 7;

void setup() {
  // Set the CH+ pin as an output
  pinMode(chPlusPin, OUTPUT);
  digitalWrite(chPlusPin, HIGH); // Ensure the pin is initially HIGH
}

void loop() {
  // Simulate a button press to change the channel
  digitalWrite(chPlusPin, LOW);  // Pull the pin LOW to simulate a press
  delay(100);                    // Hold for 100ms
  digitalWrite(chPlusPin, HIGH); // Release the button
  delay(5000);                   // Wait 5 seconds before the next press
}
Note: Ensure the CH+ pin is connected to the VTX through a suitable interface circuit to avoid damaging the VTX or Arduino.
Troubleshooting and FAQs
Common Issues and Solutions
No Video Signal
- Cause: Incorrect wiring or incompatible video format.
- Solution: Verify the VIDEO IN connection and ensure the camera is outputting NTSC or PAL.
Overheating
- Cause: Insufficient cooling or prolonged operation at maximum power.
- Solution: Improve airflow around the VTX or add a heatsink.
Poor Signal Quality
- Cause: Mismatched or damaged antenna.
- Solution: Use a high-quality SMA antenna designed for 1.2GHz/1.3GHz.
Channel Selection Not Working
- Cause: Faulty CH+ button or improper connection.
- Solution: Check the CH+ button wiring and ensure it is not stuck.
FAQs
Q: Can I use this VTX without an antenna?
A: No, operating the VTX without an antenna can cause permanent damage to the device.Q: What is the maximum range of this VTX?
A: The range depends on environmental factors, antenna quality, and receiver sensitivity. Under ideal conditions, it can exceed 10km.Q: Is this VTX compatible with digital FPV systems?
A: No, this VTX is designed for analog video transmission only.Q: Can I power the VTX directly from a 6S LiPo battery?
A: Yes, the VTX supports input voltages up to 28V, making it compatible with 6S LiPo batteries.
This concludes the documentation for the RushFPV 1.2G 1.3G 4W V2 VTX. For further assistance, refer to the manufacturer's user manual or contact RushFPV support.