How to Use Waterproof Integrated Ultrasonic Sensor: Examples, Pinouts, and Specs
Introduction
The Waterproof Integrated Ultrasonic Sensor is a robust and reliable device designed to measure distances or detect objects using ultrasonic waves. Its waterproof design makes it ideal for use in harsh environments, such as outdoor installations, industrial applications, and underwater systems. This sensor emits ultrasonic waves and calculates the time it takes for the waves to return after hitting an object, providing accurate distance measurements.
Explore Projects Built with Waterproof Integrated Ultrasonic Sensor
Explore Projects Built with Waterproof Integrated Ultrasonic Sensor
Common Applications
- Water level monitoring in tanks and reservoirs
- Obstacle detection in robotics and automation
- Outdoor security systems
- Underwater object detection
- Industrial equipment monitoring
Technical Specifications
The following table outlines the key technical details of the Waterproof Integrated Ultrasonic Sensor:
| Parameter | Specification |
|---|---|
| Operating Voltage | 5V DC |
| Operating Current | ≤ 15mA |
| Detection Range | 20mm to 4500mm (2cm to 4.5m) |
| Accuracy | ±3mm |
| Operating Frequency | 40kHz |
| Waterproof Rating | IP67 |
| Operating Temperature | -15°C to +70°C |
| Output Signal | PWM or Analog Voltage (varies by model) |
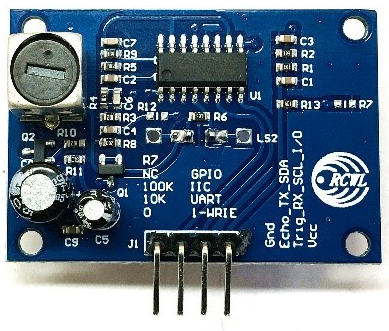
Pin Configuration
The sensor typically has four pins. The table below describes each pin:
| Pin Name | Description |
|---|---|
| VCC | Power supply input (5V DC) |
| GND | Ground connection |
| TRIG | Trigger input to initiate ultrasonic pulse |
| ECHO | Echo output to measure the reflected signal |
Usage Instructions
How to Use the Sensor in a Circuit
- Power the Sensor: Connect the
VCCpin to a 5V DC power source and theGNDpin to the ground. - Trigger the Sensor: Send a 10µs HIGH pulse to the
TRIGpin to initiate an ultrasonic burst. - Read the Echo: Measure the duration of the HIGH signal on the
ECHOpin. This duration corresponds to the time taken for the ultrasonic wave to travel to the object and back. - Calculate Distance: Use the formula below to calculate the distance:
[
\text{Distance (cm)} = \frac{\text{Time (µs)} \times 0.034}{2}
]
The factor
0.034represents the speed of sound in cm/µs, and the division by 2 accounts for the round trip of the wave.
Example Circuit with Arduino UNO
Below is an example of how to connect and use the sensor with an Arduino UNO:
Circuit Connections
- Connect
VCCto the Arduino's5Vpin. - Connect
GNDto the Arduino'sGNDpin. - Connect
TRIGto Arduino digital pin9. - Connect
ECHOto Arduino digital pin10.
Arduino Code
// Define pins for the ultrasonic sensor
const int trigPin = 9;  // TRIG pin connected to digital pin 9
const int echoPin = 10; // ECHO pin connected to digital pin 10

void setup() {
  // Initialize serial communication for debugging
  Serial.begin(9600);

  // Set pin modes
  pinMode(trigPin, OUTPUT); // TRIG pin as output
  pinMode(echoPin, INPUT);  // ECHO pin as input
}

void loop() {
  // Send a 10µs HIGH pulse to the TRIG pin
  digitalWrite(trigPin, LOW);
  delayMicroseconds(2);
  digitalWrite(trigPin, HIGH);
  delayMicroseconds(10);
  digitalWrite(trigPin, LOW);

  // Measure the duration of the HIGH signal on the ECHO pin
  long duration = pulseIn(echoPin, HIGH);

  // Calculate the distance in cm
  float distance = (duration * 0.034) / 2;

  // Print the distance to the Serial Monitor
  Serial.print("Distance: ");
  Serial.print(distance);
  Serial.println(" cm");

  // Wait before the next measurement
  delay(500);
}
Important Considerations
- Ensure the sensor is powered with a stable 5V DC supply to avoid inaccurate readings.
- Avoid placing the sensor near ultrasonic noise sources, as this may interfere with its operation.
- For outdoor use, ensure the sensor is mounted securely to prevent water ingress despite its waterproof design.
- Use proper pull-up or pull-down resistors if required by your circuit design.
Troubleshooting and FAQs
Common Issues and Solutions
No Output Signal:
- Verify that the
VCCandGNDconnections are secure. - Ensure the
TRIGpin is receiving a 10µs HIGH pulse.
- Verify that the
Inaccurate Distance Measurements:
- Check for obstacles or reflective surfaces near the sensor that may cause false readings.
- Ensure the sensor is mounted perpendicular to the target surface for accurate measurements.
Interference from Other Ultrasonic Devices:
- Use shielding or increase the distance between multiple ultrasonic sensors to reduce interference.
Sensor Not Working in Low Temperatures:
- Verify that the operating temperature is within the specified range (-15°C to +70°C).
FAQs
Q: Can this sensor be submerged underwater?
A: While the sensor is waterproof (IP67), it is designed for splash resistance and outdoor use. Submersion may affect performance and is not recommended unless specified by the manufacturer.
Q: What is the maximum detection range?
A: The sensor can detect objects up to 4.5 meters (4500mm) away under ideal conditions.
Q: Can I use this sensor with a 3.3V microcontroller?
A: The sensor requires a 5V power supply. If your microcontroller operates at 3.3V, use a level shifter for the TRIG and ECHO signals.
Q: How do I improve accuracy in outdoor environments?
A: Minimize environmental noise, ensure proper alignment, and avoid extreme weather conditions for optimal performance.