How to Use JST XH 3A Male: Examples, Pinouts, and Specs
Introduction
The JST XH 3A Male connector is a widely used electrical connector designed for secure and reliable connections in electronic circuits. With a 2.5mm pitch and a current handling capacity of up to 3A, it is ideal for applications requiring compact and robust connections. This connector is commonly found in battery packs, PCBs, and other electronic devices where a dependable connection is essential.
Explore Projects Built with JST XH 3A Male


Explore Projects Built with JST XH 3A Male
Common Applications and Use Cases
- Battery connections in RC vehicles, drones, and robotics
- Power delivery in small electronic devices
- PCB interconnections in consumer electronics
- LED strip connections
- Prototyping and DIY electronics projects
Technical Specifications
The following table outlines the key technical details of the JST XH 3A Male connector:
| Parameter | Specification |
|---|---|
| Pitch | 2.5mm |
| Current Rating | Up to 3A |
| Voltage Rating | 250V AC/DC |
| Contact Resistance | ≤ 10mΩ |
| Insulation Resistance | ≥ 1000MΩ |
| Operating Temperature | -25°C to +85°C |
| Material (Housing) | Nylon 66 (UL94V-0 rated) |
| Material (Contacts) | Tin-plated copper alloy |
Pin Configuration and Descriptions
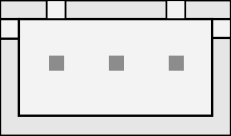
The JST XH 3A Male connector typically comes in multiple pin configurations (e.g., 2-pin, 3-pin, 4-pin, etc.). Below is an example of a 3-pin configuration:
| Pin Number | Description | Typical Use |
|---|---|---|
| 1 | VCC (Power) | Positive voltage input |
| 2 | GND (Ground) | Ground connection |
| 3 | Signal/Data | Signal or data transmission |
Usage Instructions
How to Use the JST XH 3A Male Connector in a Circuit
- Prepare the Wires: Strip the insulation from the wires to expose approximately 3-5mm of the conductor.
- Crimp the Contacts: Use a crimping tool to attach the metal contacts to the exposed wire ends. Ensure a secure and firm crimp to avoid loose connections.
- Insert Contacts into the Housing: Push the crimped contacts into the connector housing until they click into place. Verify that the contacts are properly seated.
- Connect to the Female Counterpart: Align the JST XH 3A Male connector with its female counterpart and gently push them together until they lock securely.
- Soldering Option: For PCB applications, solder the male connector pins to the PCB pads, ensuring proper alignment and secure solder joints.
Important Considerations and Best Practices
- Wire Gauge: Use wires with an appropriate gauge (typically 22-28 AWG) to handle the current without overheating.
- Crimping Tool: Always use a compatible crimping tool for reliable connections.
- Polarity: Double-check the polarity of the connections to avoid damage to the circuit.
- Insertion Force: Avoid excessive force when connecting or disconnecting to prevent damage to the housing or contacts.
- Environmental Conditions: Ensure the connector is used within its specified temperature and voltage ratings.
Example: Connecting to an Arduino UNO
The JST XH 3A Male connector can be used to supply power or transmit signals to an Arduino UNO. Below is an example of connecting a 3-pin JST XH connector to an Arduino for powering an LED:
Circuit Diagram
- Pin 1 (VCC) → Arduino 5V
- Pin 2 (GND) → Arduino GND
- Pin 3 (Signal) → Arduino Digital Pin 9
Arduino Code
// Example code to control an LED connected via a JST XH 3A Male connector
const int ledPin = 9; // Pin connected to the Signal pin of the JST connector

void setup() {
  pinMode(ledPin, OUTPUT); // Set the pin as an output
}

void loop() {
  digitalWrite(ledPin, HIGH); // Turn the LED on
  delay(1000); // Wait for 1 second
  digitalWrite(ledPin, LOW); // Turn the LED off
  delay(1000); // Wait for 1 second
}
Troubleshooting and FAQs
Common Issues and Solutions
| Issue | Possible Cause | Solution |
|---|---|---|
| Loose connection | Improper crimping or seating of pins | Re-crimp the contacts and reseat them |
| Overheating of wires or connector | Exceeding current rating | Use thicker wires or reduce current |
| Connector not locking properly | Misalignment or damaged housing | Inspect and realign or replace housing |
| Signal interference or noise | Poor grounding or long wire lengths | Ensure proper grounding and use shorter wires |
FAQs
Can the JST XH 3A Male connector handle more than 3A?
No, exceeding the 3A current rating may cause overheating and damage to the connector.What is the difference between JST XH and other JST connectors?
The JST XH series has a 2.5mm pitch, while other JST series (e.g., PH, SH) may have different pitches and current ratings.Can I solder wires directly to the JST XH Male connector?
It is not recommended. Use crimped contacts for a secure and reliable connection.Is the JST XH 3A Male connector waterproof?
No, it is not designed for waterproof applications. Use a waterproof connector if needed.
By following this documentation, you can effectively use the JST XH 3A Male connector in your electronic projects.