How to Use ProtoSnap - Pro Mini - Protoboard: Examples, Pinouts, and Specs
Introduction
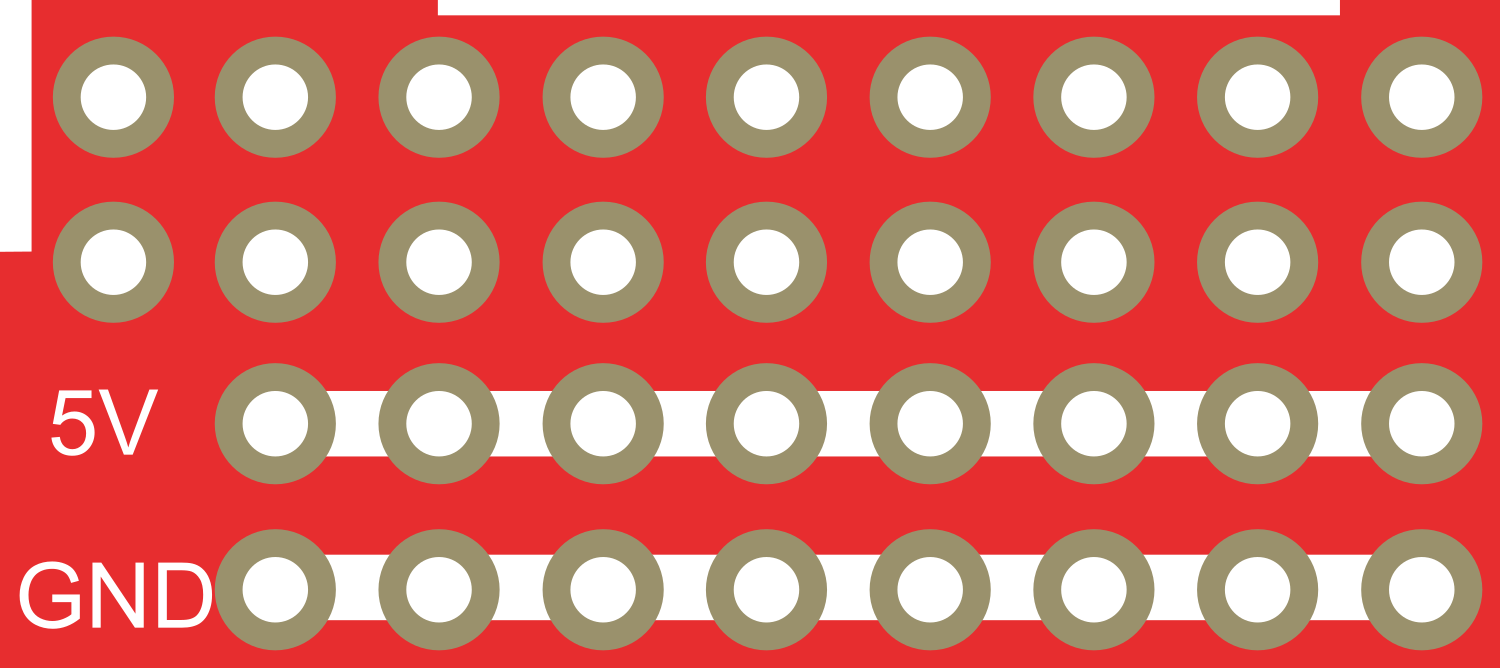
The ProtoSnap - Pro Mini Protoboard is a versatile and compact prototyping board designed for hobbyists, educators, and professionals to quickly prototype electronic circuits. It is specifically tailored to work with the ProtoSnap - Pro Mini, allowing users to create custom circuits with ease. The protoboard's through-hole design makes it ideal for soldering components, and its small form factor ensures it can fit into a variety of projects.
Common applications for the ProtoSnap - Pro Mini Protoboard include:
- Rapid prototyping of electronic circuits
- Educational projects for learning electronics and soldering
- Development of custom embedded systems
- DIY electronics projects
Explore Projects Built with ProtoSnap - Pro Mini - Protoboard
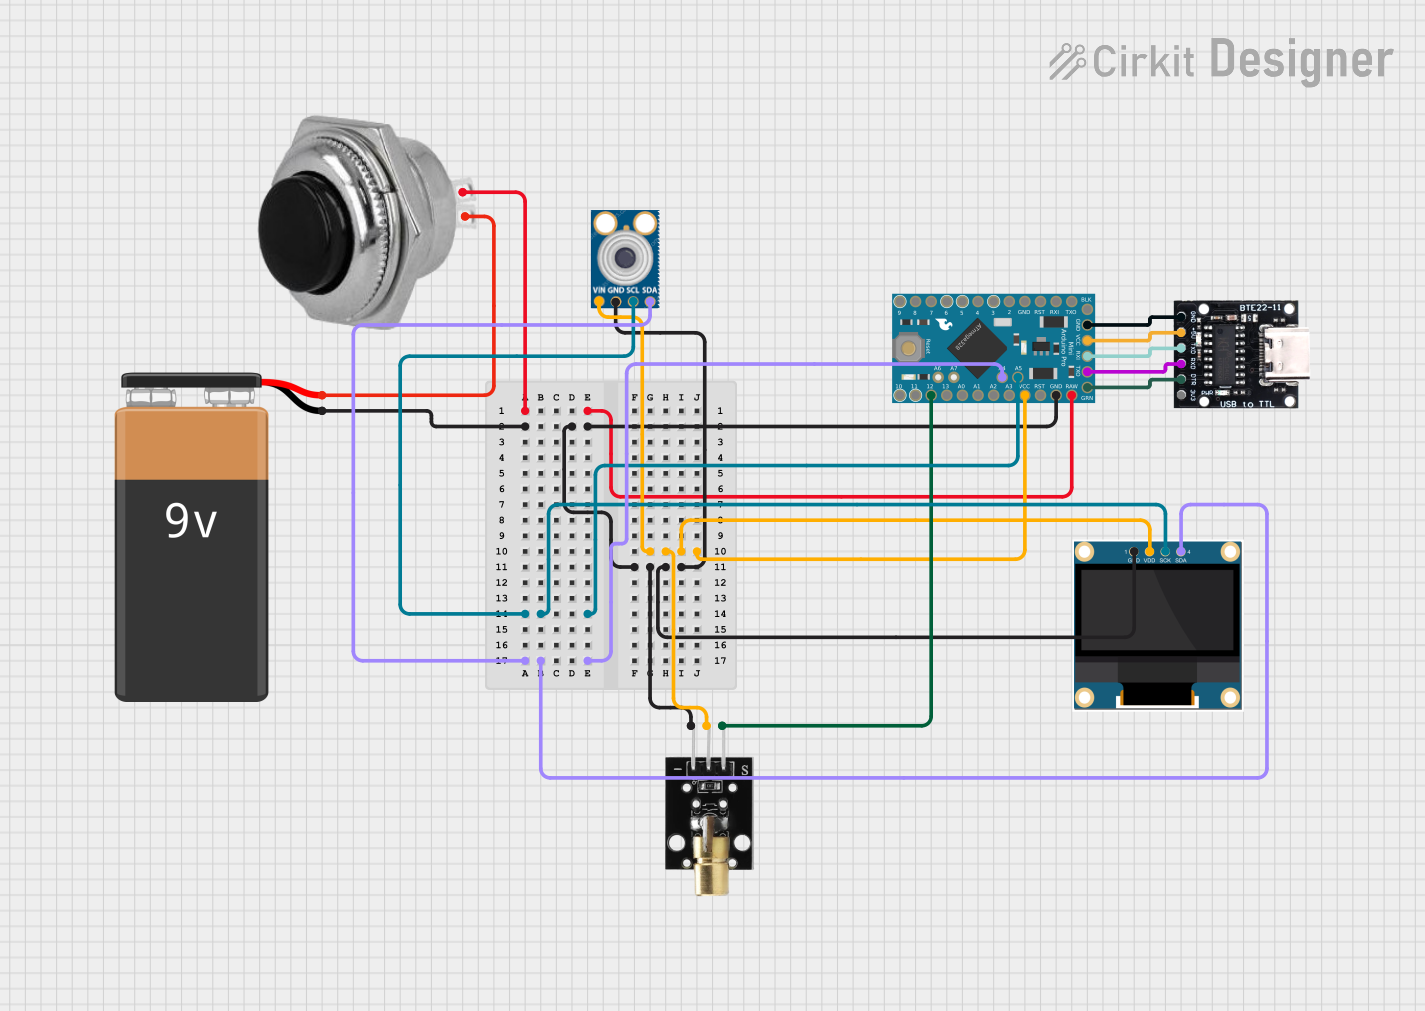
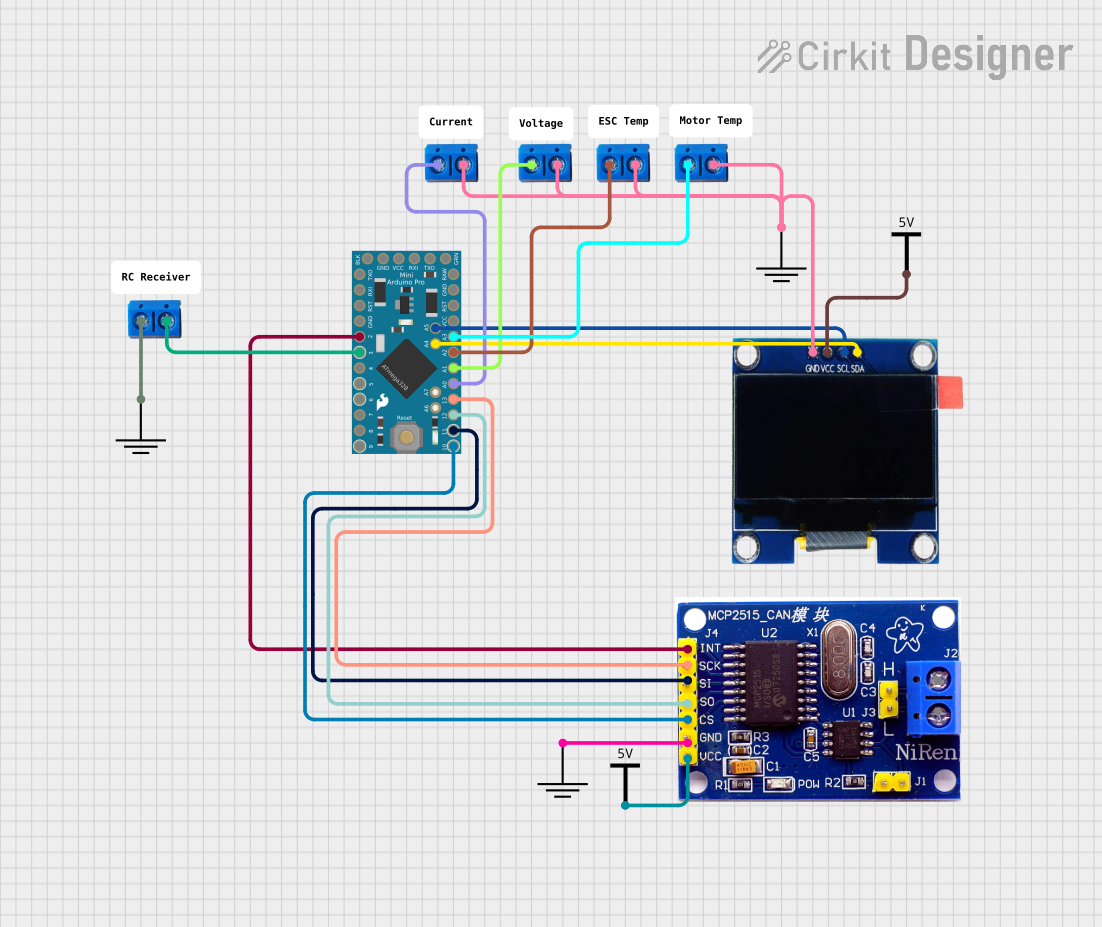
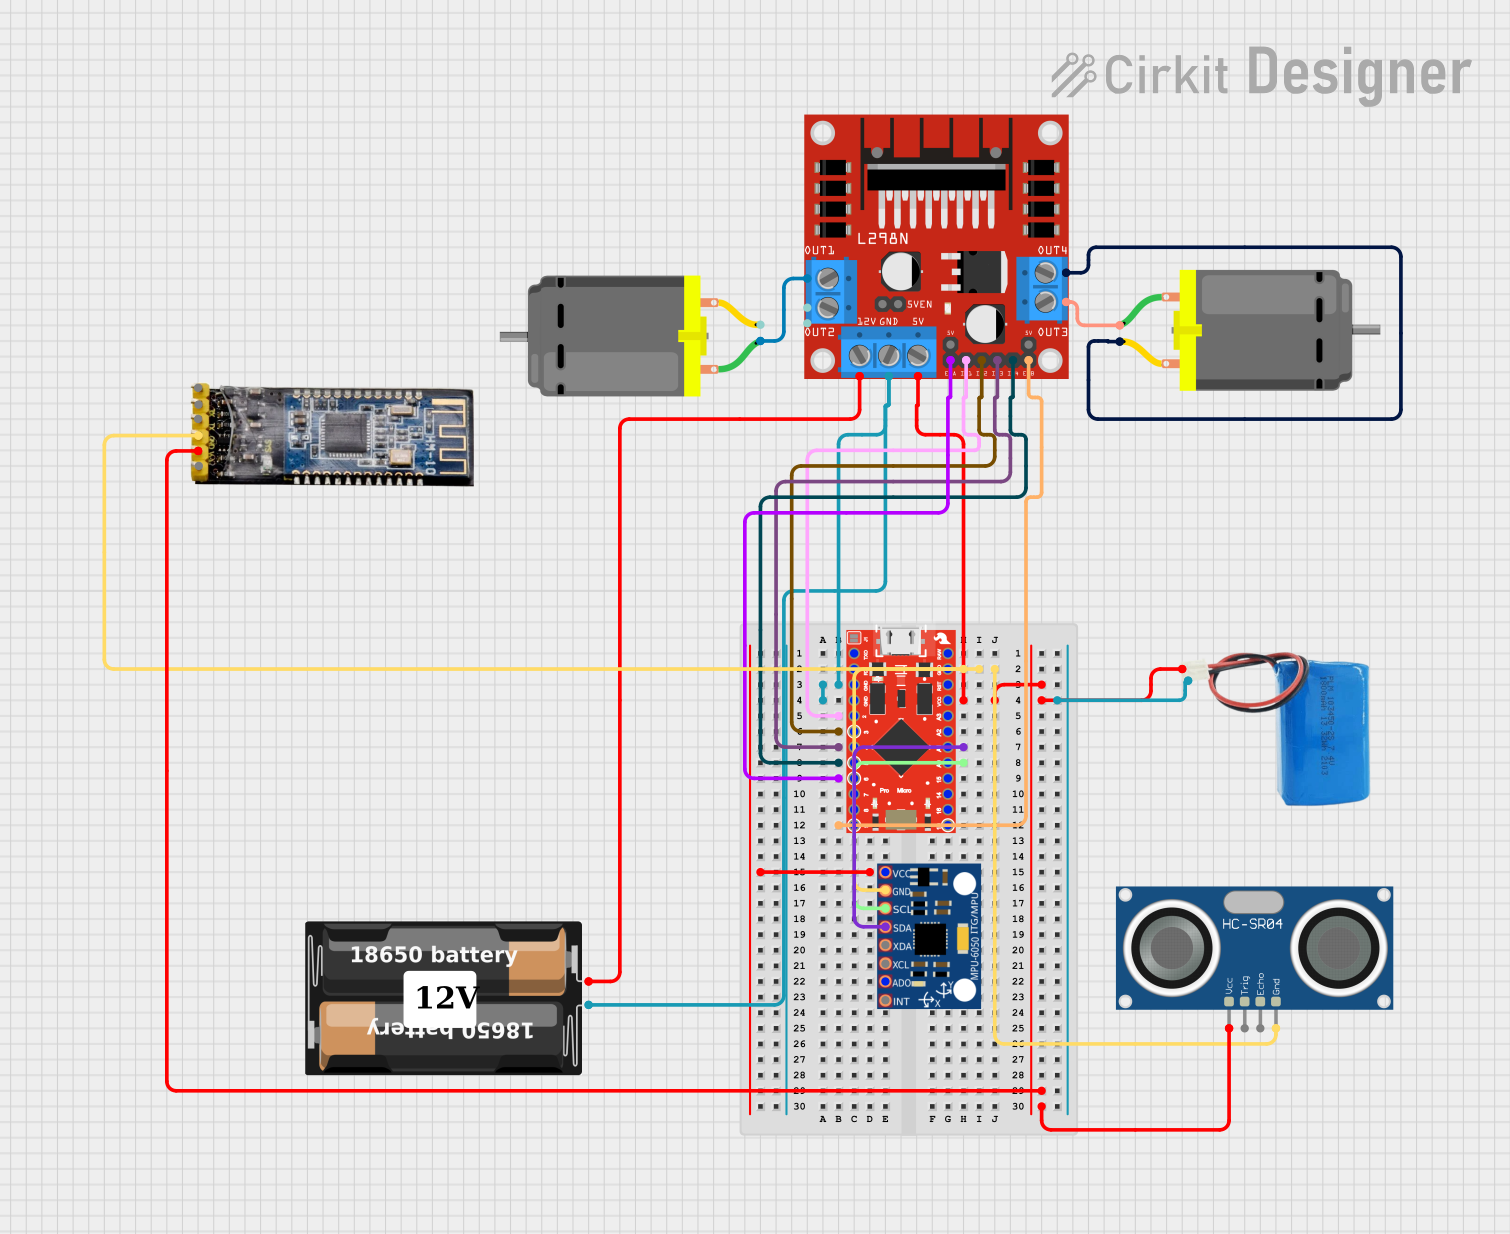

Explore Projects Built with ProtoSnap - Pro Mini - Protoboard
Technical Specifications
General Specifications
- Dimensions: 50mm x 50mm
- Material: FR4 (standard PCB material)
- Hole Diameter: 1mm
- Hole Spacing: Standard 2.54mm (0.1 inch)
Pin Configuration and Descriptions
| Pin Number | Description |
|---|---|
| N/A | Through-hole pads for soldering |
Note: The ProtoSnap - Pro Mini Protoboard does not have a predefined pin configuration as it is a general-purpose protoboard. The table above represents the general characteristic of the through-hole pads.
Usage Instructions
Integrating with ProtoSnap - Pro Mini
Design Your Circuit: Before soldering, plan your circuit layout. Use a pencil and paper to sketch where components will be placed on the protoboard.
Component Placement: Insert your electronic components through the through-hole pads. Ensure that the orientation of polarized components (like LEDs, diodes, and capacitors) is correct.
Soldering: Heat your soldering iron and carefully solder each component to the protoboard. Use enough solder to make a good electrical connection but avoid creating solder bridges between adjacent pads.
Testing: After soldering, use a multimeter to check for shorts or open circuits. Verify that all connections are solid and correct.
Connecting to Pro Mini: Once your circuit is complete and tested, you can connect it to the ProtoSnap - Pro Mini using jumper wires or by soldering directly to the Pro Mini pins if necessary.
Important Considerations and Best Practices
- Avoid Heat Damage: Do not apply heat to a single pad for too long as it may damage the protoboard or the component.
- Use Proper Soldering Techniques: Ensure that you are using proper soldering techniques to avoid cold joints or excessive solder.
- Component Spacing: Leave enough space between components to prevent short circuits and to allow for easier troubleshooting.
- Revision Control: If you make changes to your circuit, document them for future reference.
Troubleshooting and FAQs
Common Issues
- Loose Connections: If your circuit is not working as expected, check for loose solder joints or components that may not be fully inserted into the through-hole pads.
- Short Circuits: Use a multimeter to check for unintended connections between pads that may cause short circuits.
Solutions and Tips
- Resoldering: If a connection is loose, reheat the solder joint and add a small amount of solder if necessary.
- Desoldering: If you need to remove a component, use a desoldering pump or desoldering wick to remove the solder from the pad.
- Visual Inspection: Carefully inspect the board for solder bridges or components touching that shouldn't be.
FAQs
Q: Can I use the ProtoSnap - Pro Mini Protoboard with other microcontrollers?
A: Yes, the protoboard is not limited to the ProtoSnap - Pro Mini. It can be used with any microcontroller or electronic components that fit the through-hole design.
Q: How many components can the ProtoSnap - Pro Mini Protoboard accommodate?
A: The number of components depends on their size and the complexity of your circuit. Plan your layout carefully to maximize space.
Q: Is the ProtoSnap - Pro Mini Protoboard reusable?
A: While the protoboard is not designed to be reusable in the same way as a breadboard, components can be desoldered and the board can be reused for new projects.
Note: Since the ProtoSnap - Pro Mini Protoboard is a general-purpose prototyping board, specific code examples for Arduino UNO or other microcontrollers are not applicable. However, users can create circuits on the protoboard that interface with an Arduino UNO and write code accordingly for their custom applications.