How to Use SparkFun microSD Transflash Breakout: Examples, Pinouts, and Specs
Introduction
The SparkFun microSD Transflash Breakout is a compact and efficient breakout board designed to interface microSD cards with microcontrollers. It simplifies the process of adding data storage and retrieval capabilities to your projects. This breakout board is ideal for applications requiring data logging, file storage, or multimedia playback. Its small form factor and straightforward design make it a popular choice for hobbyists and professionals alike.
Explore Projects Built with SparkFun microSD Transflash Breakout
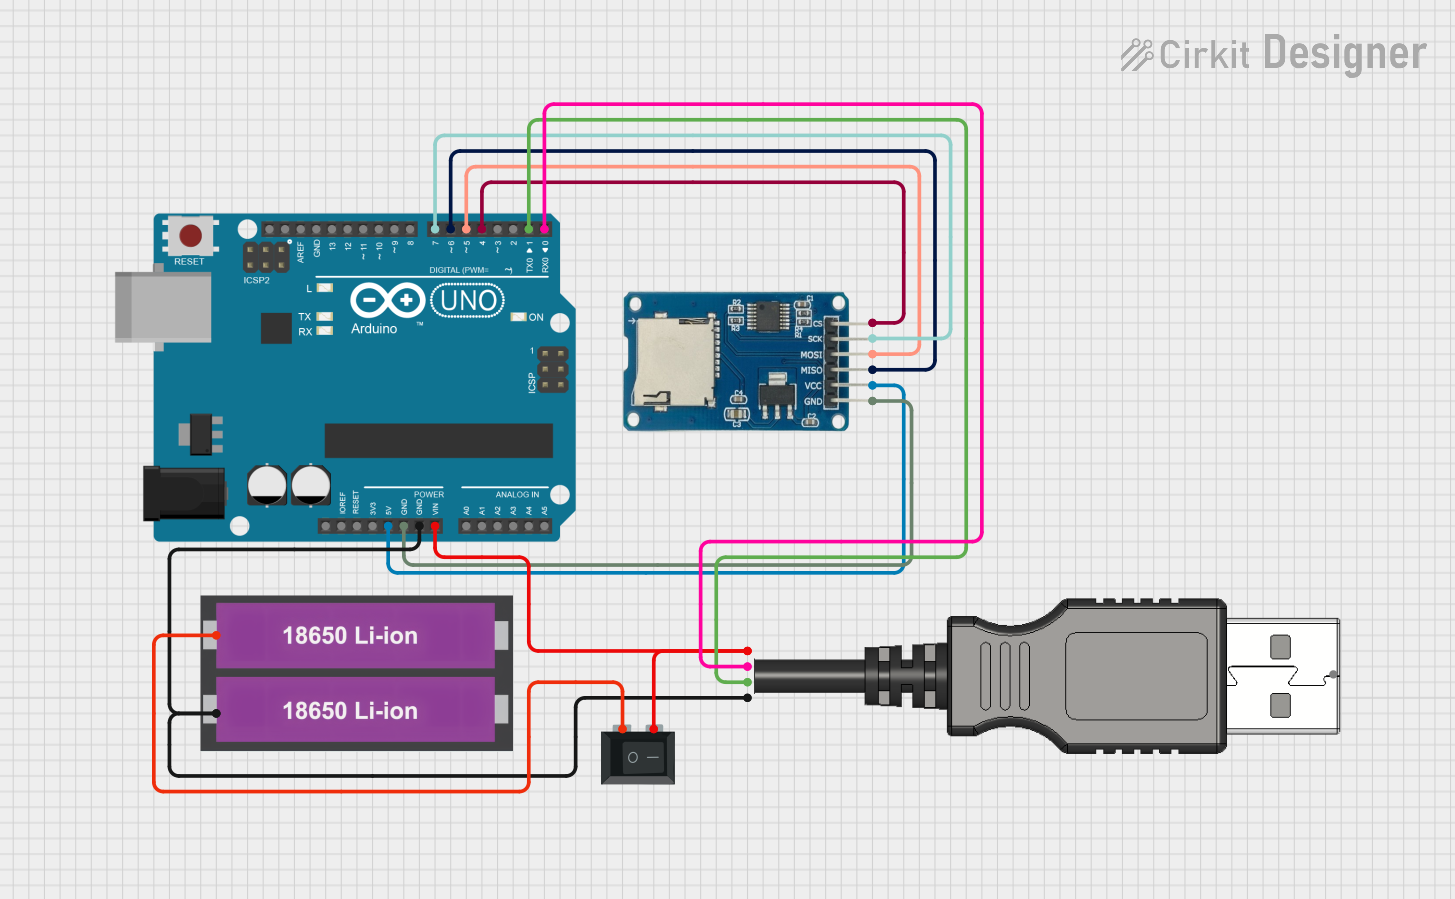
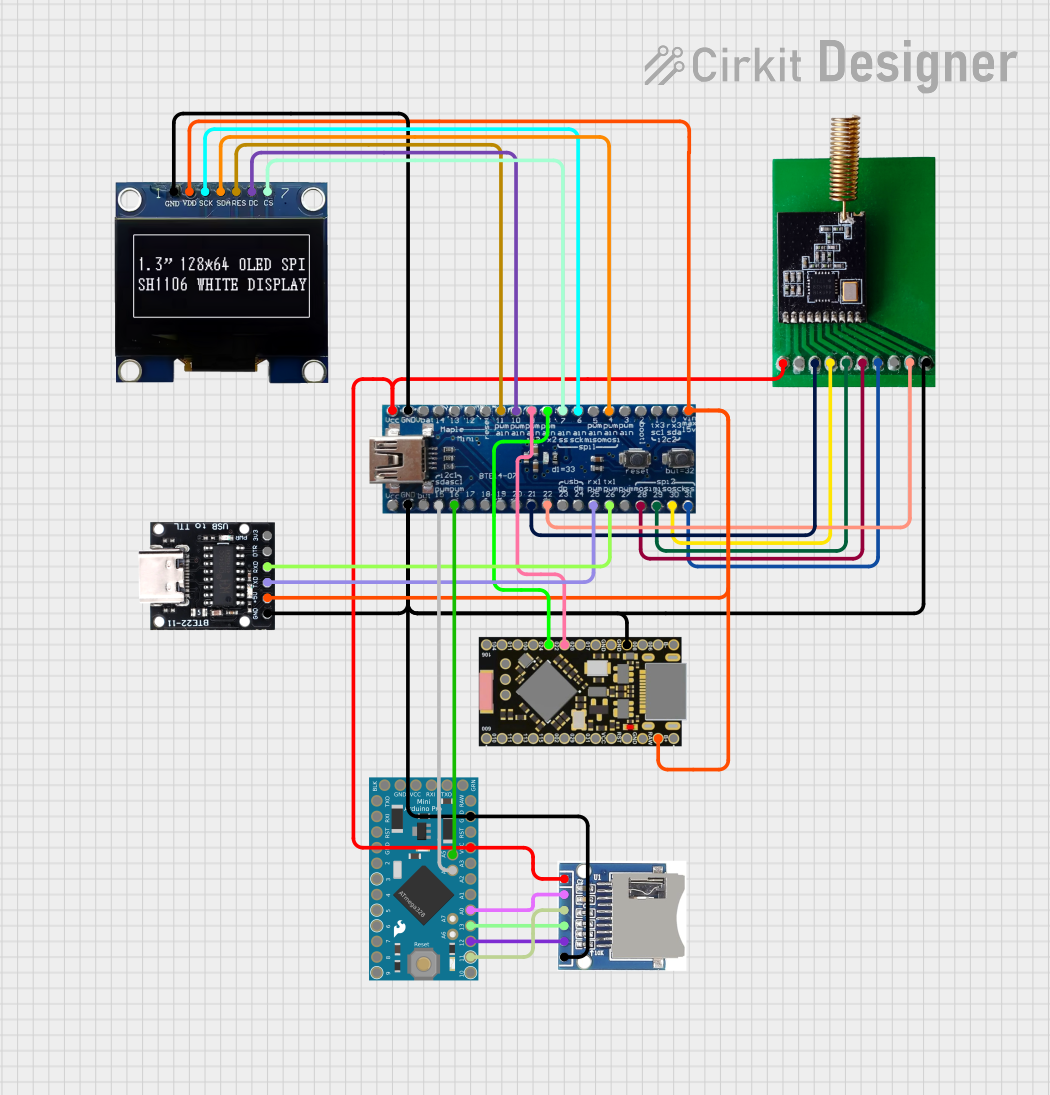

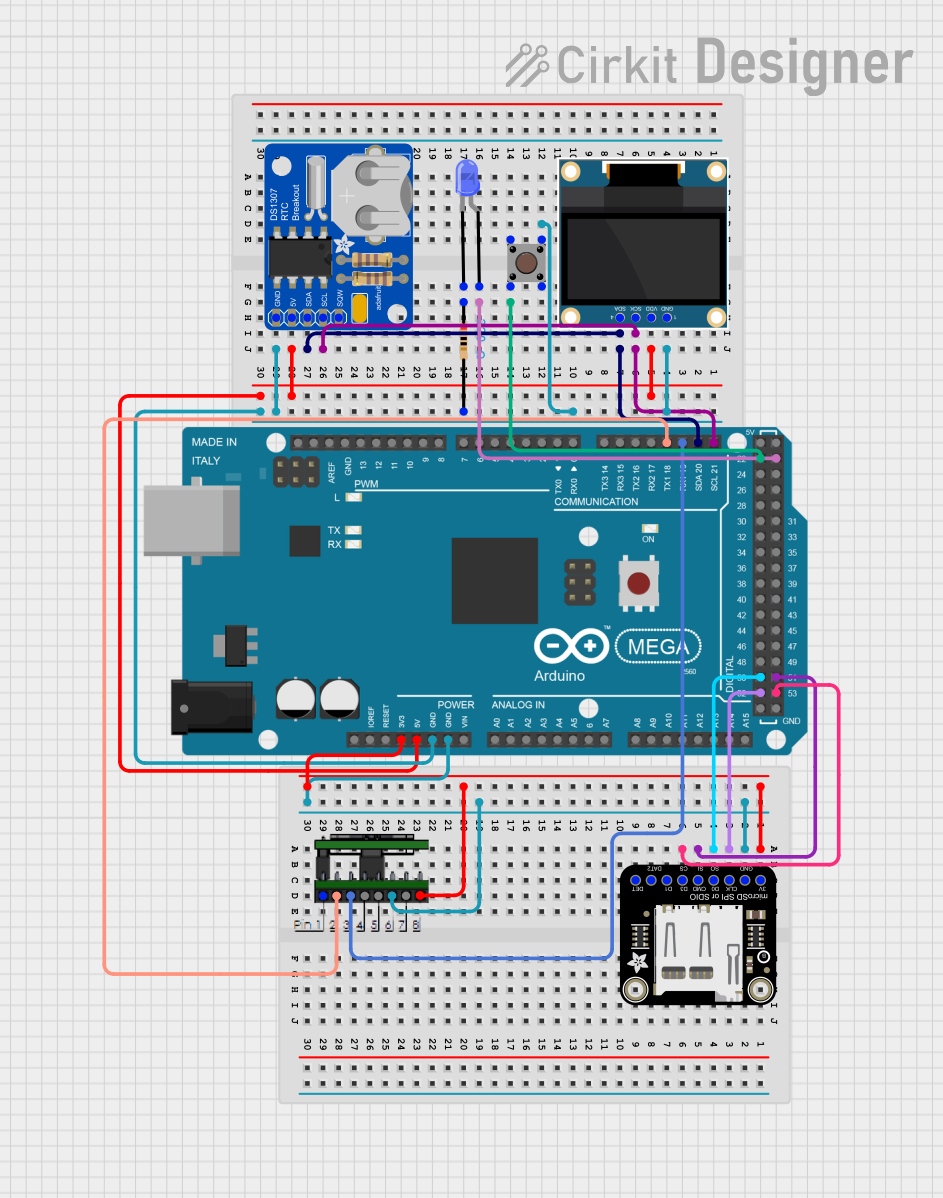
Explore Projects Built with SparkFun microSD Transflash Breakout
Common Applications
- Data logging for sensors and IoT devices
- Storing configuration files or firmware updates
- Multimedia storage for audio, video, or images
- File-based communication between microcontrollers and external systems
Technical Specifications
The SparkFun microSD Transflash Breakout is designed to work seamlessly with microcontrollers, offering reliable and efficient data storage capabilities. Below are the key technical details:
General Specifications
| Parameter | Value |
|---|---|
| Operating Voltage | 3.3V |
| Logic Level Compatibility | 3.3V and 5V |
| Card Compatibility | microSD, microSDHC |
| Communication Protocol | SPI (Serial Peripheral Interface) |
| Dimensions | 25.4mm x 25.4mm (1" x 1") |
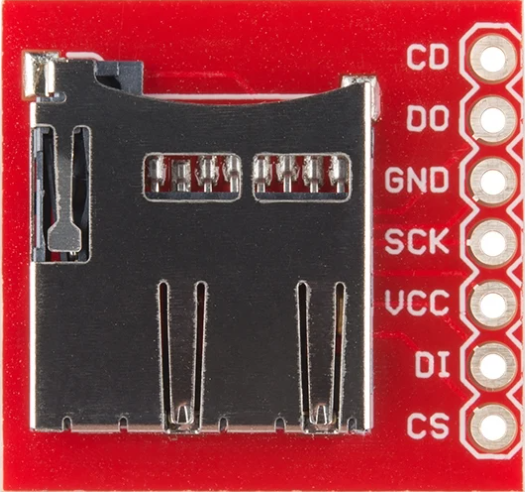
Pin Configuration
The breakout board features a simple pin layout for easy integration with microcontrollers. Below is the pin description:
| Pin Name | Description |
|---|---|
| GND | Ground connection |
| 3.3V | 3.3V power input for the microSD card |
| CS | Chip Select pin for SPI communication |
| DI | Data Input (MOSI - Master Out Slave In) |
| DO | Data Output (MISO - Master In Slave Out) |
| CLK | Clock signal for SPI communication |
| CD | Card Detect pin (optional, indicates if a card is inserted) |
Usage Instructions
How to Use the Component in a Circuit
- Power Supply: Connect the
3.3Vpin to a 3.3V power source and theGNDpin to ground. - SPI Connections: Connect the
CS,DI,DO, andCLKpins to the corresponding SPI pins on your microcontroller.- For Arduino UNO:
CS→ Pin 10 (default SPI chip select)DI→ Pin 11 (MOSI)DO→ Pin 12 (MISO)CLK→ Pin 13 (SCK)
- For Arduino UNO:
- Card Detect (Optional): Use the
CDpin to detect if a microSD card is inserted. This pin can be connected to a digital input pin on the microcontroller. - Insert microSD Card: Ensure the microSD card is formatted as FAT16 or FAT32 before inserting it into the breakout board.
Best Practices
- Use level shifters or voltage dividers if interfacing with a 5V microcontroller to avoid damaging the microSD card.
- Avoid removing the microSD card while the system is powered on to prevent data corruption.
- Use a decoupling capacitor (e.g., 0.1µF) near the power pins to stabilize the power supply.
Example Code for Arduino UNO
Below is an example code snippet to initialize and write data to a microSD card using the SparkFun microSD Transflash Breakout:
#include <SPI.h>
#include <SD.h>

const int chipSelect = 10; // CS pin connected to Arduino pin 10

void setup() {
  Serial.begin(9600);
  while (!Serial) {
    ; // Wait for Serial Monitor to open
  }

  Serial.println("Initializing SD card...");

  // Initialize the SD card
  if (!SD.begin(chipSelect)) {
    Serial.println("Card failed, or not present");
    // Halt the program if the card initialization fails
    while (1);
  }
  Serial.println("Card initialized successfully!");

  // Create or open a file on the SD card
  File dataFile = SD.open("example.txt", FILE_WRITE);

  // Check if the file opened successfully
  if (dataFile) {
    dataFile.println("Hello, SparkFun microSD Breakout!");
    dataFile.close(); // Close the file to save changes
    Serial.println("Data written to example.txt");
  } else {
    Serial.println("Error opening file for writing");
  }
}

void loop() {
  // Nothing to do here
}
Important Notes
- Ensure the
SDlibrary is installed in your Arduino IDE. - Format the microSD card as FAT16 or FAT32 before use.
- Use a reliable power source to avoid voltage fluctuations.
Troubleshooting and FAQs
Common Issues and Solutions
SD Card Initialization Fails
- Cause: Incorrect wiring or incompatible microSD card.
- Solution: Double-check the connections and ensure the card is formatted as FAT16 or FAT32.
Data Corruption
- Cause: Removing the microSD card while the system is powered on.
- Solution: Always power off the system before removing the card.
File Not Opening
- Cause: Incorrect file path or insufficient permissions.
- Solution: Verify the file name and ensure the file is opened in the correct mode (e.g.,
FILE_WRITEfor writing).
Card Detect Pin Not Working
- Cause:
CDpin not connected or not configured in the code. - Solution: Connect the
CDpin to a digital input pin and read its state in the code.
- Cause:
FAQs
Q: Can I use this breakout board with a 5V microcontroller?
A: Yes, but you must use level shifters or voltage dividers to step down the 5V logic signals to 3.3V.
Q: What is the maximum capacity of the microSD card supported?
A: The breakout board supports microSD and microSDHC cards, typically up to 32GB.
Q: Do I need external pull-up resistors for SPI communication?
A: No, the breakout board includes the necessary pull-up resistors for SPI lines.
Q: Can I use this breakout board for high-speed data logging?
A: Yes, but the speed depends on the microcontroller's SPI clock rate and the microSD card's class.
By following this documentation, you can effectively integrate the SparkFun microSD Transflash Breakout into your projects for reliable data storage and retrieval.