How to Use UV-C Tube: Examples, Pinouts, and Specs
Introduction
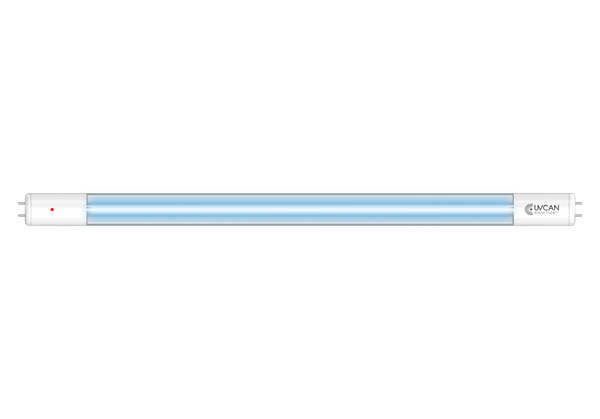
A UV-C tube is a type of ultraviolet light source that emits UV-C radiation, which is effective in disinfection and sterilization by destroying the DNA and RNA of microorganisms. UV-C tubes are widely used in various applications, including:
- Water purification systems
- Air sterilization units
- Surface disinfection in healthcare settings
- Laboratory equipment sterilization
- HVAC systems for mold and bacteria control
Explore Projects Built with UV-C Tube

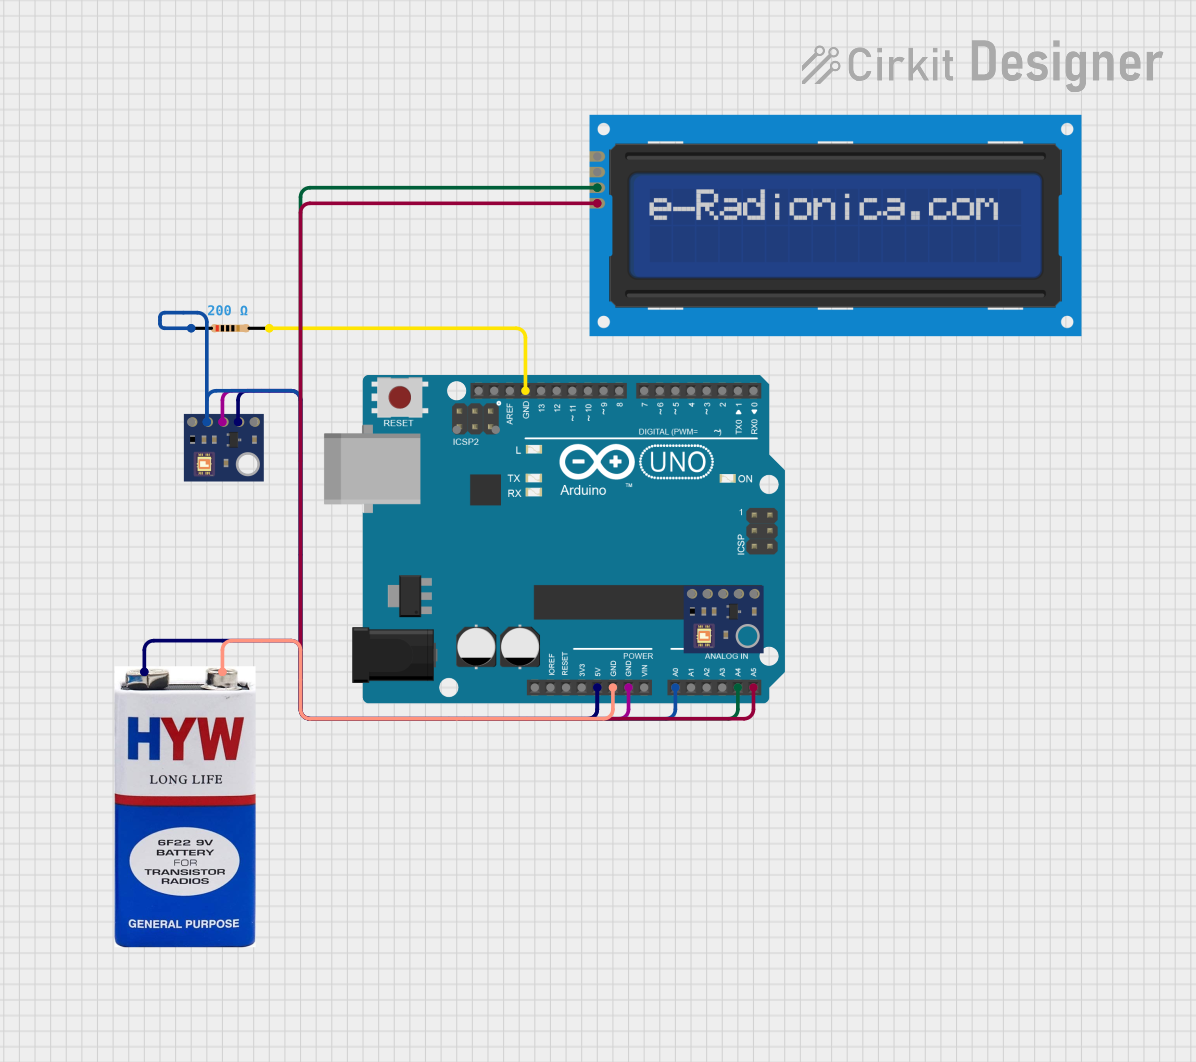
Explore Projects Built with UV-C Tube
Technical Specifications
Key Technical Details
| Parameter | Value |
|---|---|
| Wavelength | 254 nm (UV-C) |
| Voltage | 110V/220V AC |
| Power Rating | 15W, 30W, 55W (varies by model) |
| Current | 0.15A (for 15W model) |
| Tube Length | 450mm (for 15W model) |
| Base Type | G13 |
| Lifespan | 9000 hours |
| Operating Temperature | -10°C to 50°C |
Pin Configuration and Descriptions
| Pin Number | Description |
|---|---|
| 1 | AC Live (L) |
| 2 | AC Neutral (N) |
| 3 | Ground (G) |
Usage Instructions
How to Use the Component in a Circuit
Safety First: Ensure that the power supply is turned off before handling the UV-C tube. UV-C radiation is harmful to skin and eyes, so avoid direct exposure.
Mounting the Tube: Secure the UV-C tube in a suitable fixture that supports the G13 base type. Ensure that the fixture is designed to handle the power rating of the tube.
Wiring: Connect the AC Live (L) wire to pin 1, the AC Neutral (N) wire to pin 2, and the Ground (G) wire to pin 3. Use appropriate connectors and ensure all connections are secure.
Power On: Once all connections are made, turn on the power supply. The UV-C tube should emit a bright ultraviolet light.
Important Considerations and Best Practices
- Avoid Direct Exposure: UV-C radiation can cause severe burns and eye damage. Always use protective gear and avoid direct exposure to the light.
- Ventilation: Ensure proper ventilation in the area where the UV-C tube is used to avoid ozone buildup.
- Regular Maintenance: Clean the tube regularly to maintain its efficiency. Replace the tube after its rated lifespan of 9000 hours.
- Use with Timers: Consider using a timer to control the operation of the UV-C tube, ensuring it runs only for the necessary duration.
Troubleshooting and FAQs
Common Issues and Solutions
Tube Does Not Light Up
- Check Power Supply: Ensure that the power supply is turned on and providing the correct voltage.
- Inspect Connections: Verify that all wiring connections are secure and correctly made.
- Tube Lifespan: If the tube has reached its rated lifespan, replace it with a new one.
Flickering Light
- Loose Connections: Check for any loose connections and secure them.
- Faulty Fixture: Ensure that the fixture is in good condition and compatible with the UV-C tube.
Reduced Disinfection Efficiency
- Clean the Tube: Dust and dirt on the tube can reduce its effectiveness. Clean the tube regularly.
- Replace Old Tube: If the tube is nearing the end of its lifespan, replace it to maintain optimal performance.
FAQs
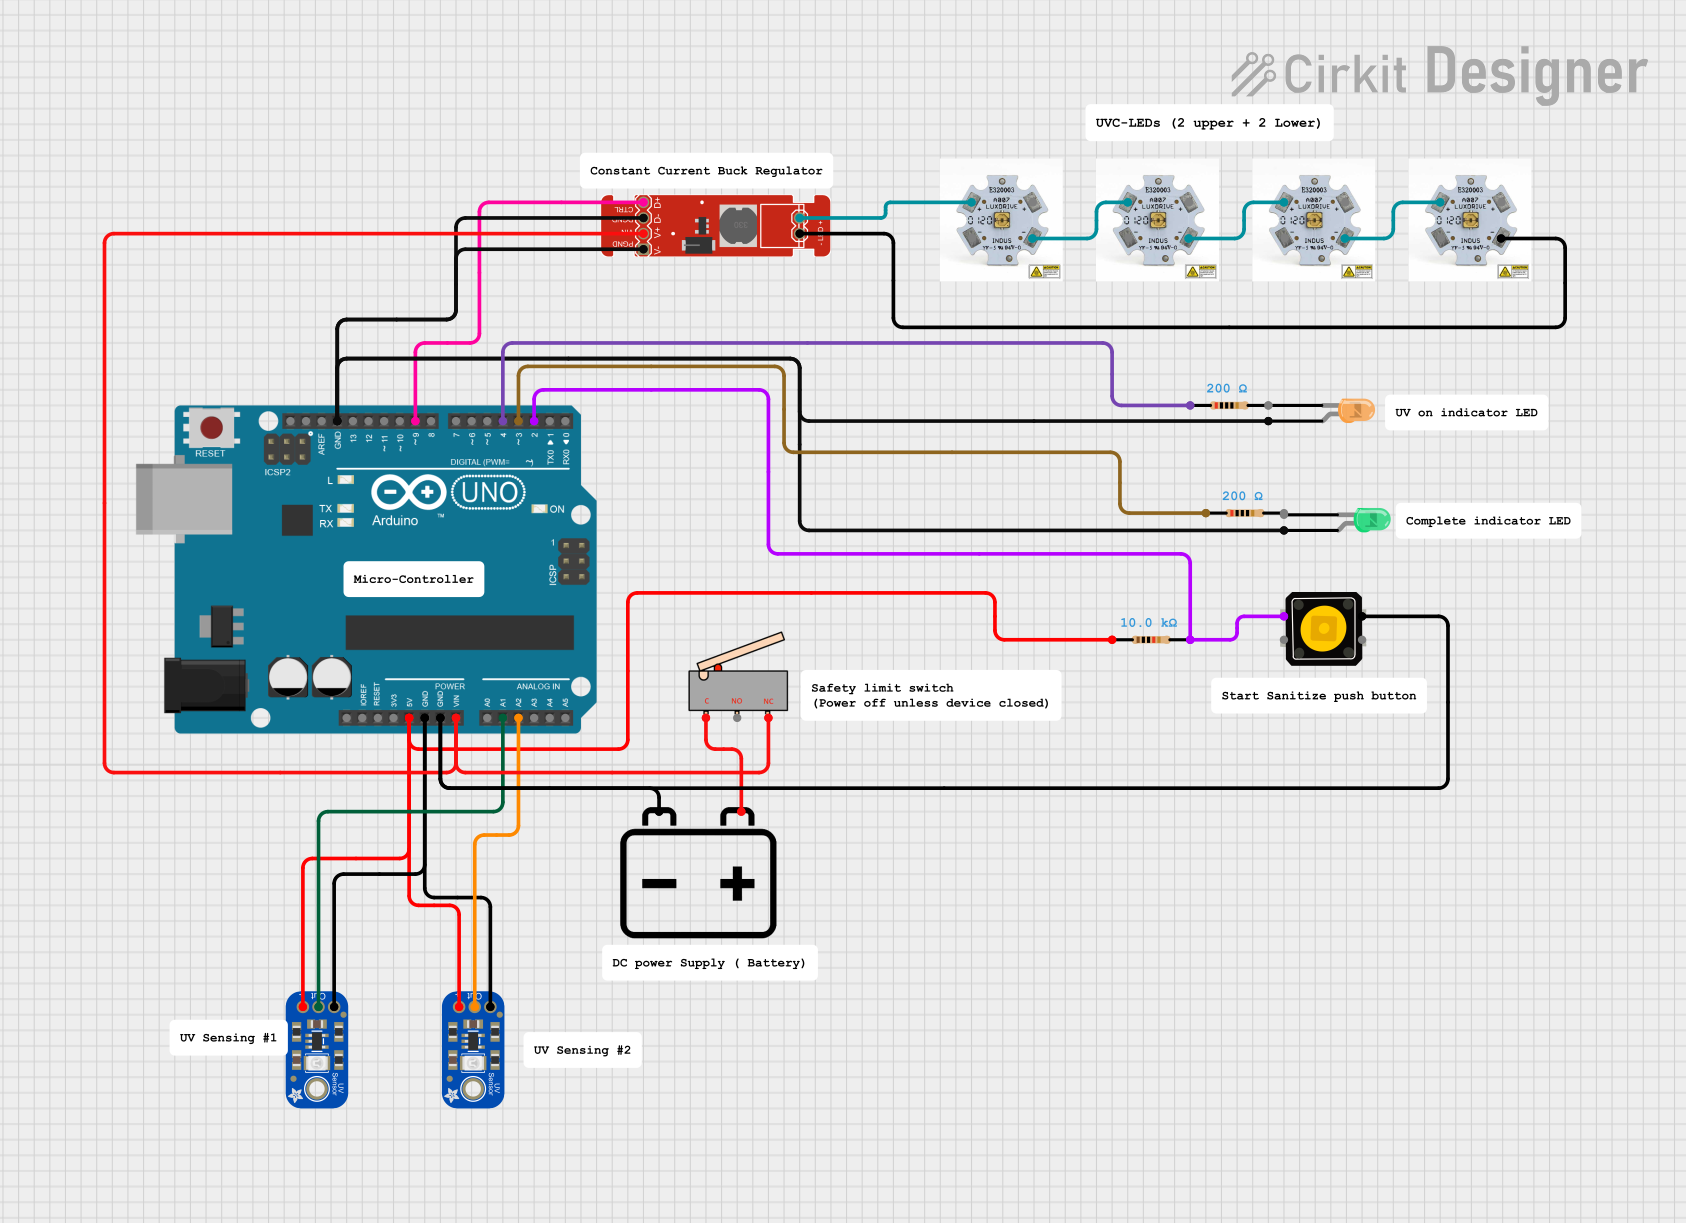
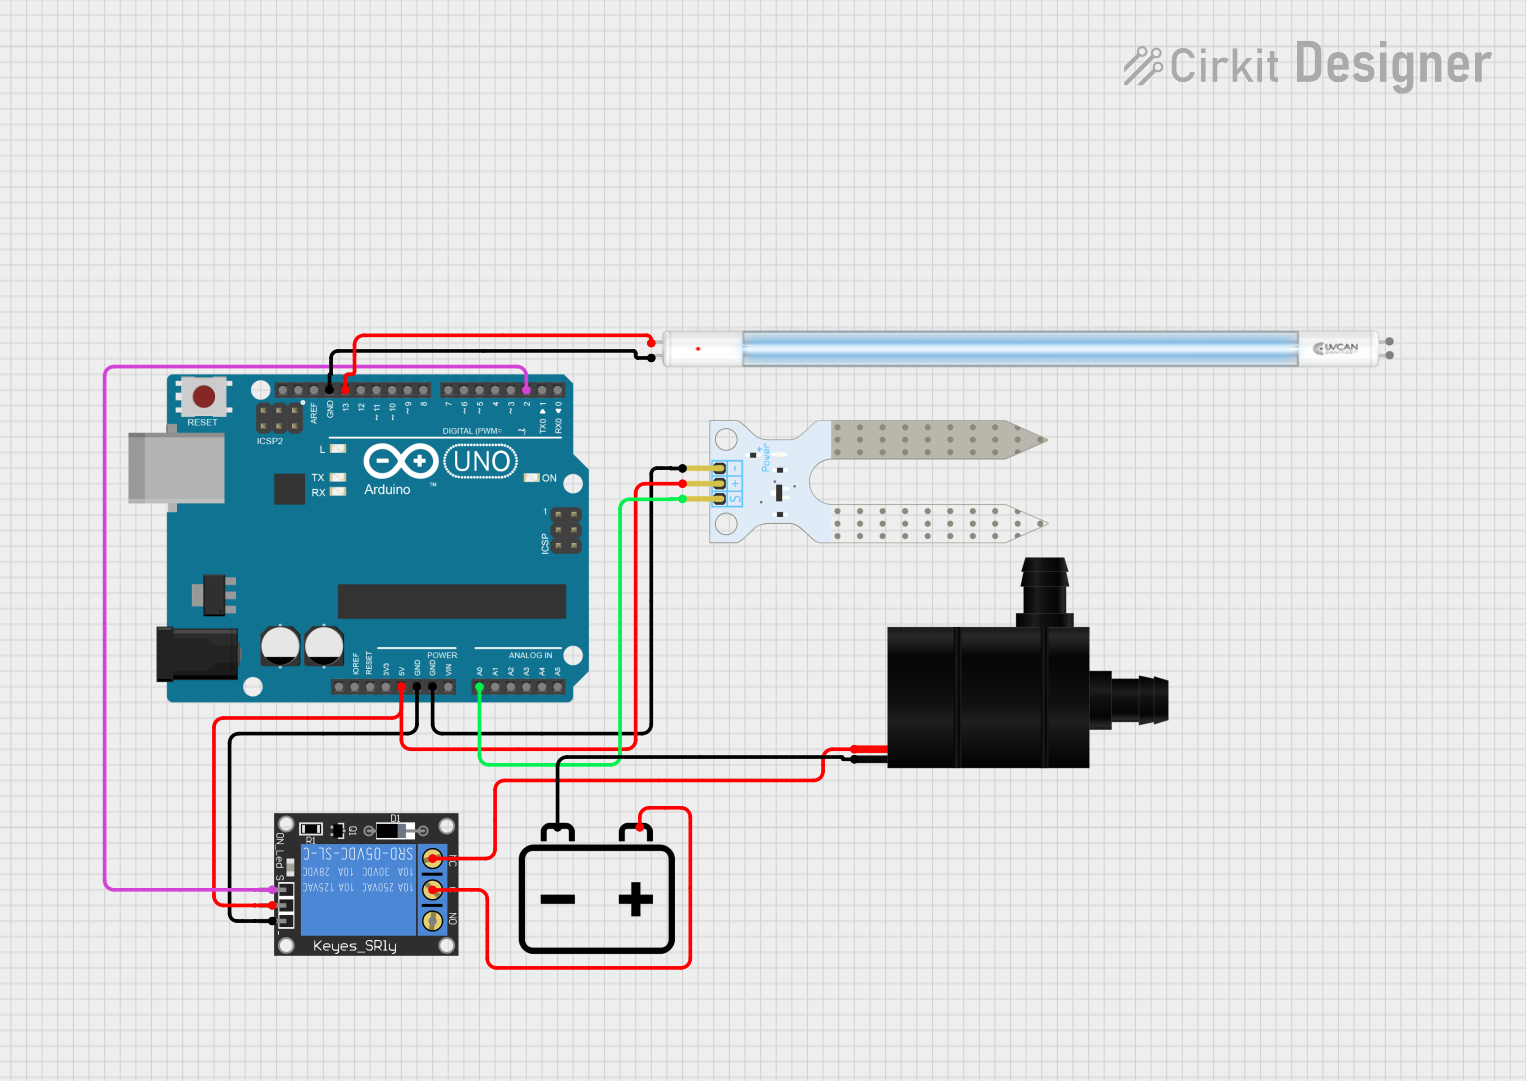
Q: Can I use a UV-C tube with an Arduino UNO? A: Directly connecting a UV-C tube to an Arduino UNO is not recommended due to the high voltage requirements. However, you can use a relay module to control the power supply to the UV-C tube via the Arduino.
Q: How do I know when to replace the UV-C tube? A: Replace the UV-C tube after its rated lifespan of 9000 hours or if you notice a significant drop in its disinfection efficiency.
Q: Is it safe to be in the room while the UV-C tube is on? A: No, it is not safe. UV-C radiation is harmful to skin and eyes. Ensure that the area is unoccupied and properly sealed off during operation.
Example Code for Arduino UNO with Relay Module
/*
 * This example code demonstrates how to control a UV-C tube using an Arduino UNO
 * and a relay module. The relay module is used to switch the high voltage power
 * supply to the UV-C tube on and off.
 */

const int relayPin = 7; // Pin connected to the relay module

void setup() {
  pinMode(relayPin, OUTPUT); // Set the relay pin as an output
  digitalWrite(relayPin, LOW); // Ensure the relay is off at startup
}

void loop() {
  // Turn on the UV-C tube
  digitalWrite(relayPin, HIGH);
  delay(60000); // Keep the UV-C tube on for 1 minute (60000 milliseconds)

  // Turn off the UV-C tube
  digitalWrite(relayPin, LOW);
  delay(60000); // Keep the UV-C tube off for 1 minute (60000 milliseconds)
}
This code will turn the UV-C tube on and off in 1-minute intervals. Adjust the delay values as needed for your specific application. Always ensure safety precautions are in place when operating the UV-C tube.