How to Use TM1637: Examples, Pinouts, and Specs
Introduction
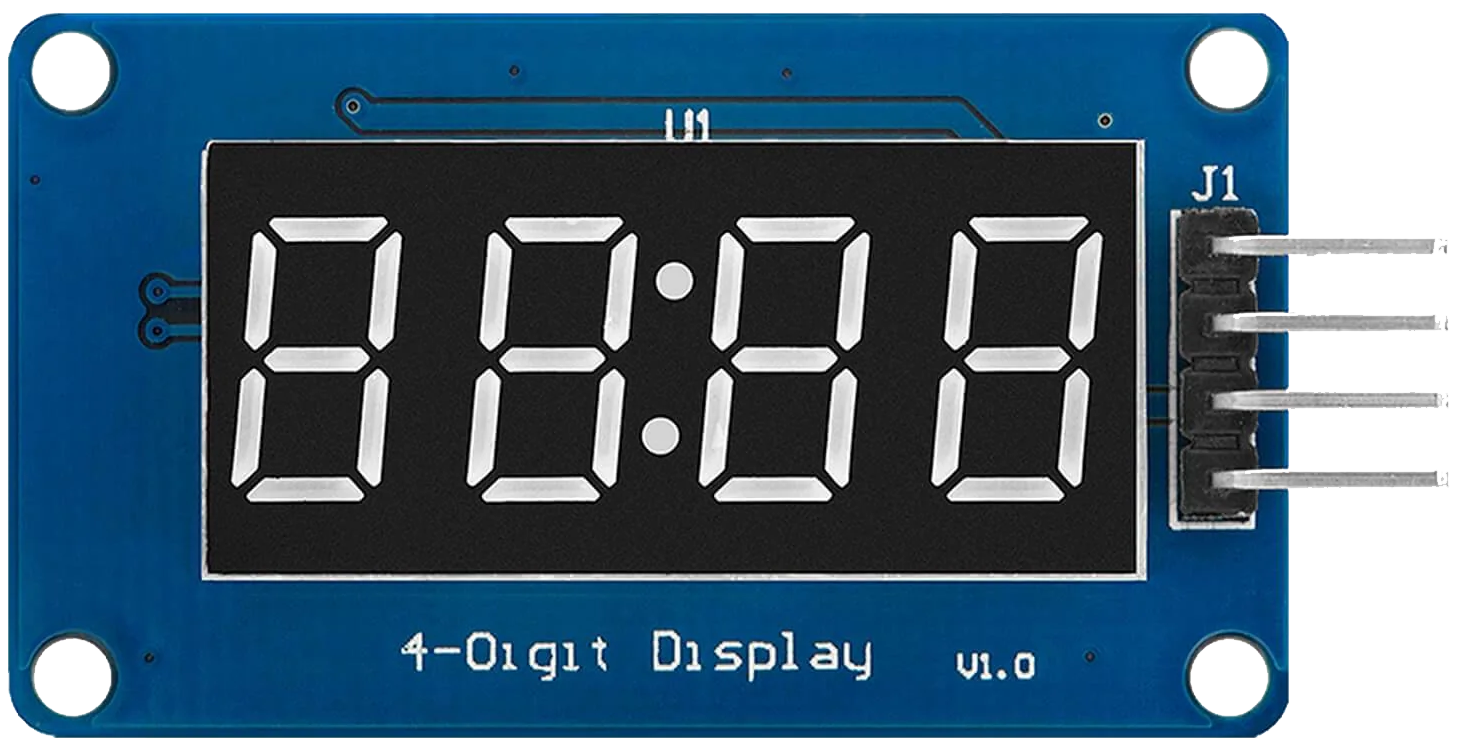
The TM1637 is a dedicated LED driver control circuit that is designed to handle up to four 7-segment numeric displays with additional decimal points. This component is widely used in applications requiring numeric output, such as digital clocks, thermometers, counters, and other electronic devices that require a simple and clear numeric display.
Explore Projects Built with TM1637

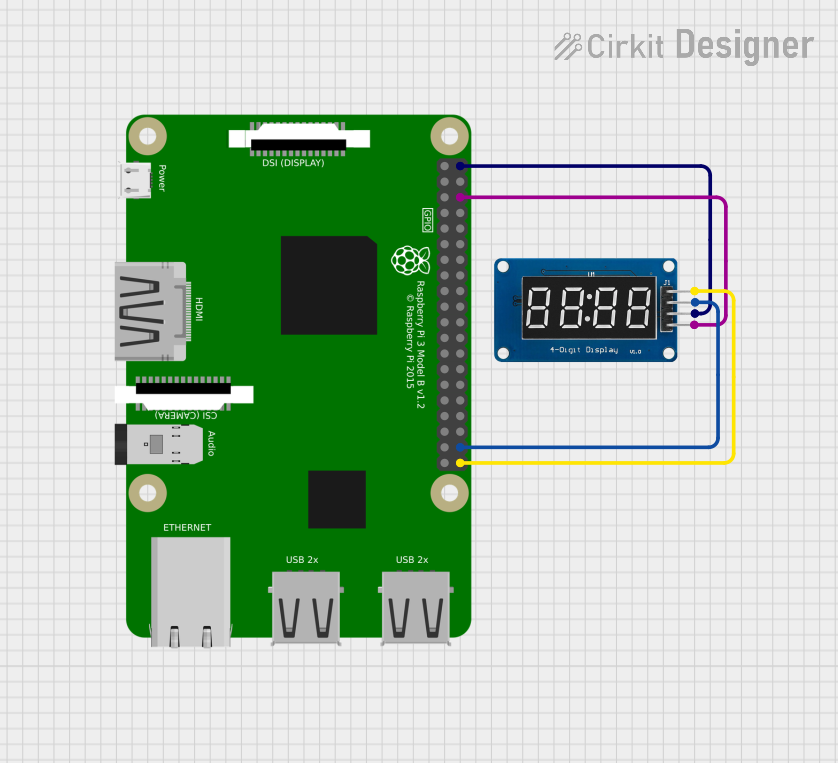
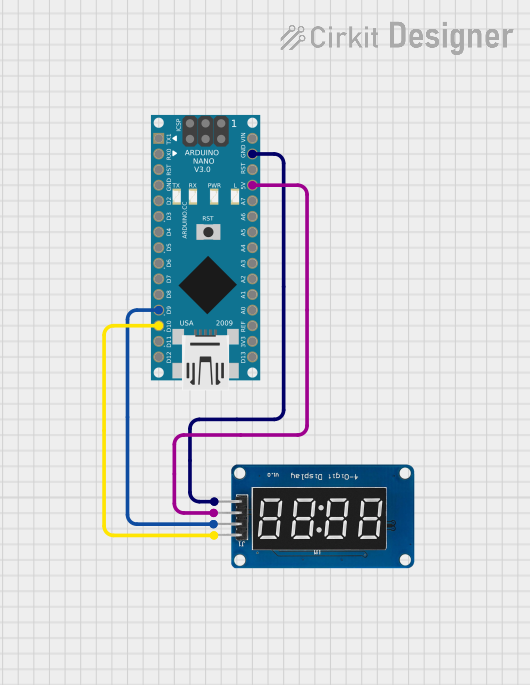
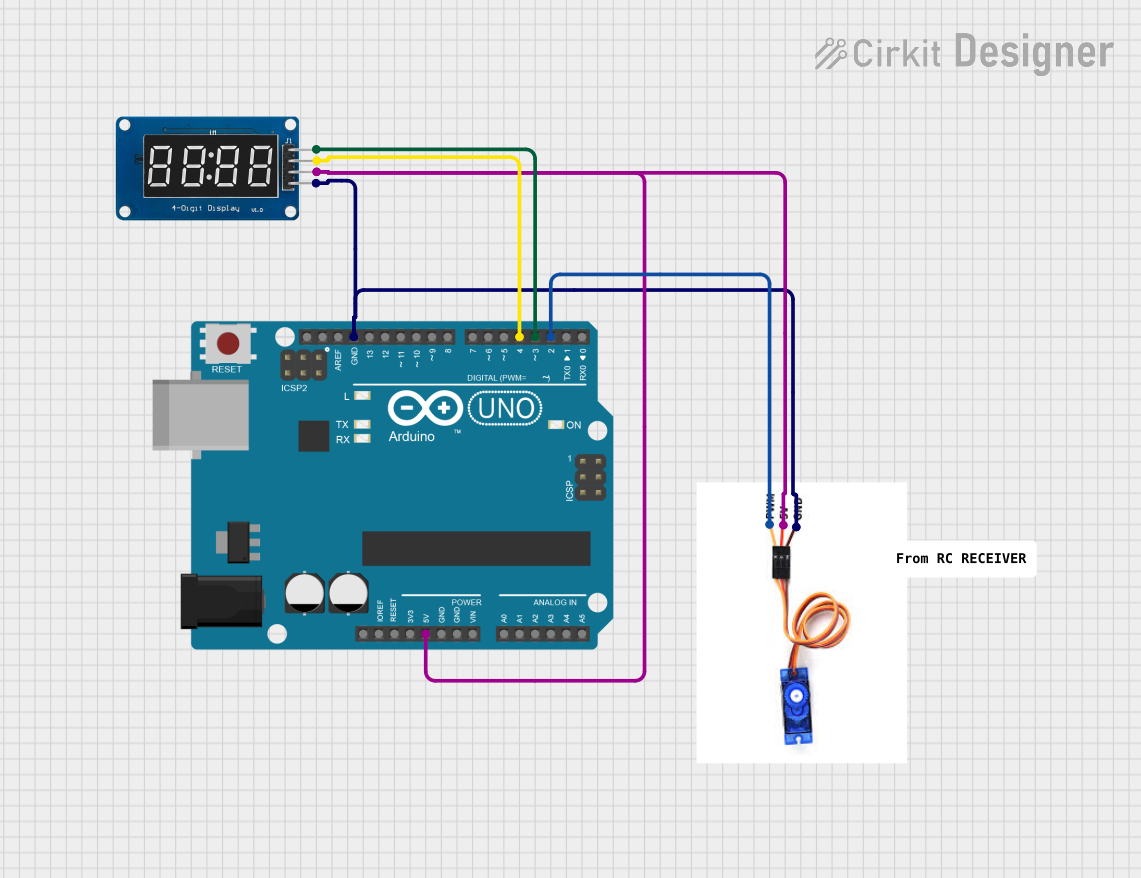
Explore Projects Built with TM1637
Common Applications and Use Cases
- Digital clocks and watches
- Electronic counters
- Timers
- Thermometers
- Calculators
- DIY projects involving numeric displays
Technical Specifications
Key Technical Details
- Operating Voltage: 3.3V to 5.5V
- Max Output Current: 40mA (per segment)
- Display Mode: 7-segment & 8-grid
- Interface Type: I2C-like two-wire serial interface
- Clock Frequency: 500kHz (max)
- Dimensions: 42mm x 24mm x 12mm (approximate)
Pin Configuration and Descriptions
| Pin Number | Pin Name | Description |
|---|---|---|
| 1 | VCC | Power supply (3.3V to 5.5V) |
| 2 | GND | Ground |
| 3 | DIO | Data input/output pin for two-wire interface |
| 4 | CLK | Clock pin for two-wire interface |
Usage Instructions
How to Use the TM1637 in a Circuit
- Power Connections: Connect the VCC pin to a 3.3V or 5V power supply and the GND pin to the ground of your circuit.
- Data and Clock Connections: Connect the DIO and CLK pins to the microcontroller's digital I/O pins.
- Initialization: Initialize the TM1637 with the appropriate library and set the brightness level.
- Display Data: Send the data to be displayed using the library functions.
Important Considerations and Best Practices
- Ensure that the power supply voltage matches the operating voltage of the TM1637.
- Use current-limiting resistors if necessary to prevent damage to the LED segments.
- Avoid exposing the display to high temperatures or moisture.
- When using with a microcontroller like Arduino, ensure that the library used is compatible with the TM1637.
Example Code for Arduino UNO
#include <TM1637Display.h>

// Define the connections pins
#define CLK 2
#define DIO 3

// Create a TM1637Display object
TM1637Display display(CLK, DIO);

void setup() {
  display.setBrightness(0x0f); // Set the display to maximum brightness
}

void loop() {
  display.showNumberDec(1234); // Display a number (1234 in this case)
  delay(2000); // Wait for 2 seconds
  display.clear(); // Clear the display
  delay(1000); // Wait for 1 second
}
Troubleshooting and FAQs
Common Issues Users Might Face
- Display Not Lighting Up: Check the power supply connections and ensure that the voltage is within the specified range.
- Garbled or Incorrect Display: Verify that the data and clock connections are secure and that the correct pins are being used.
- Dim Display: Adjust the brightness level using the library functions.
Solutions and Tips for Troubleshooting
- Double-check all connections, especially the VCC and GND, to ensure they are not reversed.
- Use the example code as a starting point and modify it according to your needs.
- If using long wires to connect the display, consider using a pull-up resistor on the DIO and CLK lines to improve signal integrity.
FAQs
Q: Can the TM1637 drive more than four 7-segment displays? A: No, the TM1637 is designed to drive up to four 7-segment displays with decimal points or a combination of up to 8 digits.
Q: Is the TM1637 compatible with all microcontrollers? A: The TM1637 can be interfaced with any microcontroller that supports a two-wire serial interface, but the library used must be compatible with the specific microcontroller.
Q: How do I change the display brightness?
A: The display brightness can be adjusted using the setBrightness() function provided by the TM1637 library.
Q: Can I display letters as well as numbers? A: The TM1637 is primarily designed for numeric displays, but it is possible to display a limited set of characters that can be represented with 7-segment displays.