How to Use Modulo Dimmer: Examples, Pinouts, and Specs
Introduction
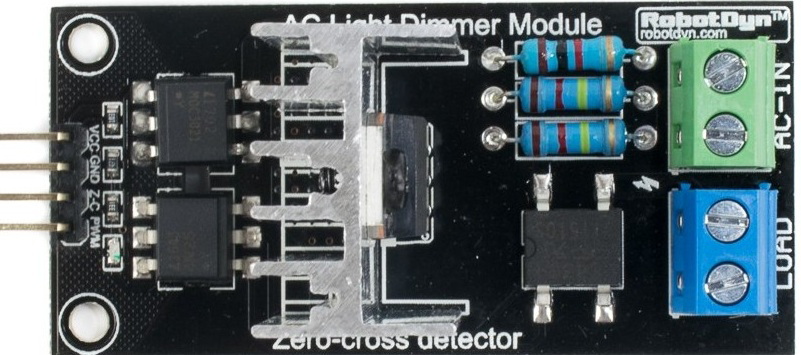
The Modulo Dimmer by Persoal (Part ID: Modulo Dimmer) is an electronic device designed to control the brightness of lighting fixtures. It achieves this by varying the voltage or current supplied to the connected lights, enabling energy efficiency and customizable lighting environments. This component is widely used in residential, commercial, and industrial applications where adjustable lighting is required.
Explore Projects Built with Modulo Dimmer
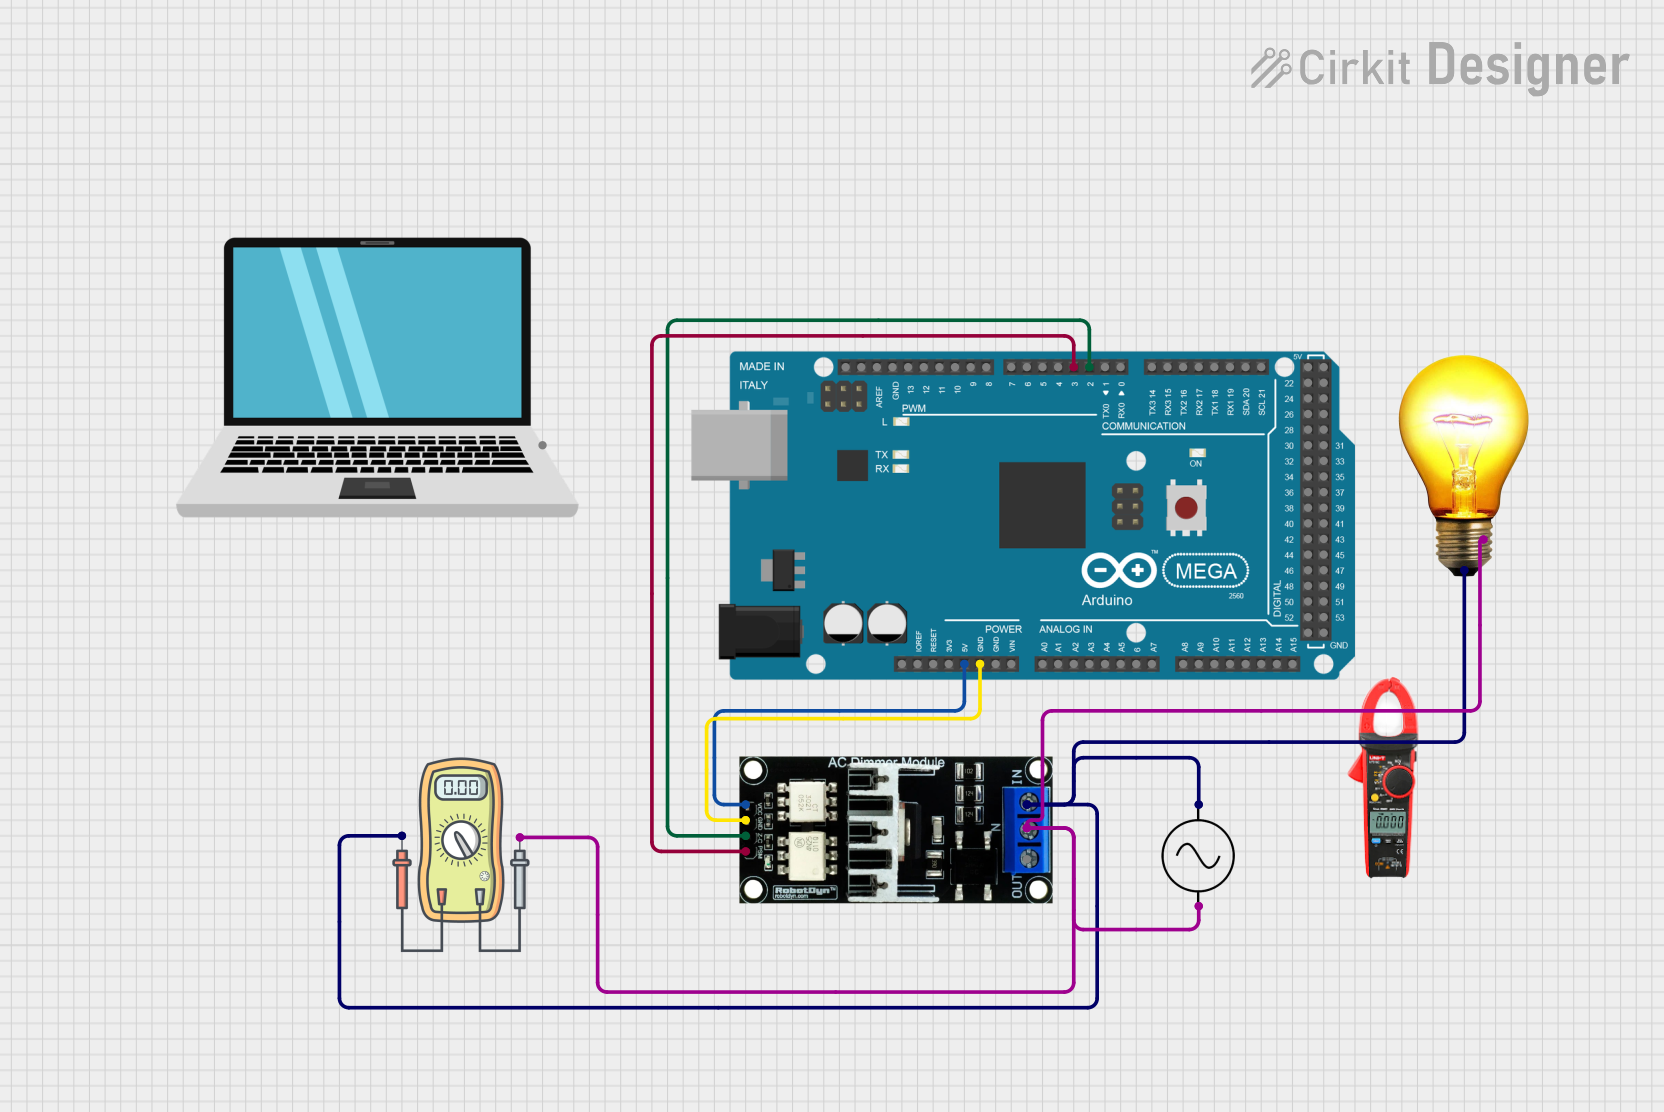
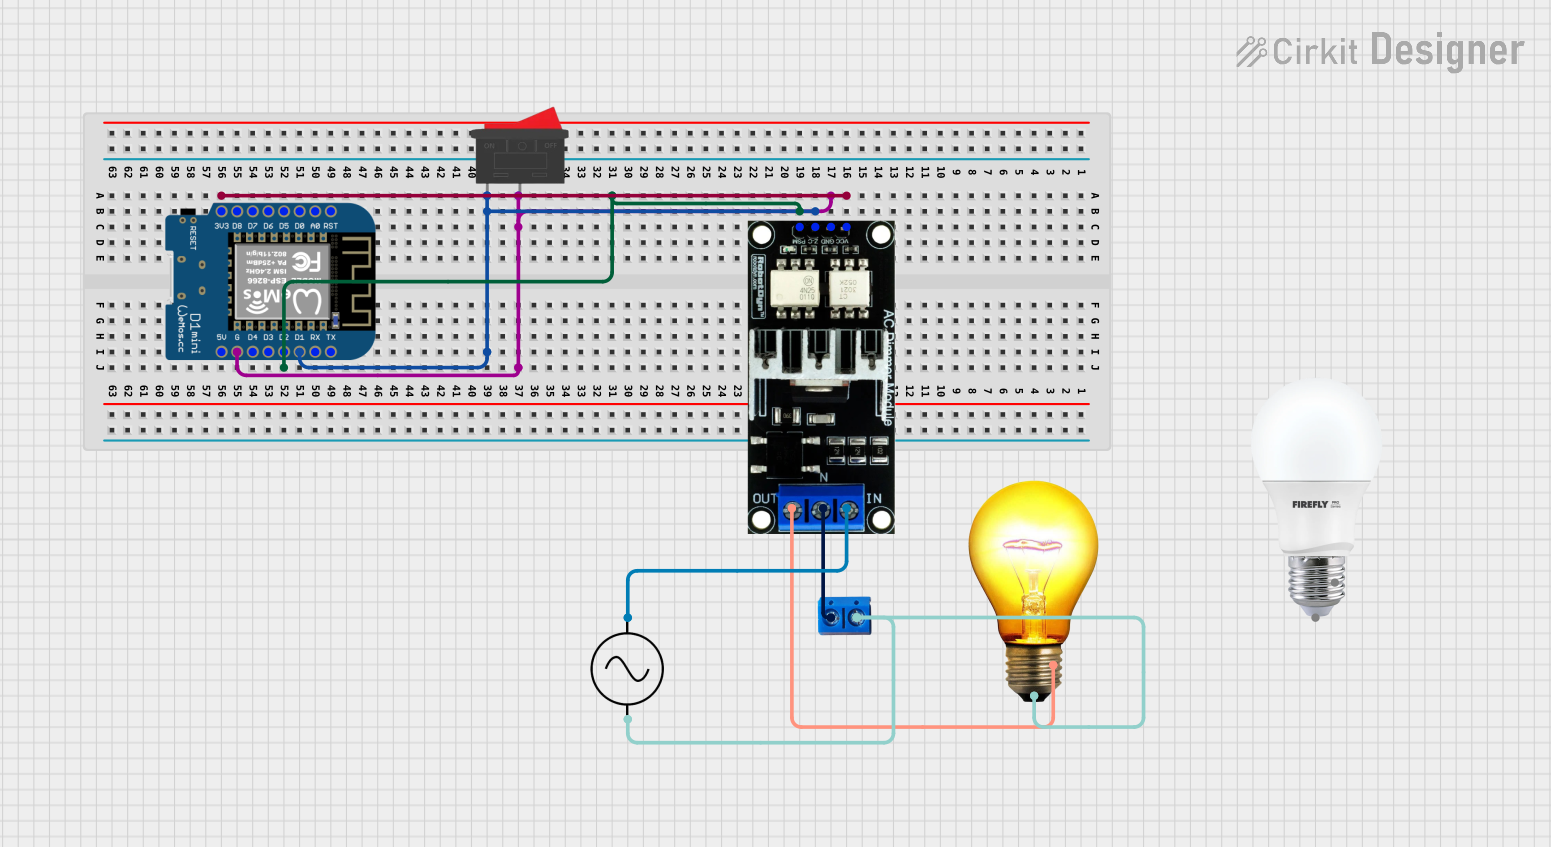

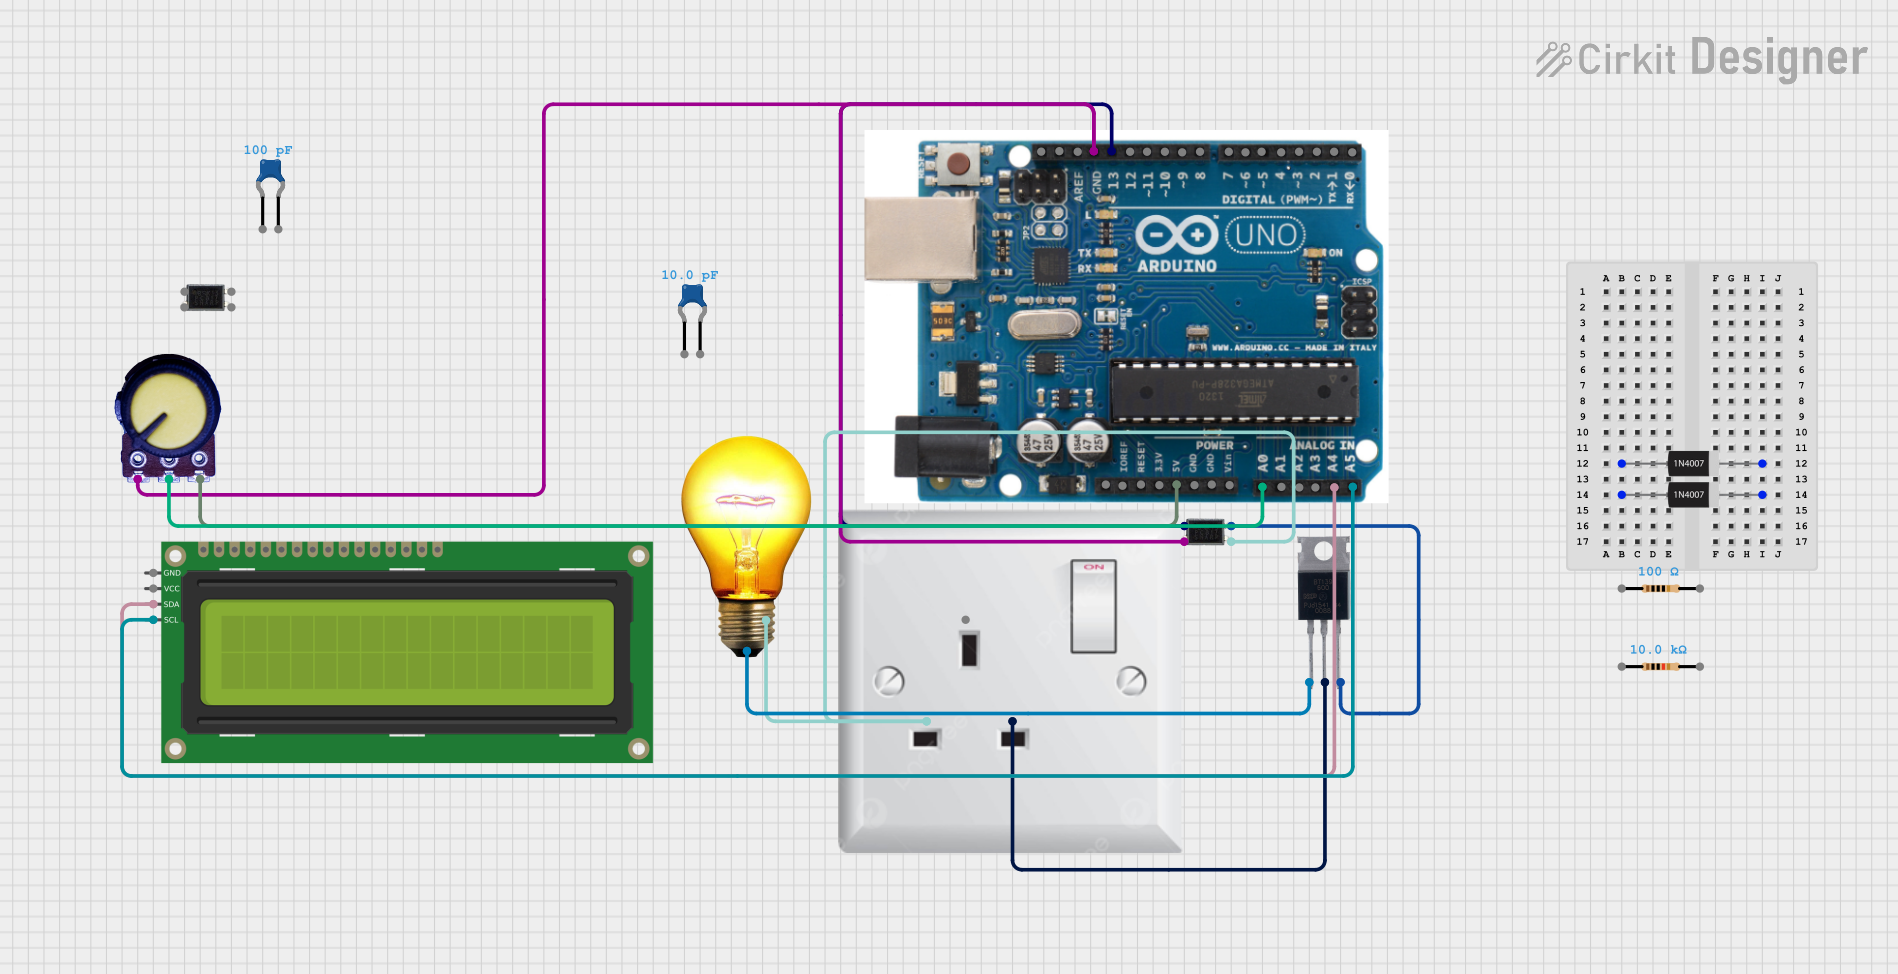
Explore Projects Built with Modulo Dimmer
Common Applications and Use Cases
- Residential Lighting: Adjusting the brightness of LED or incandescent lights for ambiance.
- Commercial Spaces: Creating dynamic lighting for retail stores, restaurants, or offices.
- Theatrical Lighting: Controlling stage lights for performances.
- Energy Savings: Reducing power consumption by dimming lights when full brightness is unnecessary.
Technical Specifications
The following table outlines the key technical details of the Modulo Dimmer:
| Parameter | Value |
|---|---|
| Input Voltage | 110V - 240V AC |
| Output Voltage | 0V - 230V AC (adjustable) |
| Maximum Load Current | 2A |
| Power Rating | 400W |
| Control Signal | PWM (Pulse Width Modulation) |
| Operating Temperature | -10°C to 50°C |
| Dimensions | 50mm x 25mm x 20mm |
| Weight | 30g |
Pin Configuration and Descriptions
The Modulo Dimmer has the following pin configuration:
| Pin Name | Description |
|---|---|
| AC IN | Connects to the AC power source (110V - 240V AC). |
| AC OUT | Outputs the dimmed AC voltage to the connected load (e.g., light fixture). |
| GND | Ground connection for the circuit. |
| PWM IN | Accepts a PWM signal (3.3V or 5V logic) to control the dimming level. |
Usage Instructions
How to Use the Modulo Dimmer in a Circuit
Connect the Power Source:
- Attach the AC IN pin to the live and neutral wires of the AC power source.
- Ensure proper insulation and safety precautions when working with high voltage.
Connect the Load:
- Connect the AC OUT pin to the live and neutral wires of the lighting fixture.
- Verify that the load does not exceed the maximum power rating of 400W.
Control the Dimming:
- Use a microcontroller (e.g., Arduino UNO) to generate a PWM signal.
- Connect the PWM signal to the PWM IN pin of the Modulo Dimmer.
Ground Connection:
- Ensure the GND pin is connected to the ground of the control circuit.
Important Considerations and Best Practices
- Safety First: Always disconnect the power supply before wiring or modifying the circuit.
- Load Compatibility: Ensure the connected load (e.g., LED or incandescent light) is dimmable.
- PWM Signal: Use a PWM frequency between 500Hz and 1kHz for optimal dimming performance.
- Heat Dissipation: Avoid overheating by ensuring proper ventilation around the dimmer module.
Example: Using Modulo Dimmer with Arduino UNO
Below is an example code to control the Modulo Dimmer using an Arduino UNO:
// Example: Controlling Modulo Dimmer with Arduino UNO
// This code generates a PWM signal to adjust the brightness of a light fixture.

const int pwmPin = 9; // PWM output pin connected to Modulo Dimmer's PWM IN

void setup() {
  pinMode(pwmPin, OUTPUT); // Set the PWM pin as an output
}

void loop() {
  // Gradually increase brightness
  for (int brightness = 0; brightness <= 255; brightness++) {
    analogWrite(pwmPin, brightness); // Send PWM signal to dimmer
    delay(10); // Small delay for smooth transition
  }

  // Gradually decrease brightness
  for (int brightness = 255; brightness >= 0; brightness--) {
    analogWrite(pwmPin, brightness); // Send PWM signal to dimmer
    delay(10); // Small delay for smooth transition
  }
}
Troubleshooting and FAQs
Common Issues and Solutions
Lights Flicker During Dimming:
- Cause: Incompatible load or incorrect PWM frequency.
- Solution: Ensure the connected light is dimmable and adjust the PWM frequency to 500Hz-1kHz.
Dimmer Module Overheats:
- Cause: Exceeding the maximum power rating or poor ventilation.
- Solution: Reduce the load or improve airflow around the module.
No Response to PWM Signal:
- Cause: Incorrect wiring or incompatible PWM voltage level.
- Solution: Verify the connections and ensure the PWM signal is 3.3V or 5V logic.
Lights Do Not Turn On:
- Cause: Faulty wiring or insufficient input voltage.
- Solution: Check all connections and ensure the input voltage is within the specified range.
FAQs
Q: Can the Modulo Dimmer be used with non-dimmable LEDs?
A: No, the Modulo Dimmer is designed for use with dimmable lighting fixtures only.Q: What happens if I exceed the maximum load current?
A: Exceeding the 2A limit may damage the module or cause overheating. Always stay within the specified ratings.Q: Can I use the Modulo Dimmer with a DC power source?
A: No, the Modulo Dimmer is designed for AC power sources only.Q: What is the recommended PWM duty cycle range for dimming?
A: The duty cycle can range from 0% (off) to 100% (full brightness), depending on your desired brightness level.
By following this documentation, users can safely and effectively integrate the Modulo Dimmer into their projects for precise lighting control.