How to Use LCD TFT screen ILI9488 HD : Examples, Pinouts, and Specs
Introduction
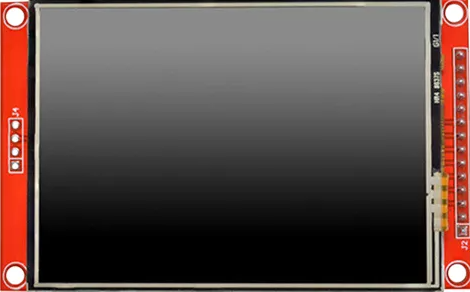
The ILI9488 HD is a high-definition TFT LCD screen with In-Plane Switching (IPS) technology, offering vivid color reproduction and wide viewing angles. This display is commonly used in IoT projects, embedded systems, and DIY electronics, providing a rich user interface for applications such as smart home devices, portable instruments, and gaming consoles.
Explore Projects Built with LCD TFT screen ILI9488 HD

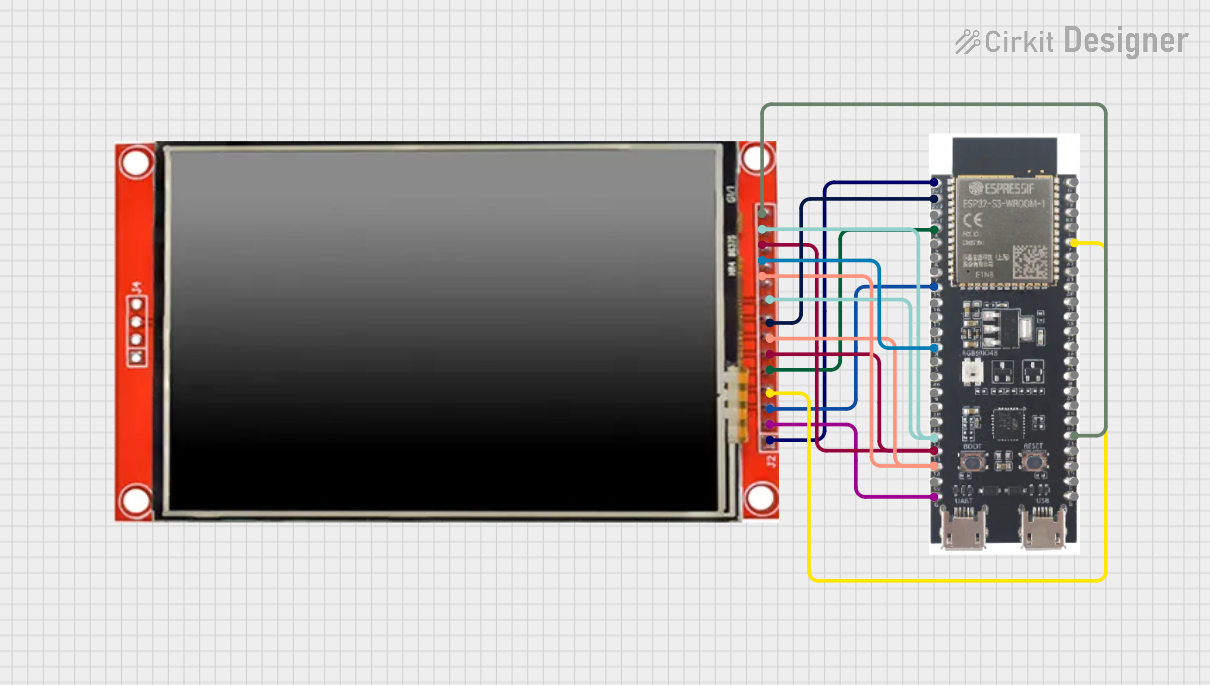
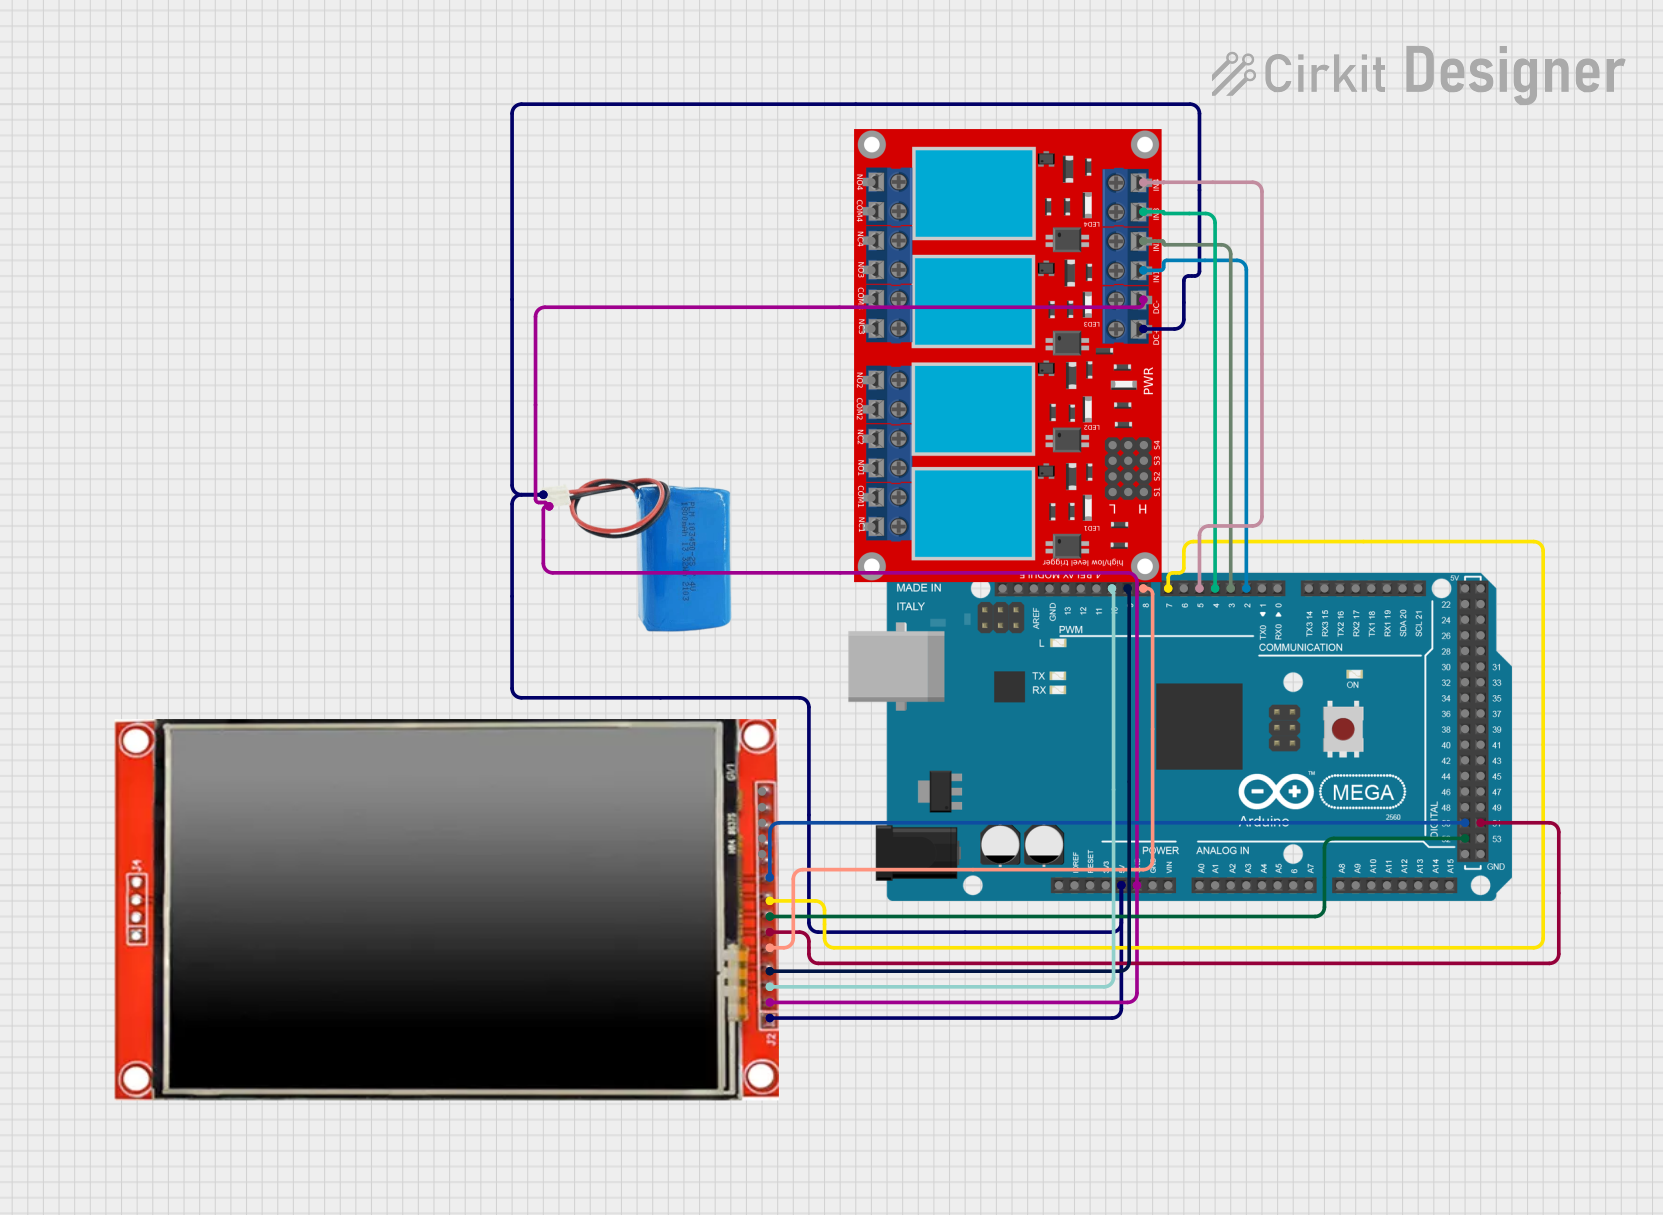
Explore Projects Built with LCD TFT screen ILI9488 HD
Technical Specifications
General Features
- Display Type: TFT LCD with IPS technology
- Screen Size: 3.5 inches (diagonal)
- Resolution: 320 x 480 pixels
- Color Depth: 16 million colors (24-bit)
- Interface: 8/16-bit parallel, 3/4-wire SPI
- Touch Screen: Optional resistive or capacitive touch panel
Electrical Characteristics
- Operating Voltage: 2.5V to 3.3V
- Logic Level Voltage: 3.3V (5V tolerant with level shifter)
- Current Consumption: Typically 20mA (backlight off), up to 150mA (backlight on)
Pin Configuration and Descriptions
| Pin Number | Pin Name | Description |
|---|---|---|
| 1 | GND | Ground |
| 2 | VCC | Power supply (2.5V-3.3V) |
| 3 | CS | Chip Select for SPI |
| 4 | RESET | Reset signal (active low) |
| 5 | D/C | Data/Command control pin |
| 6 | MOSI | SPI data input |
| 7 | SCK | SPI clock input |
| 8 | LED | Backlight control (anode) |
| 9-16 | DB8-DB15 | Parallel data bus (high byte for 16-bit mode) |
| 17-24 | DB0-DB7 | Parallel data bus (low byte for 8/16-bit mode) |
| 25 | RD | Read signal (active low) |
| 26 | WR | Write signal (active low) |
| 27 | T_IRQ | Touch panel interrupt (optional) |
| 28 | T_DO | SPI touch data output (optional) |
| 29 | T_DIN | SPI touch data input (optional) |
| 30 | T_CS | Touch panel chip select (optional) |
| 31 | T_CLK | SPI touch clock (optional) |
Usage Instructions
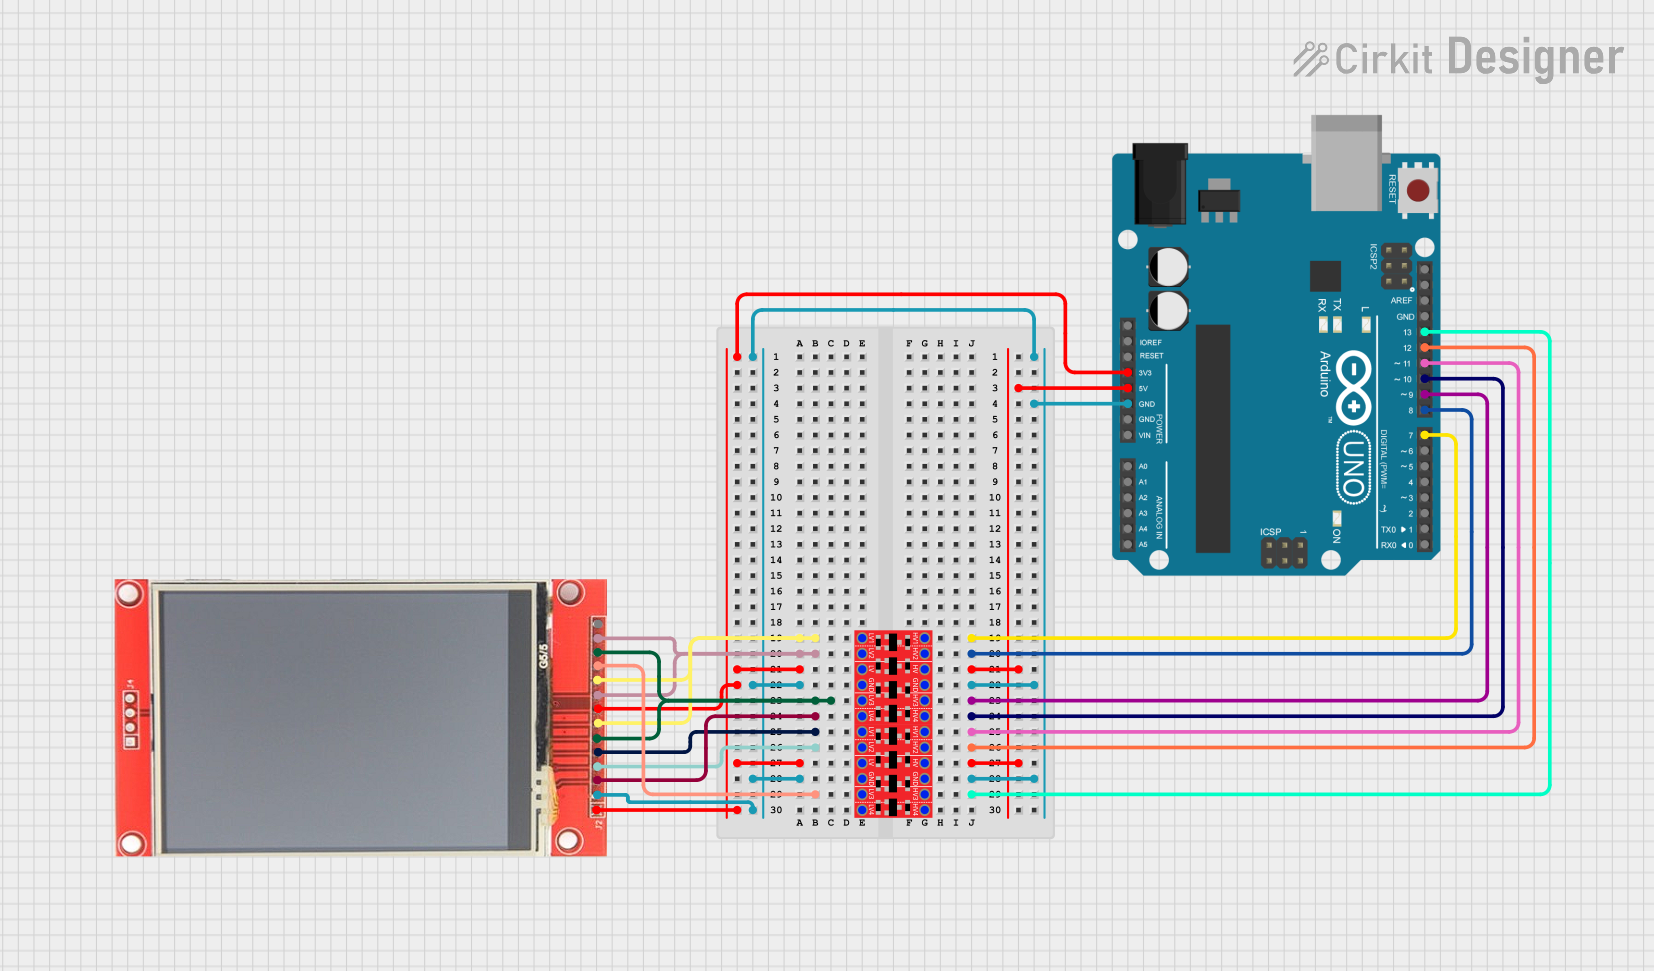
Connecting to an Arduino UNO
Power Connections:
- Connect the VCC pin to the 3.3V output on the Arduino.
- Connect the GND pin to a ground pin on the Arduino.
SPI Interface:
- Connect SCK to the SCK pin (Digital 13 on UNO).
- Connect MOSI to the MOSI pin (Digital 11 on UNO).
- Connect CS to a free digital pin (e.g., Digital 10).
- Connect D/C to another free digital pin (e.g., Digital 9).
- Connect RESET to another free digital pin (e.g., Digital 8).
Backlight Control:
- Connect LED to a PWM-capable pin if brightness control is needed, or directly to 3.3V for full brightness.
Touch Panel (Optional):
- If the touch panel is used, connect T_CS, T_IRQ, T_CLK, T_DIN, and T_DO to the corresponding pins on the Arduino.
Arduino Code Example
#include <SPI.h>
#include <Adafruit_GFX.h>
#include <Adafruit_ILI9488.h>

// Pin configuration
#define TFT_CS   10
#define TFT_DC   9
#define TFT_RST  8

// Create an ILI9488 display object
Adafruit_ILI9488 tft = Adafruit_ILI9488(TFT_CS, TFT_DC, TFT_RST);

void setup() {
  // Initialize the display
  tft.begin();
  // Set the rotation before starting
  tft.setRotation(1);
  // Fill the screen with black color
  tft.fillScreen(ILI9488_BLACK);
}

void loop() {
  // Main loop code
  // Example: Draw a red rectangle
  tft.fillRect(50, 50, 100, 100, ILI9488_RED);
  // Delay for demonstration purpose
  delay(2000);
}
Important Considerations and Best Practices
- Always ensure that the power supply voltage matches the specifications.
- Use a level shifter if connecting to a 5V logic level device.
- Avoid exposing the display to direct sunlight or high temperatures.
- Handle the display with care to prevent damage to the screen or the flex cables.
Troubleshooting and FAQs
Common Issues
- Screen not powering on: Check the power connections and ensure the voltage is within the specified range.
- No display or corrupted image: Verify the SPI or parallel connections and ensure proper initialization in the code.
- Touch not responsive: If using the touch panel, check the touch-specific connections and calibrate the touch controller if necessary.
Solutions and Tips
- Double-check wiring against the pin configuration table.
- Use the example code as a starting point and adjust according to your setup.
- Ensure that the library versions used are compatible with your display module.
FAQs
Q: Can I use this display with a 5V system? A: Yes, but a level shifter is required for the logic pins to ensure they are 3.3V.
Q: How can I adjust the brightness of the backlight?
A: Connect the LED pin to a PWM-capable pin and use analogWrite() to adjust the brightness.
Q: Is it possible to use this display in portrait and landscape modes?
A: Yes, you can change the display orientation by adjusting the setRotation() parameter in your code.
For further assistance, consult the manufacturer's datasheet and technical forums specific to the ILI9488 HD display.