How to Use Green Led Touchpad: Examples, Pinouts, and Specs
Introduction
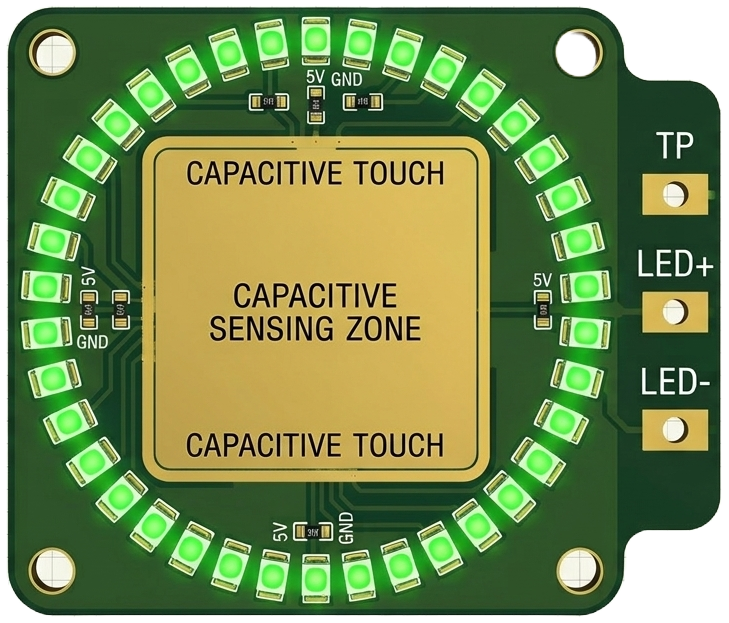
The Green LED Touchpad is a versatile electronic component that combines a touch-sensitive pad with an integrated green LED indicator. This component allows users to interact with electronic devices through touch input while providing immediate visual feedback via the LED. It is widely used in applications such as touch-based control panels, interactive displays, and user interfaces for embedded systems.
Explore Projects Built with Green Led Touchpad
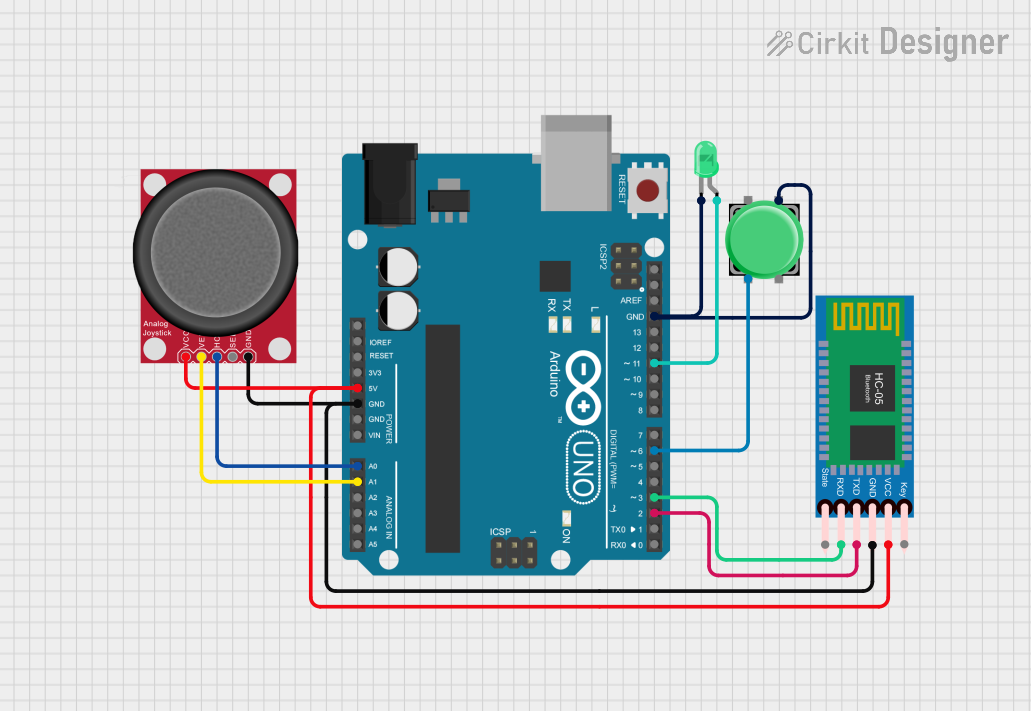

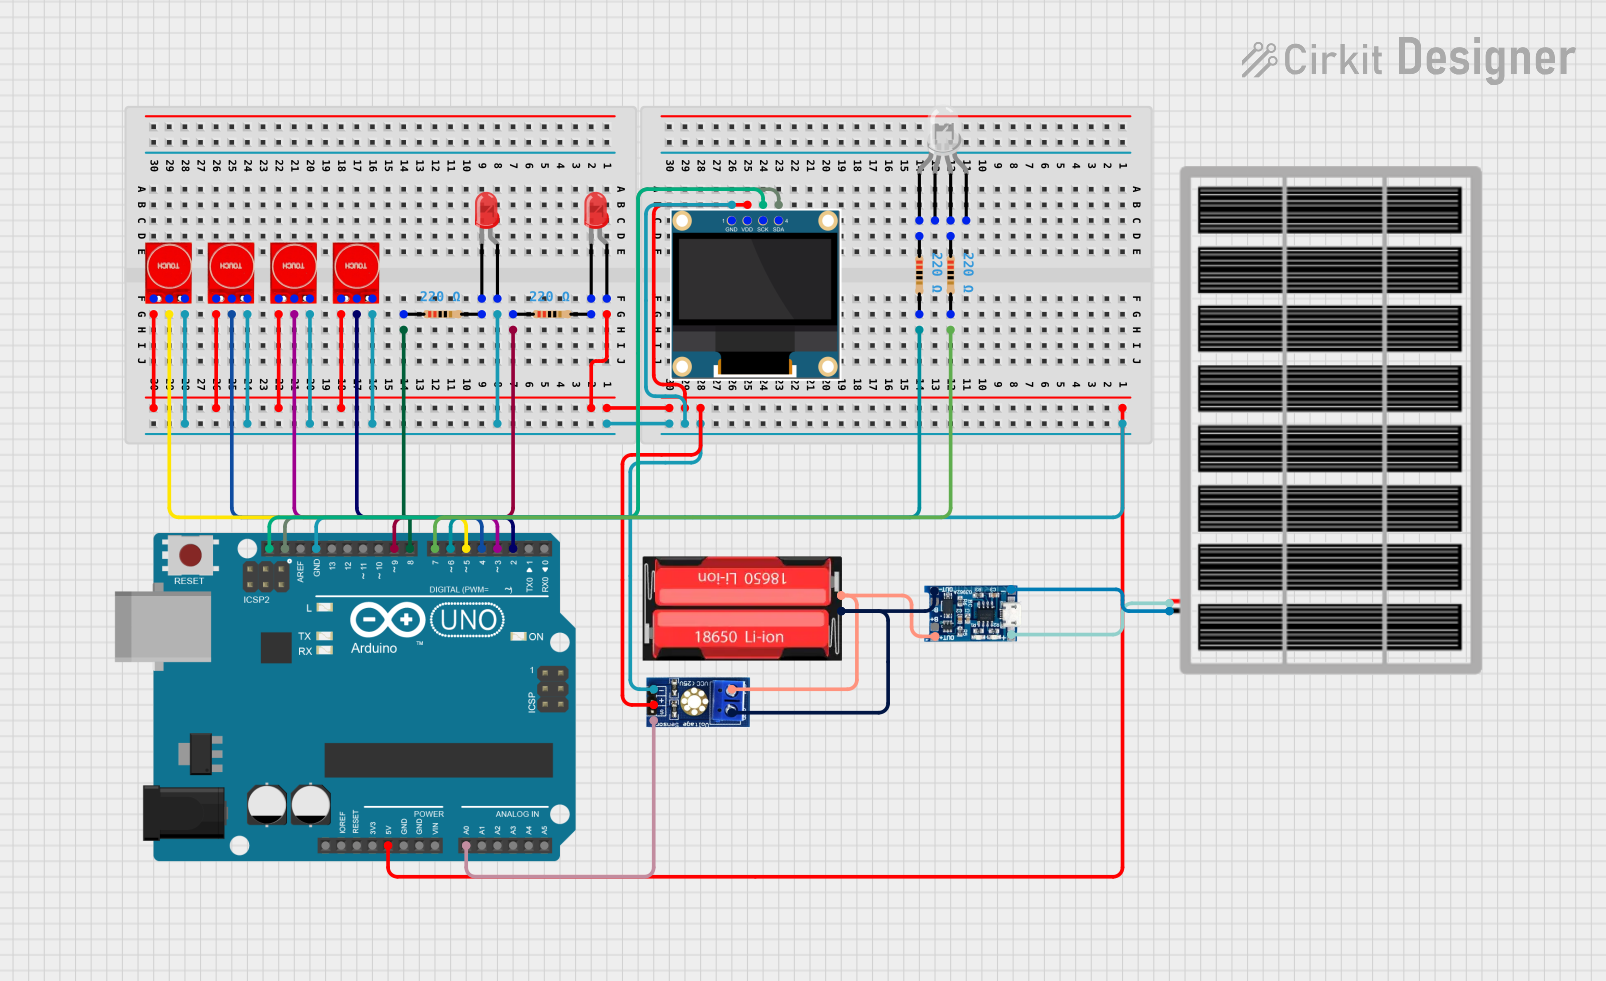
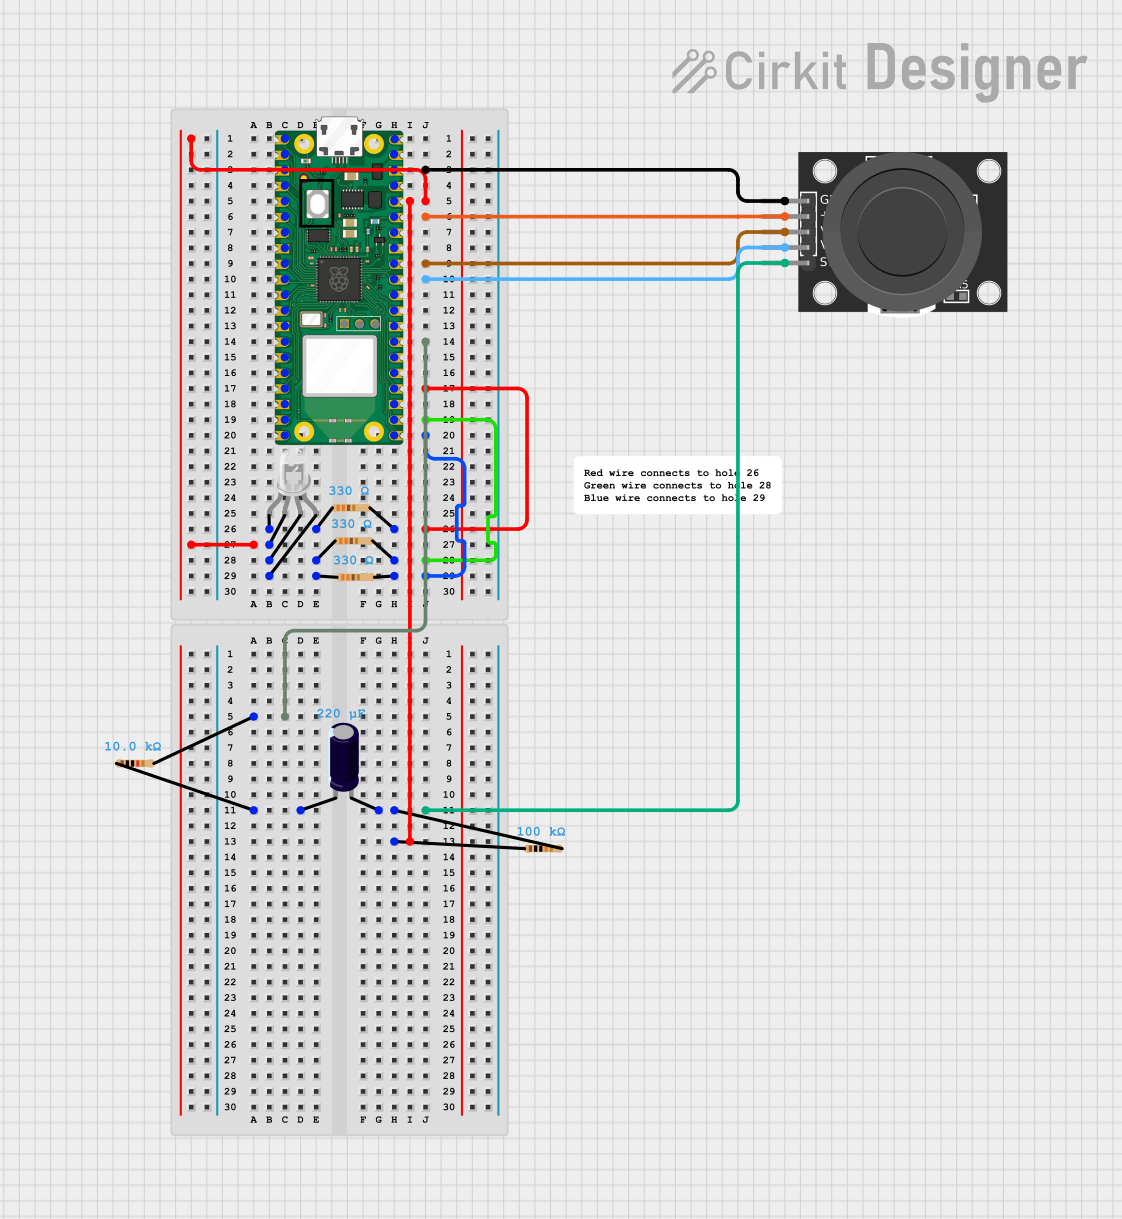
Explore Projects Built with Green Led Touchpad
Common Applications and Use Cases
- Touch-sensitive control panels for home automation systems
- Interactive kiosks and displays
- User input interfaces for microcontroller-based projects
- Visual feedback for touch-based switches
- Educational and prototyping projects
Technical Specifications
Key Technical Details
- Operating Voltage: 3.3V to 5V DC
- Current Consumption: < 20mA (LED active)
- Touch Sensitivity: Capacitive touch sensing
- LED Color: Green
- Response Time: < 50ms
- Operating Temperature: -20°C to 70°C
- Dimensions: 20mm x 20mm x 5mm (approx.)
Pin Configuration and Descriptions
The Green LED Touchpad typically has 3 pins for interfacing with other components. The pinout is as follows:
| Pin | Name | Description |
|---|---|---|
| 1 | VCC | Power supply input (3.3V to 5V DC). Connect to the positive terminal of the power source. |
| 2 | GND | Ground. Connect to the ground of the circuit. |
| 3 | OUT | Output signal pin. Outputs a HIGH signal when the touchpad is activated. |
Usage Instructions
How to Use the Component in a Circuit
- Power the Component: Connect the
VCCpin to a 3.3V or 5V DC power source and theGNDpin to the ground of your circuit. - Connect the Output: Use the
OUTpin to interface with a microcontroller or other logic-level input. The pin outputs a HIGH signal when the touchpad is touched. - LED Feedback: The green LED will light up when the touchpad is activated, providing visual feedback.
Important Considerations and Best Practices
- Ensure the power supply voltage is within the specified range (3.3V to 5V) to avoid damaging the component.
- Avoid placing the touchpad in environments with excessive moisture or dust, as this may affect touch sensitivity.
- If using the touchpad with a microcontroller, consider adding a pull-down resistor (10kΩ) to the
OUTpin to ensure a stable LOW signal when the touchpad is not activated. - For optimal performance, avoid touching the pad with sharp or conductive objects that could damage the surface.
Example: Using the Green LED Touchpad with an Arduino UNO
Below is an example of how to connect and use the Green LED Touchpad with an Arduino UNO:
Circuit Connections
- Connect the
VCCpin of the touchpad to the 5V pin on the Arduino. - Connect the
GNDpin of the touchpad to the GND pin on the Arduino. - Connect the
OUTpin of the touchpad to digital pin 2 on the Arduino.
Arduino Code
// Define the pin connected to the touchpad output
const int touchpadPin = 2;

// Define the pin for the onboard LED (optional visual feedback)
const int ledPin = 13;

void setup() {
  // Initialize the touchpad pin as an input
  pinMode(touchpadPin, INPUT);

  // Initialize the onboard LED pin as an output
  pinMode(ledPin, OUTPUT);

  // Start the serial communication for debugging
  Serial.begin(9600);
}

void loop() {
  // Read the state of the touchpad
  int touchState = digitalRead(touchpadPin);

  // If the touchpad is activated, turn on the LED and print a message
  if (touchState == HIGH) {
    digitalWrite(ledPin, HIGH); // Turn on the onboard LED
    Serial.println("Touchpad activated!"); // Print activation message
  } else {
    digitalWrite(ledPin, LOW); // Turn off the onboard LED
  }

  // Add a small delay to stabilize readings
  delay(50);
}
Troubleshooting and FAQs
Common Issues and Solutions
The touchpad is not responding to touch:
- Ensure the
VCCandGNDpins are properly connected to the power supply. - Verify that the
OUTpin is correctly connected to the microcontroller or circuit input. - Check for any physical damage to the touchpad surface.
- Ensure the
The green LED does not light up:
- Confirm that the touchpad is receiving the correct operating voltage (3.3V to 5V).
- Ensure the touchpad is being activated by touch. If not, check the sensitivity of the touchpad.
False triggers or unstable output:
- Add a pull-down resistor (10kΩ) to the
OUTpin to stabilize the signal. - Avoid placing the touchpad near sources of electrical noise or interference.
- Add a pull-down resistor (10kΩ) to the
FAQs
Q: Can the touchpad be used with a 3.3V microcontroller?
A: Yes, the touchpad is compatible with both 3.3V and 5V systems.Q: Is the touchpad waterproof?
A: No, the touchpad is not waterproof. Avoid exposing it to moisture or liquids.Q: Can the LED color be changed?
A: No, the LED color is fixed as green and cannot be changed.Q: How can I increase the touch sensitivity?
A: The sensitivity is pre-calibrated and cannot be adjusted. However, ensure the touchpad surface is clean and free of debris for optimal performance.