How to Use TC3 Heat controller: Examples, Pinouts, and Specs
Introduction
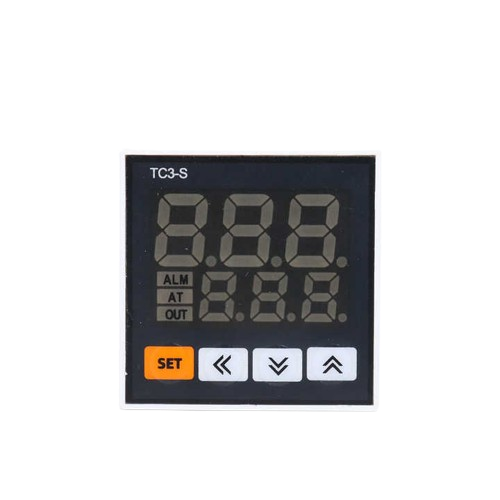
The TC3 Heat Controller is a temperature control device designed to regulate heating elements in electronic circuits. It ensures precise and stable temperature settings, making it ideal for applications requiring consistent thermal management. The TC3 is widely used in industrial heating systems, 3D printers, incubators, and other temperature-sensitive devices. Its compact design and ease of integration make it a versatile choice for both hobbyists and professionals.
Explore Projects Built with TC3 Heat controller


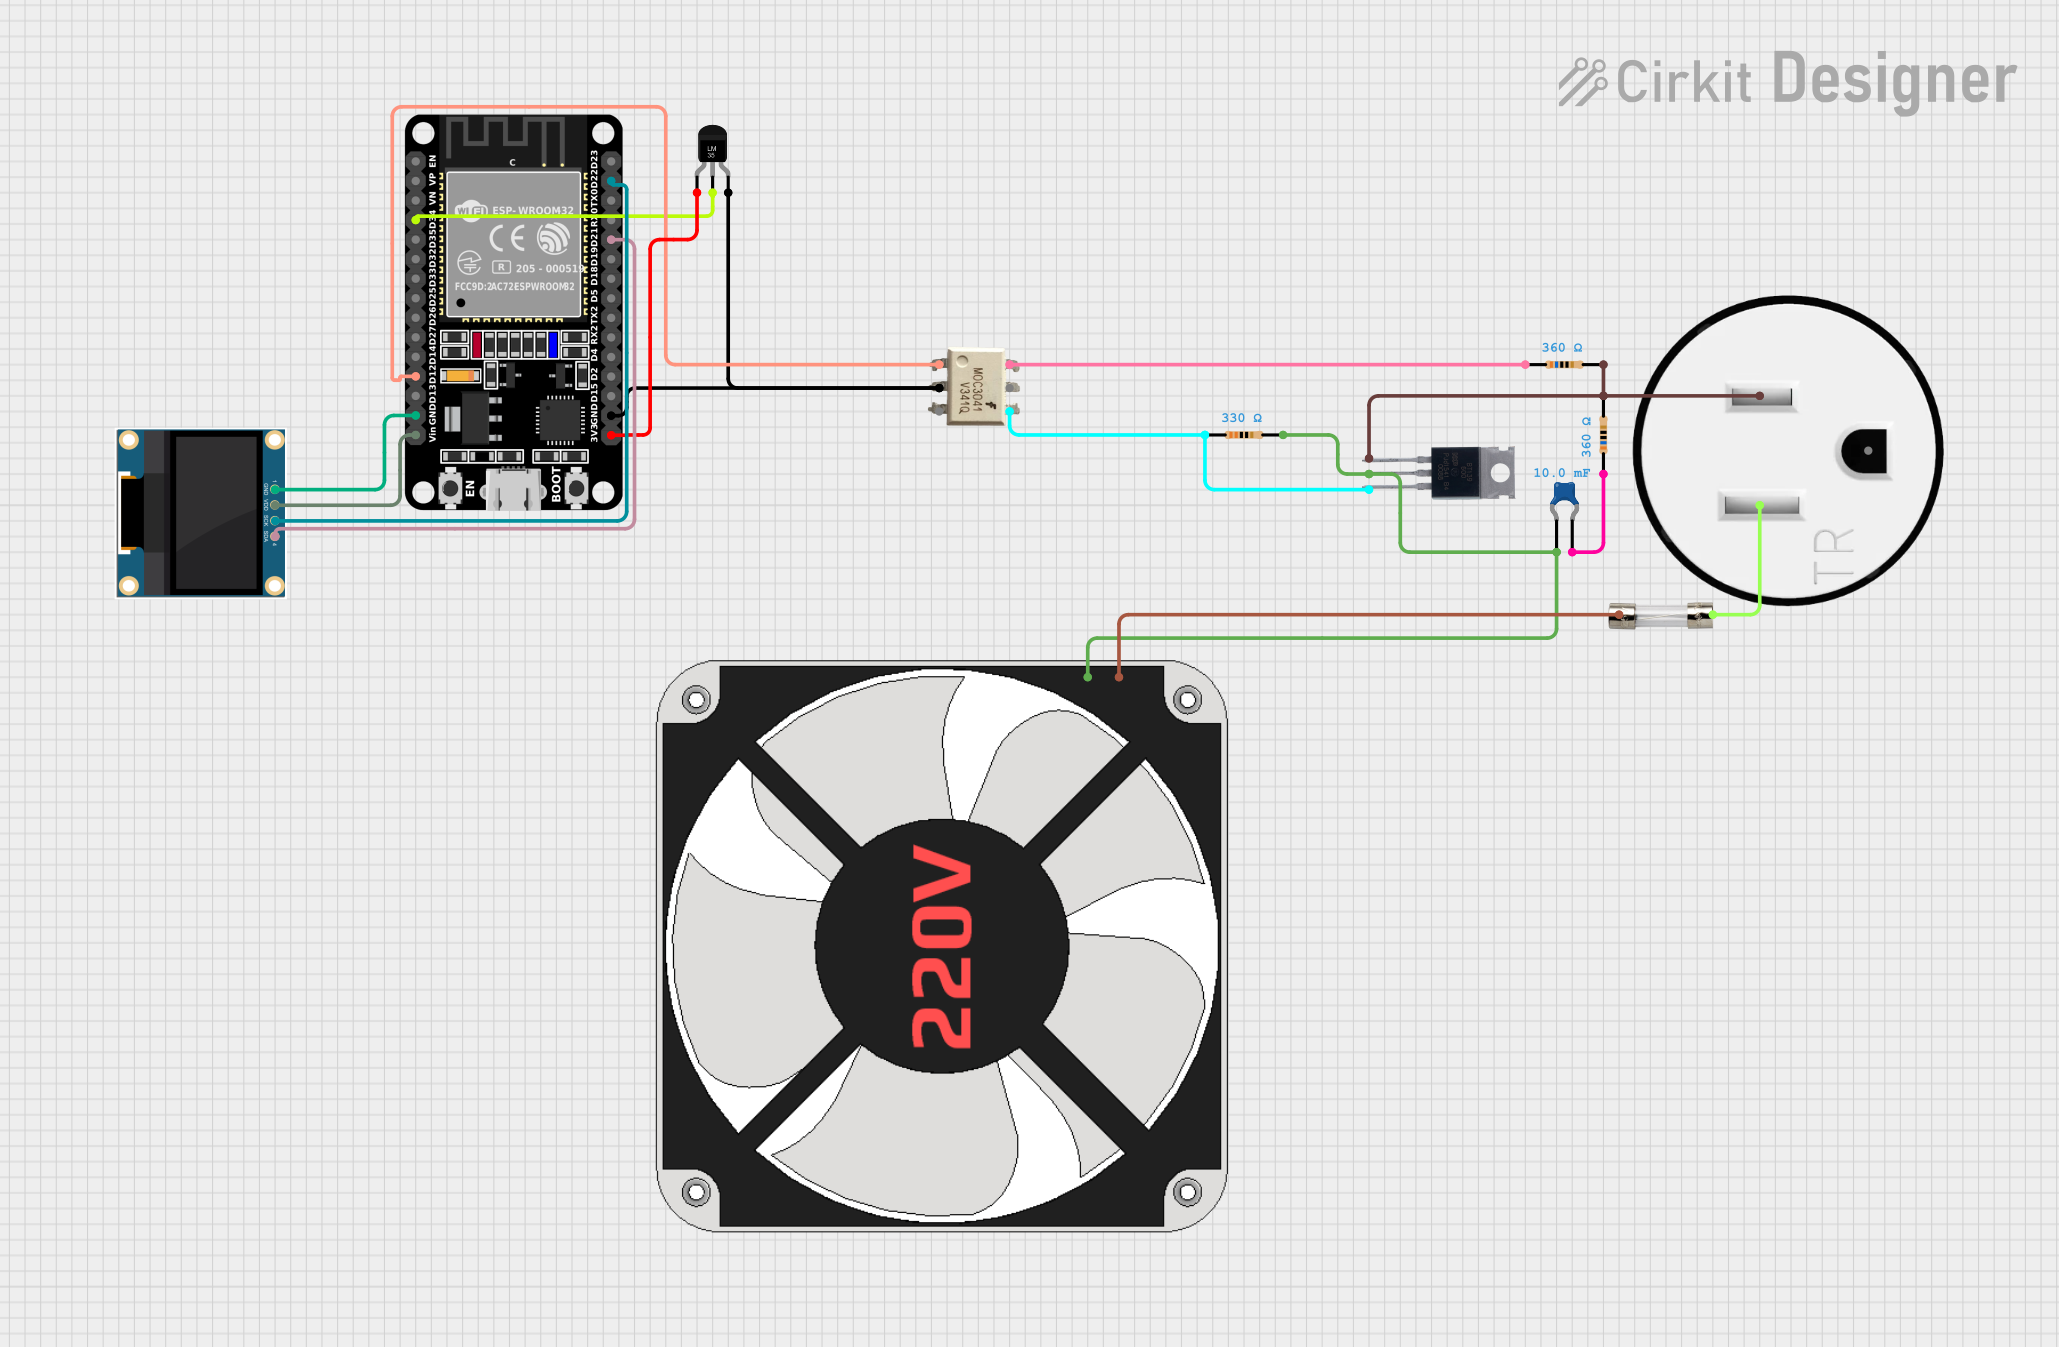
Explore Projects Built with TC3 Heat controller
Technical Specifications
- Input Voltage: 12V to 24V DC
- Output Current: Up to 10A
- Temperature Range: -40°C to 125°C
- Control Accuracy: ±0.5°C
- Sensor Type: NTC thermistor (10kΩ at 25°C)
- Operating Temperature: -20°C to 85°C
- Dimensions: 50mm x 30mm x 15mm
- Interface: Digital control with PWM output
Pin Configuration and Descriptions
| Pin Name | Type | Description |
|---|---|---|
| VIN | Power Input | Connect to a 12V-24V DC power source. |
| GND | Ground | Connect to the ground of the power supply. |
| OUT+ | Output Positive | Connect to the positive terminal of the heating element. |
| OUT- | Output Negative | Connect to the negative terminal of the heating element. |
| TEMP | Sensor Input | Connect to the NTC thermistor for temperature sensing. |
| PWM | Control Input | Accepts a PWM signal (0-5V) for temperature control or external microcontroller. |
Usage Instructions
How to Use the TC3 Heat Controller in a Circuit
- Power Connection: Connect the VIN pin to a 12V-24V DC power source and the GND pin to the ground.
- Heating Element: Attach the heating element to the OUT+ and OUT- pins. Ensure the heating element's power rating matches the TC3's output capacity.
- Temperature Sensor: Connect the NTC thermistor to the TEMP pin. Place the sensor close to the heating element for accurate temperature readings.
- Control Signal: If using an external microcontroller (e.g., Arduino UNO), connect the PWM pin to a PWM-capable output pin on the microcontroller.
- Calibration: Adjust the control parameters (e.g., PWM duty cycle) to achieve the desired temperature.
Important Considerations and Best Practices
- Ensure the power supply voltage matches the TC3's input voltage range (12V-24V DC).
- Use a properly rated heating element to avoid overloading the TC3.
- Place the temperature sensor as close as possible to the heating element for accurate feedback.
- If using an Arduino UNO, ensure the PWM signal is within the 0-5V range to avoid damage to the TC3.
- Use proper heat dissipation methods (e.g., heatsinks) if the heating element generates excessive heat.
Example Code for Arduino UNO
Below is an example code snippet to control the TC3 Heat Controller using an Arduino UNO:
// Define the PWM pin connected to the TC3's PWM input
const int pwmPin = 9; // Pin 9 supports PWM on Arduino UNO

// Set the desired temperature range (in degrees Celsius)
const float targetTemperature = 50.0; // Target temperature
const float tolerance = 2.0;          // Allowable temperature deviation

// Simulated temperature reading function (replace with actual sensor code)
float readTemperature() {
  // Replace this with actual code to read the NTC thermistor
  return 48.0; // Example: returning a simulated temperature
}

void setup() {
  pinMode(pwmPin, OUTPUT); // Set the PWM pin as an output
}

void loop() {
  float currentTemperature = readTemperature(); // Read the current temperature

  if (currentTemperature < targetTemperature - tolerance) {
    // If the temperature is too low, increase heating
    analogWrite(pwmPin, 255); // Set PWM to maximum (100% duty cycle)
  } else if (currentTemperature > targetTemperature + tolerance) {
    // If the temperature is too high, turn off heating
    analogWrite(pwmPin, 0); // Set PWM to 0 (0% duty cycle)
  } else {
    // Maintain moderate heating to stabilize temperature
    analogWrite(pwmPin, 128); // Set PWM to 50% duty cycle
  }

  delay(1000); // Wait for 1 second before the next reading
}
Troubleshooting and FAQs
Common Issues and Solutions
Heating Element Not Working:
- Cause: Incorrect wiring or insufficient power supply.
- Solution: Verify the connections to the OUT+ and OUT- pins. Ensure the power supply provides sufficient voltage and current.
Inaccurate Temperature Readings:
- Cause: Poor placement of the temperature sensor or a faulty sensor.
- Solution: Ensure the NTC thermistor is placed close to the heating element. Replace the sensor if necessary.
Overheating:
- Cause: Incorrect PWM signal or control parameters.
- Solution: Check the PWM signal from the microcontroller. Adjust the duty cycle to maintain the desired temperature.
No Response to PWM Signal:
- Cause: Incompatible voltage levels or damaged PWM input.
- Solution: Ensure the PWM signal is within the 0-5V range. Test the PWM pin with a known working signal.
FAQs
Can the TC3 Heat Controller work with AC heating elements? No, the TC3 is designed for DC heating elements only.
What type of temperature sensor is compatible with the TC3? The TC3 is compatible with NTC thermistors rated at 10kΩ at 25°C.
Can I use the TC3 without a microcontroller? Yes, the TC3 can operate autonomously with a fixed PWM signal or a manual control circuit.
What is the maximum power output of the TC3? The TC3 can handle up to 240W (24V x 10A) of power output. Ensure your heating element does not exceed this limit.