A buzzer is an audio signaling device that produces sound when an electrical signal is applied. It is widely used in various applications such as alarms, timers, notifications, and user interfaces to provide audible feedback. Buzzers are available in two main types: active and passive. Active buzzers generate sound when powered, while passive buzzers require an external signal to produce sound.
Common applications of buzzers include:
Alarm systems (e.g., fire alarms, security alarms)
Timers and reminders
Notification systems in electronic devices
Feedback in user interfaces (e.g., button presses)
Explore Projects Built with Buzzer
Use Cirkit Designer to design, explore, and prototype these projects online. Some projects support real-time simulation. Click "Open Project" to start designing instantly!
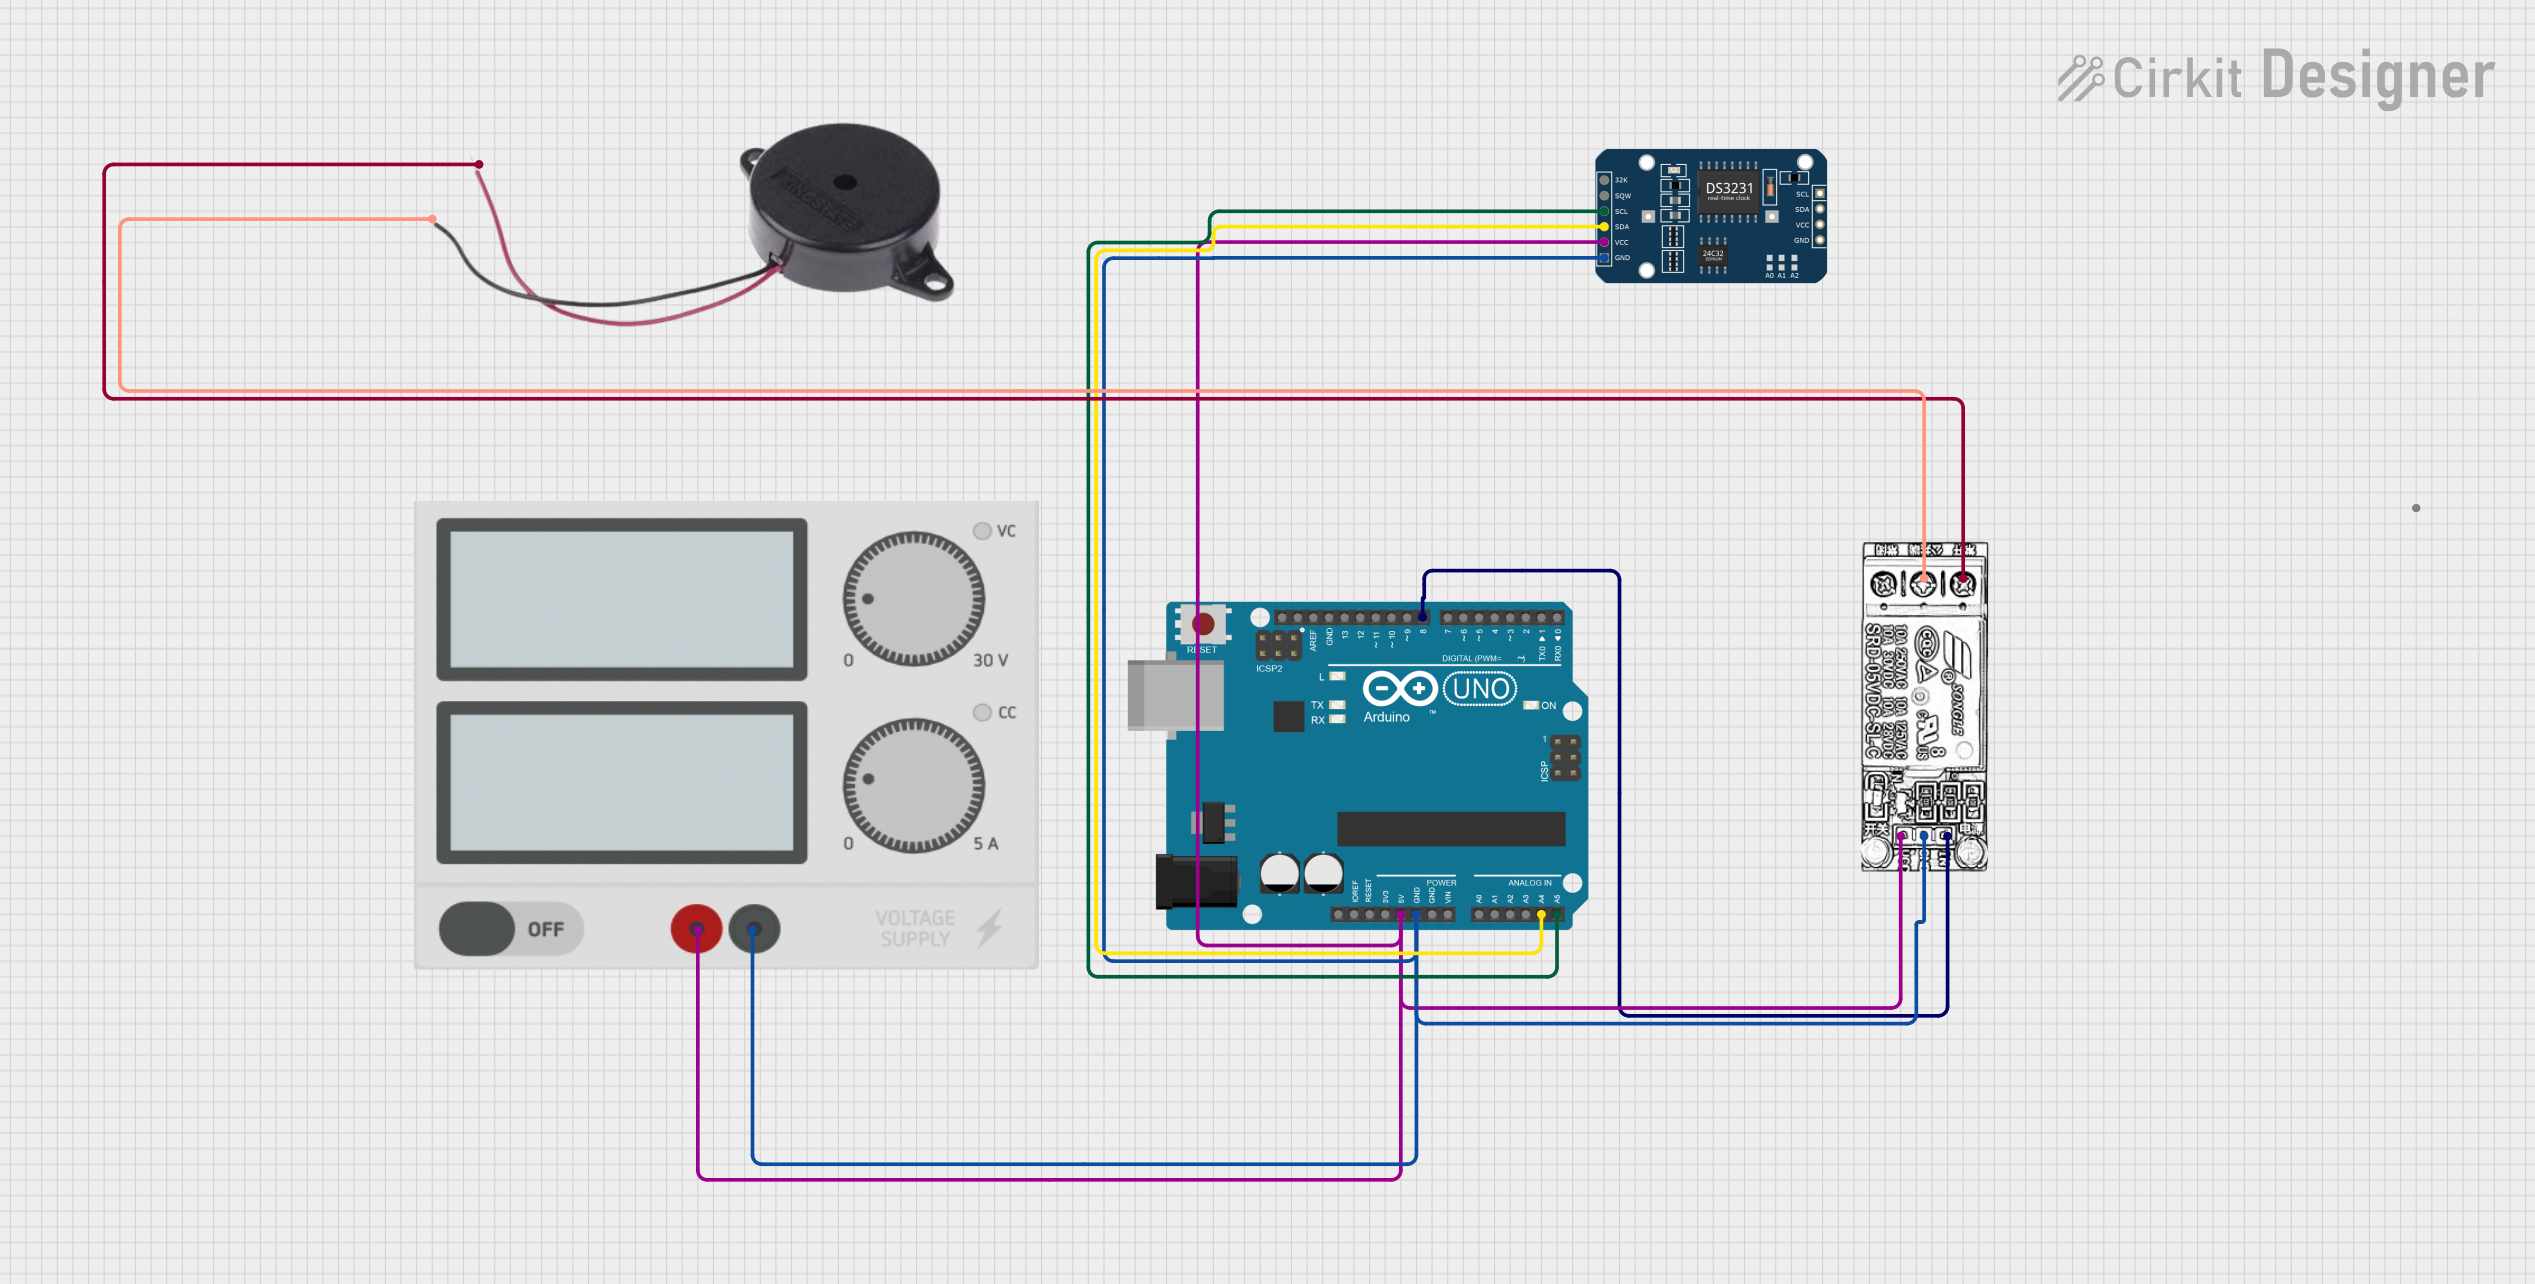
This circuit is designed as an automatic school bell system controlled by an Arduino UNO microcontroller. The Arduino is programmed to ring a buzzer at the start of each school period, with a total of 6 periods defined in the code. The DS3231 Real-Time Clock (RTC) module is used for accurate timekeeping, and a relay module interfaces the Arduino with the buzzer to handle the higher current required to drive the buzzer.
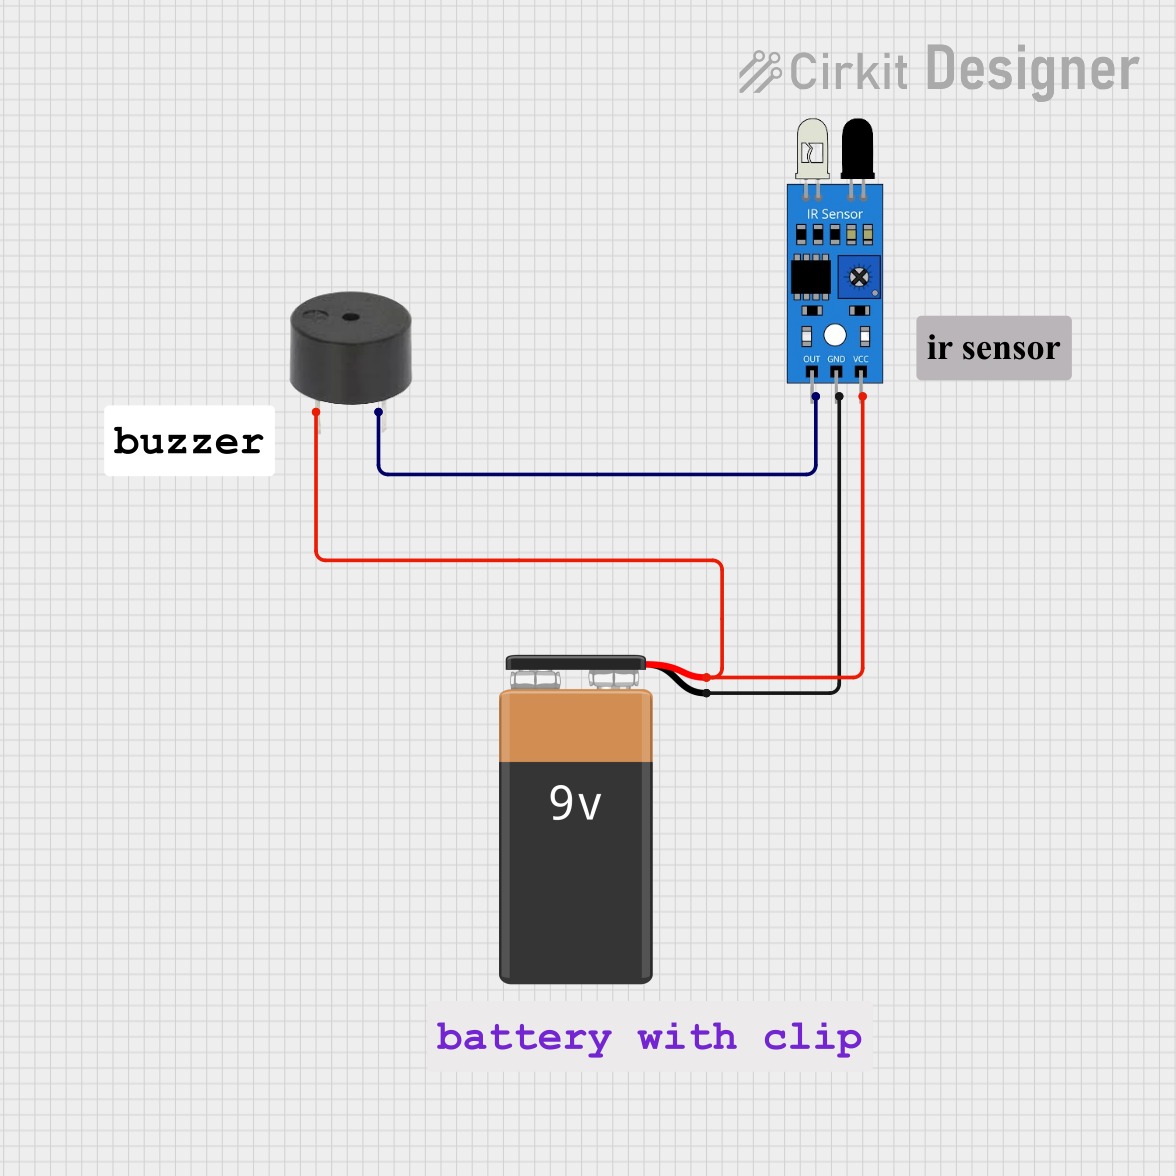
This circuit consists of an IR sensor and a buzzer powered by a 9V battery. The IR sensor detects an object and triggers the buzzer to sound an alarm when an object is detected.
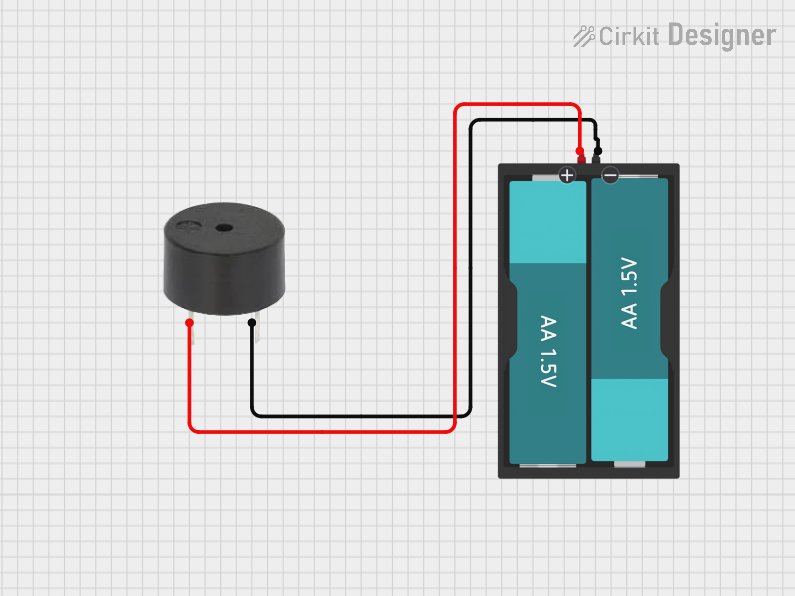
This circuit consists of a simple buzzer connected to a 3V battery source. The positive terminal of the battery is connected to the buzzer's power input, and the negative terminal is connected to the buzzer's ground. The circuit is designed to power the buzzer continuously, producing a constant sound or tone as long as the battery provides sufficient voltage.
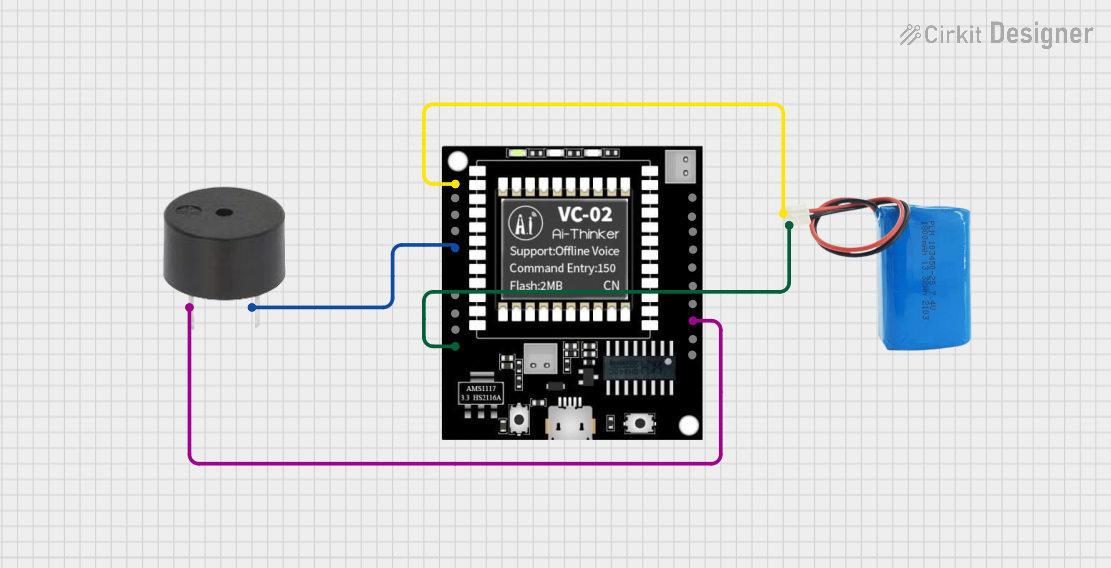
This circuit features a VC-02 voice recognition module connected to a buzzer and powered by a 5V battery. The VC-02 module is programmed to listen for specific voice commands and, upon recognizing the command 'can you make a sound', it activates the buzzer for one second. The circuit is designed for voice-activated sound generation, with the VC-02 module handling voice recognition and serial communication, and the buzzer providing audible feedback.
Below are the general technical specifications for a typical buzzer. Note that specific values may vary depending on the model and manufacturer.
Parameter
Specification
Operating Voltage
3V to 12V (commonly 5V)
Current Consumption
10mA to 50mA
Sound Frequency
2 kHz to 4 kHz
Sound Pressure Level
85 dB to 100 dB (at 10 cm distance)
Operating Temperature
-20°C to +60°C
Dimensions
Varies (e.g., 12mm diameter, 8mm height)
Pin Configuration and Descriptions
Buzzers typically have two pins:
Pin
Description
Positive (+)
Connect to the positive terminal of the power supply or signal source.
Negative (-)
Connect to the ground (GND) of the circuit.
For active buzzers, simply applying a DC voltage to the pins will produce sound. For passive buzzers, an oscillating signal (e.g., PWM) is required to generate sound.
Usage Instructions
How to Use the Buzzer in a Circuit
Identify the Type of Buzzer: Determine whether the buzzer is active or passive. Active buzzers are easier to use as they only require a DC voltage, while passive buzzers need a signal source.
Connect the Pins:
Connect the positive pin of the buzzer to the power supply or signal source.
Connect the negative pin to the ground (GND) of the circuit.
For Passive Buzzers: Use a microcontroller (e.g., Arduino) or an external oscillator circuit to generate a PWM signal at the desired frequency.
Important Considerations and Best Practices
Voltage Compatibility: Ensure the operating voltage of the buzzer matches the voltage of your circuit to avoid damage.
Current Limiting: If the buzzer draws significant current, consider using a current-limiting resistor or a transistor to drive it.
Placement: Place the buzzer in an open area of the enclosure to maximize sound output.
Signal Frequency: For passive buzzers, experiment with different frequencies to achieve the desired tone.
Example: Connecting a Buzzer to an Arduino UNO
Below is an example of how to connect and control a passive buzzer using an Arduino UNO.
Circuit Diagram
Connect the positive pin of the buzzer to Arduino pin 9.
Connect the negative pin of the buzzer to GND.
Code Example
// Example code to generate a tone on a passive buzzer using Arduino UNO

// Define the pin connected to the buzzer
const int buzzerPin = 9;

void setup() {
  // Set the buzzer pin as an output
  pinMode(buzzerPin, OUTPUT);
}

void loop() {
  // Generate a tone at 1000 Hz for 500 milliseconds
  tone(buzzerPin, 1000, 500);
  delay(1000); // Wait for 1 second

  // Generate a tone at 2000 Hz for 500 milliseconds
  tone(buzzerPin, 2000, 500);
  delay(1000); // Wait for 1 second
}
Notes:
The tone() function is used to generate a square wave signal for the passive buzzer.
The first parameter is the pin number, the second is the frequency in Hz, and the third is the duration in milliseconds.
Troubleshooting and FAQs
Common Issues and Solutions
No Sound from the Buzzer:
Cause: Incorrect wiring or insufficient voltage.
Solution: Double-check the connections and ensure the power supply matches the buzzer's operating voltage.
Low or Distorted Sound:
Cause: Insufficient current or incorrect signal frequency (for passive buzzers).
Solution: Use a transistor to drive the buzzer if the current is insufficient. For passive buzzers, adjust the frequency of the signal.
Buzzer Gets Hot:
Cause: Overvoltage or excessive current.
Solution: Verify the voltage and current ratings of the buzzer and use a current-limiting resistor if necessary.
Cause: A constant DC voltage is applied instead of a PWM signal.
Solution: Use a microcontroller or oscillator circuit to generate a proper signal.
FAQs
Q: Can I use a passive buzzer without a microcontroller?
A: Yes, but you will need an external oscillator circuit to generate the required signal.
Q: How do I differentiate between an active and a passive buzzer?
A: Active buzzers typically produce sound when connected to a DC voltage, while passive buzzers require an oscillating signal. Active buzzers may also have a built-in driver circuit.
Q: What is the typical lifespan of a buzzer?
A: Most buzzers have a lifespan of over 10,000 hours under normal operating conditions.
Q: Can I control the volume of a buzzer?
A: The volume is generally fixed, but you can reduce it by lowering the supply voltage (within the operating range).


 Open Project in Cirkit Designer