Cirkit Designer Logo
Cirkit Designer
Your all-in-one circuit design IDE
Home / 
Component Documentation

How to Use NPK Soil Sensor: Examples, Pinouts, and Specs

Image of NPK Soil Sensor
Cirkit Designer LogoDesign with NPK Soil Sensor in Cirkit Designer

Introduction

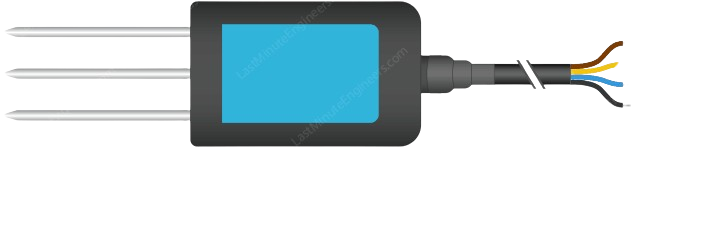
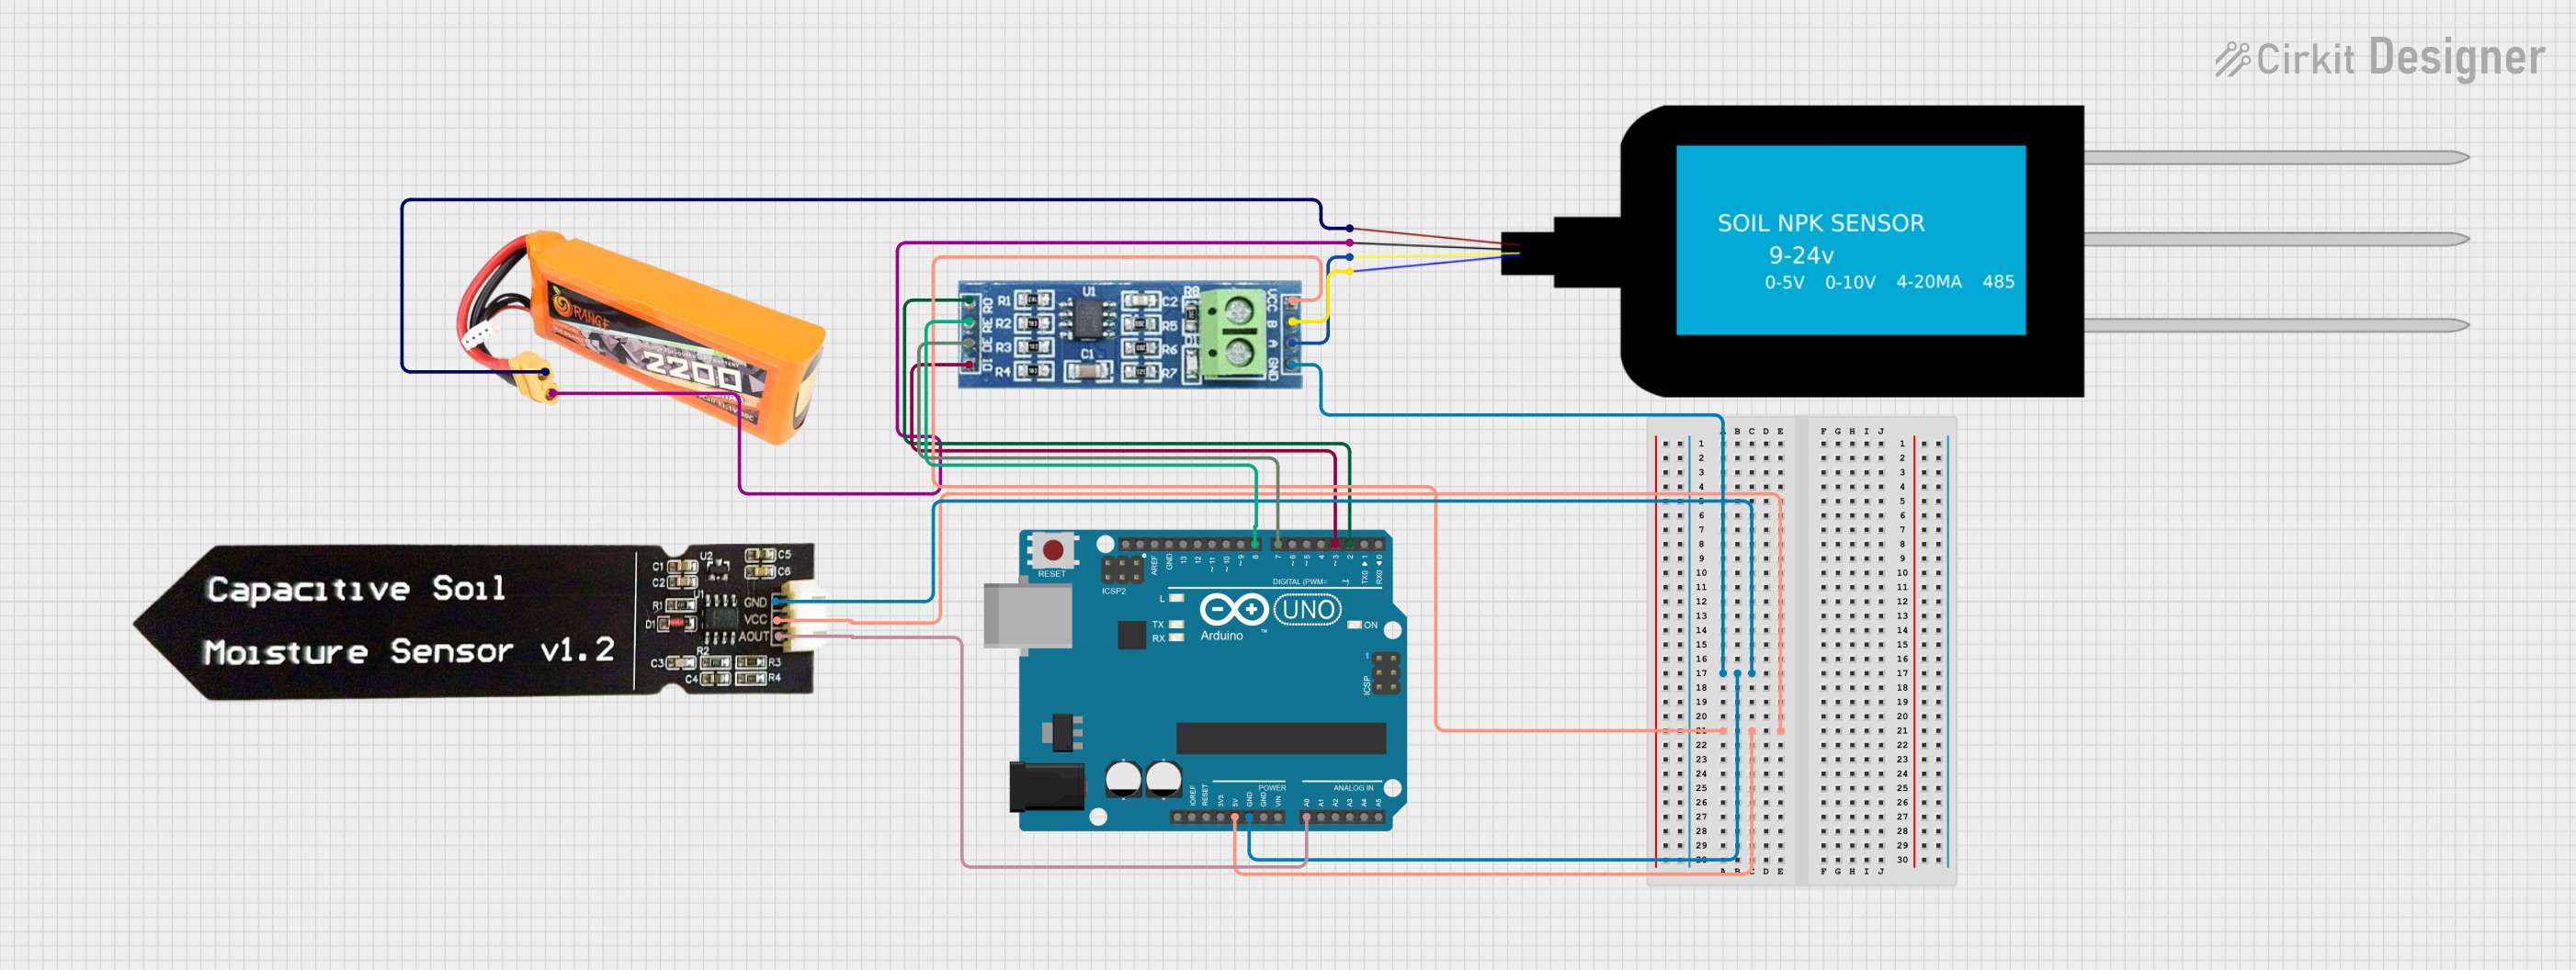
The NPK Soil Sensor is an innovative electronic device designed to measure the levels of nitrogen (N), phosphorus (P), and potassium (K) in soil, which are vital nutrients for plant growth. By providing accurate readings of these nutrients, the sensor assists farmers, gardeners, and researchers in assessing soil fertility and making informed decisions about fertilizer application. This sensor is particularly useful in precision agriculture, horticulture, and environmental monitoring.

Explore Projects Built with NPK Soil Sensor

Use Cirkit Designer to design, explore, and prototype these projects online. Some projects support real-time simulation. Click "Open Project" to start designing instantly!
Arduino UNO-Based NPK Soil Sensor with OLED Display and RS-485 Communication
Image of npk: A project utilizing NPK Soil Sensor in a practical application
This circuit is designed to measure soil nutrient levels using an NPK soil sensor and display the results on an OLED screen. An Arduino UNO microcontroller reads data from the soil sensor via an RS-485 module and processes the information to display nitrogen, phosphorus, and potassium levels on the OLED display.
Cirkit Designer LogoOpen Project in Cirkit Designer
Arduino UNO-Based Soil Nutrient and Moisture Monitoring System with RS485 Communication
Image of NPK final: A project utilizing NPK Soil Sensor in a practical application
This circuit uses an Arduino UNO to read soil nutrient levels (Nitrogen, Phosphorous, and Potassium) via an NPK Soil Sensor connected through an RS485 module, and soil moisture levels via a Capacitive Soil Moisture Sensor. The data is then printed to the Serial Monitor for analysis.
Cirkit Designer LogoOpen Project in Cirkit Designer
ESP32-Based Soil Nutrient Analyzer with RS-485 Communication
Image of npk: A project utilizing NPK Soil Sensor in a practical application
This circuit is designed to measure soil nutrient levels using an NPK Soil Sensor, with data communication facilitated by an RS-485 module. The ESP32 microcontroller is used to process the sensor data, which is likely transmitted over RS-485 for remote monitoring or control. A 12V power supply provides the necessary power to the sensor, while the ESP32 is powered by its 3.3V pin, and the common ground ensures all components share a reference potential.
Cirkit Designer LogoOpen Project in Cirkit Designer
Arduino UNO-Based Soil Nutrient and Moisture Monitoring System with RS485 and Battery Power
Image of SOIL NUTRIENTS, NPK: A project utilizing NPK Soil Sensor in a practical application
This circuit uses an Arduino UNO to read soil nutrient levels (Nitrogen, Phosphorous, and Potassium) from an NPK Soil Sensor via an RS485 module and soil moisture levels from a Capacitive Soil Moisture Sensor. The data is then printed to the Serial Monitor for monitoring purposes.
Cirkit Designer LogoOpen Project in Cirkit Designer

Explore Projects Built with NPK Soil Sensor

Use Cirkit Designer to design, explore, and prototype these projects online. Some projects support real-time simulation. Click "Open Project" to start designing instantly!
Image of npk: A project utilizing NPK Soil Sensor in a practical application
Arduino UNO-Based NPK Soil Sensor with OLED Display and RS-485 Communication
This circuit is designed to measure soil nutrient levels using an NPK soil sensor and display the results on an OLED screen. An Arduino UNO microcontroller reads data from the soil sensor via an RS-485 module and processes the information to display nitrogen, phosphorus, and potassium levels on the OLED display.
Cirkit Designer LogoOpen Project in Cirkit Designer
Image of NPK final: A project utilizing NPK Soil Sensor in a practical application
Arduino UNO-Based Soil Nutrient and Moisture Monitoring System with RS485 Communication
This circuit uses an Arduino UNO to read soil nutrient levels (Nitrogen, Phosphorous, and Potassium) via an NPK Soil Sensor connected through an RS485 module, and soil moisture levels via a Capacitive Soil Moisture Sensor. The data is then printed to the Serial Monitor for analysis.
Cirkit Designer LogoOpen Project in Cirkit Designer
Image of npk: A project utilizing NPK Soil Sensor in a practical application
ESP32-Based Soil Nutrient Analyzer with RS-485 Communication
This circuit is designed to measure soil nutrient levels using an NPK Soil Sensor, with data communication facilitated by an RS-485 module. The ESP32 microcontroller is used to process the sensor data, which is likely transmitted over RS-485 for remote monitoring or control. A 12V power supply provides the necessary power to the sensor, while the ESP32 is powered by its 3.3V pin, and the common ground ensures all components share a reference potential.
Cirkit Designer LogoOpen Project in Cirkit Designer
Image of SOIL NUTRIENTS, NPK: A project utilizing NPK Soil Sensor in a practical application
Arduino UNO-Based Soil Nutrient and Moisture Monitoring System with RS485 and Battery Power
This circuit uses an Arduino UNO to read soil nutrient levels (Nitrogen, Phosphorous, and Potassium) from an NPK Soil Sensor via an RS485 module and soil moisture levels from a Capacitive Soil Moisture Sensor. The data is then printed to the Serial Monitor for monitoring purposes.
Cirkit Designer LogoOpen Project in Cirkit Designer

Technical Specifications

Key Technical Details

  • Operating Voltage: 3.3V to 5V
  • Output Voltage: 0 - 3.0V
  • Current Consumption: 35mA (typical)
  • Measurement Range: 0 to 1999 mg/kg (ppm) for N, P, and K
  • Accuracy: ±10%
  • Operating Temperature: -40°C to +85°C
  • Interface: Analog

Pin Configuration and Descriptions

Pin Number Name Description
1 VCC Power supply (3.3V to 5V)
2 GND Ground connection
3 AO Analog output for N concentration
4 AO Analog output for P concentration
5 AO Analog output for K concentration

Usage Instructions

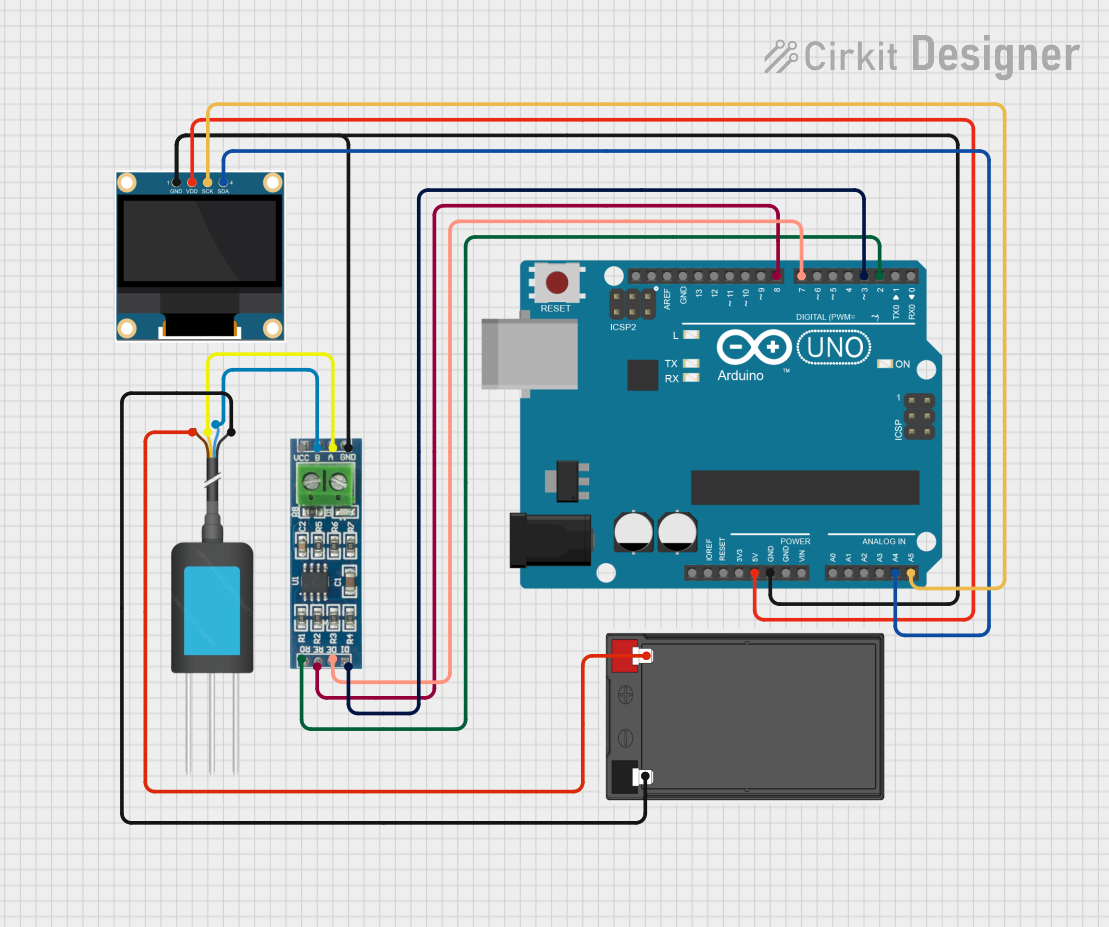
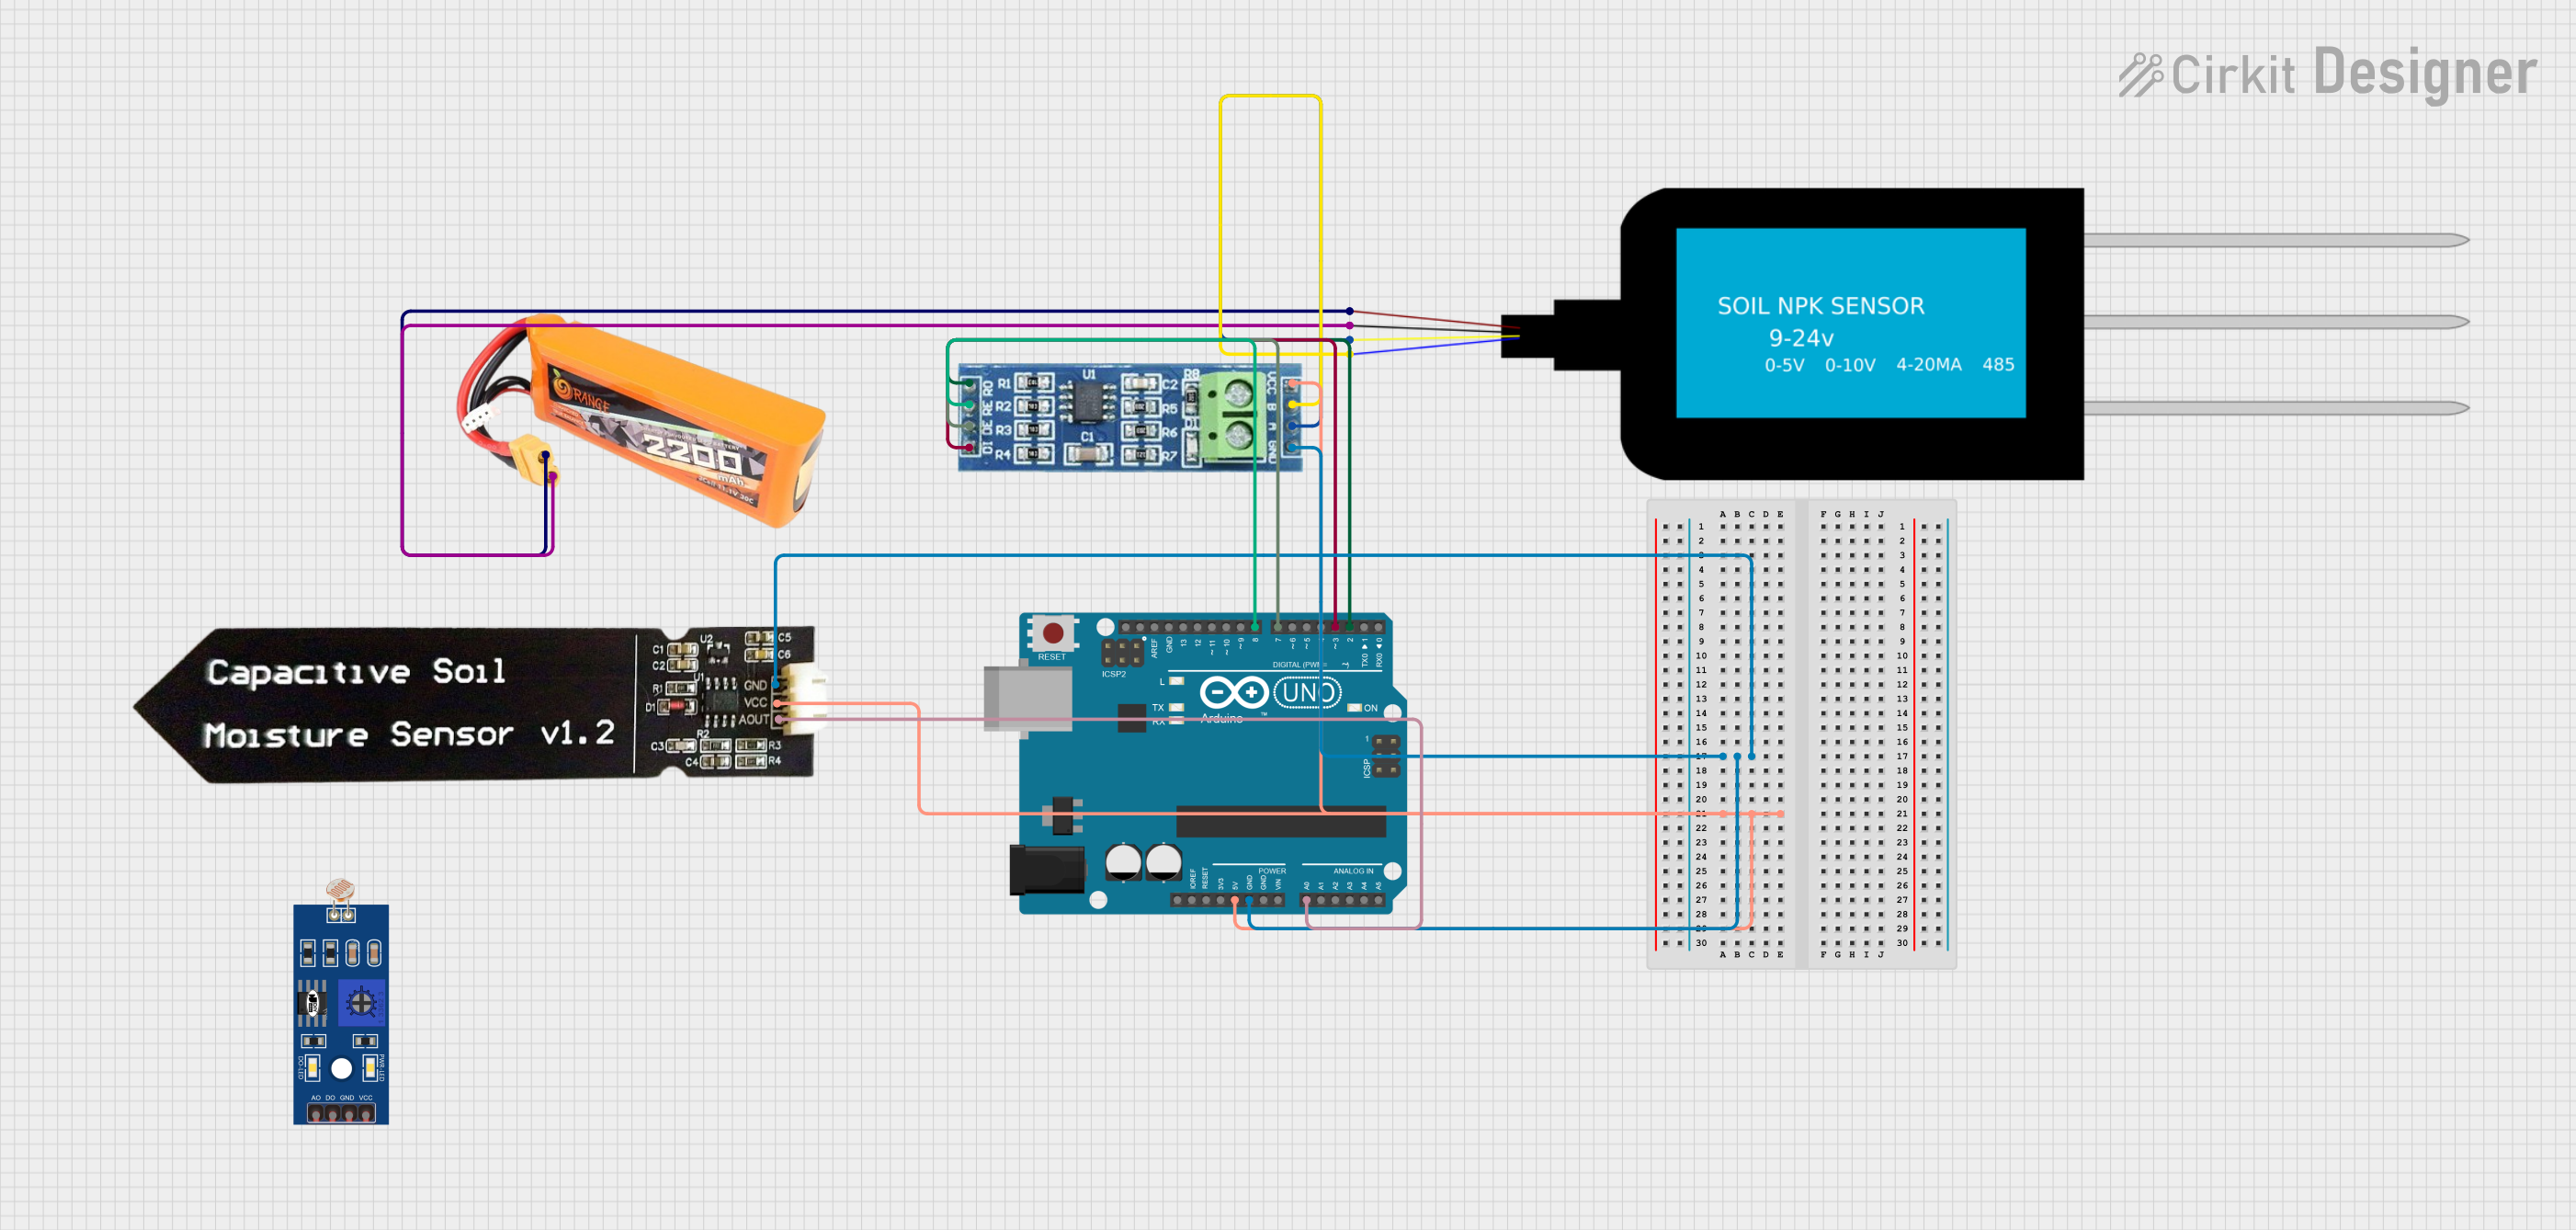
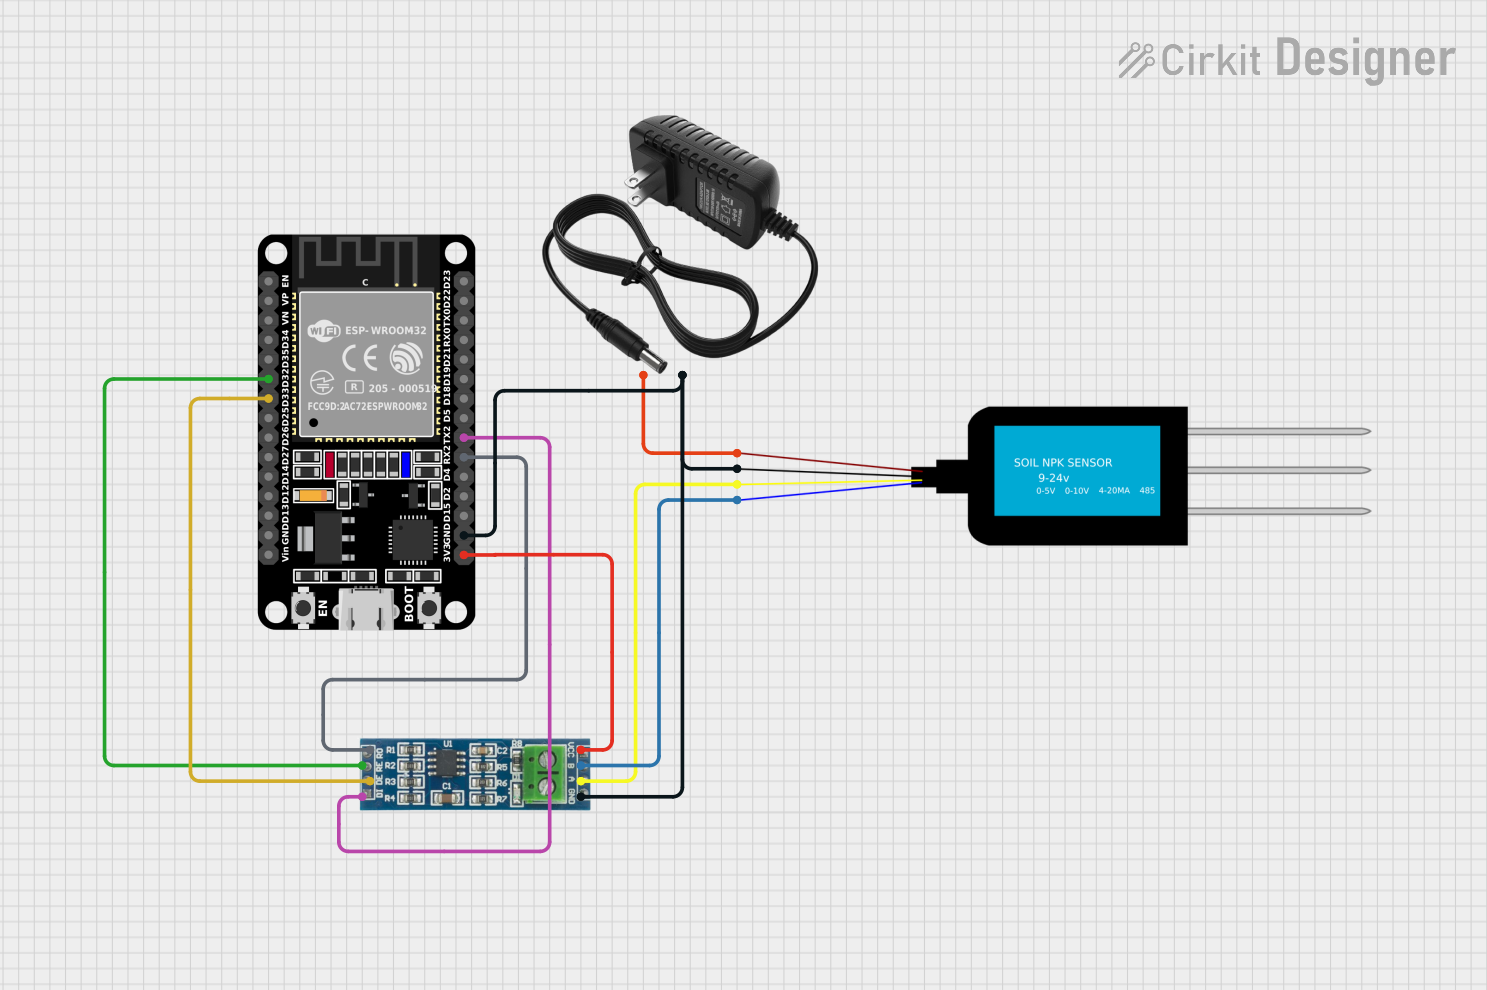
Integration with a Circuit

To use the NPK Soil Sensor in a circuit:

  1. Connect the VCC pin to a 3.3V or 5V power supply.
  2. Connect the GND pin to the ground of the power supply.
  3. Connect the AO pins to the analog input pins of a microcontroller, such as an Arduino UNO.

Best Practices

  • Calibrate the sensor before use to ensure accurate readings.
  • Avoid exposing the sensor to liquids or corrosive chemicals.
  • Insert the sensor probes fully into the soil for consistent measurements.
  • Allow the sensor to stabilize in the soil for a few minutes before taking a reading.

Example Code for Arduino UNO

// Define the analog input pins for N, P, and K
const int N_Sensor_Pin = A0;
const int P_Sensor_Pin = A1;
const int K_Sensor_Pin = A2;

void setup() {
  // Initialize serial communication at 9600 baud rate
  Serial.begin(9600);
}

void loop() {
  // Read the analog values from the sensor
  int N_value = analogRead(N_Sensor_Pin);
  int P_value = analogRead(P_Sensor_Pin);
  int K_value = analogRead(K_Sensor_Pin);

  // Convert the analog values to nutrient concentration (example conversion)
  float N_concentration = N_value * (1999.0 / 1023.0);
  float P_concentration = P_value * (1999.0 / 1023.0);
  float K_concentration = K_value * (1999.0 / 1023.0);

  // Print the nutrient concentrations to the serial monitor
  Serial.print("Nitrogen (N): ");
  Serial.print(N_concentration);
  Serial.println(" ppm");

  Serial.print("Phosphorus (P): ");
  Serial.print(P_concentration);
  Serial.println(" ppm");

  Serial.print("Potassium (K): ");
  Serial.print(K_concentration);
  Serial.println(" ppm");

  // Wait for a second before taking the next reading
  delay(1000);
}

Troubleshooting and FAQs

Common Issues

  • Inaccurate Readings: Ensure the sensor is calibrated correctly and the probes are fully inserted into the soil.
  • No Output Signal: Check the power supply connections and ensure the sensor is not damaged.
  • Fluctuating Readings: Stabilize the sensor in the soil for a few minutes before taking a reading.

FAQs

Q: Can the sensor be left in the soil permanently? A: It is not recommended to leave the sensor in the soil permanently as prolonged exposure to moisture and soil chemicals can degrade the sensor's performance.

Q: How often should the sensor be calibrated? A: The sensor should be calibrated before the first use and periodically thereafter, especially if used in different types of soil.

Q: Is the sensor waterproof? A: The sensor probes are typically water-resistant, but the electronic components are not waterproof. Care should be taken to avoid getting the sensor's head wet.

For further assistance, please contact the manufacturer's technical support with the part ID npk_soil_sensor.