How to Use DHT11 Humitidy and Temperature Sensor (Sim test): Examples, Pinouts, and Specs
Introduction
The DHT11 is a digital sensor designed to measure both humidity and temperature, providing accurate and reliable readings for environmental monitoring. It features a simple single-wire communication interface, making it easy to integrate into various electronic projects. The DHT11 is widely used in applications such as weather stations, HVAC systems, and indoor air quality monitoring.
Explore Projects Built with DHT11 Humitidy and Temperature Sensor (Sim test)


Explore Projects Built with DHT11 Humitidy and Temperature Sensor (Sim test)
Common Applications:
- Weather monitoring systems
- Home automation and HVAC control
- Greenhouse and agricultural monitoring
- IoT-based environmental sensing projects
Technical Specifications
The DHT11 sensor is compact and efficient, with the following key specifications:
| Parameter | Value |
|---|---|
| Operating Voltage | 3.3V to 5.5V |
| Operating Current | 0.3mA (measuring), 60µA (standby) |
| Humidity Range | 20% to 90% RH |
| Humidity Accuracy | ±5% RH |
| Temperature Range | 0°C to 50°C |
| Temperature Accuracy | ±2°C |
| Sampling Rate | 1 reading per second (1Hz) |
| Communication Protocol | Single-wire digital interface |
| Dimensions | 15.5mm x 12mm x 5.5mm |
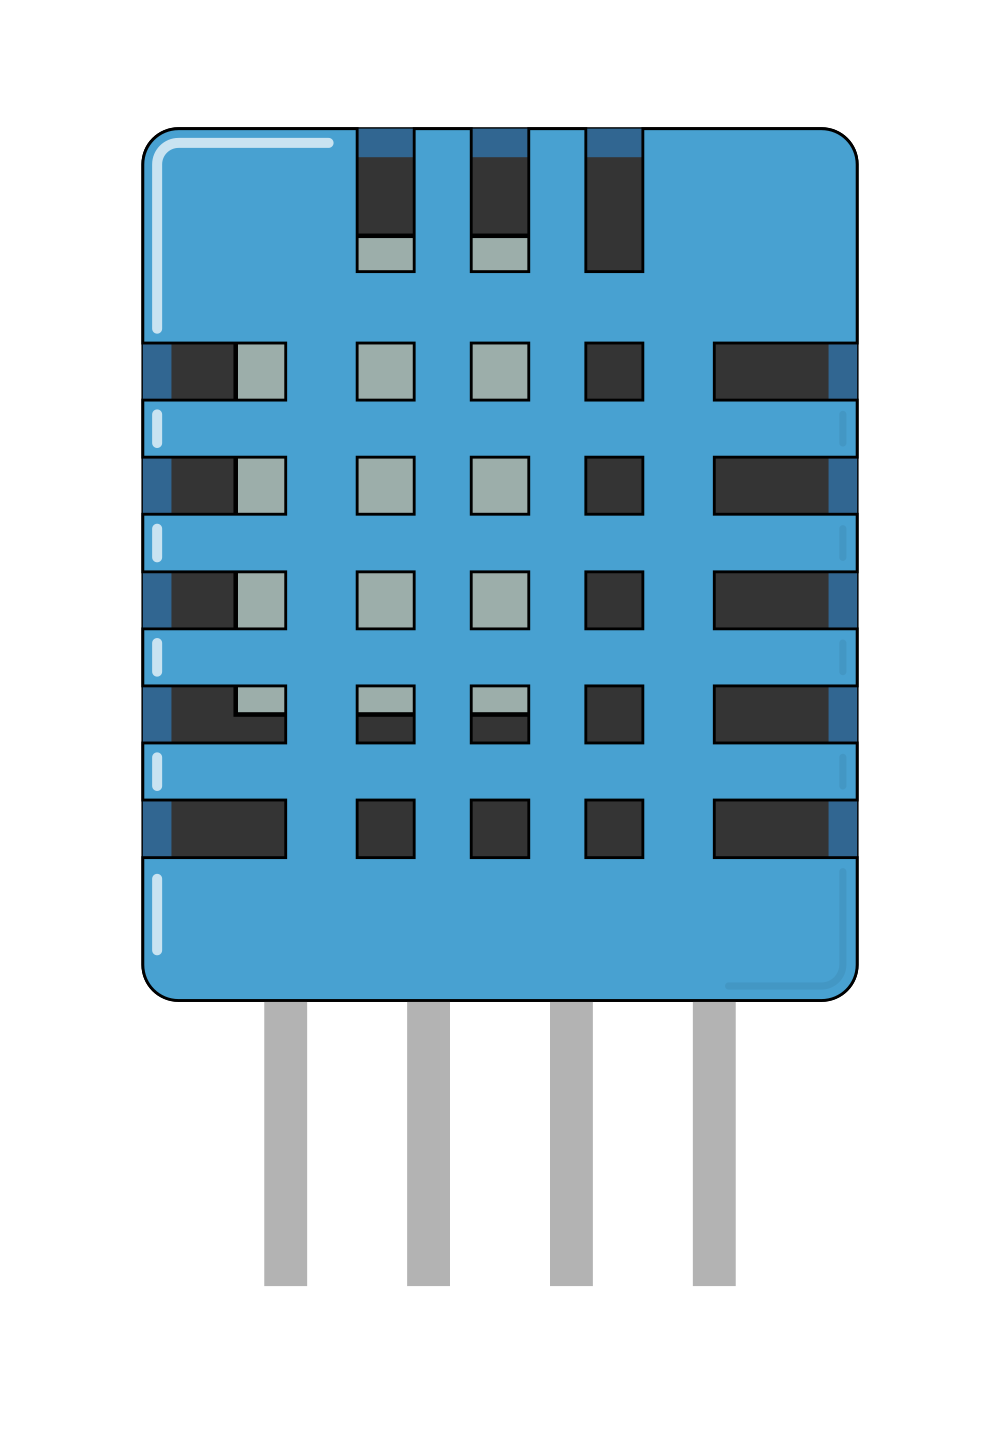
Pin Configuration
The DHT11 sensor typically has 4 pins, as shown below:
| Pin | Name | Description |
|---|---|---|
| 1 | VCC | Power supply (3.3V to 5.5V) |
| 2 | DATA | Digital data output (connect to microcontroller) |
| 3 | NC (Not Connected) | No connection (leave unconnected) |
| 4 | GND | Ground (0V reference) |
Note: Some DHT11 modules may have only 3 pins, with the NC pin omitted.
Usage Instructions
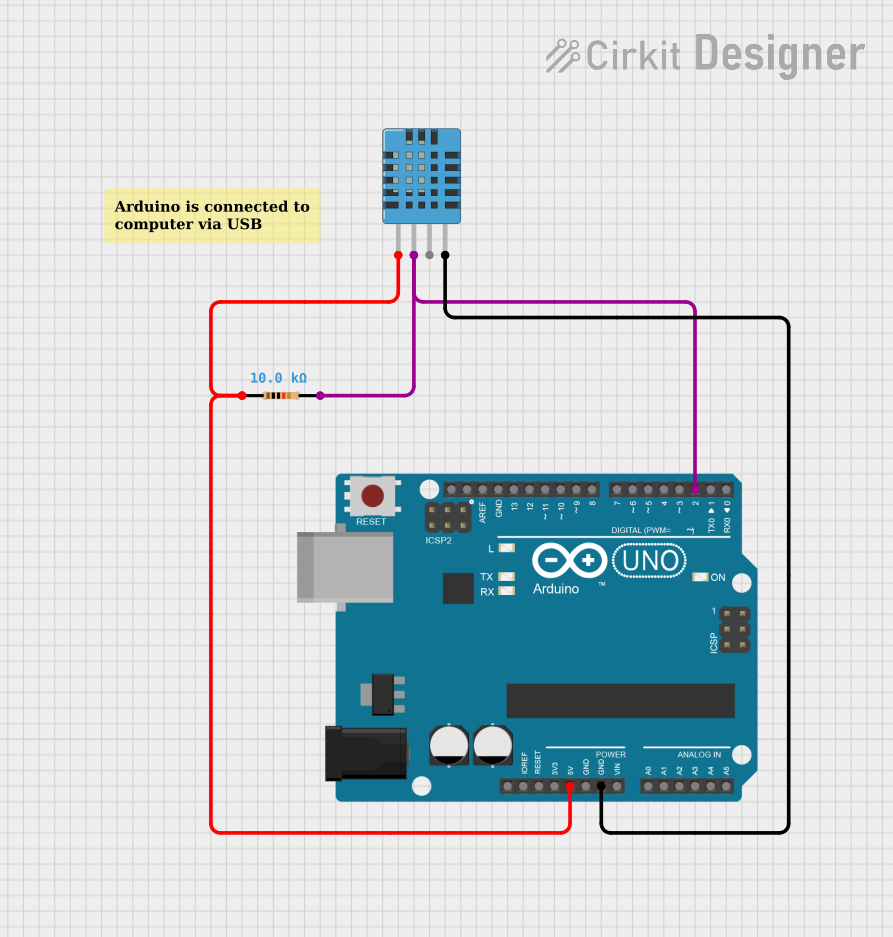
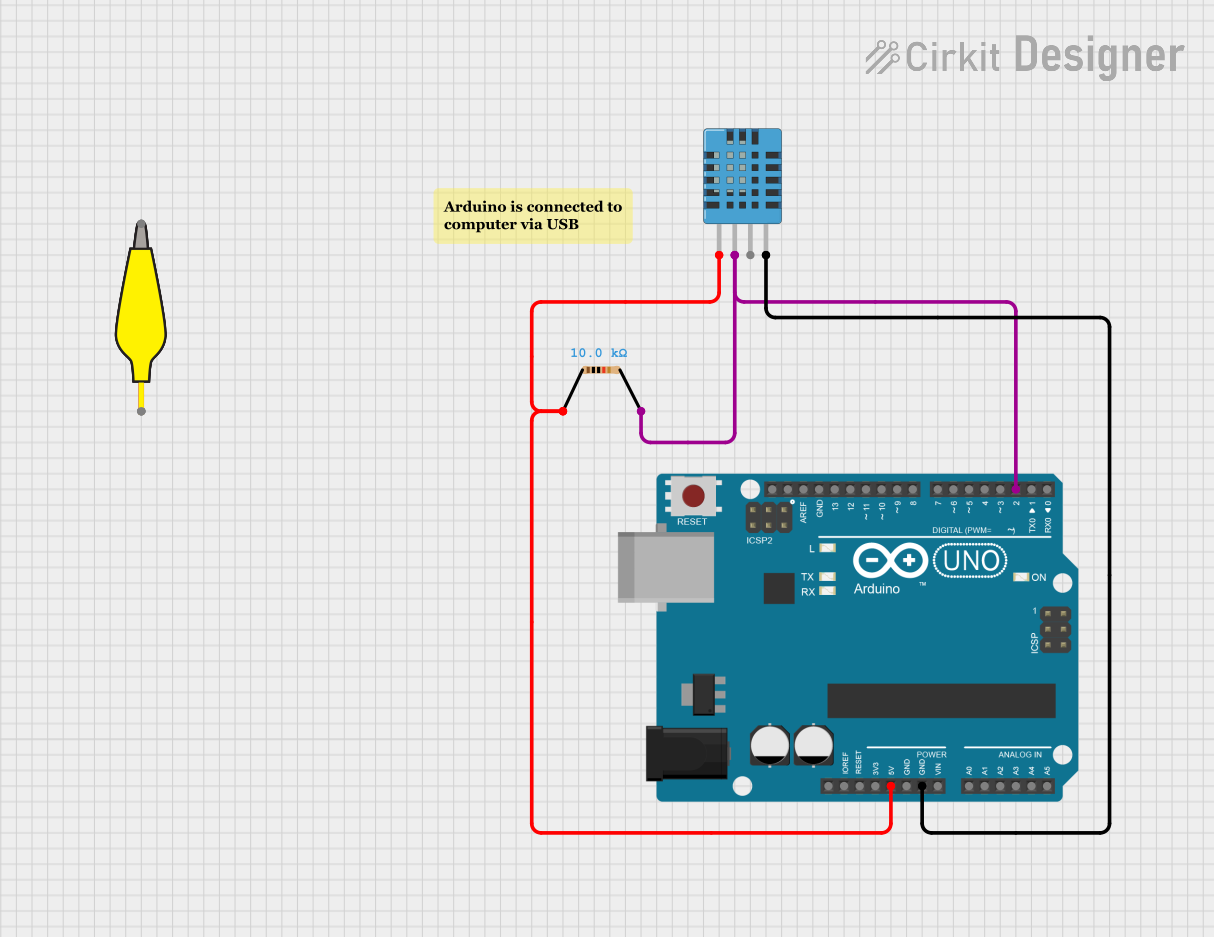
Connecting the DHT11 to a Circuit
- Power the Sensor: Connect the VCC pin to a 3.3V or 5V power source and the GND pin to ground.
- Data Communication: Connect the DATA pin to a digital input pin on your microcontroller. Use a pull-up resistor (typically 10kΩ) between the DATA pin and VCC to ensure reliable communication.
- Leave NC Unconnected: If your DHT11 has an NC pin, leave it unconnected.
Important Considerations
- Sampling Rate: The DHT11 can only provide one reading per second. Avoid polling the sensor more frequently to prevent communication errors.
- Cable Length: Keep the cable length between the sensor and the microcontroller as short as possible to minimize signal degradation.
- Environmental Conditions: The DHT11 is designed for indoor use. Avoid exposing it to extreme temperatures, high humidity, or condensation.
Example Code for Arduino UNO
Below is an example of how to use the DHT11 sensor with an Arduino UNO. This code uses the popular DHT library.
// Include the DHT library
#include <DHT.h>

// Define the DHT11 pin and type
#define DHTPIN 2       // Pin connected to the DATA pin of DHT11
#define DHTTYPE DHT11  // Specify the sensor type (DHT11)

// Initialize the DHT sensor
DHT dht(DHTPIN, DHTTYPE);

void setup() {
  Serial.begin(9600);  // Start the serial communication
  dht.begin();         // Initialize the DHT sensor
  Serial.println("DHT11 Sensor Initialized");
}

void loop() {
  // Wait a second between readings
  delay(1000);

  // Read temperature and humidity
  float humidity = dht.readHumidity();
  float temperature = dht.readTemperature();

  // Check if the readings are valid
  if (isnan(humidity) || isnan(temperature)) {
    Serial.println("Failed to read from DHT sensor!");
    return;
  }

  // Print the readings to the Serial Monitor
  Serial.print("Humidity: ");
  Serial.print(humidity);
  Serial.print("%  Temperature: ");
  Serial.print(temperature);
  Serial.println("°C");
}
Note: Install the
DHTlibrary in the Arduino IDE by navigating to Sketch > Include Library > Manage Libraries, then search for "DHT" and install the library by Adafruit.
Troubleshooting and FAQs
Common Issues
No Data or Incorrect Readings:
- Ensure the pull-up resistor (10kΩ) is connected between the DATA pin and VCC.
- Verify that the sensor is powered correctly (3.3V to 5.5V).
- Check the wiring and ensure the DATA pin is connected to the correct microcontroller pin.
Frequent Communication Errors:
- Ensure the sampling rate is no faster than 1 reading per second.
- Use shorter cables to reduce signal interference.
Sensor Not Responding:
- Confirm that the DHT library is installed and correctly included in your code.
- Double-check the pin definitions in your code.
FAQs
Q: Can the DHT11 measure negative temperatures?
A: No, the DHT11 can only measure temperatures in the range of 0°C to 50°C.
Q: Can I use the DHT11 outdoors?
A: The DHT11 is not designed for outdoor use. For outdoor applications, consider using a sensor with a wider operating range and better environmental protection, such as the DHT22.
Q: What is the difference between the DHT11 and DHT22?
A: The DHT22 offers a wider temperature and humidity range, higher accuracy, and faster response times compared to the DHT11. However, it is also more expensive.
Q: Do I need an external pull-up resistor for the DATA pin?
A: Yes, a 10kΩ pull-up resistor is recommended for reliable communication between the DHT11 and the microcontroller. Some DHT11 modules may have a built-in pull-up resistor.
By following this documentation, you should be able to successfully integrate the DHT11 sensor into your projects and troubleshoot any issues that arise.