How to Use SOIL SENSOR 4IN1 RS485 THCPH-S: Examples, Pinouts, and Specs
Introduction
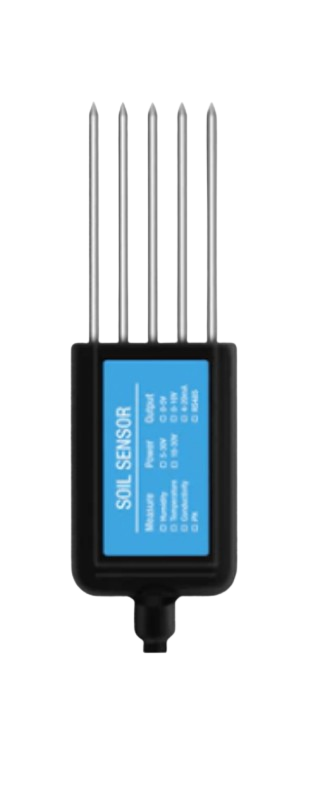
The SOIL SENSOR 4IN1 RS485 THCPH-S is a versatile and high-precision soil sensor designed to measure four critical soil parameters: moisture, temperature, pH, and electrical conductivity (EC). It utilizes RS485 communication for robust and reliable data transmission, making it suitable for a wide range of agricultural, horticultural, and environmental monitoring applications.
Explore Projects Built with SOIL SENSOR 4IN1 RS485 THCPH-S
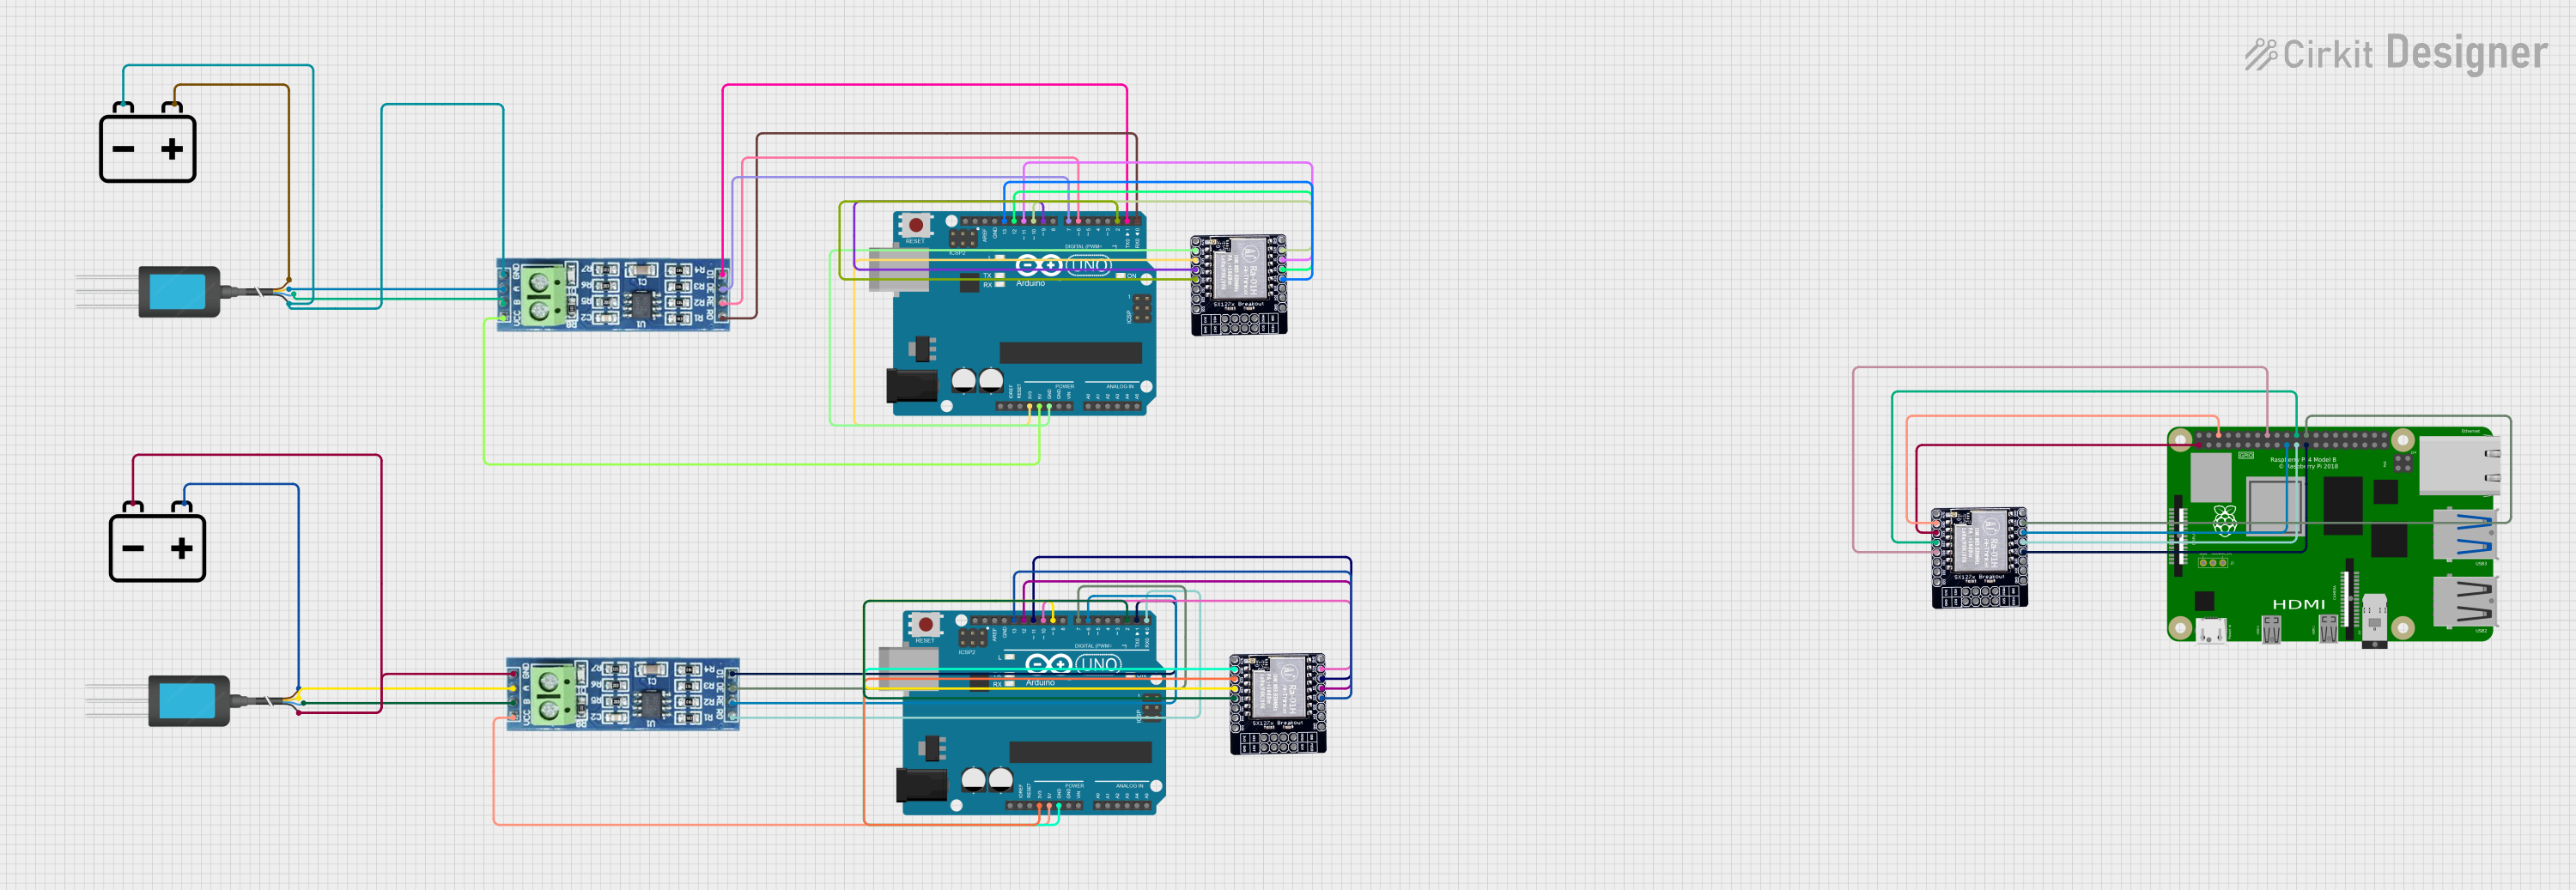
Explore Projects Built with SOIL SENSOR 4IN1 RS485 THCPH-S
Common Applications and Use Cases
- Precision agriculture for optimizing irrigation and fertilization
- Greenhouse monitoring and control systems
- Soil quality analysis in research and development
- Environmental monitoring for land management
- Smart farming and IoT-based agricultural systems
Technical Specifications
The following table outlines the key technical details of the SOIL SENSOR 4IN1 RS485 THCPH-S:
| Parameter | Specification |
|---|---|
| Manufacturer | SOIL SENSOR |
| Part ID | THCPH-S |
| Communication Protocol | RS485 |
| Power Supply Voltage | 9V to 24V DC |
| Power Consumption | ≤ 0.5W |
| Measurement Parameters | Soil Moisture, Temperature, pH, EC |
| Moisture Range | 0% to 100% |
| Temperature Range | -40°C to 80°C |
| pH Range | 3.0 to 9.0 |
| EC Range | 0 to 20 mS/cm |
| Accuracy | ±2% (Moisture), ±0.5°C (Temperature), ±0.1 (pH), ±2% (EC) |
| Output Format | Modbus RTU |
| Cable Length | 2 meters (extendable) |
| Waterproof Rating | IP68 |
Pin Configuration and Descriptions
The sensor has a 4-wire interface for power and communication. The pin configuration is as follows:
| Pin | Wire Color | Description |
|---|---|---|
| 1 | Red | Power Supply (9V to 24V DC) |
| 2 | Black | Ground (GND) |
| 3 | Yellow | RS485-A (Data Line A) |
| 4 | Blue | RS485-B (Data Line B) |
Usage Instructions
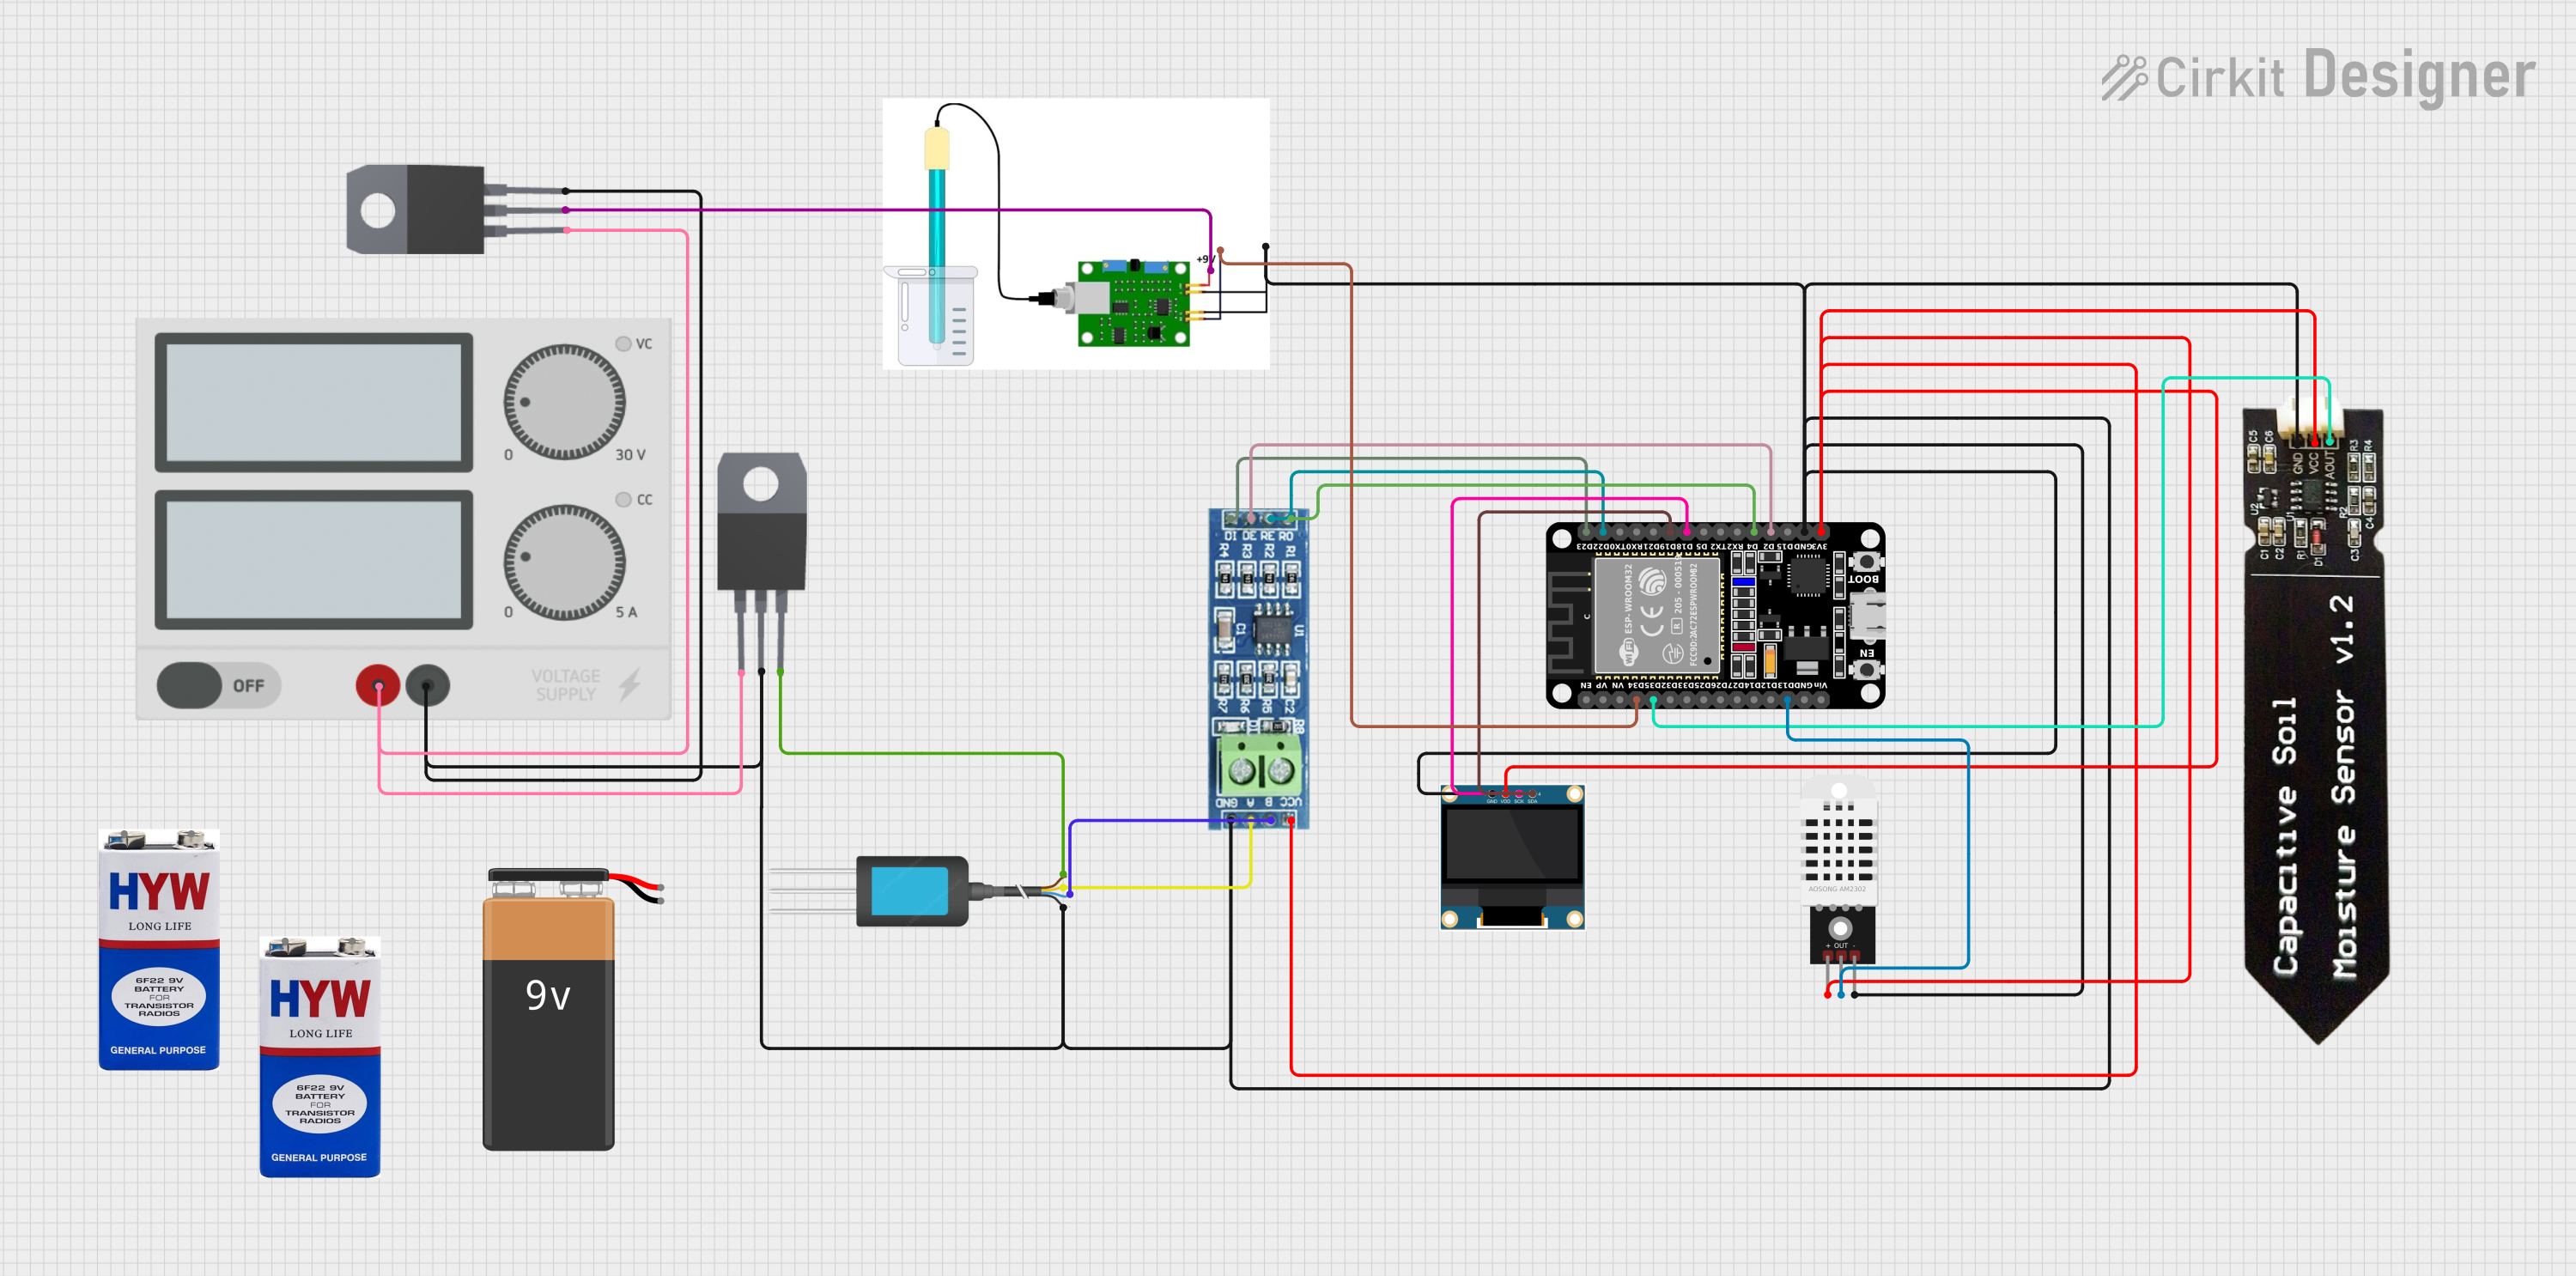
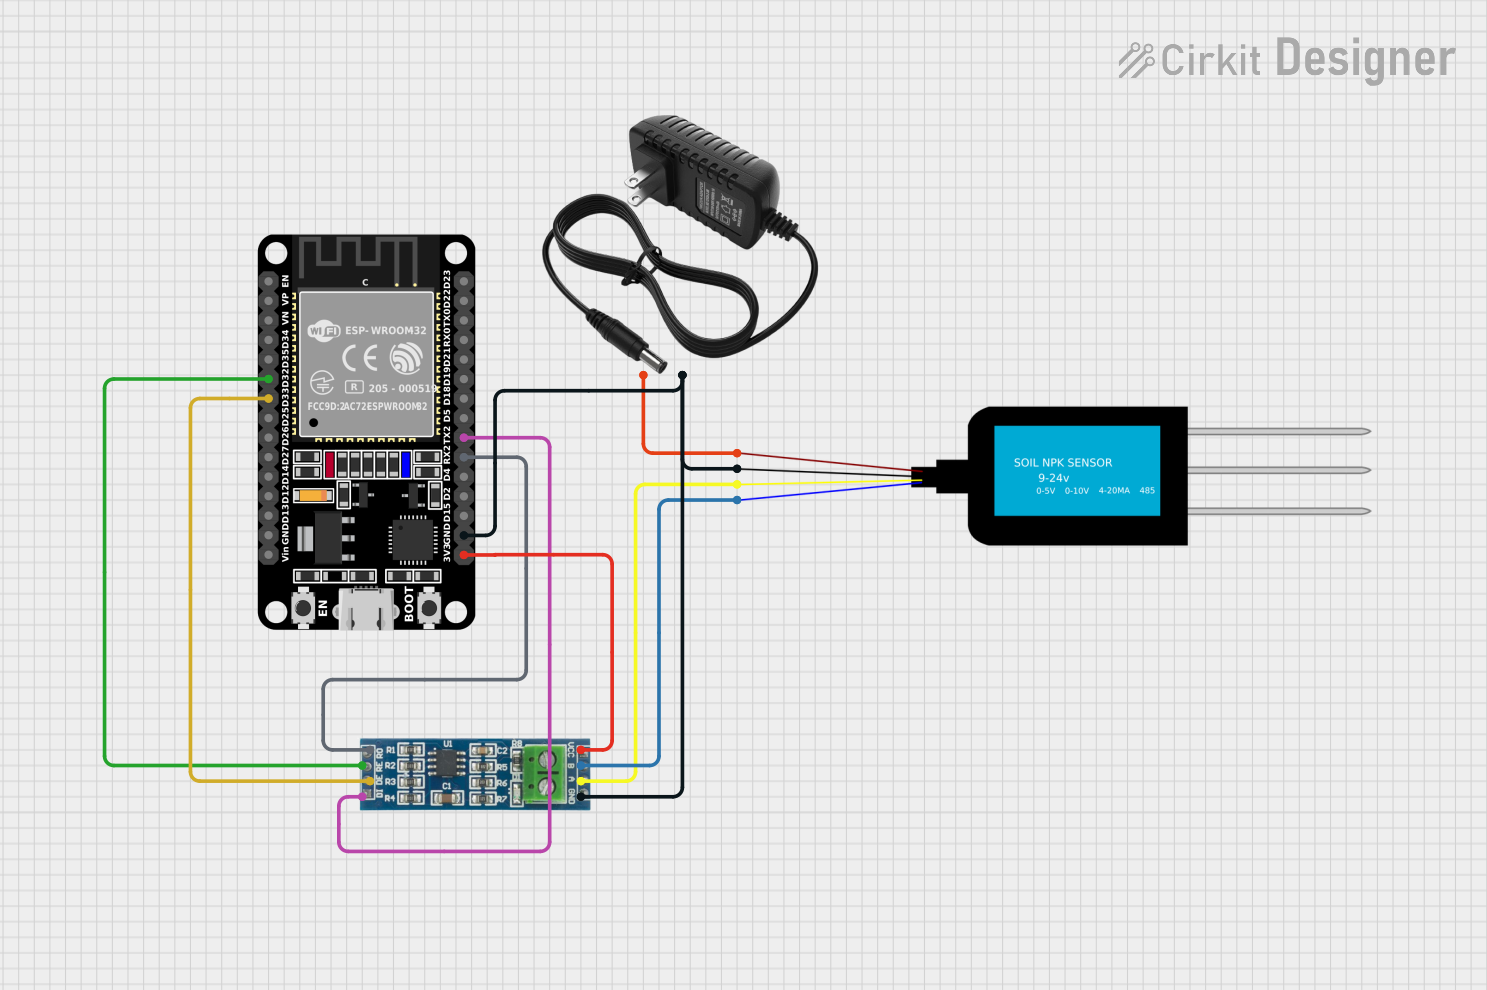
How to Use the Component in a Circuit
- Power Connection: Connect the red wire to a DC power supply (9V to 24V) and the black wire to ground.
- RS485 Communication: Connect the yellow (RS485-A) and blue (RS485-B) wires to the RS485 interface of your microcontroller or RS485-to-USB converter.
- Modbus RTU Configuration: Configure your microcontroller or software to communicate with the sensor using the Modbus RTU protocol. The default baud rate is 9600 bps.
- Data Reading: Use Modbus commands to query the sensor for soil moisture, temperature, pH, and EC data.
Important Considerations and Best Practices
- Ensure the sensor is fully inserted into the soil for accurate measurements.
- Avoid placing the sensor in highly acidic or alkaline environments outside its pH range (3.0 to 9.0).
- Use a shielded cable for RS485 communication to minimize interference in noisy environments.
- Calibrate the sensor periodically for pH and EC measurements to maintain accuracy.
- Protect the sensor from physical damage during installation and use.
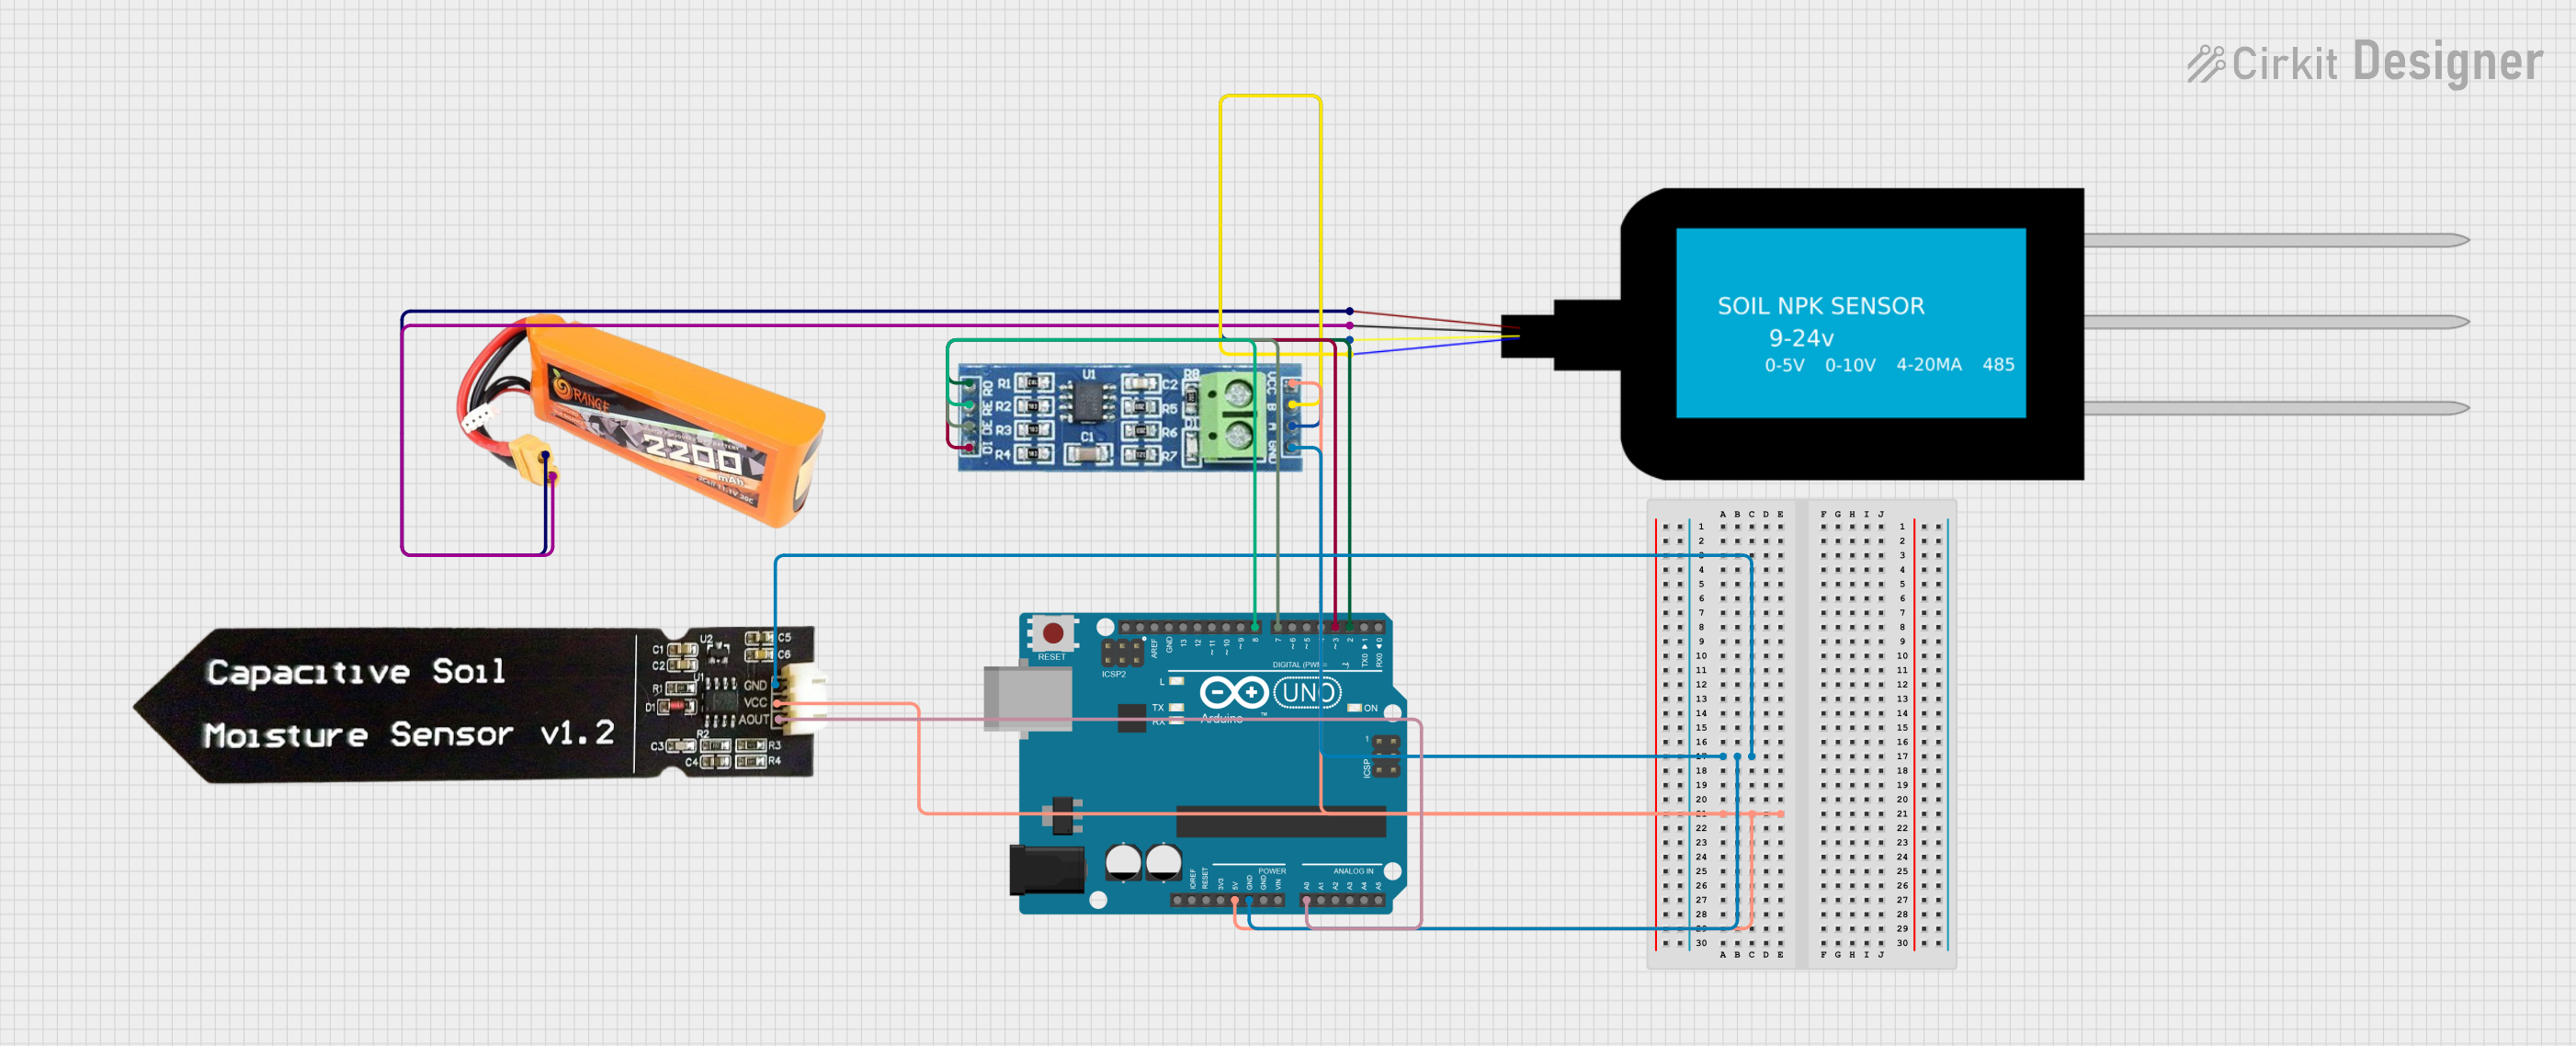
Arduino UNO Example Code
Below is an example of how to interface the SOIL SENSOR 4IN1 RS485 THCPH-S with an Arduino UNO using an RS485 module:
#include <ModbusMaster.h>

// Instantiate ModbusMaster object
ModbusMaster node;

// RS485 communication pins
#define RE_DE_PIN 2 // Pin to control RS485 module (RE/DE)

// Function to control RS485 module direction
void preTransmission() {
  digitalWrite(RE_DE_PIN, HIGH); // Enable transmission
}

void postTransmission() {
  digitalWrite(RE_DE_PIN, LOW); // Enable reception
}

void setup() {
  // Initialize serial communication
  Serial.begin(9600);
  Serial.println("SOIL SENSOR 4IN1 RS485 THCPH-S");

  // Initialize RS485 control pin
  pinMode(RE_DE_PIN, OUTPUT);
  digitalWrite(RE_DE_PIN, LOW);

  // Initialize Modbus communication
  node.begin(1, Serial); // Sensor Modbus ID is 1
  node.preTransmission(preTransmission);
  node.postTransmission(postTransmission);
}

void loop() {
  uint8_t result;
  uint16_t data[4];

  // Read 4 registers starting from address 0x0000
  result = node.readInputRegisters(0x0000, 4);

  if (result == node.ku8MBSuccess) {
    // Store the data
    data[0] = node.getResponseBuffer(0); // Moisture
    data[1] = node.getResponseBuffer(1); // Temperature
    data[2] = node.getResponseBuffer(2); // pH
    data[3] = node.getResponseBuffer(3); // EC

    // Print the data
    Serial.print("Moisture: ");
    Serial.print(data[0]);
    Serial.println("%");

    Serial.print("Temperature: ");
    Serial.print(data[1] / 10.0); // Convert to °C
    Serial.println("°C");

    Serial.print("pH: ");
    Serial.print(data[2] / 10.0); // Convert to pH
    Serial.println();

    Serial.print("EC: ");
    Serial.print(data[3] / 100.0); // Convert to mS/cm
    Serial.println(" mS/cm");
  } else {
    Serial.print("Error reading sensor: ");
    Serial.println(result, HEX);
  }

  delay(2000); // Wait 2 seconds before next reading
}
Troubleshooting and FAQs
Common Issues and Solutions
No Data Received from the Sensor
- Ensure the RS485-A and RS485-B wires are correctly connected to the RS485 module.
- Verify that the sensor's Modbus ID and baud rate match your configuration.
- Check the power supply voltage (9V to 24V DC) and ensure it is stable.
Inaccurate Measurements
- Ensure the sensor is fully inserted into the soil and free from debris.
- Calibrate the sensor for pH and EC measurements if readings are inconsistent.
- Avoid using the sensor in extreme environmental conditions outside its specified ranges.
Communication Errors
- Use a shielded cable for RS485 communication to reduce interference.
- Verify the termination resistor (120Ω) is properly installed at the end of the RS485 bus.
FAQs
Q: Can the sensor be used underwater?
A: Yes, the sensor is IP68-rated and can be submerged in water, but it is designed primarily for soil applications.
Q: How often should the sensor be calibrated?
A: Calibration frequency depends on usage, but it is recommended to calibrate the pH and EC measurements every 6 months for optimal accuracy.
Q: Can the sensor be used with other microcontrollers?
A: Yes, the sensor can be used with any microcontroller that supports RS485 communication and Modbus RTU protocol.