How to Use Battery 24V 6S4P: Examples, Pinouts, and Specs
Introduction
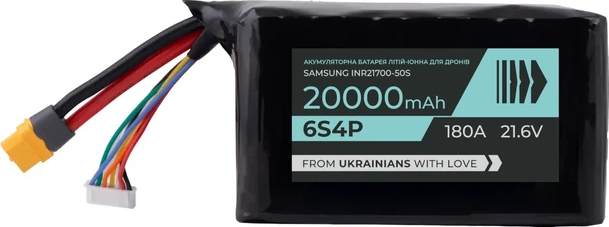
The Battery 24V 6S4P is a lithium-ion battery pack manufactured by Arduino (Part ID: UNO). It is configured in a 6-series and 4-parallel arrangement, providing a nominal voltage of 24 volts. This configuration ensures a higher capacity and energy density, making it suitable for applications requiring reliable and long-lasting power. The 6S4P design combines six cells in series to achieve the desired voltage and four parallel groups to increase the overall capacity.
Explore Projects Built with Battery 24V 6S4P


Explore Projects Built with Battery 24V 6S4P
Common Applications and Use Cases
- Electric bicycles and scooters
- Robotics and automation systems
- Renewable energy storage (e.g., solar power systems)
- Portable power supplies for Arduino-based projects
- Uninterruptible Power Supplies (UPS)
- High-power IoT devices
Technical Specifications
The following table outlines the key technical details of the Battery 24V 6S4P:
| Parameter | Value |
|---|---|
| Nominal Voltage | 24V |
| Configuration | 6S4P (6 cells in series, 4 in parallel) |
| Cell Chemistry | Lithium-Ion |
| Capacity | Varies based on cell rating (e.g., 10,000mAh for 2500mAh cells) |
| Maximum Discharge Current | Depends on cell specifications (e.g., 40A for 10A-rated cells) |
| Charging Voltage | 25.2V (maximum) |
| Charging Current | Typically 0.5C to 1C of total capacity |
| Protection Circuit | Built-in Battery Management System (BMS) |
| Operating Temperature | -20°C to 60°C |
| Weight | Varies based on cell type and configuration |
Pin Configuration and Descriptions
The Battery 24V 6S4P typically includes the following connections:
| Pin/Connector | Description |
|---|---|
| Positive (+) | Main positive terminal for power output |
| Negative (-) | Main negative terminal for power output |
| BMS Balance Leads | Connectors for individual cell group monitoring and balancing |
| Charging Port | Dedicated port for charging the battery pack |
Usage Instructions
How to Use the Battery in a Circuit
- Connection to Load: Connect the positive (+) and negative (-) terminals of the battery to the load or device requiring power. Ensure the load's voltage and current requirements match the battery's specifications.
- Charging: Use a compatible lithium-ion battery charger with a maximum output voltage of 25.2V. Connect the charger to the charging port or directly to the main terminals if no dedicated port is available.
- Monitoring: If the battery includes a Battery Management System (BMS), use the balance leads for monitoring individual cell voltages and ensuring safe operation.
Important Considerations and Best Practices
- Avoid Overcharging: Always use a charger with proper voltage and current limits to prevent overcharging, which can damage the cells or cause safety hazards.
- Discharge Limits: Do not discharge the battery below its minimum voltage (typically 3.0V per cell or 18V for the pack) to avoid permanent damage.
- Temperature Management: Operate the battery within the specified temperature range to ensure optimal performance and safety.
- Storage: Store the battery at a partial charge (around 40-60%) in a cool, dry place if not in use for extended periods.
- Arduino Integration: When using the battery with an Arduino UNO or other microcontroller, ensure the voltage is regulated to match the microcontroller's input requirements (e.g., 5V or 3.3V).
Example Code for Monitoring Battery Voltage with Arduino UNO
The following code demonstrates how to monitor the battery voltage using an Arduino UNO and a voltage divider circuit:
// Define the analog pin connected to the voltage divider
const int voltagePin = A0;

// Define the voltage divider ratio (e.g., 10:1 for a 24V battery)
const float voltageDividerRatio = 10.0;

// Define the reference voltage of the Arduino UNO (5V for most boards)
const float referenceVoltage = 5.0;

void setup() {
  Serial.begin(9600); // Initialize serial communication at 9600 baud
}

void loop() {
  // Read the analog value from the voltage divider
  int analogValue = analogRead(voltagePin);

  // Convert the analog value to the actual battery voltage
  float batteryVoltage = (analogValue * referenceVoltage / 1023.0) * voltageDividerRatio;

  // Print the battery voltage to the Serial Monitor
  Serial.print("Battery Voltage: ");
  Serial.print(batteryVoltage);
  Serial.println(" V");

  delay(1000); // Wait for 1 second before the next reading
}
Note: Use appropriate resistors for the voltage divider to ensure the input voltage to the Arduino does not exceed 5V.
Troubleshooting and FAQs
Common Issues and Solutions
Battery Not Charging:
- Cause: Charger not compatible or faulty.
- Solution: Verify the charger specifications and ensure it matches the battery's requirements.
Low Battery Runtime:
- Cause: Cells may be degraded or unbalanced.
- Solution: Check individual cell voltages using the BMS balance leads and replace degraded cells if necessary.
Overheating During Use:
- Cause: Excessive current draw or poor ventilation.
- Solution: Ensure the load does not exceed the battery's maximum discharge current and improve airflow around the battery.
Arduino Not Powering On:
- Cause: Voltage mismatch or insufficient current.
- Solution: Use a voltage regulator to step down the battery voltage to 5V or 3.3V as required by the Arduino UNO.
FAQs
Can I use this battery for a 12V device?
- Yes, but you will need a DC-DC step-down converter to reduce the voltage to 12V.
How do I know when the battery is fully charged?
- The battery is fully charged when the voltage reaches 25.2V, and the charger indicates a full charge (e.g., LED indicator).
Is the battery safe to use without a BMS?
- No, a BMS is essential for safe operation as it prevents overcharging, over-discharging, and ensures cell balancing.
Can I connect multiple 24V 6S4P batteries in parallel?
- Yes, but ensure all batteries are at the same voltage level before connecting to avoid current surges.
This documentation provides a comprehensive guide to using the Battery 24V 6S4P effectively and safely. For further assistance, refer to the manufacturer's support resources.