Cirkit Designer Logo
Cirkit Designer
Your all-in-one circuit design IDE
Home / 
Component Documentation

How to Use Motor Vibración: Examples, Pinouts, and Specs

Image of Motor Vibración
Cirkit Designer LogoDesign with Motor Vibración in Cirkit Designer

Introduction

A vibration motor is an electromechanical device that converts electrical energy into mechanical energy, producing vibrations. It is commonly used in applications where tactile feedback is desired, such as mobile devices, gaming controllers, wearables, and haptic feedback systems. These motors are compact, reliable, and easy to integrate into various electronic projects, making them a popular choice for both hobbyists and professionals.

Explore Projects Built with Motor Vibración

Use Cirkit Designer to design, explore, and prototype these projects online. Some projects support real-time simulation. Click "Open Project" to start designing instantly!
Arduino UNO-Based Vibration Monitoring and Control System with ADXL345 and L298N Motor Driver
Image of vibrating table: A project utilizing Motor Vibración in a practical application
This circuit is a vibrating table control system that uses an Arduino UNO to manage a DC motor via an L298N motor driver, with vibration feedback from an ADXL345 accelerometer and speed control via a potentiometer. The system includes an emergency stop feature and displays vibration and motor speed data on an OLED screen.
Cirkit Designer LogoOpen Project in Cirkit Designer
ESP32 Battery-Powered Vibration Motor Controller
Image of Board 3: A project utilizing Motor Vibración in a practical application
This circuit uses an ESP32 microcontroller to control a vibration motor through an NPN transistor. The ESP32 is powered by a Li-ion battery, and a resistor and capacitor are used for current limiting and noise filtering, respectively.
Cirkit Designer LogoOpen Project in Cirkit Designer
Arduino Nano Battery-Powered Vibration Motor Controller
Image of bitirme: A project utilizing Motor Vibración in a practical application
This circuit uses an Arduino Nano to control four vibration motors through NPN transistors, with each motor connected to a transistor and a rectifier diode for protection. The Arduino Nano receives power from a 5V battery and controls the transistors via digital pins D9, D10, D11, and D12, enabling the vibration motors to be turned on and off programmatically.
Cirkit Designer LogoOpen Project in Cirkit Designer
ESP32-Based Posture Monitoring System with Wi-Fi and Vibration Feedback
Image of Esp32 flex sensor for posture monitoring with haptic vibration feedback: A project utilizing Motor Vibración in a practical application
This circuit uses an ESP32 microcontroller to monitor flex sensors and control a PWM vibration motor. The ESP32 reads the flex sensor values to detect slouching and triggers the vibration motor to alert the user, while also sending the sensor data to a server over Wi-Fi.
Cirkit Designer LogoOpen Project in Cirkit Designer

Explore Projects Built with Motor Vibración

Use Cirkit Designer to design, explore, and prototype these projects online. Some projects support real-time simulation. Click "Open Project" to start designing instantly!
Image of vibrating table: A project utilizing Motor Vibración in a practical application
Arduino UNO-Based Vibration Monitoring and Control System with ADXL345 and L298N Motor Driver
This circuit is a vibrating table control system that uses an Arduino UNO to manage a DC motor via an L298N motor driver, with vibration feedback from an ADXL345 accelerometer and speed control via a potentiometer. The system includes an emergency stop feature and displays vibration and motor speed data on an OLED screen.
Cirkit Designer LogoOpen Project in Cirkit Designer
Image of Board 3: A project utilizing Motor Vibración in a practical application
ESP32 Battery-Powered Vibration Motor Controller
This circuit uses an ESP32 microcontroller to control a vibration motor through an NPN transistor. The ESP32 is powered by a Li-ion battery, and a resistor and capacitor are used for current limiting and noise filtering, respectively.
Cirkit Designer LogoOpen Project in Cirkit Designer
Image of bitirme: A project utilizing Motor Vibración in a practical application
Arduino Nano Battery-Powered Vibration Motor Controller
This circuit uses an Arduino Nano to control four vibration motors through NPN transistors, with each motor connected to a transistor and a rectifier diode for protection. The Arduino Nano receives power from a 5V battery and controls the transistors via digital pins D9, D10, D11, and D12, enabling the vibration motors to be turned on and off programmatically.
Cirkit Designer LogoOpen Project in Cirkit Designer
Image of Esp32 flex sensor for posture monitoring with haptic vibration feedback: A project utilizing Motor Vibración in a practical application
ESP32-Based Posture Monitoring System with Wi-Fi and Vibration Feedback
This circuit uses an ESP32 microcontroller to monitor flex sensors and control a PWM vibration motor. The ESP32 reads the flex sensor values to detect slouching and triggers the vibration motor to alert the user, while also sending the sensor data to a server over Wi-Fi.
Cirkit Designer LogoOpen Project in Cirkit Designer

Technical Specifications

Below are the key technical details for a typical vibration motor:

Parameter Value
Operating Voltage 2V to 5V DC
Rated Voltage 3V DC
Operating Current 70mA to 120mA (at 3V)
Starting Voltage ~2.0V DC
Vibration Frequency ~100 Hz to 250 Hz
Dimensions Varies (e.g., 10mm x 3mm for coin type)
Motor Type Eccentric Rotating Mass (ERM) or Linear Resonant Actuator (LRA)

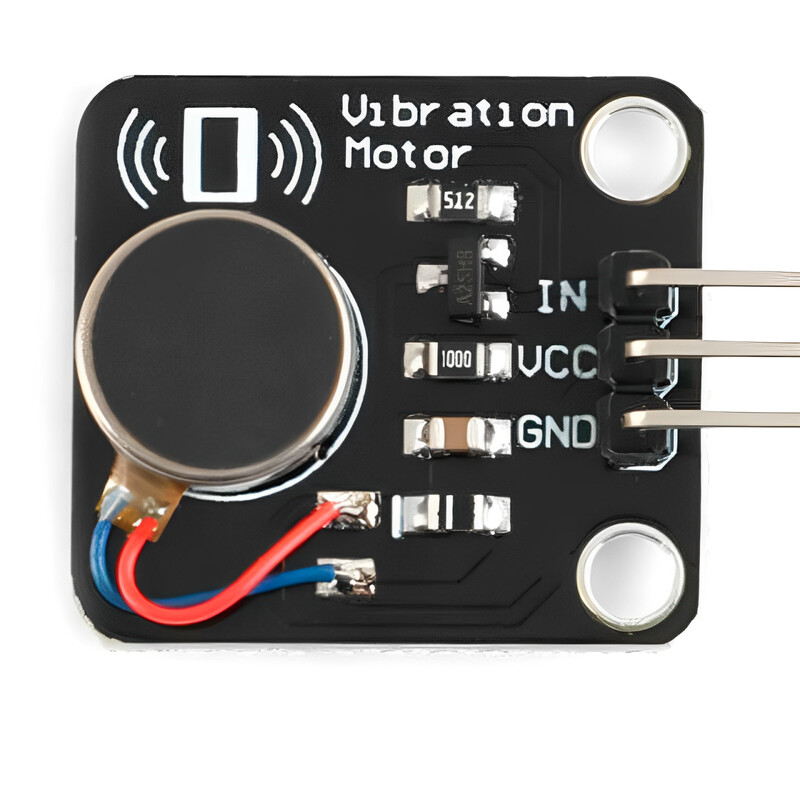
Pin Configuration and Descriptions

The vibration motor typically has two pins for electrical connections:

Pin Description
Pin 1 Positive terminal (+), connects to the power supply or control circuit.
Pin 2 Negative terminal (-), connects to ground.

Usage Instructions

How to Use the Motor in a Circuit

  1. Power Supply: Connect the motor to a DC power supply within its operating voltage range (e.g., 3V). Exceeding the voltage rating may damage the motor.
  2. Control: To control the motor, you can use a transistor or MOSFET as a switch. This allows you to turn the motor on and off using a microcontroller like an Arduino.
  3. PWM Control: For variable vibration intensity, use Pulse Width Modulation (PWM) to adjust the motor's speed.

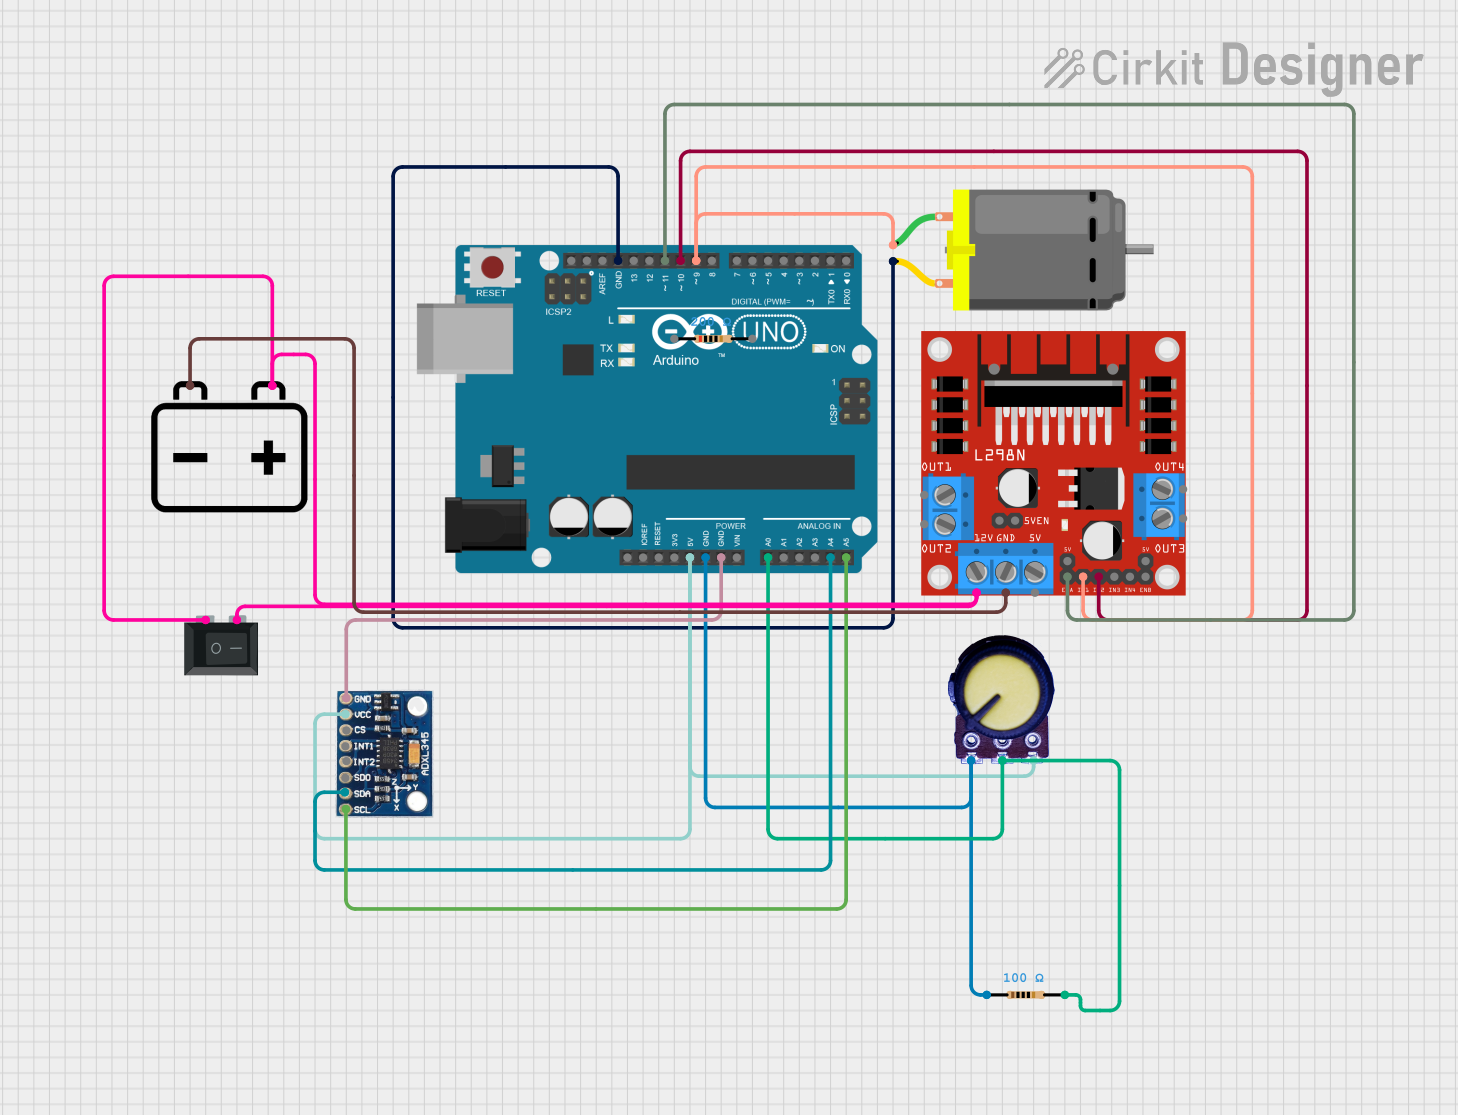
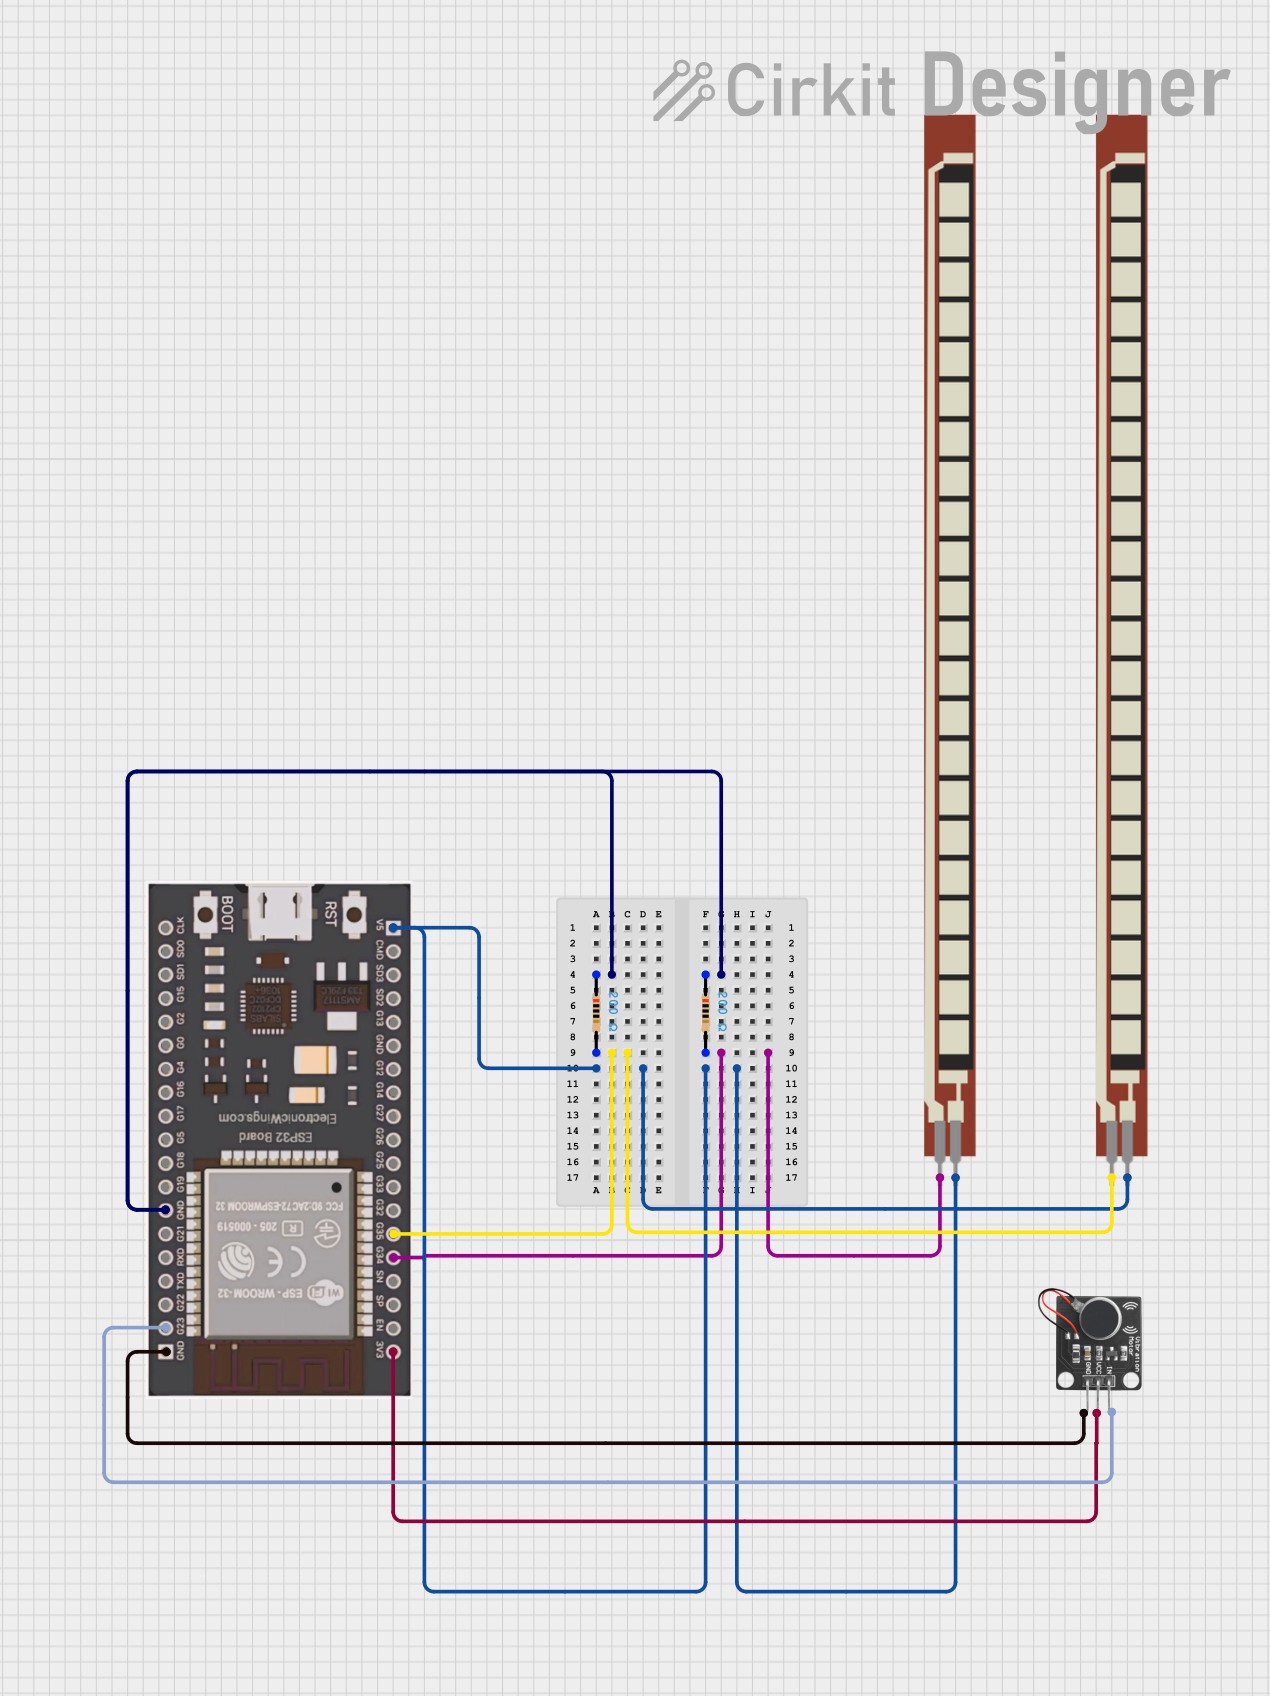
Example Circuit with Arduino UNO

Below is an example of how to connect and control a vibration motor using an Arduino UNO:

Components Required:

  • Vibration motor
  • NPN transistor (e.g., 2N2222)
  • 1 kΩ resistor
  • Diode (e.g., 1N4007)
  • Arduino UNO
  • External power supply (if needed)

Circuit Diagram:

  1. Connect the positive terminal of the motor to the collector of the NPN transistor.
  2. Connect the emitter of the transistor to ground.
  3. Place a diode across the motor terminals (cathode to positive terminal) to protect against back EMF.
  4. Connect the base of the transistor to a PWM-capable pin on the Arduino (e.g., Pin 9) through a 1 kΩ resistor.
  5. Connect the Arduino ground to the ground of the motor circuit.

Arduino Code:

// Arduino code to control a vibration motor using PWM

const int motorPin = 9; // PWM pin connected to the transistor base

void setup() {
  pinMode(motorPin, OUTPUT); // Set motorPin as an output
}

void loop() {
  analogWrite(motorPin, 128); // Set motor speed to 50% (128 out of 255)
  delay(1000);                // Run motor for 1 second
  analogWrite(motorPin, 0);   // Turn off motor
  delay(1000);                // Wait for 1 second
}

Important Considerations and Best Practices

  • Back EMF Protection: Always use a flyback diode across the motor terminals to protect the circuit from voltage spikes caused by the motor's inductive load.
  • Heat Dissipation: Ensure proper ventilation or heat dissipation for the transistor or MOSFET used in the circuit.
  • Power Supply: Use a stable power supply to avoid fluctuations that could affect motor performance.
  • Mounting: Securely mount the motor to prevent unwanted movement or noise during operation.

Troubleshooting and FAQs

Common Issues and Solutions

Issue Possible Cause Solution
Motor does not vibrate Insufficient voltage or loose connections Check power supply and connections.
Motor vibrates weakly Voltage too low or PWM duty cycle too small Increase voltage or adjust PWM settings.
Motor gets hot Overvoltage or prolonged operation Reduce voltage or limit runtime.
Circuit not working after motor use Back EMF damage Ensure a flyback diode is installed.

FAQs

  1. Can I connect the motor directly to an Arduino pin?

    • No, the motor's current draw exceeds the Arduino's pin capacity. Use a transistor or MOSFET to control the motor.
  2. What type of vibration motor should I use for my project?

    • For compact devices, use a coin-type motor. For stronger vibrations, consider a cylindrical motor.
  3. How do I reduce noise from the motor?

    • Use rubber mounts or vibration-dampening materials to minimize noise and mechanical stress.

By following this documentation, you can effectively integrate and troubleshoot a vibration motor in your electronic projects.