How to Use TSSOP 28 socket: Examples, Pinouts, and Specs
Introduction
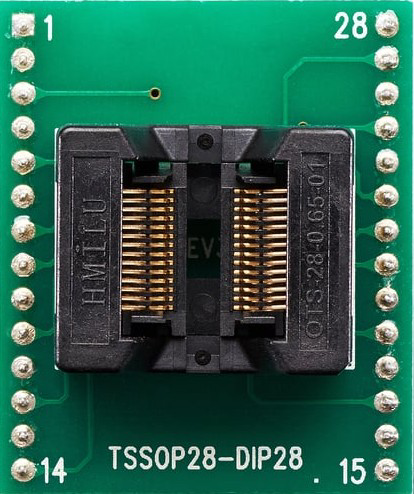
The TSSOP 28 Socket by Adafruit (Manufacturer Part ID: TSSOP 28 Socket) is a specialized socket designed to house 28-pin Thin Shrink Small Outline Package (TSSOP) integrated circuits. This socket allows for easy insertion and removal of ICs without the need for soldering, making it ideal for prototyping, testing, and development purposes.
Explore Projects Built with TSSOP 28 socket


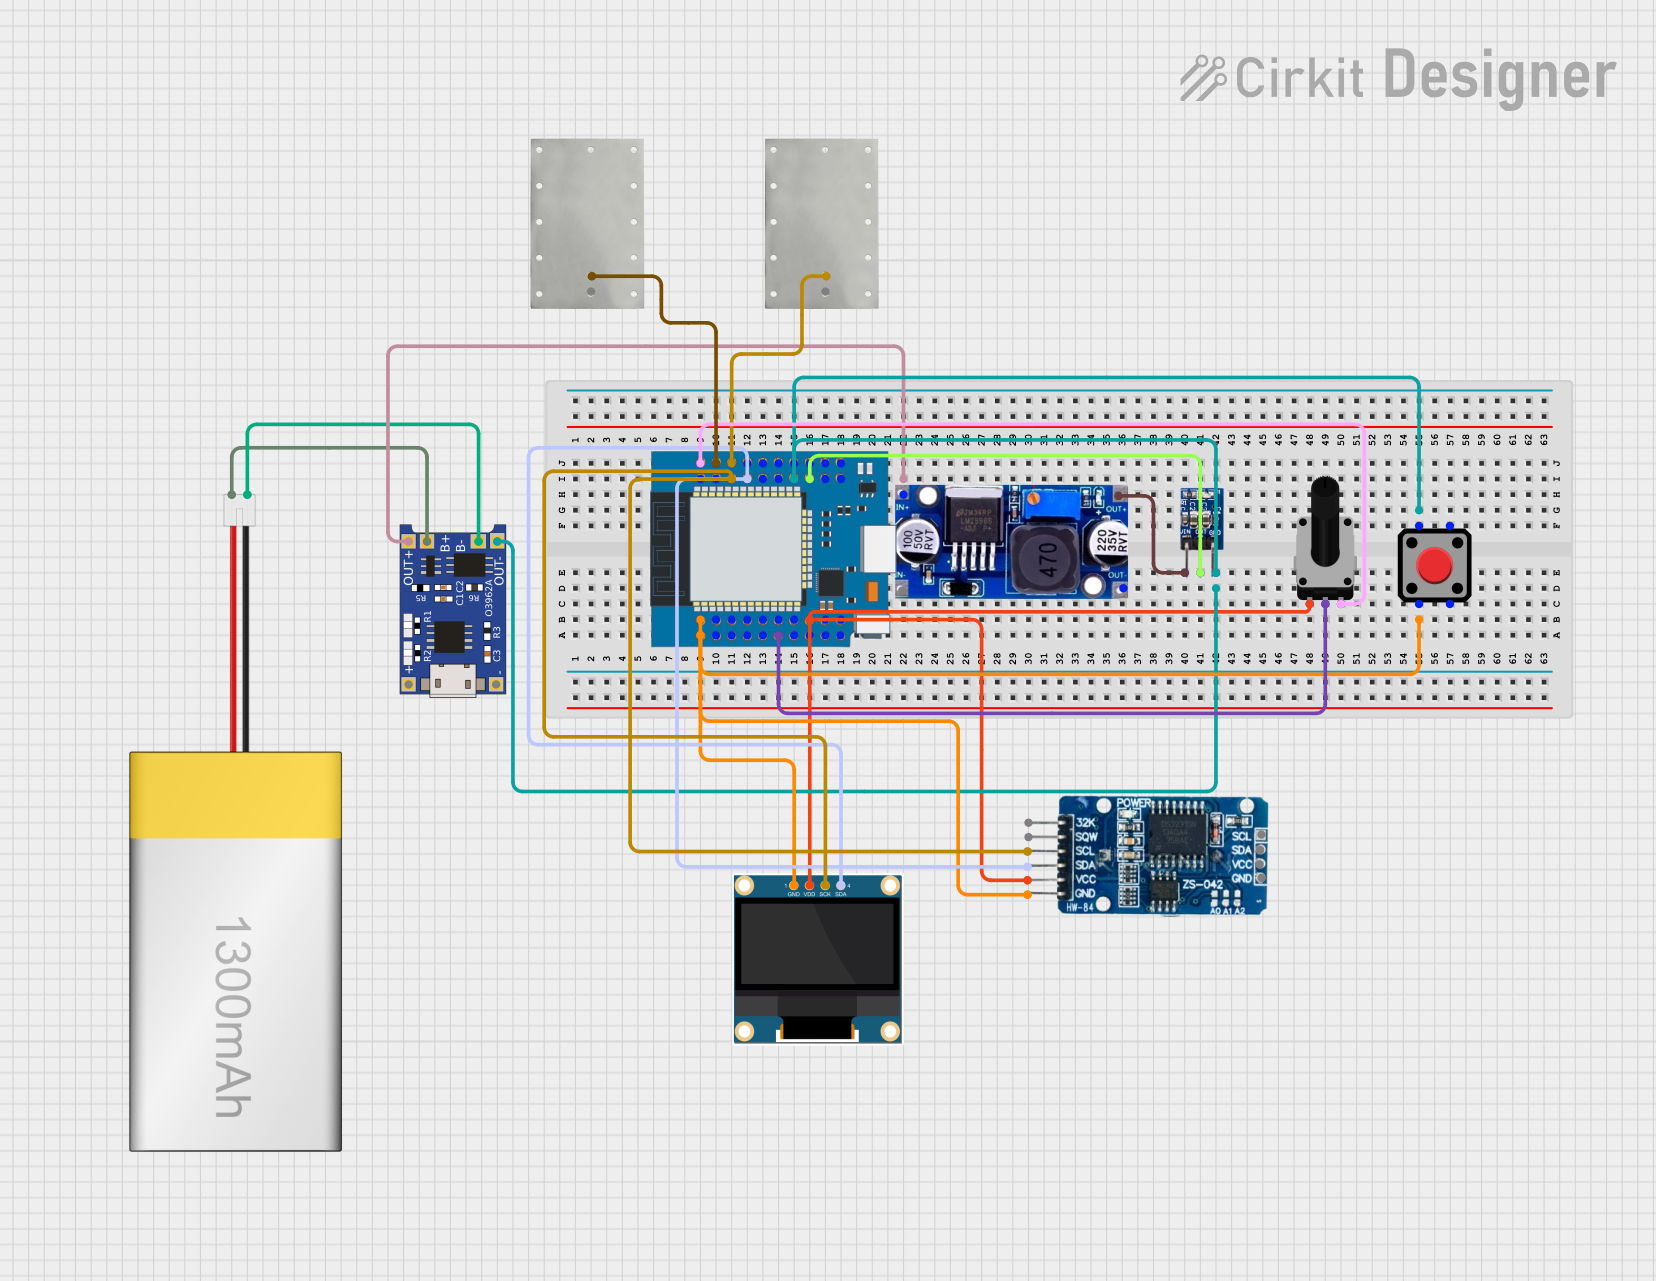
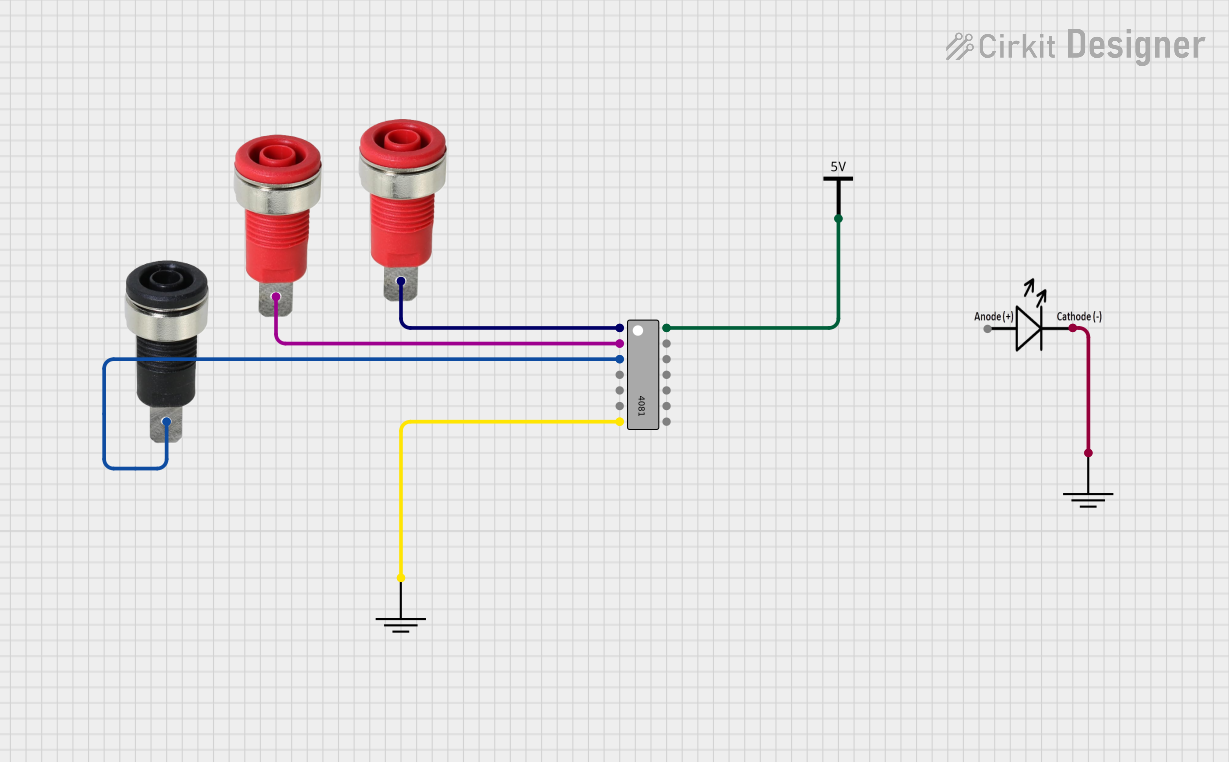
Explore Projects Built with TSSOP 28 socket
Common Applications and Use Cases
- Prototyping and Development: Enables quick swapping of ICs during circuit design and testing.
- IC Testing: Facilitates testing of TSSOP ICs without permanent soldering.
- Educational Projects: Useful for students and hobbyists working with TSSOP ICs.
- Repair and Replacement: Allows for easy replacement of ICs in circuits.
Technical Specifications
The TSSOP 28 Socket is designed to meet the needs of engineers and hobbyists working with TSSOP ICs. Below are the key technical details:
General Specifications
- Manufacturer: Adafruit
- Part ID: TSSOP 28 Socket
- Socket Type: TSSOP (Thin Shrink Small Outline Package)
- Pin Count: 28
- Material: High-quality plastic and metal contacts for durability and reliable connections.
- Pitch: 0.65 mm (distance between adjacent pins)
- Operating Temperature: -40°C to +85°C
- Insertion/Removal Cycles: Rated for multiple insertions and removals without degradation.
Pin Configuration and Descriptions
The TSSOP 28 Socket has 28 pins arranged in two rows, each with 14 pins. The pin configuration corresponds directly to the pinout of the TSSOP IC being used. Below is a general description of the pin layout:
| Pin Number | Description |
|---|---|
| 1-28 | Direct connection to IC pins |
Note: The pinout of the socket depends on the specific TSSOP IC being inserted. Refer to the IC's datasheet for detailed pin functions.
Usage Instructions
How to Use the TSSOP 28 Socket in a Circuit
- Prepare the Socket: Ensure the socket is clean and free of debris before use.
- Insert the IC: Align the IC's pins with the socket's pin slots. Carefully press the IC into the socket until it is securely seated.
- Connect to Circuit: Solder the socket's pins to the PCB or connect them to a breadboard as needed.
- Test the Circuit: Power the circuit and verify the functionality of the IC.
Important Considerations and Best Practices
- Alignment: Ensure the IC is properly aligned with the socket to avoid bent pins or improper connections.
- Insertion Force: Do not apply excessive force when inserting or removing the IC to prevent damage to the socket or IC.
- Static Protection: Handle the IC and socket in an ESD-safe environment to prevent damage from static electricity.
- Thermal Limits: Avoid exposing the socket to temperatures beyond its rated operating range.
Example: Using the TSSOP 28 Socket with an Arduino UNO
If you are using a TSSOP IC (e.g., a TSSOP EEPROM) with the socket and connecting it to an Arduino UNO, follow these steps:
- Insert the TSSOP IC into the socket.
- Connect the socket's pins to the Arduino UNO using jumper wires or a PCB.
- Write and upload the Arduino code to interact with the IC.
Here is an example Arduino code snippet for interfacing with a TSSOP EEPROM IC:
#include <Wire.h> // Include the Wire library for I2C communication

#define EEPROM_I2C_ADDRESS 0x50 // Replace with your EEPROM's I2C address

void setup() {
  Wire.begin(); // Initialize I2C communication
  Serial.begin(9600); // Start serial communication for debugging
  Serial.println("TSSOP EEPROM Test");
}

void loop() {
  // Write a byte to the EEPROM
  Wire.beginTransmission(EEPROM_I2C_ADDRESS);
  Wire.write(0x00); // Memory address to write to
  Wire.write(0x42); // Data to write (example: 0x42)
  Wire.endTransmission();
  delay(10); // Small delay for write operation

  // Read the byte back from the EEPROM
  Wire.beginTransmission(EEPROM_I2C_ADDRESS);
  Wire.write(0x00); // Memory address to read from
  Wire.endTransmission();
  Wire.requestFrom(EEPROM_I2C_ADDRESS, 1); // Request 1 byte from EEPROM

  if (Wire.available()) {
    byte data = Wire.read(); // Read the byte
    Serial.print("Read Data: 0x");
    Serial.println(data, HEX); // Print the data in hexadecimal format
  }

  delay(1000); // Wait 1 second before repeating
}
Note: Replace the I2C address and memory addresses in the code with those specific to your TSSOP IC.
Troubleshooting and FAQs
Common Issues and Solutions
IC Not Detected in Circuit
- Cause: Misalignment of IC pins with the socket.
- Solution: Remove the IC, realign it carefully, and reinsert it into the socket.
Intermittent Connections
- Cause: Dust or debris in the socket.
- Solution: Clean the socket with compressed air or a soft brush.
Bent or Damaged Pins
- Cause: Excessive force during insertion or removal.
- Solution: Straighten the pins carefully with tweezers or replace the IC if necessary.
Socket Overheating
- Cause: Prolonged exposure to high temperatures during soldering.
- Solution: Use a temperature-controlled soldering iron and limit soldering time.
FAQs
Q: Can I reuse the TSSOP 28 Socket for multiple ICs?
A: Yes, the socket is designed for multiple insertions and removals, making it reusable for different ICs.
Q: Is the socket compatible with other IC packages?
A: No, the socket is specifically designed for 28-pin TSSOP packages and may not fit other IC package types.
Q: How do I ensure a secure connection between the IC and the socket?
A: Ensure the IC is properly aligned and fully seated in the socket. Avoid applying excessive force.
Q: Can I use the socket in high-frequency applications?
A: The socket is suitable for most general-purpose applications. For high-frequency circuits, verify the socket's performance with your specific IC and circuit design.
By following this documentation, you can effectively use the Adafruit TSSOP 28 Socket in your projects and ensure reliable performance.