How to Use H.I.D.R.A: Examples, Pinouts, and Specs
Introduction
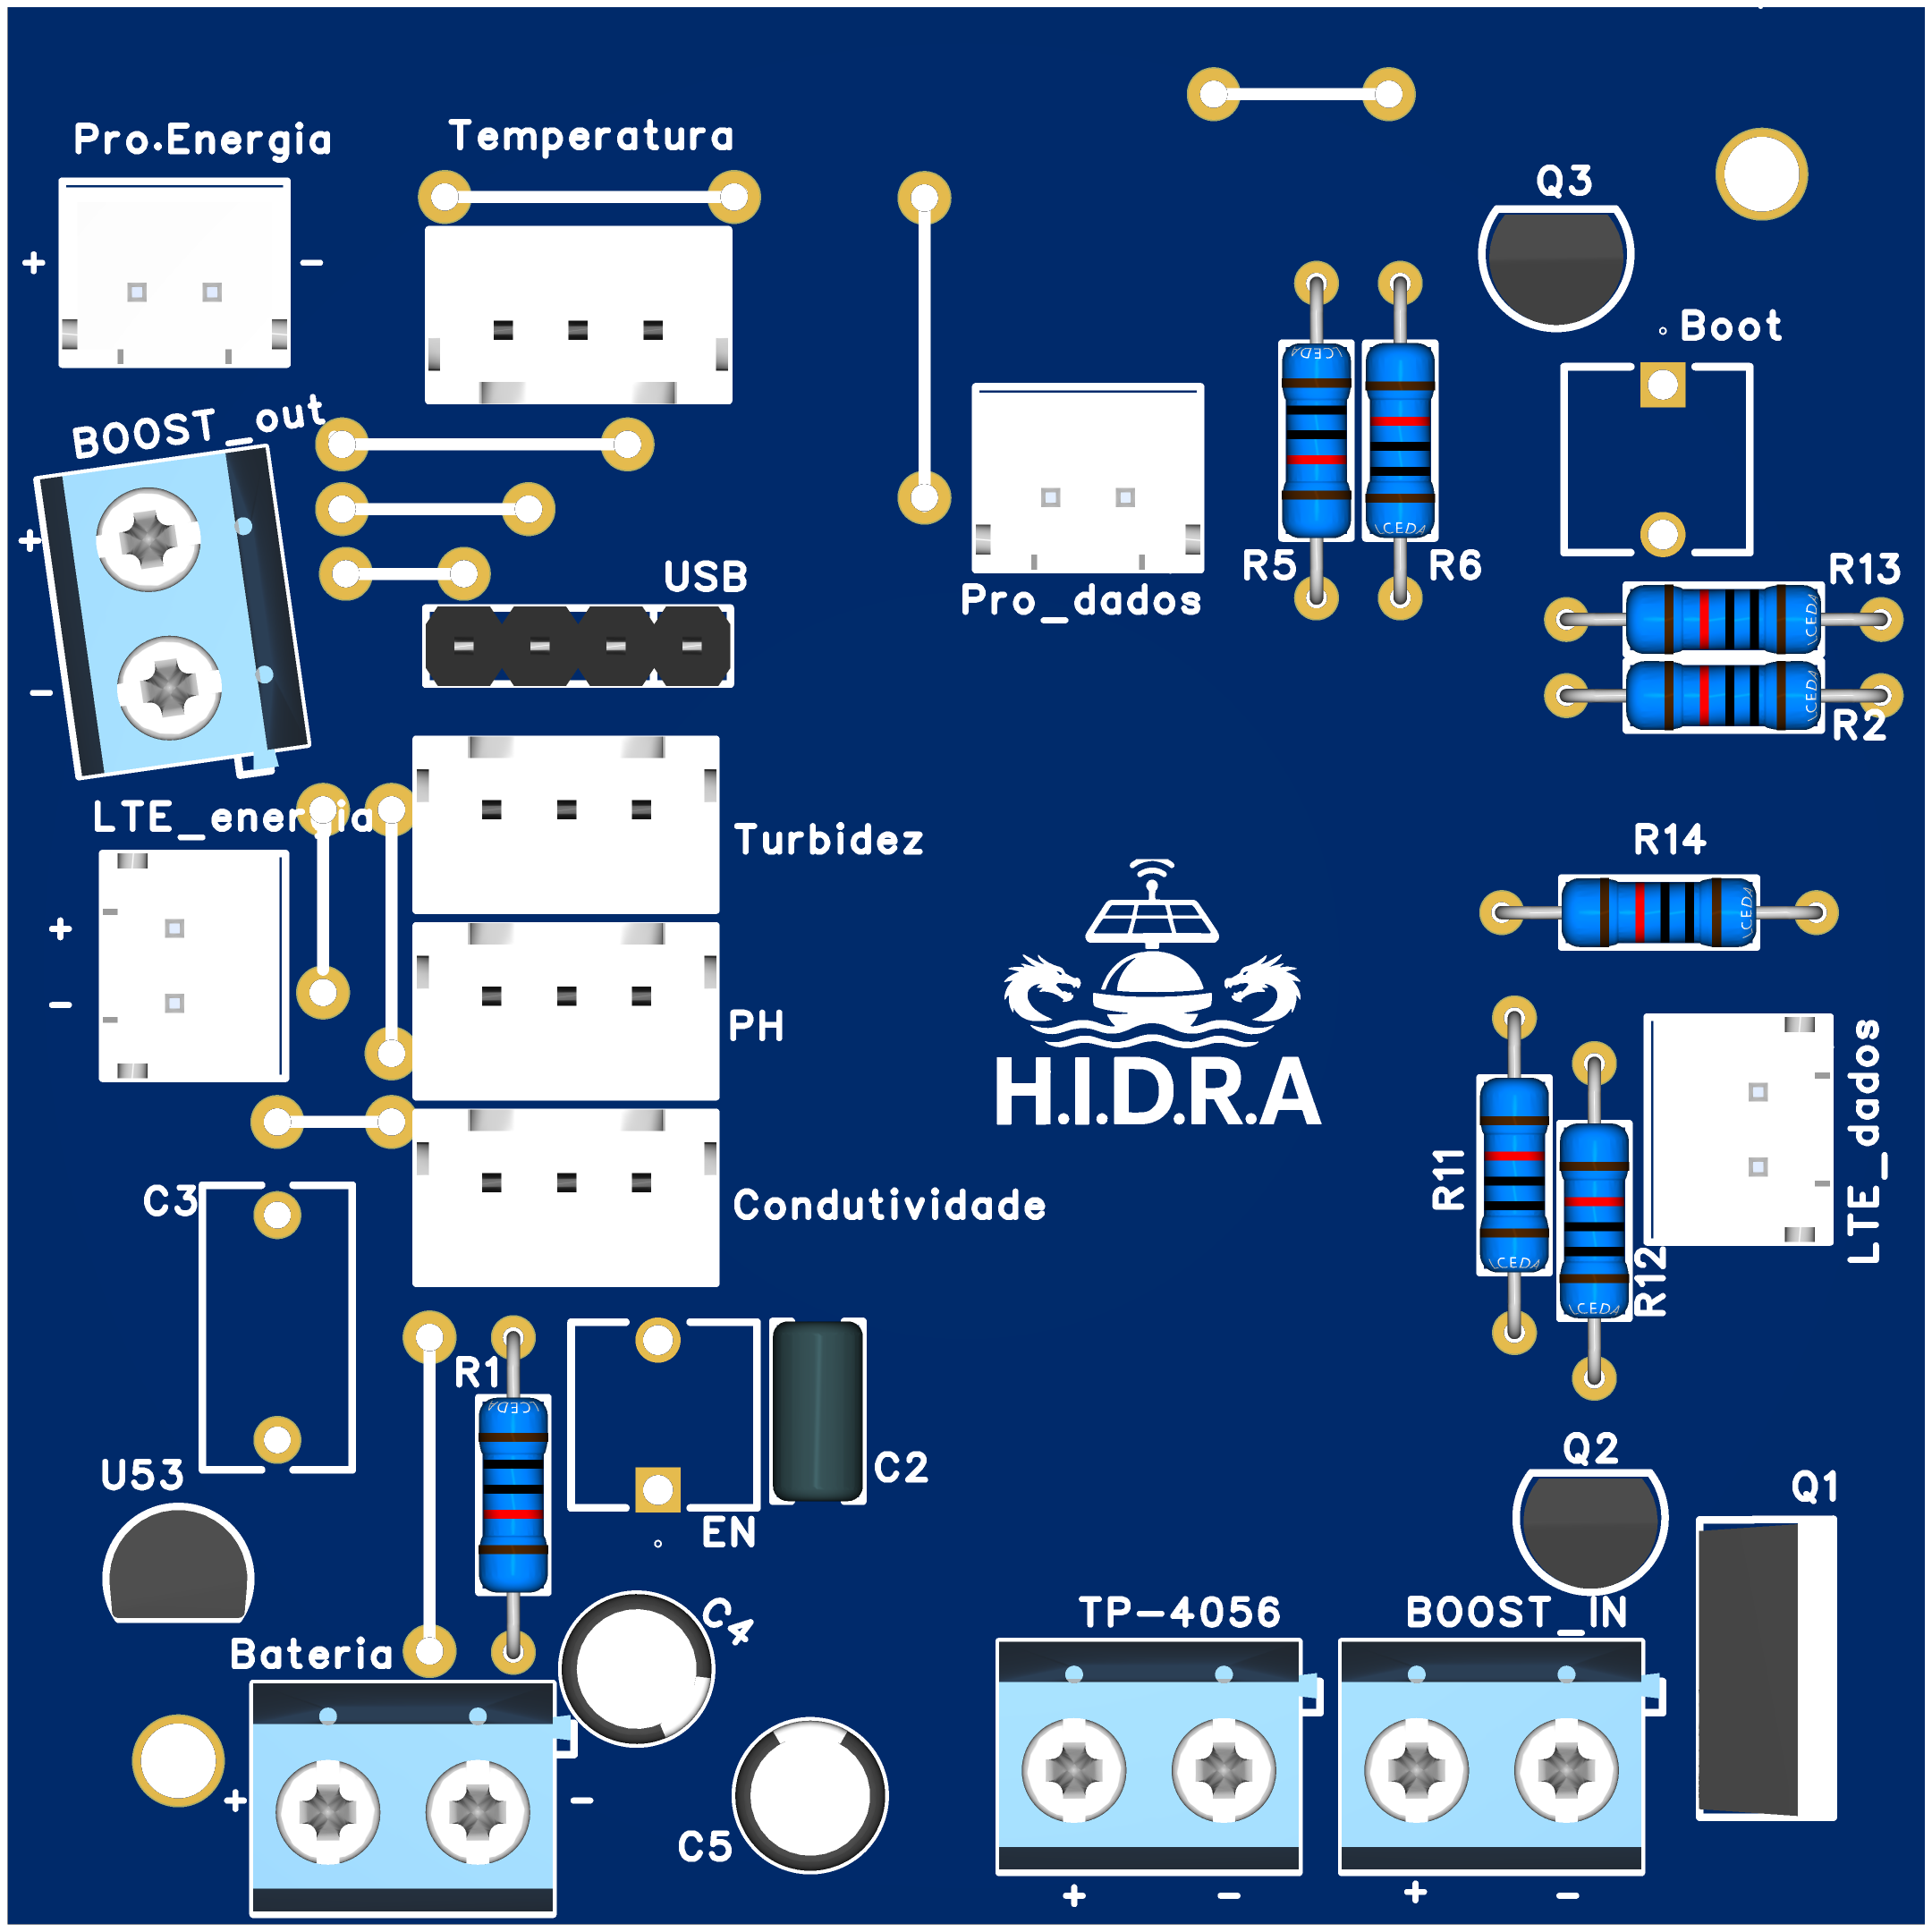
H.I.D.R.A (Highly Intelligent Data Retrieval and Analysis) is a cutting-edge electronic component designed for advanced data processing and analysis. It is widely used in complex circuit designs to optimize performance, enhance efficiency, and enable intelligent decision-making in real-time. H.I.D.R.A is particularly suited for applications requiring high-speed data handling, such as IoT systems, robotics, and industrial automation.
Explore Projects Built with H.I.D.R.A

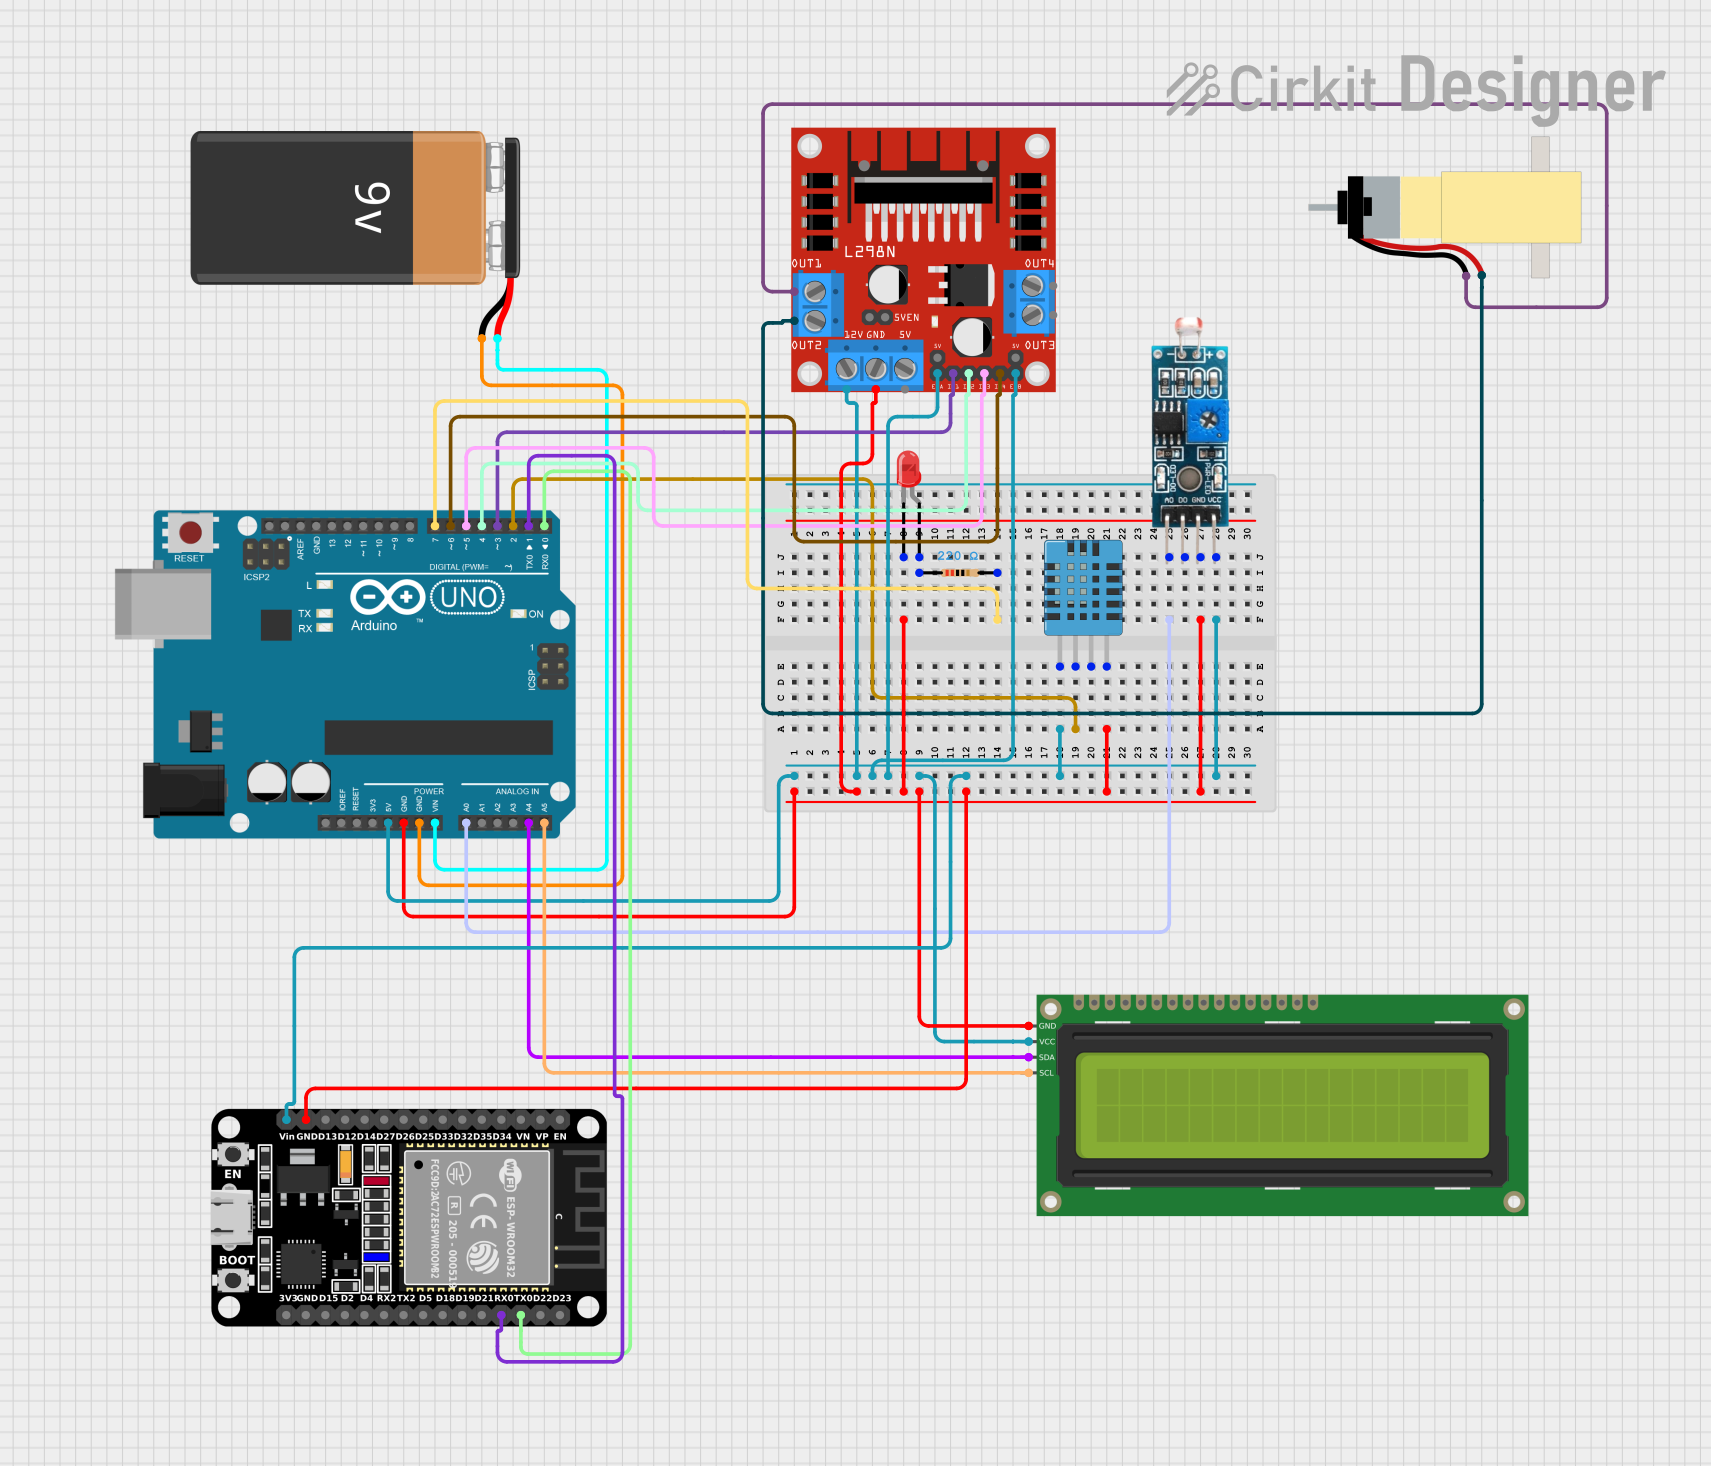
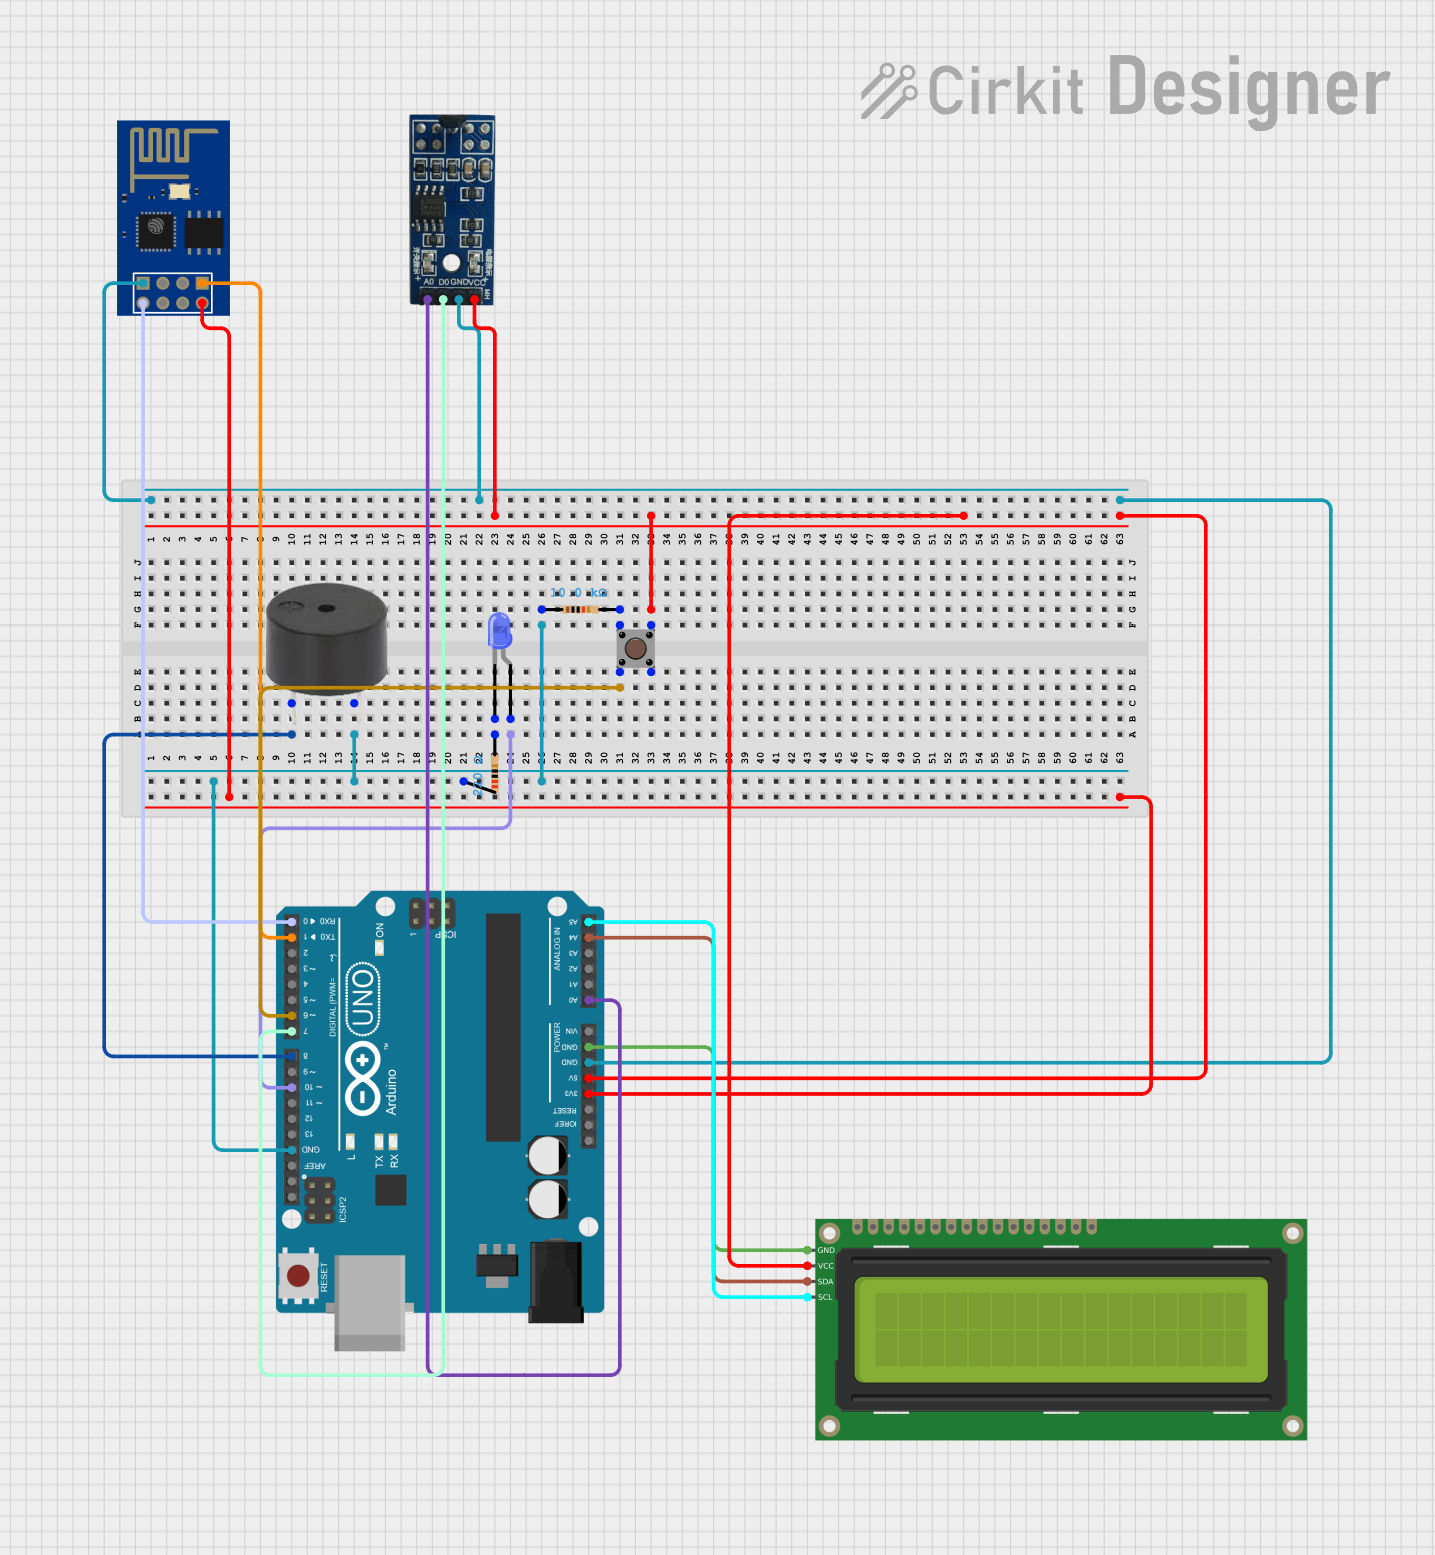
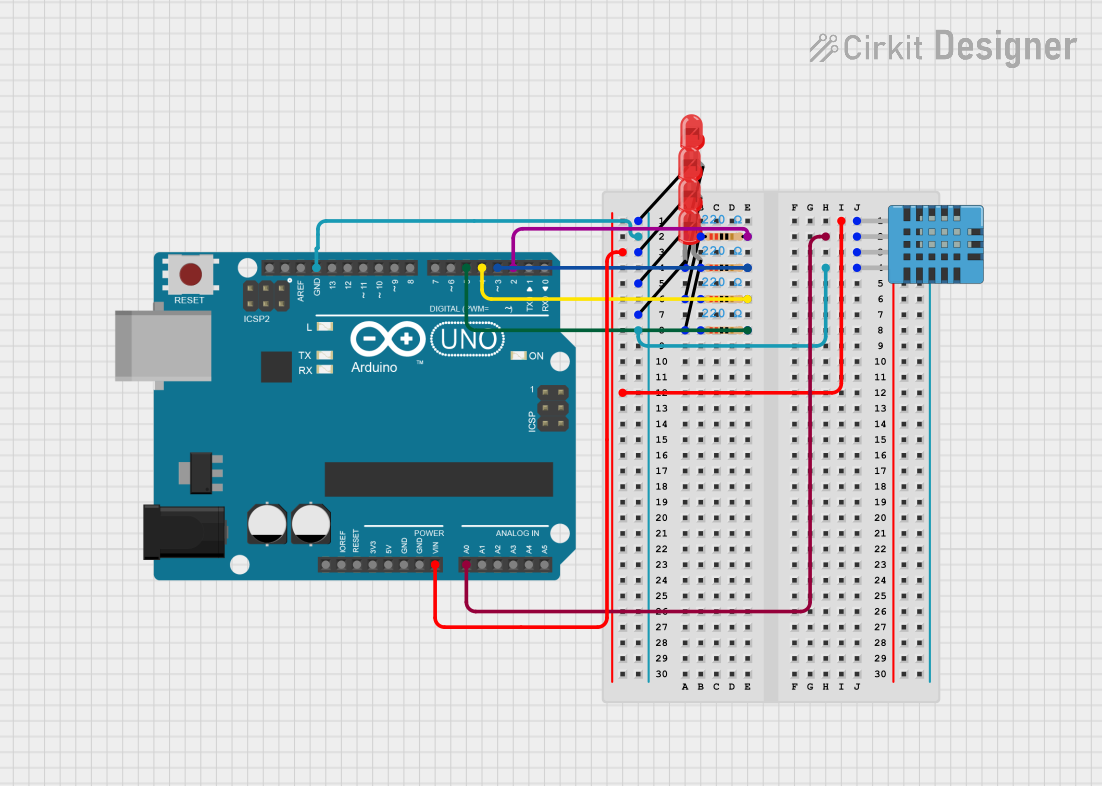
Explore Projects Built with H.I.D.R.A
Common Applications and Use Cases
- IoT Systems: Real-time data collection and processing for smart devices.
- Robotics: Advanced decision-making and control in autonomous systems.
- Industrial Automation: Optimizing processes and improving operational efficiency.
- Data Analytics: High-speed data retrieval and analysis for predictive modeling.
- Embedded Systems: Enhancing the intelligence of microcontroller-based designs.
Technical Specifications
H.I.D.R.A is a versatile component with robust technical capabilities. Below are its key specifications:
General Specifications
| Parameter | Value |
|---|---|
| Operating Voltage | 3.3V to 5V |
| Power Consumption | 250mW (typical) |
| Data Processing Speed | Up to 1 GHz |
| Communication Protocols | I2C, SPI, UART |
| Operating Temperature | -40°C to 85°C |
| Package Type | QFN-32 (Quad Flat No-lead) |
Pin Configuration and Descriptions
| Pin Number | Pin Name | Description |
|---|---|---|
| 1 | VCC | Power supply input (3.3V to 5V). |
| 2 | GND | Ground connection. |
| 3 | SDA | I2C data line for communication. |
| 4 | SCL | I2C clock line for communication. |
| 5 | TX | UART transmit pin for serial communication. |
| 6 | RX | UART receive pin for serial communication. |
| 7 | CS | SPI chip select pin. |
| 8 | MOSI | SPI master-out, slave-in data line. |
| 9 | MISO | SPI master-in, slave-out data line. |
| 10 | SCK | SPI clock line. |
| 11-30 | GPIO1-20 | General-purpose input/output pins. |
| 31 | RESET | Reset pin to restart the component. |
| 32 | INT | Interrupt pin for signaling events. |
Usage Instructions
H.I.D.R.A is designed to be user-friendly and highly adaptable. Follow these steps to integrate it into your circuit:
Basic Setup
- Power Supply: Connect the VCC pin to a 3.3V or 5V power source and the GND pin to ground.
- Communication Interface: Choose the appropriate communication protocol (I2C, SPI, or UART) and connect the corresponding pins:
- For I2C: Connect SDA and SCL to the microcontroller's I2C pins.
- For SPI: Connect CS, MOSI, MISO, and SCK to the microcontroller's SPI pins.
- For UART: Connect TX and RX to the microcontroller's UART pins.
- GPIO Configuration: Use the GPIO pins for additional input/output functionality as needed.
- Interrupts: Connect the INT pin to the microcontroller if you need event-driven processing.
Example: Using H.I.D.R.A with Arduino UNO
Below is an example of how to use H.I.D.R.A with an Arduino UNO via I2C communication:
#include <Wire.h> // Include the Wire library for I2C communication

#define HIDRA_I2C_ADDRESS 0x42 // Replace with H.I.D.R.A's I2C address

void setup() {
  Wire.begin(); // Initialize I2C communication
  Serial.begin(9600); // Start serial communication for debugging
  Serial.println("Initializing H.I.D.R.A...");

  // Send initialization command to H.I.D.R.A
  Wire.beginTransmission(HIDRA_I2C_ADDRESS);
  Wire.write(0x01); // Example command to initialize the component
  Wire.endTransmission();

  Serial.println("H.I.D.R.A initialized successfully.");
}

void loop() {
  // Request data from H.I.D.R.A
  Wire.requestFrom(HIDRA_I2C_ADDRESS, 4); // Request 4 bytes of data

  if (Wire.available() == 4) { // Check if 4 bytes are available
    int data = Wire.read() << 24 | Wire.read() << 16 |
               Wire.read() << 8 | Wire.read(); // Combine bytes into an integer
    Serial.print("Data received: ");
    Serial.println(data);
  }

  delay(1000); // Wait 1 second before the next request
}
Important Considerations
- Voltage Levels: Ensure the operating voltage matches the component's requirements (3.3V or 5V).
- Pull-up Resistors: Use appropriate pull-up resistors for I2C communication.
- Reset Pin: Use the RESET pin to restart the component if it becomes unresponsive.
- Interrupt Handling: Properly configure the INT pin to handle interrupts efficiently.
Troubleshooting and FAQs
Common Issues and Solutions
No Response from H.I.D.R.A
- Cause: Incorrect wiring or communication protocol mismatch.
- Solution: Double-check the connections and ensure the correct protocol is used.
Data Corruption
- Cause: Noise or interference in the communication lines.
- Solution: Use shorter wires and add decoupling capacitors near the power pins.
Overheating
- Cause: Exceeding the power consumption limit.
- Solution: Ensure the power supply provides sufficient current and stays within the specified voltage range.
Interrupts Not Triggering
- Cause: Improper configuration of the INT pin.
- Solution: Verify the microcontroller's interrupt settings and ensure the INT pin is connected correctly.
FAQs
Q: Can H.I.D.R.A operate at 3.3V and 5V interchangeably?
A: Yes, H.I.D.R.A supports both 3.3V and 5V operation, making it compatible with a wide range of systems.
Q: What is the maximum data rate for SPI communication?
A: H.I.D.R.A supports SPI data rates of up to 10 Mbps.
Q: Is H.I.D.R.A compatible with Raspberry Pi?
A: Yes, H.I.D.R.A can be used with Raspberry Pi via I2C, SPI, or UART communication.
Q: How do I update H.I.D.R.A's firmware?
A: Firmware updates can be performed via the SPI interface. Refer to the manufacturer's firmware update guide for detailed instructions.
By following this documentation, you can effectively integrate and utilize H.I.D.R.A in your projects.