Cirkit Designer Logo
Cirkit Designer
Your all-in-one circuit design IDE
Home / 
Component Documentation

How to Use MS5837: Examples, Pinouts, and Specs
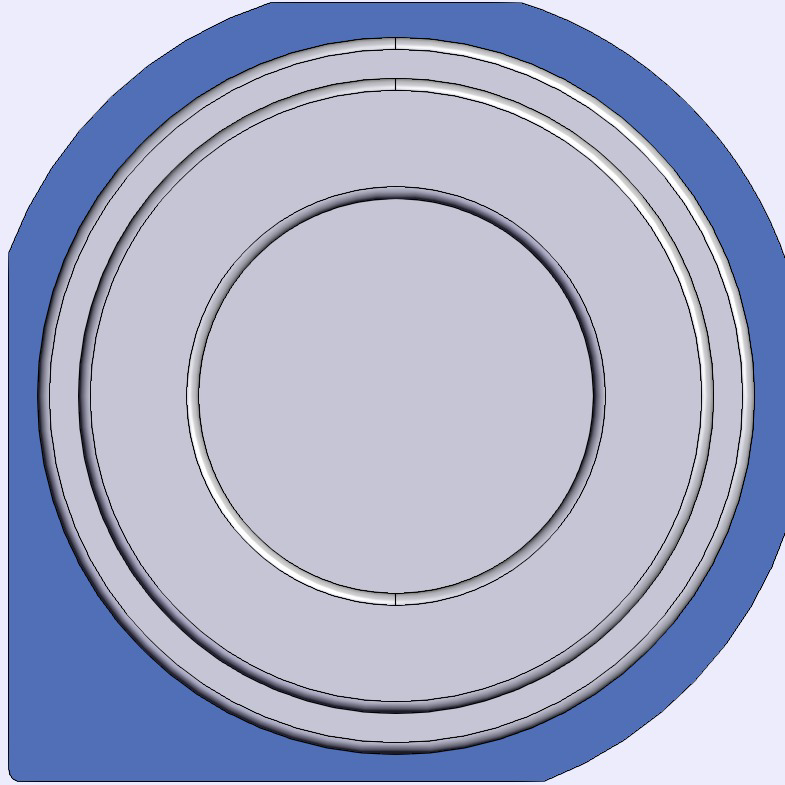
Image of MS5837
Cirkit Designer LogoDesign with MS5837 in Cirkit Designer

Introduction

The MS5837 is a high-resolution pressure sensor designed for depth measurement in water. Manufactured by Arduino, this sensor is known for its accuracy and reliability in various environmental conditions. It features a digital output, making it easy to interface with microcontrollers such as the Arduino UNO. Common applications include underwater robotics, diving equipment, and environmental monitoring systems.

Explore Projects Built with MS5837

Use Cirkit Designer to design, explore, and prototype these projects online. Some projects support real-time simulation. Click "Open Project" to start designing instantly!
Arduino Mega 2560 Based Security System with Fingerprint Authentication and SMS Alerts
Image of Door security system: A project utilizing MS5837 in a practical application
This circuit features an Arduino Mega 2560 microcontroller interfaced with a SIM800L GSM module, two fingerprint scanners, an I2C LCD display, an IR sensor, and a piezo buzzer. Power management is handled by a PowerBoost 1000 Basic Pad USB, a TP4056 charging module, and a Li-ion 18650 battery, with an option to use a Mini AC-DC 110V-230V to 5V 700mA module for direct power supply. The primary functionality appears to be a security system with GSM communication capabilities, biometric access control, and visual/audible feedback.
Cirkit Designer LogoOpen Project in Cirkit Designer
Battery-Powered Emergency Alert System with NUCLEO-F072RB, SIM800L, and GPS NEO 6M
Image of women safety: A project utilizing MS5837 in a practical application
This circuit is an emergency alert system that uses a NUCLEO-F072RB microcontroller to send SMS alerts and make calls via a SIM800L GSM module, while obtaining location data from a GPS NEO 6M module. The system is powered by a Li-ion battery and includes a TP4056 module for battery charging and protection, with a rocker switch to control power to the microcontroller.
Cirkit Designer LogoOpen Project in Cirkit Designer
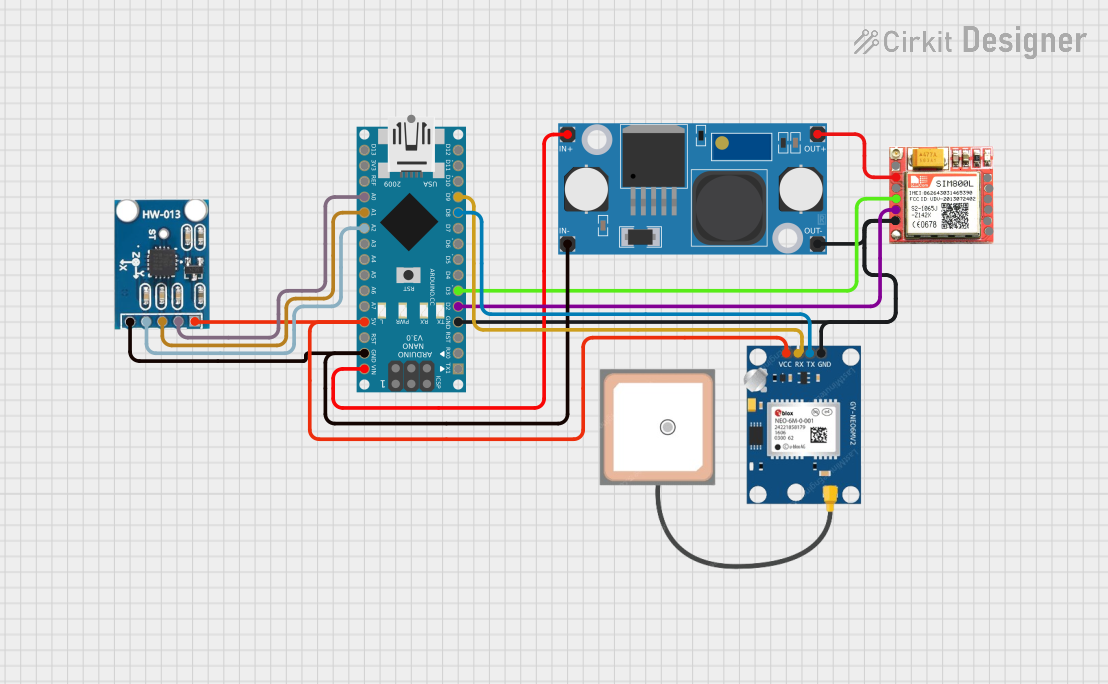
Arduino Nano Based GPS Tracker with GSM Communication and Accelerometer
Image of Circuit Aayush: A project utilizing MS5837 in a practical application
This circuit is designed for communication and location tracking purposes. It features an Arduino Nano interfaced with a SIM800L GSM module for cellular connectivity, a GPS NEO 6M module for obtaining geographical coordinates, and an AITrip ADXL335 GY-61 accelerometer for motion sensing. The LM2596 Step Down Module is used to regulate the power supply to the components.
Cirkit Designer LogoOpen Project in Cirkit Designer
Cellular-Enabled IoT Device with Real-Time Clock and Power Management
Image of LRCM PHASE 2 BASIC: A project utilizing MS5837 in a practical application
This circuit features a LilyGo-SIM7000G module for cellular communication and GPS functionality, interfaced with an RTC DS3231 for real-time clock capabilities. It includes voltage sensing through two voltage sensor modules, and uses an 8-channel opto-coupler for isolating different parts of the circuit. Power management is handled by a buck converter connected to a DC power source and batteries, with a fuse for protection and a rocker switch for on/off control. Additionally, there's an LED for indication purposes.
Cirkit Designer LogoOpen Project in Cirkit Designer

Explore Projects Built with MS5837

Use Cirkit Designer to design, explore, and prototype these projects online. Some projects support real-time simulation. Click "Open Project" to start designing instantly!
Image of Door security system: A project utilizing MS5837 in a practical application
Arduino Mega 2560 Based Security System with Fingerprint Authentication and SMS Alerts
This circuit features an Arduino Mega 2560 microcontroller interfaced with a SIM800L GSM module, two fingerprint scanners, an I2C LCD display, an IR sensor, and a piezo buzzer. Power management is handled by a PowerBoost 1000 Basic Pad USB, a TP4056 charging module, and a Li-ion 18650 battery, with an option to use a Mini AC-DC 110V-230V to 5V 700mA module for direct power supply. The primary functionality appears to be a security system with GSM communication capabilities, biometric access control, and visual/audible feedback.
Cirkit Designer LogoOpen Project in Cirkit Designer
Image of women safety: A project utilizing MS5837 in a practical application
Battery-Powered Emergency Alert System with NUCLEO-F072RB, SIM800L, and GPS NEO 6M
This circuit is an emergency alert system that uses a NUCLEO-F072RB microcontroller to send SMS alerts and make calls via a SIM800L GSM module, while obtaining location data from a GPS NEO 6M module. The system is powered by a Li-ion battery and includes a TP4056 module for battery charging and protection, with a rocker switch to control power to the microcontroller.
Cirkit Designer LogoOpen Project in Cirkit Designer
Image of Circuit Aayush: A project utilizing MS5837 in a practical application
Arduino Nano Based GPS Tracker with GSM Communication and Accelerometer
This circuit is designed for communication and location tracking purposes. It features an Arduino Nano interfaced with a SIM800L GSM module for cellular connectivity, a GPS NEO 6M module for obtaining geographical coordinates, and an AITrip ADXL335 GY-61 accelerometer for motion sensing. The LM2596 Step Down Module is used to regulate the power supply to the components.
Cirkit Designer LogoOpen Project in Cirkit Designer
Image of LRCM PHASE 2 BASIC: A project utilizing MS5837 in a practical application
Cellular-Enabled IoT Device with Real-Time Clock and Power Management
This circuit features a LilyGo-SIM7000G module for cellular communication and GPS functionality, interfaced with an RTC DS3231 for real-time clock capabilities. It includes voltage sensing through two voltage sensor modules, and uses an 8-channel opto-coupler for isolating different parts of the circuit. Power management is handled by a buck converter connected to a DC power source and batteries, with a fuse for protection and a rocker switch for on/off control. Additionally, there's an LED for indication purposes.
Cirkit Designer LogoOpen Project in Cirkit Designer

Technical Specifications

Key Technical Details

Parameter Value
Operating Voltage 3.3V
Pressure Range 0 to 30 bar
Resolution 0.2 mbar
Interface I2C
Operating Temperature Range -40°C to +85°C
Accuracy ±0.5 mbar
Response Time 0.5 ms

Pin Configuration and Descriptions

Pin Number Pin Name Description
1 VDD Power Supply (3.3V)
2 GND Ground
3 SCL I2C Clock Line
4 SDA I2C Data Line

Usage Instructions

How to Use the Component in a Circuit

  1. Power Supply: Connect the VDD pin to a 3.3V power supply and the GND pin to the ground.
  2. I2C Interface: Connect the SCL pin to the I2C clock line (A5 on Arduino UNO) and the SDA pin to the I2C data line (A4 on Arduino UNO).
  3. Pull-up Resistors: Ensure that 4.7kΩ pull-up resistors are connected to the SCL and SDA lines.

Important Considerations and Best Practices

  • Power Supply: Ensure a stable 3.3V power supply to avoid inaccurate readings.
  • I2C Address: The default I2C address for the MS5837 is 0x76. Ensure no address conflicts on the I2C bus.
  • Environmental Conditions: While the sensor is designed for underwater use, avoid exposing it to extreme temperatures beyond its operating range.

Sample Arduino Code

#include <Wire.h>
#include <MS5837.h> // Include the MS5837 library

MS5837 sensor; // Create an instance of the sensor

void setup() {
  Serial.begin(9600); // Initialize serial communication
  Wire.begin(); // Initialize I2C communication

  if (!sensor.init()) { // Initialize the sensor
    Serial.println("Sensor initialization failed!");
    while (1);
  }

  sensor.setModel(MS5837::MS5837_30BA); // Set the sensor model
  sensor.setFluidDensity(997); // Set fluid density (997 for freshwater)
}

void loop() {
  sensor.read(); // Read sensor data

  Serial.print("Pressure: ");
  Serial.print(sensor.pressure()); // Print pressure in mbar
  Serial.println(" mbar");

  Serial.print("Temperature: ");
  Serial.print(sensor.temperature()); // Print temperature in °C
  Serial.println(" °C");

  delay(1000); // Wait for 1 second before next reading
}

Troubleshooting and FAQs

Common Issues Users Might Face

  1. Sensor Initialization Failure: The sensor may fail to initialize if the connections are incorrect or if the power supply is unstable.
  2. Inaccurate Readings: Inaccurate readings can result from electrical noise, incorrect fluid density settings, or extreme environmental conditions.

Solutions and Tips for Troubleshooting

  • Check Connections: Ensure all connections are secure and correct, especially the I2C lines.
  • Stable Power Supply: Use a stable 3.3V power supply to avoid fluctuations in readings.
  • Verify I2C Address: Ensure no other devices on the I2C bus share the same address (0x76).
  • Environmental Conditions: Ensure the sensor is used within its specified operating temperature range.

FAQs

Q: Can the MS5837 be used in saltwater? A: Yes, but you need to adjust the fluid density setting in the code to match the density of saltwater.

Q: What is the maximum depth the MS5837 can measure? A: The MS5837 can measure depths up to approximately 300 meters, given its pressure range of 0 to 30 bar.

Q: How often should I calibrate the sensor? A: Calibration frequency depends on the application. For critical applications, periodic calibration is recommended to ensure accuracy.


This documentation provides a comprehensive guide to using the MS5837 high-resolution pressure sensor. Whether you are a beginner or an experienced user, following these instructions and best practices will help you achieve accurate and reliable measurements in your projects.