How to Use AM26LV32E: Examples, Pinouts, and Specs
Introduction
The AM26LV32E is a quad differential line receiver manufactured by Texas Instruments. It is designed for high-speed data transmission in applications requiring robust signal integrity and noise immunity. This component operates over a wide voltage range, making it ideal for low-voltage systems. Its ability to handle differential signals ensures reliable communication in noisy environments, such as industrial or automotive systems.
Explore Projects Built with AM26LV32E


Explore Projects Built with AM26LV32E
Common Applications and Use Cases
- RS-422 and RS-485 communication systems
- High-speed data transmission in industrial automation
- Motor control and robotics
- Signal integrity enhancement in noisy environments
- Low-voltage communication systems
Technical Specifications
Key Technical Details
| Parameter | Value |
|---|---|
| Supply Voltage (Vcc) | 3.0 V to 3.6 V or 4.5 V to 5.5 V |
| Input Voltage Range | -14 V to +14 V |
| Differential Input Voltage | ±14 V |
| Output Voltage Range | 0 V to Vcc |
| Data Rate | Up to 32 Mbps |
| Operating Temperature | -40°C to +85°C |
| Input Impedance | ≥ 12 kΩ |
| Propagation Delay | 10 ns (typical) |
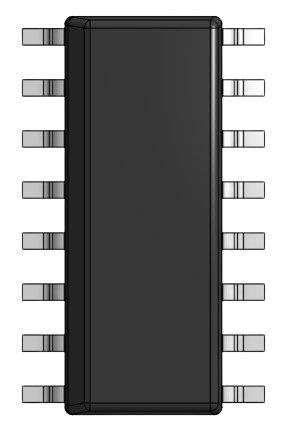
| Package Options | SOIC-16, TSSOP-16 |
Pin Configuration and Descriptions
The AM26LV32E is available in a 16-pin package. Below is the pinout and description:
| Pin No. | Name | Type | Description |
|---|---|---|---|
| 1 | 1A | Input | Non-inverting input for channel 1 |
| 2 | 1B | Input | Inverting input for channel 1 |
| 3 | 1Y | Output | Output for channel 1 |
| 4 | 2A | Input | Non-inverting input for channel 2 |
| 5 | 2B | Input | Inverting input for channel 2 |
| 6 | 2Y | Output | Output for channel 2 |
| 7 | GND | Ground | Ground connection |
| 8 | Vcc | Power | Positive supply voltage |
| 9 | 3Y | Output | Output for channel 3 |
| 10 | 3A | Input | Non-inverting input for channel 3 |
| 11 | 3B | Input | Inverting input for channel 3 |
| 12 | 4Y | Output | Output for channel 4 |
| 13 | 4A | Input | Non-inverting input for channel 4 |
| 14 | 4B | Input | Inverting input for channel 4 |
| 15 | ENABLE | Input | Enable pin for all outputs (active high) |
| 16 | NC | - | No connection |
Usage Instructions
How to Use the AM26LV32E in a Circuit
- Power Supply: Connect the Vcc pin to a 3.3 V or 5 V power supply, depending on your system requirements. Connect the GND pin to the ground of the circuit.
- Differential Inputs: Connect the differential signal pairs to the
A(non-inverting) andB(inverting) input pins for each channel. - Outputs: The corresponding output pins (
Y) will provide the processed signal. These outputs can be connected to the next stage of your circuit. - Enable Pin: Use the ENABLE pin to control the outputs. When ENABLE is high, the outputs are active. When ENABLE is low, the outputs are in a high-impedance state.
Important Considerations and Best Practices
- Termination Resistors: For long-distance communication, use termination resistors at the ends of the differential pair to minimize signal reflections.
- Bypass Capacitors: Place a 0.1 µF ceramic capacitor close to the Vcc pin to filter out power supply noise.
- Input Voltage Range: Ensure that the input voltage does not exceed the specified range of -14 V to +14 V to avoid damage.
- Unused Channels: If any channels are unused, tie their inputs to a known logic level (e.g., GND or Vcc) to prevent floating inputs.
Example: Connecting to an Arduino UNO
The AM26LV32E can be used to interface differential signals with an Arduino UNO. Below is an example of how to read data from a differential signal source:
Circuit Setup
- Connect the differential signal source to
1Aand1B. - Connect the
1Youtput to a digital input pin on the Arduino (e.g., pin 2). - Connect Vcc to 5 V and GND to the Arduino's ground.
Arduino Code
// Example code to read data from the AM26LV32E output

const int inputPin = 2; // Digital pin connected to 1Y output of AM26LV32E

void setup() {
  pinMode(inputPin, INPUT); // Set the pin as input
  Serial.begin(9600);       // Initialize serial communication at 9600 baud
}

void loop() {
  int signal = digitalRead(inputPin); // Read the signal from the AM26LV32E
  Serial.print("Signal: ");
  Serial.println(signal);  // Print the signal value to the Serial Monitor
  delay(100);              // Add a small delay for readability
}
Troubleshooting and FAQs
Common Issues and Solutions
No Output Signal
- Cause: The ENABLE pin is not set high.
- Solution: Ensure the ENABLE pin is connected to a high logic level (e.g., Vcc).
Distorted Output Signal
- Cause: Missing or incorrect termination resistors.
- Solution: Add 120 Ω termination resistors at the ends of the differential pair.
Excessive Noise
- Cause: Power supply noise or improper grounding.
- Solution: Use bypass capacitors near the Vcc pin and ensure a solid ground connection.
Overheating
- Cause: Input voltage exceeds the specified range.
- Solution: Verify that the input voltage is within the -14 V to +14 V range.
FAQs
Can the AM26LV32E operate with a 3.3 V supply?
- Yes, the AM26LV32E supports a supply voltage range of 3.0 V to 3.6 V.
What is the maximum data rate supported?
- The AM26LV32E supports data rates up to 32 Mbps.
Can I use the AM26LV32E for single-ended signals?
- No, the AM26LV32E is designed for differential signals. For single-ended signals, consider using a different receiver.
What happens if the ENABLE pin is left floating?
- If the ENABLE pin is left floating, the outputs may behave unpredictably. Always tie the ENABLE pin to a defined logic level.