How to Use Dust Smoke Particle Sensor: Examples, Pinouts, and Specs
Introduction
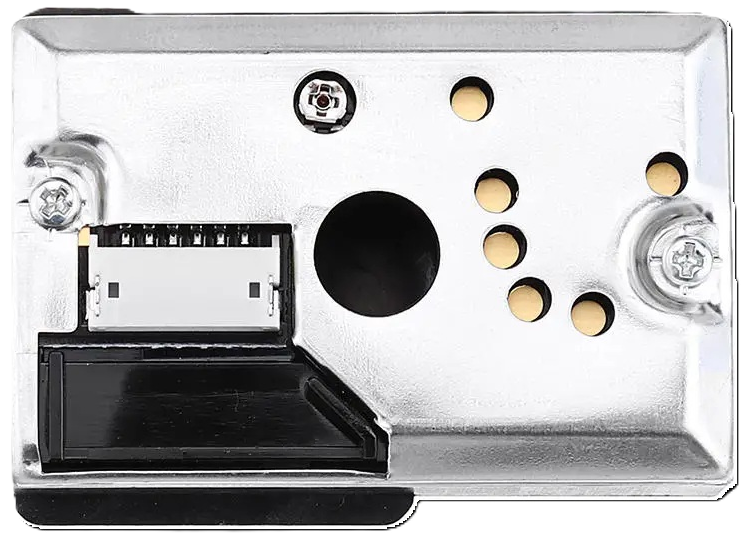
The Dust Smoke Particle Sensor (Manufacturer Part ID: 132) is a highly sensitive device designed to detect and measure the concentration of dust and smoke particles in the air. Manufactured in China, this sensor is widely used in air quality monitoring systems, HVAC systems, and environmental monitoring applications. It provides real-time data on particulate matter (PM) levels, making it an essential component for ensuring healthy indoor and outdoor air quality.
Explore Projects Built with Dust Smoke Particle Sensor

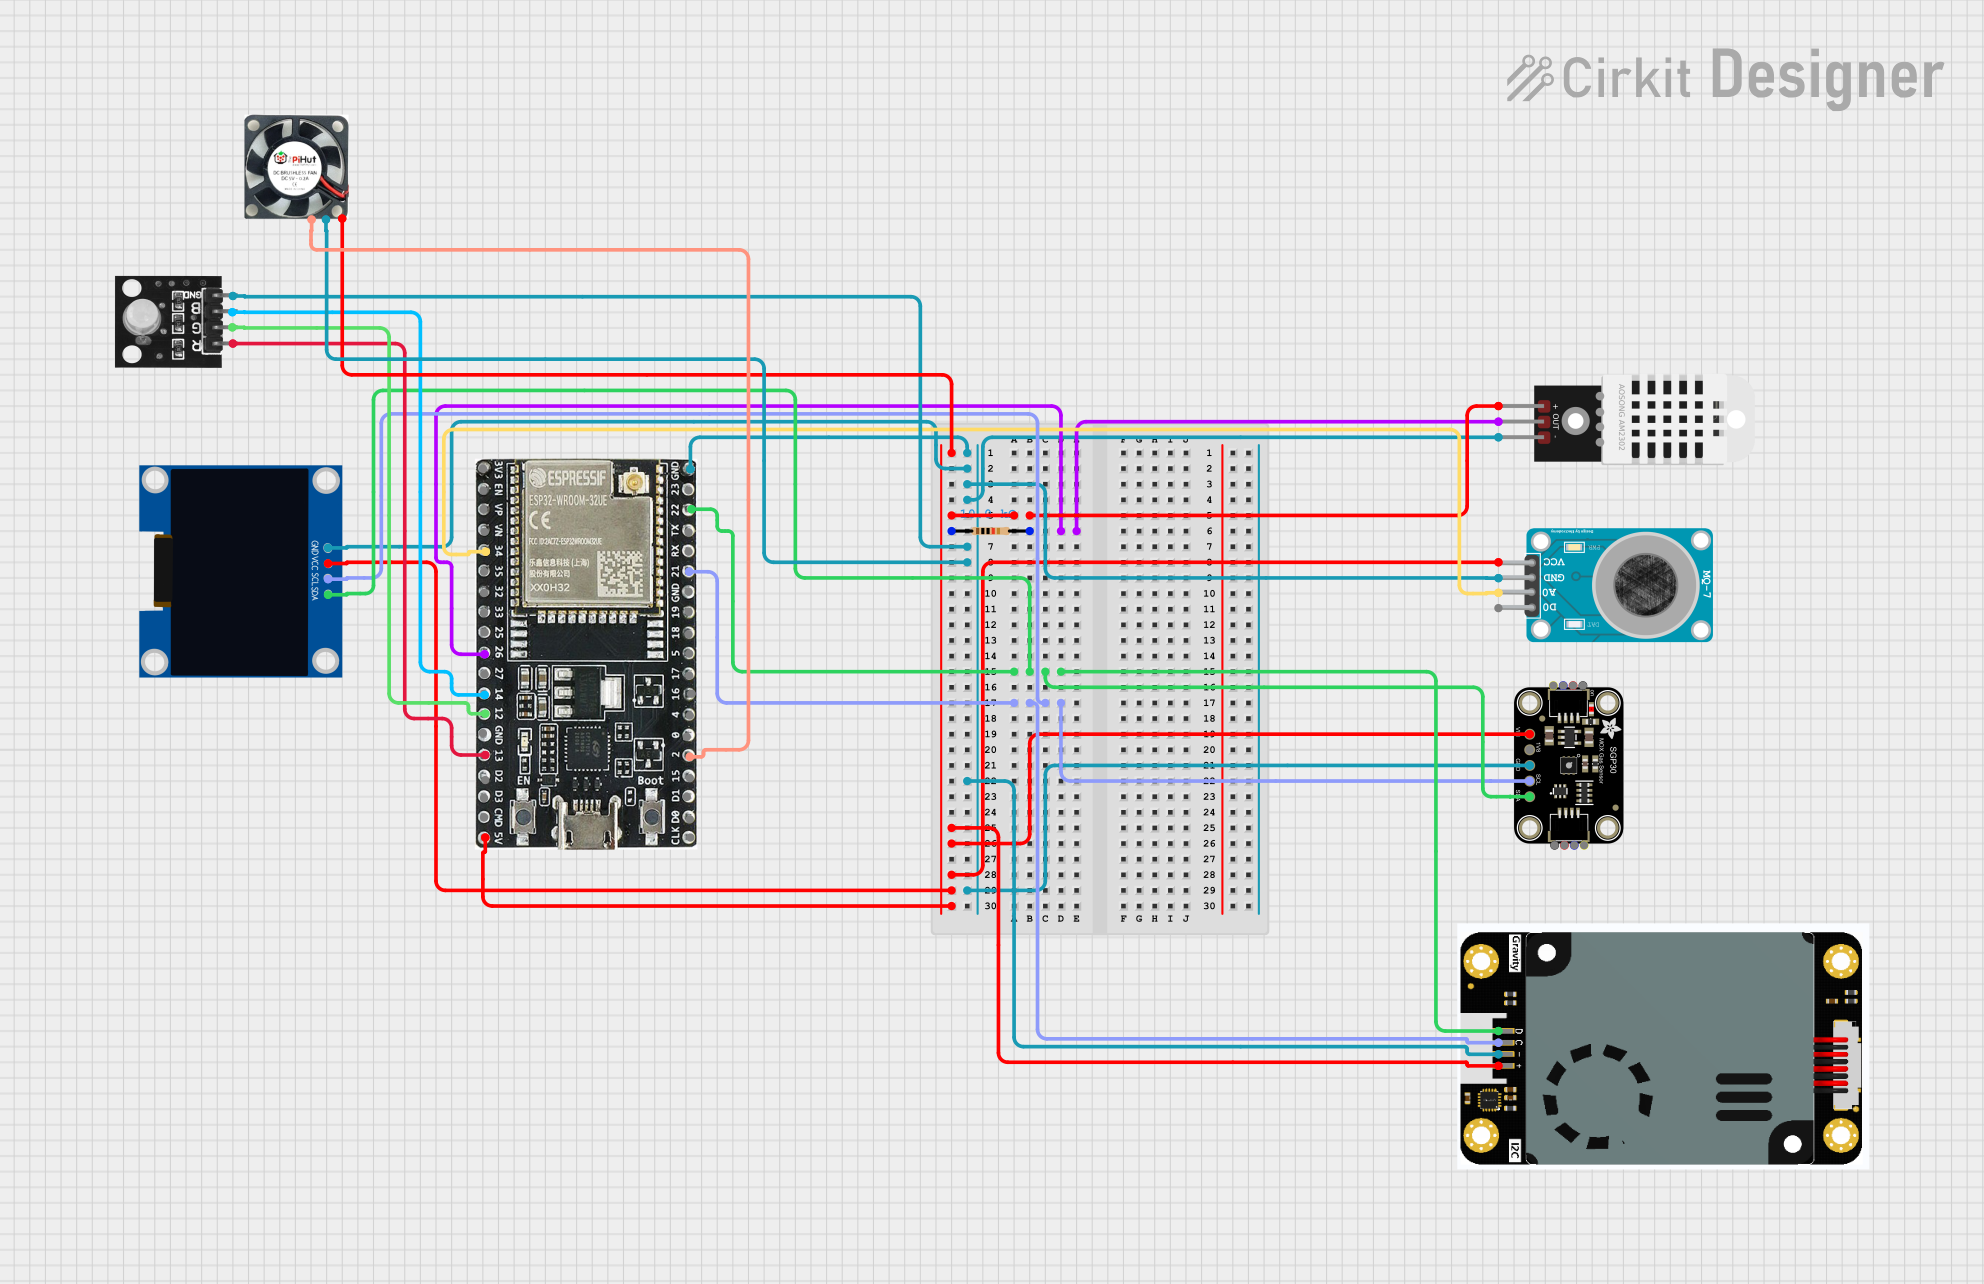
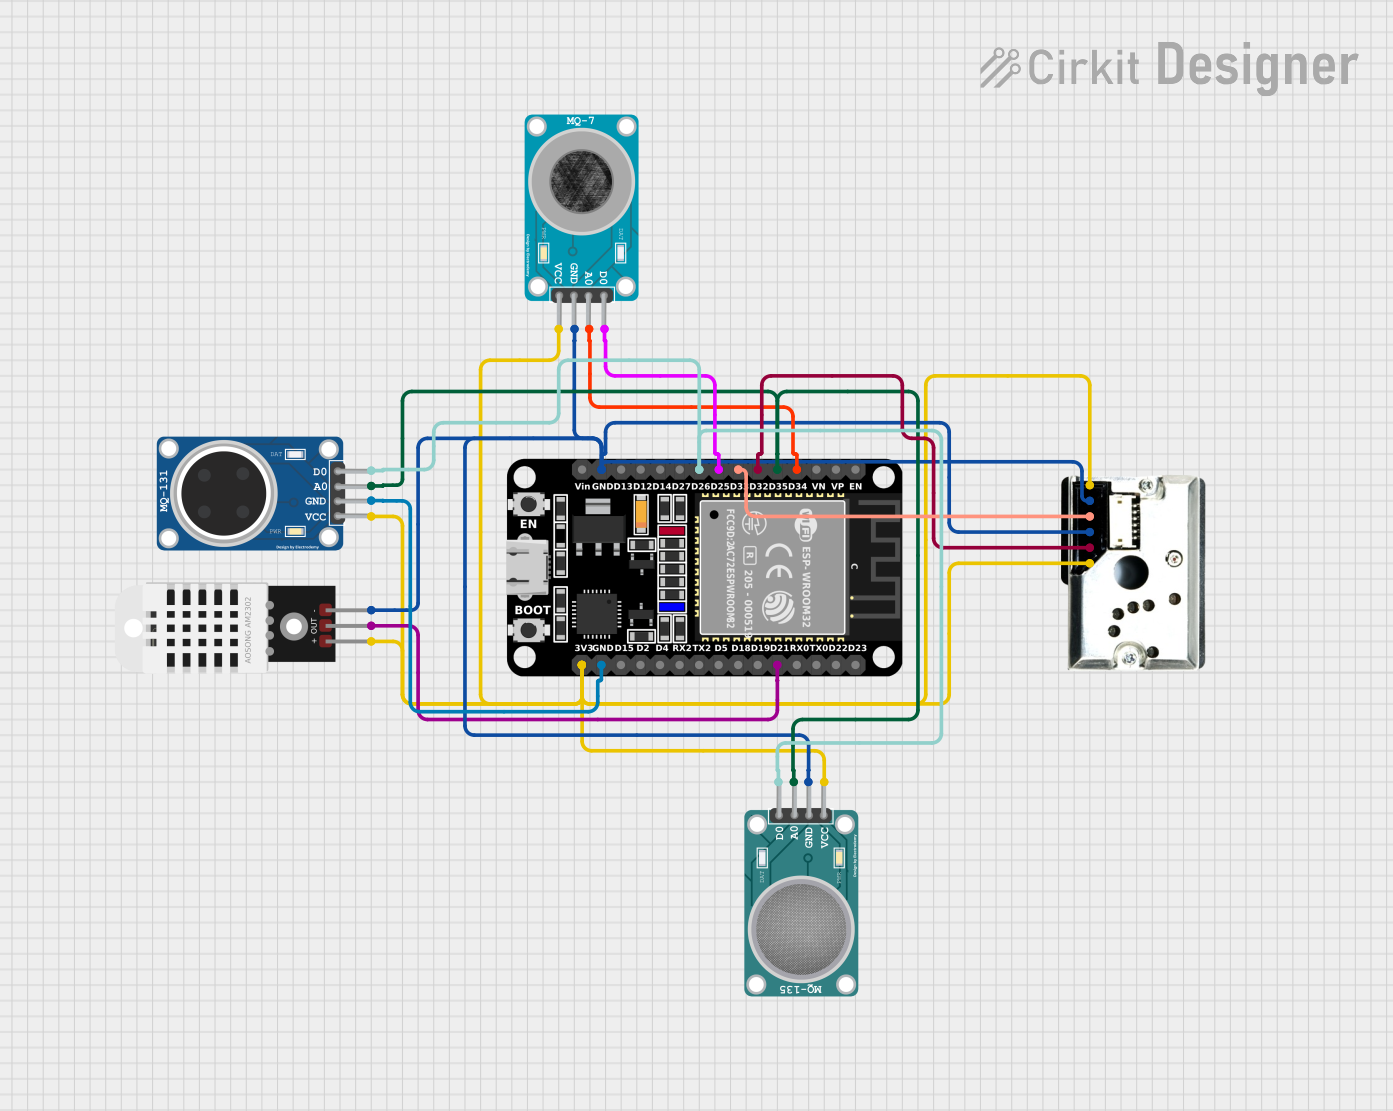
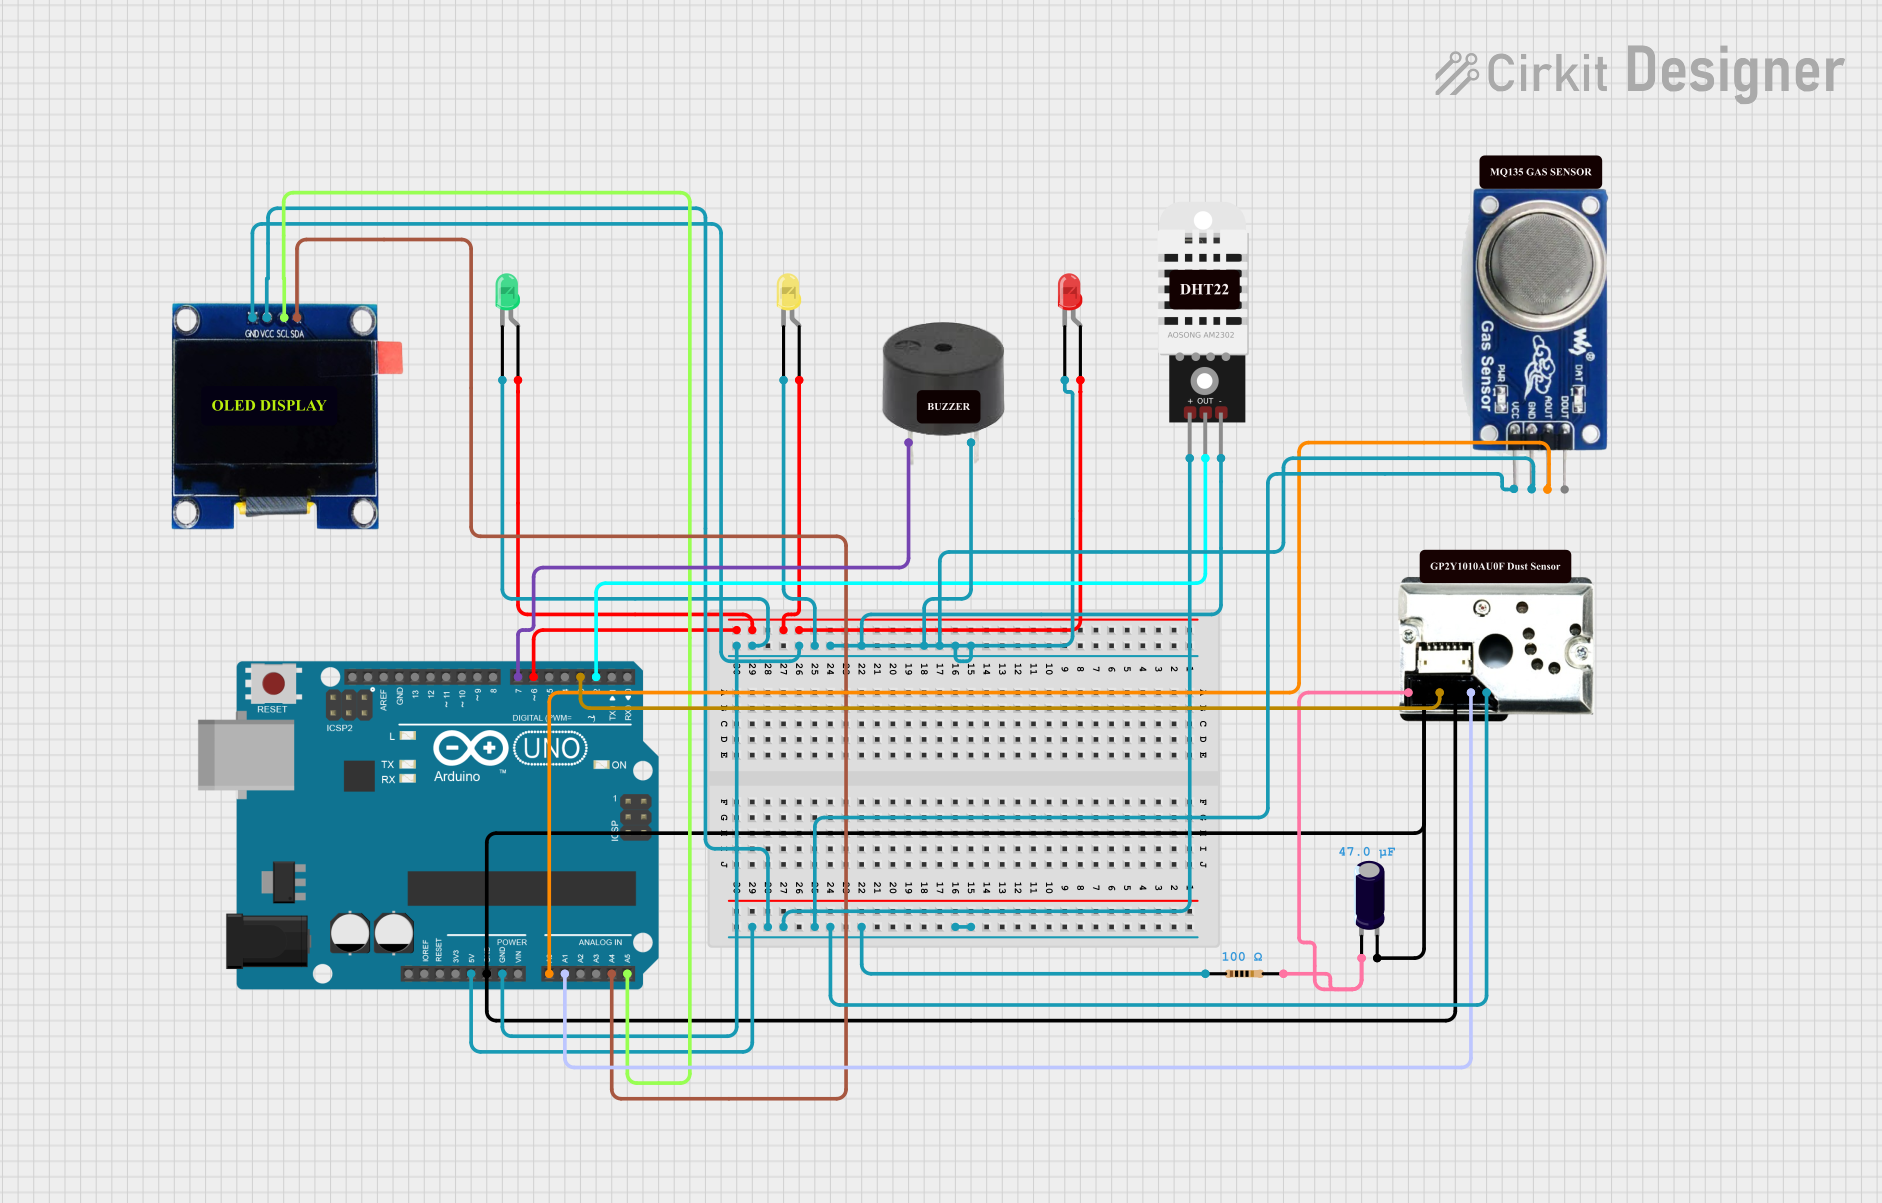
Explore Projects Built with Dust Smoke Particle Sensor
Common Applications and Use Cases
- Air purifiers and air quality monitors
- HVAC systems for indoor air quality control
- Environmental monitoring stations
- Industrial dust monitoring
- Smart home automation systems
Technical Specifications
The following table outlines the key technical details of the Dust Smoke Particle Sensor:
| Parameter | Value |
|---|---|
| Manufacturer | China |
| Part ID | 132 |
| Operating Voltage | 5V DC |
| Operating Current | ≤ 20 mA |
| Particle Detection | PM2.5 and PM10 |
| Output Signal | Analog voltage or digital PWM |
| Detection Range | 0.1 to 500 µg/m³ |
| Response Time | ≤ 1 second |
| Operating Temperature | -10°C to 50°C |
| Storage Temperature | -20°C to 60°C |
| Dimensions | 59 mm x 45 mm x 22 mm |
Pin Configuration and Descriptions
The Dust Smoke Particle Sensor typically has a 6-pin interface. The pin configuration is as follows:
| Pin Number | Pin Name | Description |
|---|---|---|
| 1 | VCC | Power supply input (5V DC) |
| 2 | GND | Ground connection |
| 3 | SET | Mode selection pin (optional, leave unconnected if unused) |
| 4 | RX | Serial data input (for communication) |
| 5 | TX | Serial data output (for communication) |
| 6 | PWM | Pulse-width modulation output for particle data |
Usage Instructions
How to Use the Component in a Circuit
- Power Supply: Connect the VCC pin to a 5V DC power source and the GND pin to the ground.
- Data Output: Use either the TX pin for serial communication or the PWM pin for analog output, depending on your application.
- Mode Selection: If required, connect the SET pin to configure the sensor's operating mode. For most applications, this pin can be left unconnected.
- Microcontroller Interface: Connect the TX or PWM pin to a microcontroller (e.g., Arduino UNO) to read the sensor's output data.
Important Considerations and Best Practices
- Placement: Install the sensor in a location with good airflow for accurate readings. Avoid placing it near sources of heat or moisture.
- Power Stability: Ensure a stable 5V power supply to avoid fluctuations in sensor readings.
- Warm-Up Time: Allow the sensor to warm up for 30 seconds after powering it on for optimal performance.
- Filtering: Use software filtering techniques to smooth out noise in the sensor's output data.
Example Code for Arduino UNO
Below is an example of how to interface the Dust Smoke Particle Sensor with an Arduino UNO using the PWM output:
// Define the PWM pin connected to the sensor
const int pwmPin = 2; // Connect the sensor's PWM pin to Arduino digital pin 2

void setup() {
  Serial.begin(9600); // Initialize serial communication at 9600 baud
  pinMode(pwmPin, INPUT); // Set the PWM pin as an input
}

void loop() {
  int duration = pulseIn(pwmPin, LOW); // Measure the low pulse duration
  float concentration = duration / 1000.0; // Convert to particle concentration (µg/m³)

  // Print the particle concentration to the serial monitor
  Serial.print("Dust Concentration: ");
  Serial.print(concentration);
  Serial.println(" µg/m³");

  delay(1000); // Wait for 1 second before the next reading
}
Troubleshooting and FAQs
Common Issues and Solutions
No Output Data:
- Cause: Incorrect wiring or loose connections.
- Solution: Double-check all connections, especially the VCC, GND, and data pins.
Inaccurate Readings:
- Cause: Sensor placement in a poor airflow area or near heat sources.
- Solution: Relocate the sensor to a well-ventilated area away from heat or moisture.
Fluctuating Data:
- Cause: Electrical noise or unstable power supply.
- Solution: Use a decoupling capacitor (e.g., 10 µF) across the VCC and GND pins to stabilize the power supply.
Sensor Not Responding:
- Cause: Incorrect baud rate or communication settings.
- Solution: Ensure the baud rate matches the sensor's default (typically 9600 bps).
FAQs
Q1: Can this sensor detect gases like CO2 or VOCs?
A1: No, this sensor is specifically designed to detect particulate matter (PM2.5 and PM10) and cannot measure gases.
Q2: How often should the sensor be calibrated?
A2: The sensor is factory-calibrated and does not require frequent calibration. However, periodic testing against a reference device is recommended for critical applications.
Q3: Can I use this sensor outdoors?
A3: Yes, but ensure it is protected from direct exposure to rain, extreme temperatures, and high humidity.
Q4: What is the lifespan of the sensor?
A4: The sensor typically has a lifespan of 3-5 years under normal operating conditions.