How to Use 11.7V LiPo Charger: Examples, Pinouts, and Specs
Introduction
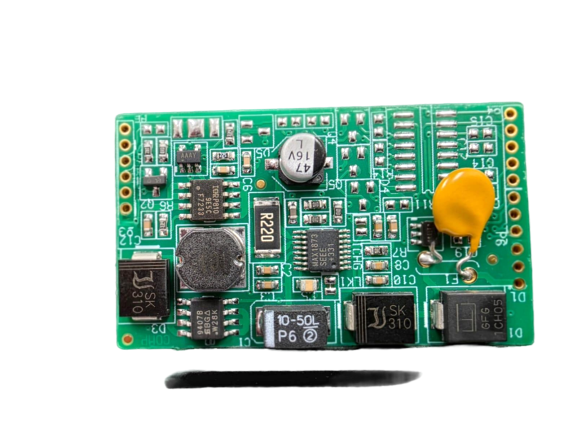
The 11.7V LiPo Charger (Manufacturer Part ID: 11.7V LiPo CHG) by DIY is a specialized device designed to safely charge lithium polymer (LiPo) batteries. It provides a constant voltage of 11.7 volts, ensuring optimal charging performance while protecting the battery from overcharging or damage. This charger is commonly used in applications such as RC vehicles, drones, robotics, and other portable electronic devices that rely on LiPo batteries for power.
Explore Projects Built with 11.7V LiPo Charger


Explore Projects Built with 11.7V LiPo Charger
Common Applications and Use Cases
- Charging LiPo batteries for remote-controlled (RC) cars, drones, and boats.
- Powering robotics projects that utilize LiPo batteries.
- Use in DIY electronics projects requiring a reliable LiPo charging solution.
- Charging backup power supplies or portable battery packs.
Technical Specifications
The following table outlines the key technical details of the 11.7V LiPo Charger:
| Parameter | Value |
|---|---|
| Input Voltage Range | 12V to 15V DC |
| Output Voltage | 11.7V DC (constant voltage) |
| Maximum Output Current | 2A |
| Charging Method | Constant Current / Constant Voltage (CC/CV) |
| Battery Compatibility | 3-cell (3S) LiPo batteries |
| Efficiency | ≥ 85% |
| Operating Temperature | 0°C to 50°C |
| Dimensions | 60mm x 40mm x 15mm |
| Weight | 30g |
Pin Configuration and Descriptions
The charger has the following input and output connections:
| Pin Name | Type | Description |
|---|---|---|
| VIN+ | Input | Positive terminal for DC input voltage (12V-15V). |
| VIN- | Input | Negative terminal for DC input voltage (ground). |
| BATT+ | Output | Positive terminal for connecting the LiPo battery. |
| BATT- | Output | Negative terminal for connecting the LiPo battery. |
| STATUS LED | Indicator | LED that indicates charging status (e.g., charging, fully charged). |
Usage Instructions
How to Use the 11.7V LiPo Charger in a Circuit
Connect the Input Voltage:
- Use a DC power supply or adapter that provides a voltage between 12V and 15V.
- Connect the positive terminal of the power supply to the
VIN+pin and the negative terminal to theVIN-pin.
Connect the LiPo Battery:
- Ensure the LiPo battery is a 3-cell (3S) configuration with a nominal voltage of 11.1V.
- Connect the positive terminal of the battery to the
BATT+pin and the negative terminal to theBATT-pin.
Monitor the Charging Status:
- Observe the STATUS LED. Typically, the LED will light up during charging and turn off or change color when the battery is fully charged.
Disconnect After Charging:
- Once the battery is fully charged, disconnect it from the charger to prevent overcharging.
Important Considerations and Best Practices
- Verify Battery Compatibility: Only use this charger with 3-cell (3S) LiPo batteries. Using incompatible batteries may result in damage or safety hazards.
- Use a Proper Power Supply: Ensure the input voltage is within the specified range (12V-15V) and can supply at least 2A of current.
- Avoid Overcharging: Disconnect the battery promptly after it is fully charged to prolong its lifespan.
- Monitor Temperature: Ensure the charger operates within the specified temperature range (0°C to 50°C). Avoid using it in excessively hot or cold environments.
- Safety Precautions: Always charge LiPo batteries in a fireproof container or on a non-flammable surface to mitigate risks associated with battery failure.
Example: Using the Charger with an Arduino UNO
If you are using the 11.7V LiPo Charger to power an Arduino UNO via a LiPo battery, follow these steps:
- Connect the charger to the LiPo battery as described above.
- Use a DC-DC step-down converter to reduce the 11.7V output to 5V or 7-9V (suitable for the Arduino UNO's input).
- Connect the output of the step-down converter to the Arduino's VIN and GND pins.
Here is an example Arduino sketch to monitor the battery voltage using an analog input pin:
// Arduino code to monitor LiPo battery voltage
const int batteryPin = A0; // Analog pin connected to battery voltage divider
const float voltageDividerRatio = 5.7; // Adjust based on your resistor values
const float referenceVoltage = 5.0; // Arduino's reference voltage (5V)

void setup() {
  Serial.begin(9600); // Initialize serial communication
  pinMode(batteryPin, INPUT); // Set the battery pin as input
}

void loop() {
  int rawValue = analogRead(batteryPin); // Read the analog value
  float batteryVoltage = (rawValue / 1023.0) * referenceVoltage * voltageDividerRatio;

  // Print the battery voltage to the Serial Monitor
  Serial.print("Battery Voltage: ");
  Serial.print(batteryVoltage);
  Serial.println(" V");

  delay(1000); // Wait for 1 second before the next reading
}
Note: Use a voltage divider circuit to scale down the 11.7V battery voltage to a level readable by the Arduino's analog input (0-5V). Adjust the
voltageDividerRatioin the code based on the resistor values used in the divider.
Troubleshooting and FAQs
Common Issues and Solutions
The STATUS LED does not light up:
- Check the input voltage and ensure it is within the 12V-15V range.
- Verify all connections are secure and correctly polarized.
- Ensure the power supply can provide sufficient current (at least 2A).
The battery is not charging:
- Confirm the battery is a 3-cell (3S) LiPo and is properly connected to the
BATT+andBATT-pins. - Check for any damage to the battery or charger.
- Confirm the battery is a 3-cell (3S) LiPo and is properly connected to the
The charger overheats:
- Ensure the charger is operating within the specified temperature range (0°C to 50°C).
- Verify the input voltage and current are within the recommended limits.
The battery voltage is too low after charging:
- Check the battery's health. LiPo batteries degrade over time and may not hold a full charge.
- Ensure the charger is functioning correctly and providing a constant 11.7V output.
FAQs
Q: Can I use this charger with a 2-cell (2S) or 4-cell (4S) LiPo battery?
A: No, this charger is specifically designed for 3-cell (3S) LiPo batteries. Using it with other configurations may result in improper charging or damage.
Q: Is it safe to leave the battery connected to the charger after it is fully charged?
A: It is recommended to disconnect the battery after charging to prevent overcharging and extend the battery's lifespan.
Q: Can I use a solar panel as the input power source?
A: Yes, as long as the solar panel provides a stable DC voltage between 12V and 15V and can supply sufficient current (at least 2A).