How to Use XL-ZF12C-ZW: Examples, Pinouts, and Specs
Introduction
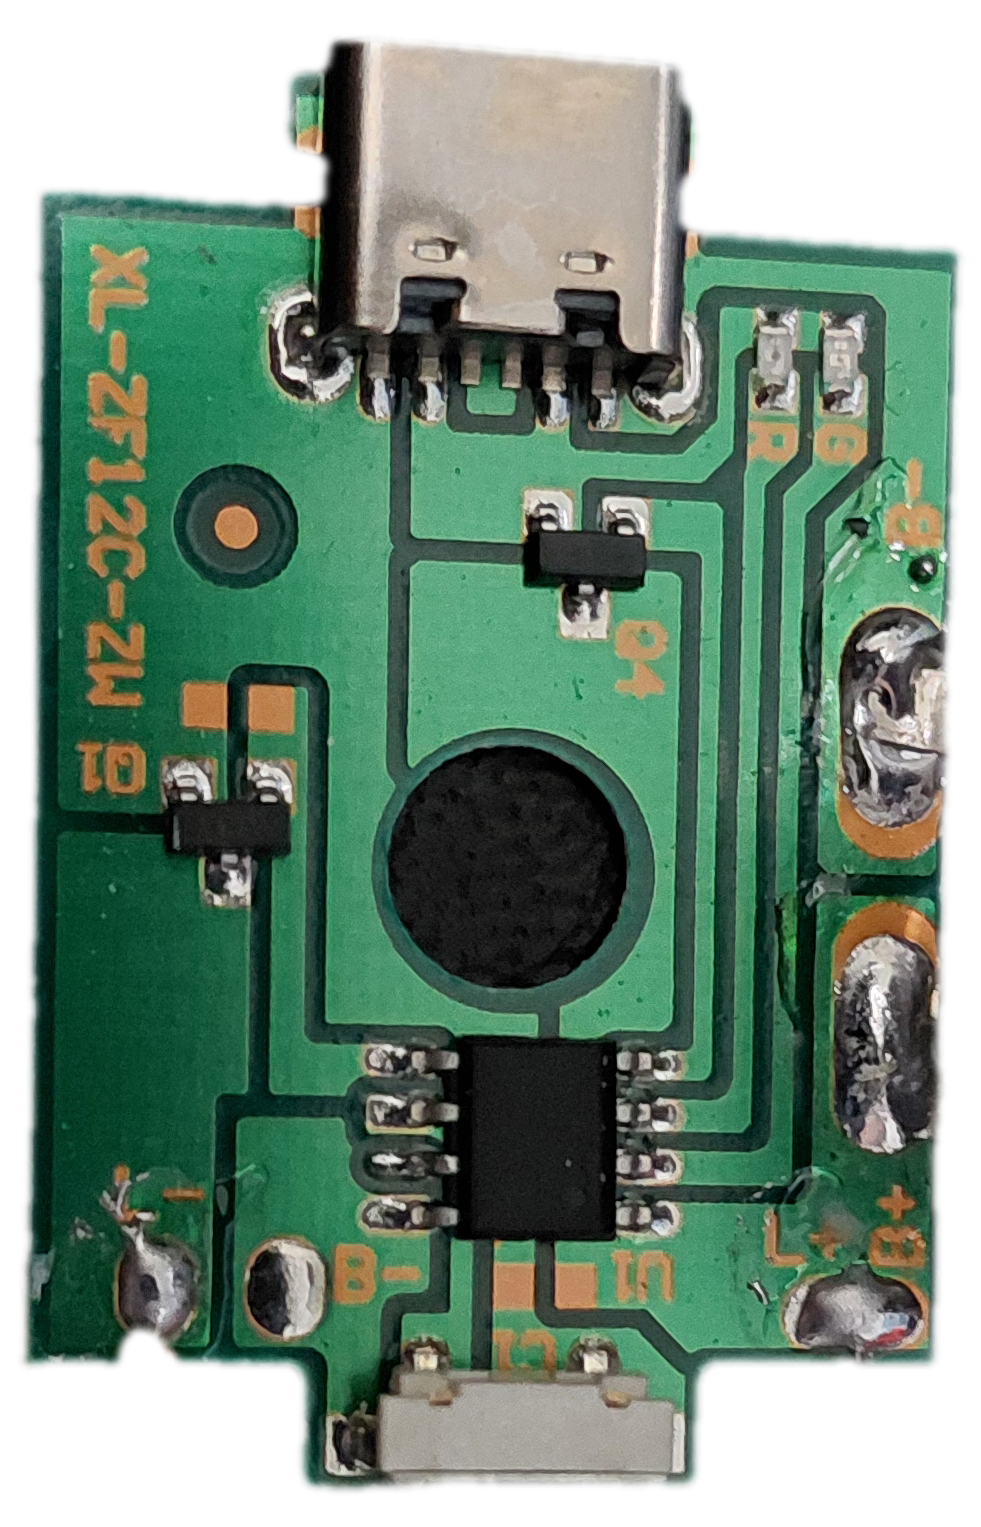
The XL-ZF12C-ZW is a wireless relay module designed for remote control applications. It operates on a 12V power supply and enables the control of electrical devices via a wireless signal. This module is widely used in automation systems, smart home projects, and other applications requiring remote switching of devices. Its compact design and reliable performance make it a popular choice for hobbyists and professionals alike.
Explore Projects Built with XL-ZF12C-ZW


Explore Projects Built with XL-ZF12C-ZW
Common Applications
- Smart home automation (e.g., controlling lights, fans, or appliances)
- Remote control of industrial equipment
- Wireless switching in IoT projects
- Security systems for activating alarms or locks
Technical Specifications
Below are the key technical details of the XL-ZF12C-ZW wireless relay module:
| Parameter | Specification |
|---|---|
| Operating Voltage | 12V DC |
| Relay Output Voltage | 250V AC / 30V DC (Max) |
| Relay Output Current | 10A (Max) |
| Wireless Frequency | 433 MHz |
| Control Distance | Up to 50 meters (line of sight) |
| Operating Modes | Momentary, Toggle, Latching |
| Dimensions | 68mm x 48mm x 19mm |
| Operating Temperature | -20°C to 60°C |
Pin Configuration and Descriptions
The XL-ZF12C-ZW module has the following pin and terminal layout:
| Pin/Terminal | Description |
|---|---|
| VCC | Connect to 12V DC power supply (positive terminal). |
| GND | Connect to the ground (negative terminal) of the power supply. |
| NO (Normally Open) | Normally open terminal of the relay. Connect to the load for switching. |
| COM (Common) | Common terminal of the relay. Connect to the power source for the load. |
| NC (Normally Closed) | Normally closed terminal of the relay. Used for default closed connections. |
Usage Instructions
How to Use the XL-ZF12C-ZW in a Circuit
- Power the Module: Connect the VCC pin to a 12V DC power supply and the GND pin to the ground.
- Connect the Load:
- For devices that should remain off by default, connect the load between the NO (Normally Open) terminal and COM (Common).
- For devices that should remain on by default, connect the load between the NC (Normally Closed) terminal and COM.
- Wireless Control:
- Use a compatible 433 MHz remote control to send signals to the module.
- Configure the operating mode (Momentary, Toggle, or Latching) using the onboard jumpers or switches.
- Test the Setup: Ensure the relay clicks when the remote control is used, indicating successful switching.
Important Considerations
- Power Supply: Ensure the module is powered with a stable 12V DC supply to avoid malfunction.
- Load Ratings: Do not exceed the relay's maximum voltage (250V AC / 30V DC) or current (10A).
- Wireless Range: The control distance may vary depending on obstacles and interference. For optimal performance, maintain a clear line of sight between the remote and the module.
- Safety: When working with high voltages, ensure proper insulation and avoid direct contact with live wires.
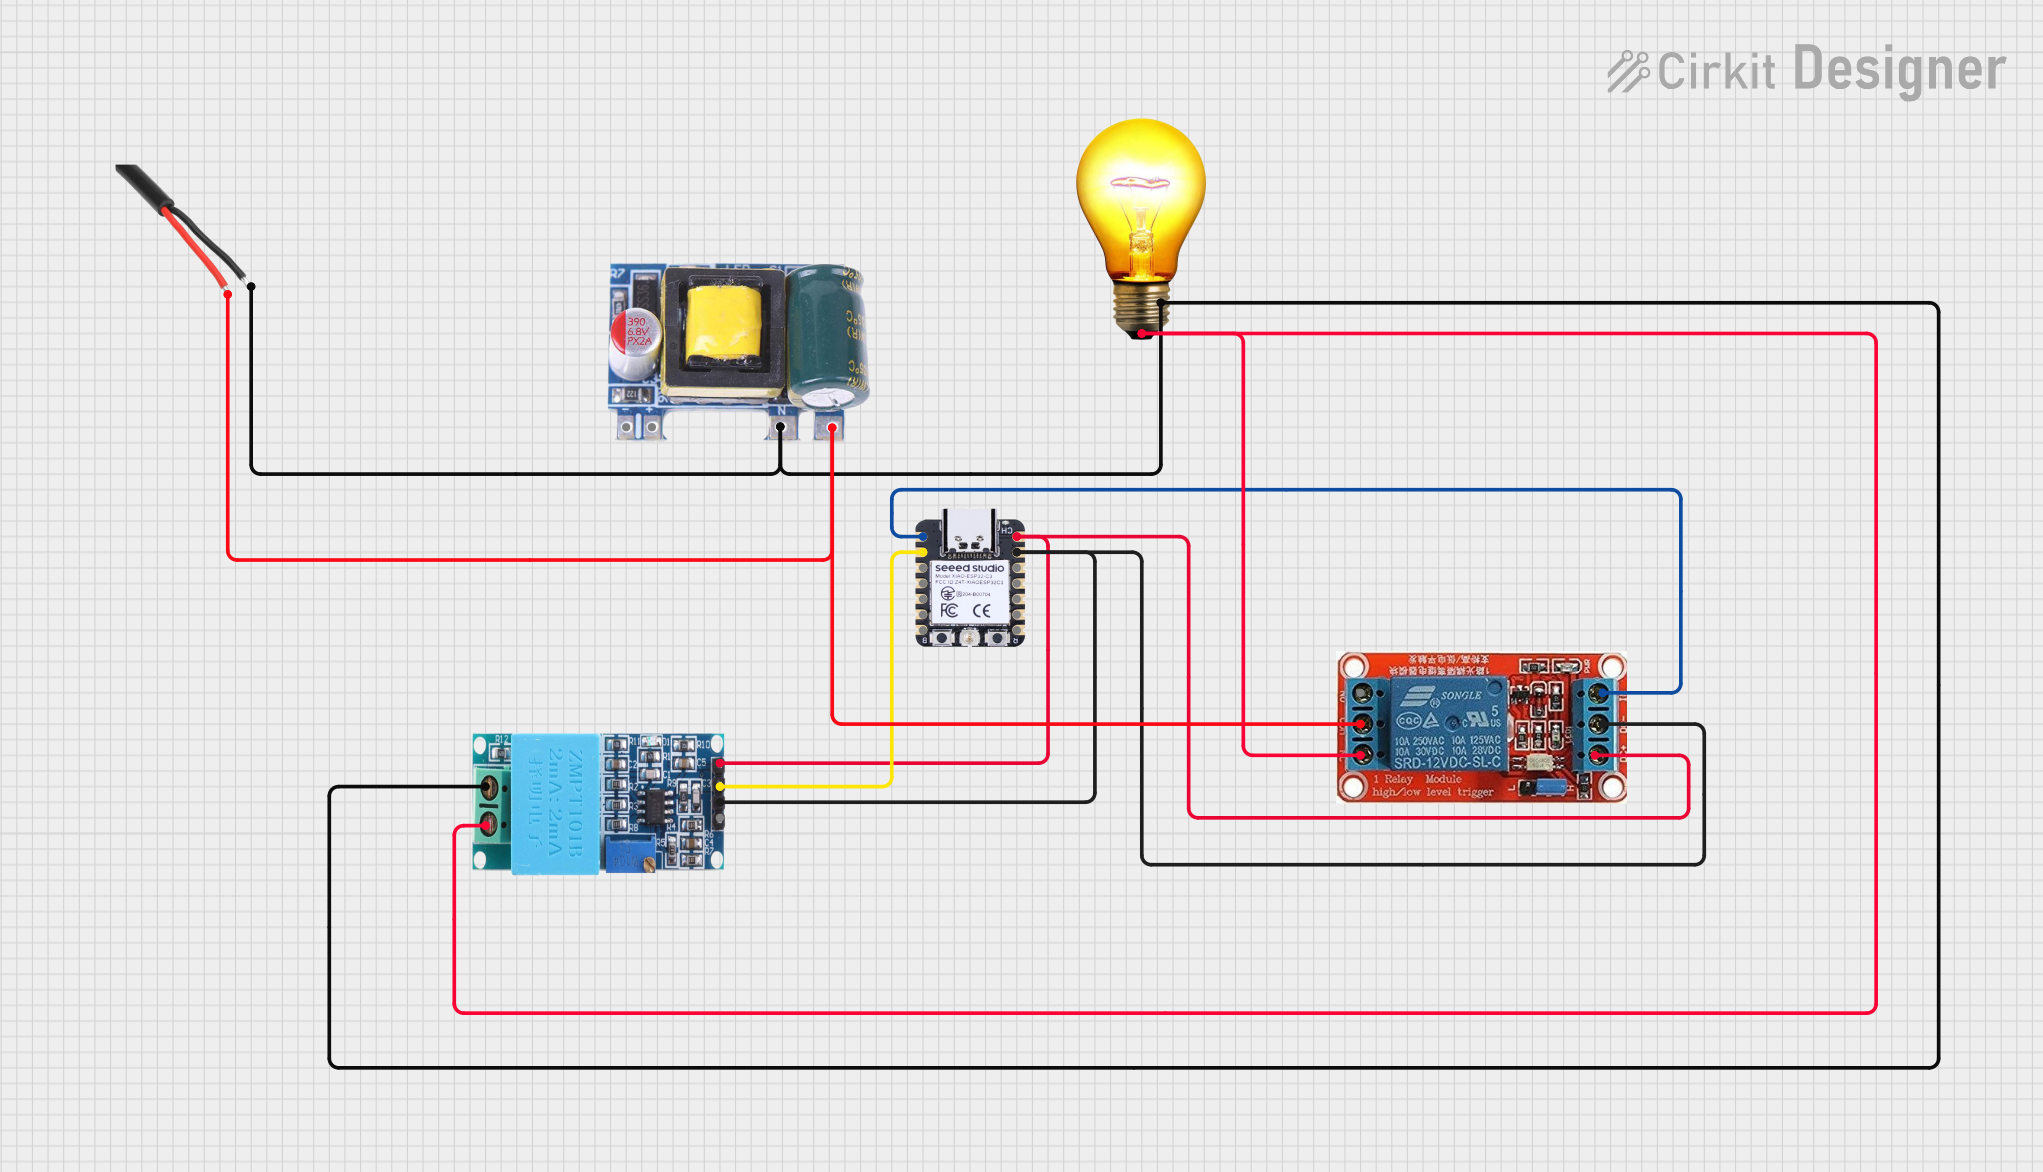
Example: Connecting to an Arduino UNO
The XL-ZF12C-ZW can also be controlled via an Arduino UNO by simulating the 433 MHz signal using a transmitter module. Below is an example code snippet:
#include <RCSwitch.h> // Include the RC-Switch library for 433 MHz communication

RCSwitch mySwitch = RCSwitch();

void setup() {
  mySwitch.enableTransmit(10); // Set pin 10 as the transmitter pin
  // Adjust the pulse length and protocol if needed
  mySwitch.setPulseLength(320);
  mySwitch.setProtocol(1);
  Serial.begin(9600); // Initialize serial communication for debugging
}

void loop() {
  // Example: Send a signal to toggle the relay
  mySwitch.send(123456); // Replace with the actual code for your relay module
  delay(1000); // Wait for 1 second before sending the next signal
}
Note: Replace
123456with the specific code for your relay module. Refer to the remote control's documentation or use a 433 MHz receiver to decode the signal.
Troubleshooting and FAQs
Common Issues and Solutions
Relay Not Switching:
- Cause: Insufficient power supply or incorrect wiring.
- Solution: Verify that the module is receiving a stable 12V DC supply and check all connections.
Wireless Signal Not Received:
- Cause: Interference or out-of-range operation.
- Solution: Ensure the remote control is within the specified range and there are no major obstacles. Replace the remote's battery if necessary.
Load Not Operating Correctly:
- Cause: Exceeding the relay's voltage or current ratings.
- Solution: Check the load's specifications and ensure they are within the relay's limits.
Relay Stuck in One State:
- Cause: Incorrect operating mode configuration.
- Solution: Reconfigure the module's operating mode using the onboard jumpers or switches.
FAQs
Q1: Can I use the XL-ZF12C-ZW with a 5V power supply?
A1: No, the module requires a 12V DC power supply for proper operation.
Q2: How do I change the operating mode?
A2: The operating mode can be changed by adjusting the onboard jumpers or switches. Refer to the module's datasheet for detailed instructions.
Q3: Can I control multiple modules with one remote?
A3: Yes, as long as the modules are configured to respond to the same signal code.
Q4: Is the module suitable for outdoor use?
A4: The XL-ZF12C-ZW is not weatherproof. If used outdoors, ensure it is housed in a waterproof enclosure.
Q5: What is the maximum control distance?
A5: The module can be controlled up to 50 meters in an open area with a clear line of sight. Obstacles and interference may reduce this range.