How to Use gnd: Examples, Pinouts, and Specs

Introduction
The GND (Ground) pin is a fundamental component in electrical and electronic circuits. It serves as the reference point for all voltage measurements and provides a common return path for electric current. In the context of Arduino UNO, the GND pin is essential for establishing a shared electrical ground between the microcontroller and other connected components or devices.
Explore Projects Built with gnd
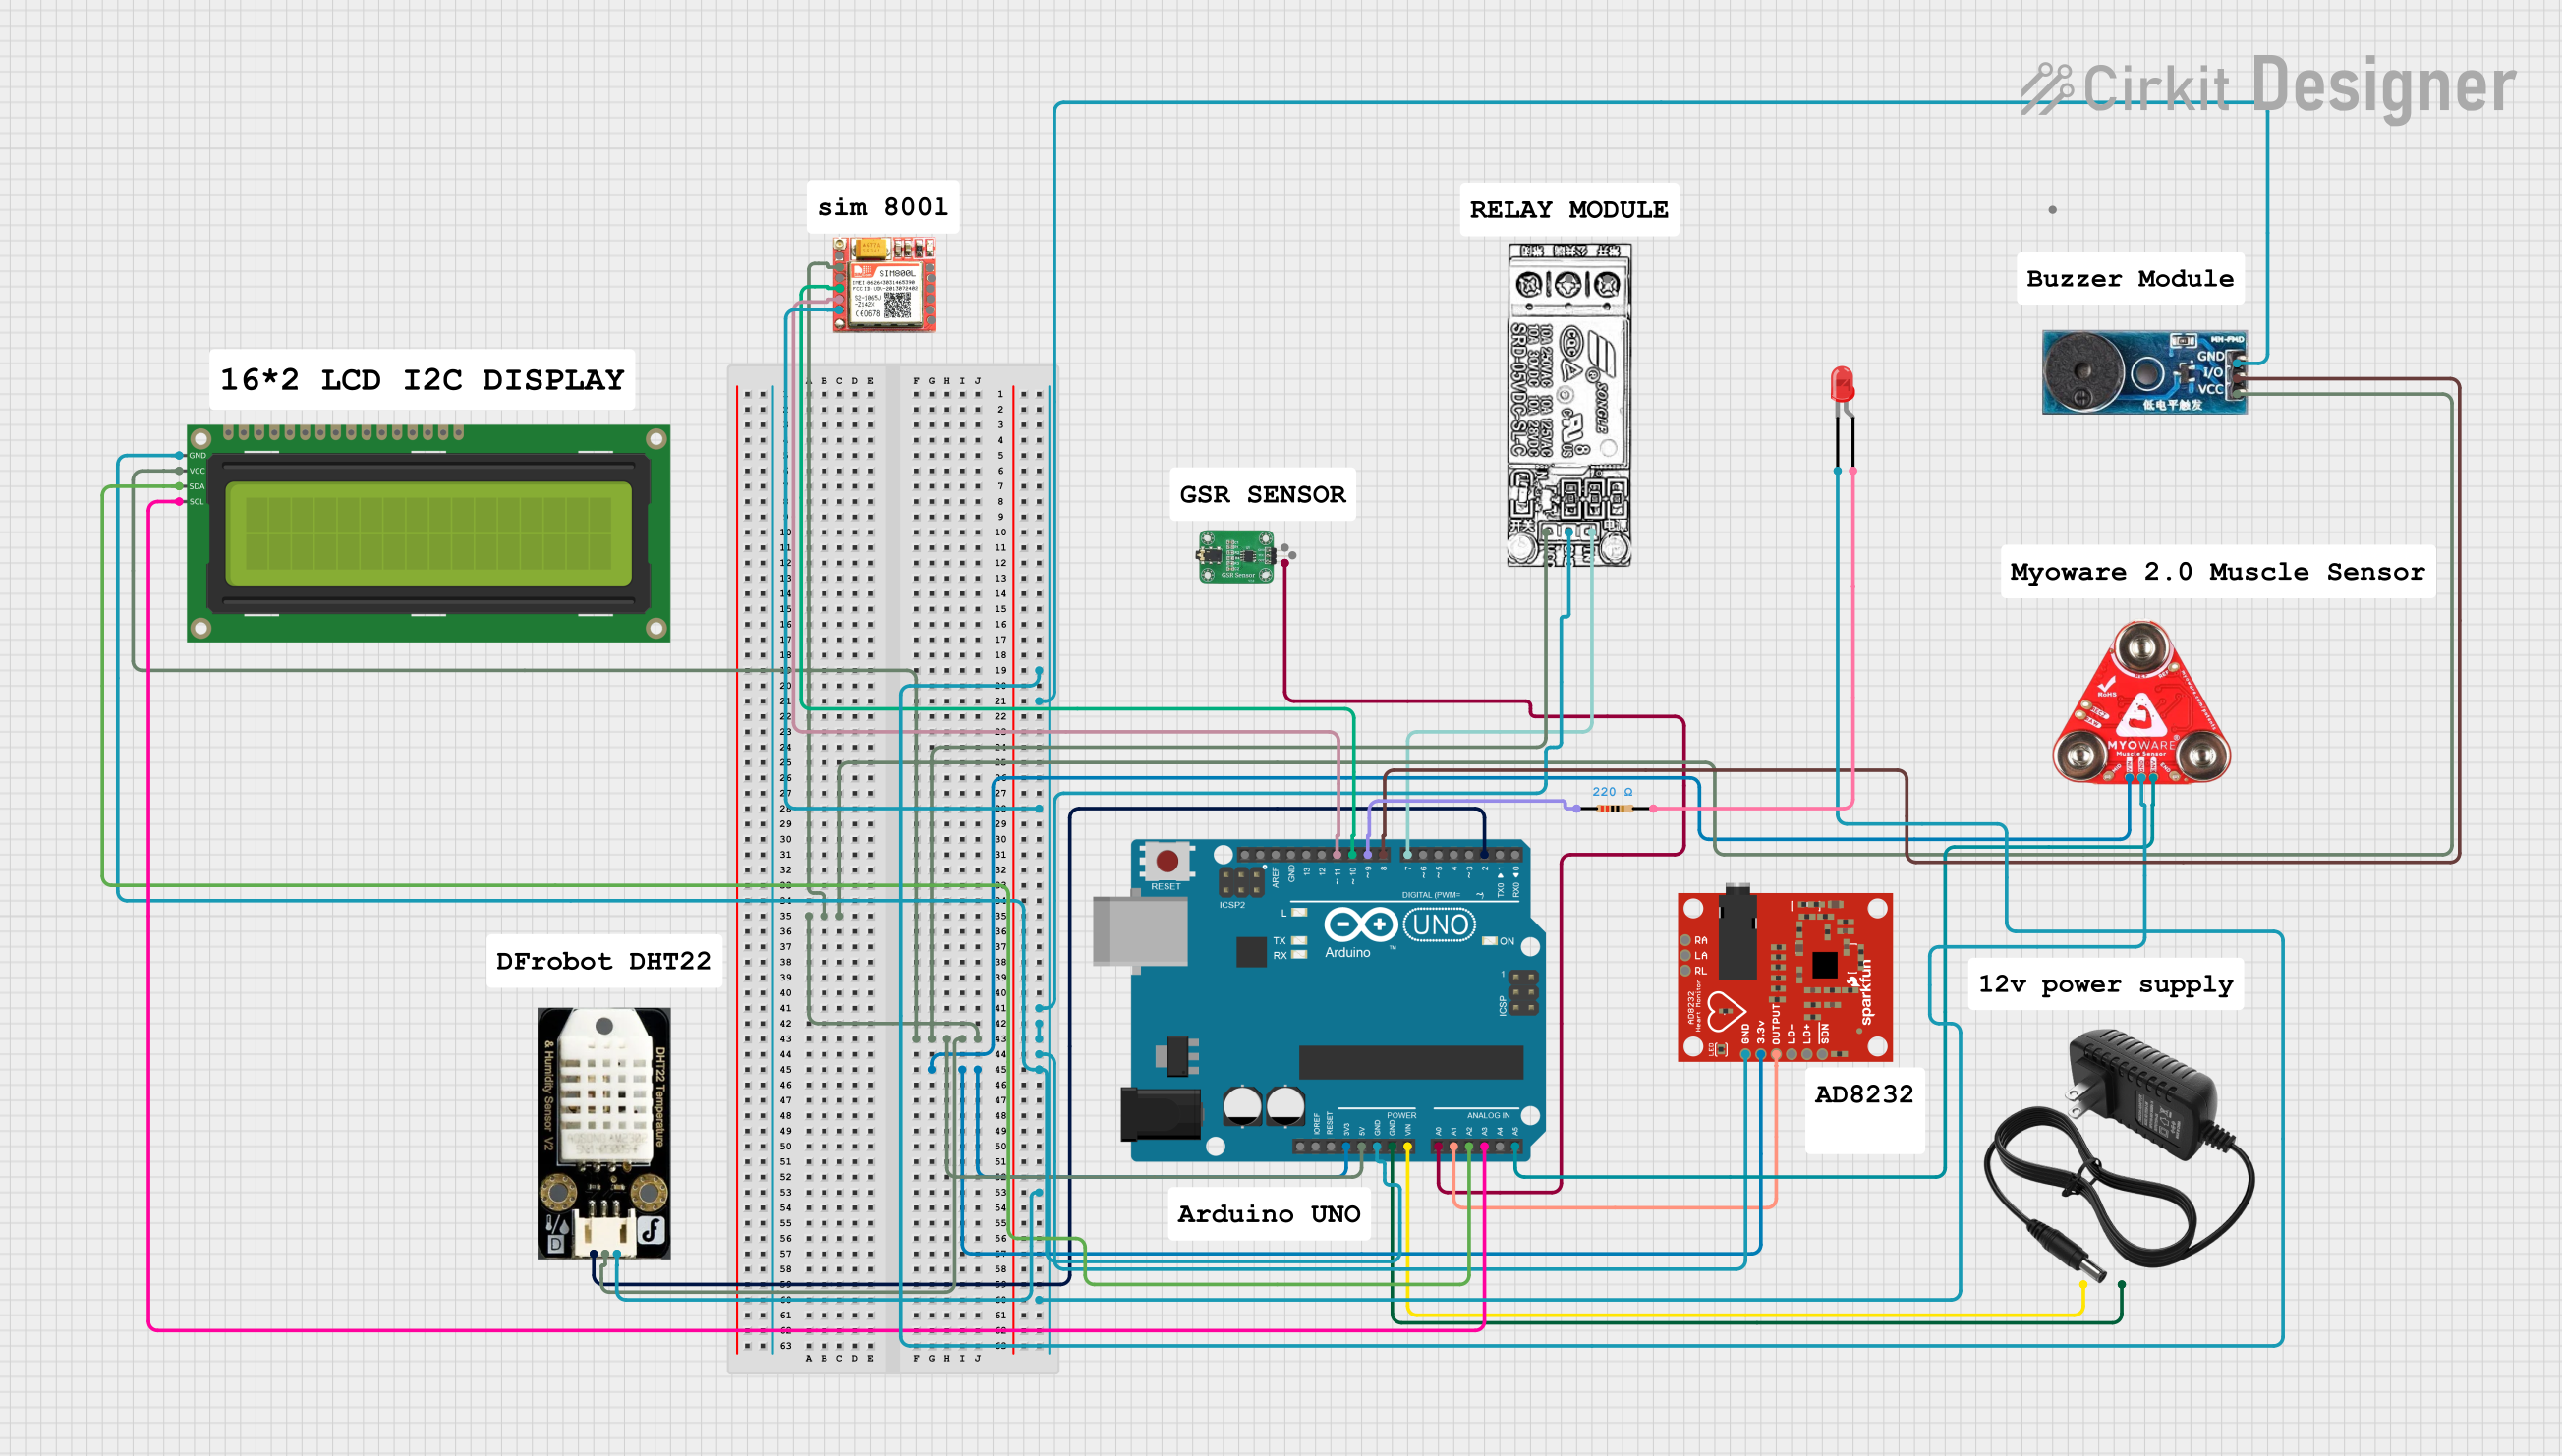

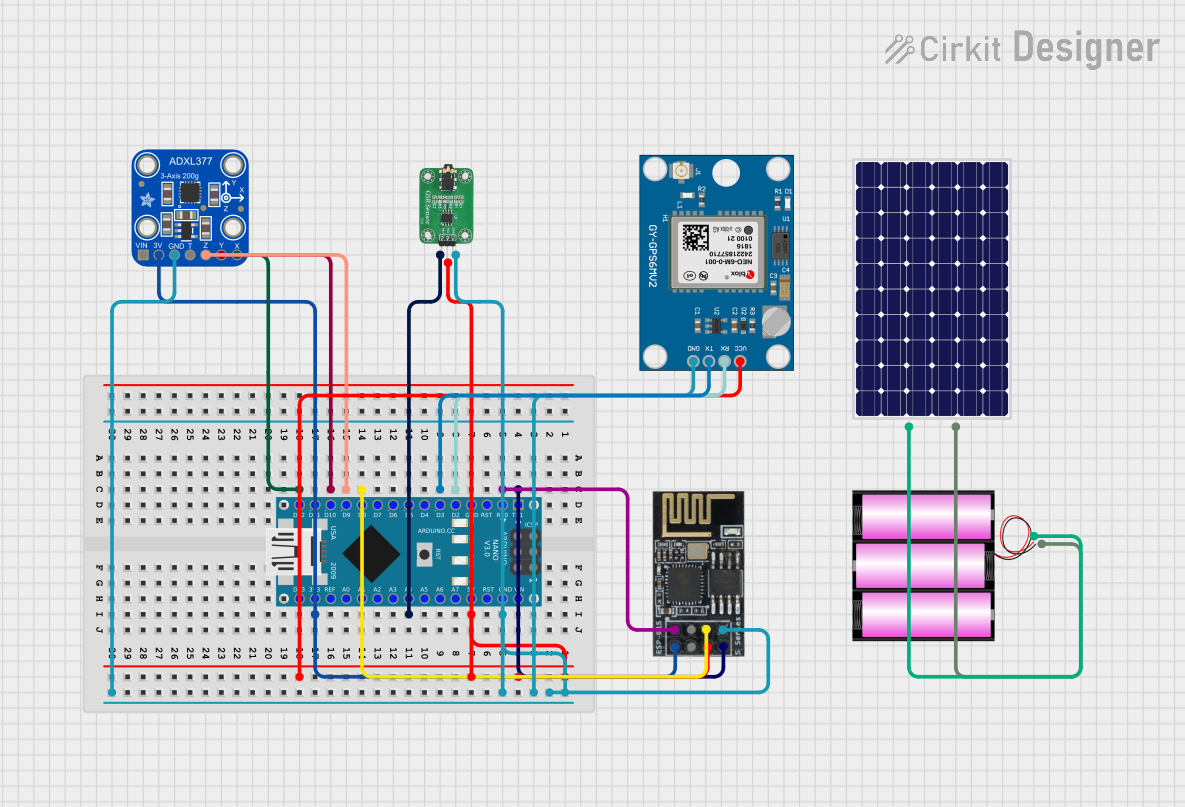

Explore Projects Built with gnd
Common Applications and Use Cases
- Establishing a common reference point in circuits.
- Completing electrical circuits for proper current flow.
- Connecting external sensors, modules, or devices to the Arduino UNO.
- Ensuring stable operation of electronic components by providing a consistent ground.
Technical Specifications
The GND pin on the Arduino UNO is designed to provide a reliable ground connection for various electronic components. Below are the key technical details and pin configuration:
Key Technical Details
- Voltage Reference: 0V (Ground potential)
- Current Capacity: Up to the maximum current rating of the Arduino UNO board (typically 200mA per pin, with a total board limit of 500mA when powered via USB).
- Pin Type: Ground (common return path for current).
Pin Configuration and Descriptions
The Arduino UNO board includes multiple GND pins for convenience. The table below outlines their locations and descriptions:
| Pin Name | Location on Arduino UNO | Description |
|---|---|---|
| GND | Near the power pins | Primary ground pin for power and signals |
| GND | Near the digital pins | Secondary ground pin for circuit use |
| GND | ICSP header | Ground pin for in-circuit programming |
Usage Instructions
To use the GND pin effectively in a circuit, follow these steps and best practices:
How to Use the GND Pin
- Connect to Power Source: Ensure that the GND pin is connected to the ground terminal of your power source.
- Complete the Circuit: Connect the GND pin to the ground terminals of all external components, such as sensors, LEDs, or modules, to establish a common reference point.
- Avoid Floating Grounds: Always connect the GND pin to prevent floating grounds, which can cause erratic behavior in the circuit.
Important Considerations and Best Practices
- Shared Ground: When interfacing the Arduino UNO with external devices, ensure all devices share a common ground to avoid voltage mismatches.
- Current Limits: Do not exceed the current capacity of the Arduino UNO board. Use external power supplies and ground connections for high-current devices.
- Noise Reduction: For sensitive circuits, use proper grounding techniques (e.g., star grounding) to minimize electrical noise.
Example: Connecting an LED to Arduino UNO
Below is an example of how to use the GND pin to complete a simple LED circuit:
// Simple LED circuit example
// Connect the long leg (anode) of the LED to pin 13
// Connect the short leg (cathode) of the LED to a 220-ohm resistor
// Connect the other end of the resistor to the GND pin

void setup() {
  pinMode(13, OUTPUT); // Set pin 13 as an output
}

void loop() {
  digitalWrite(13, HIGH); // Turn the LED on
  delay(1000);            // Wait for 1 second
  digitalWrite(13, LOW);  // Turn the LED off
  delay(1000);            // Wait for 1 second
}
Troubleshooting and FAQs
Common Issues Users Might Face
- Circuit Not Working: If the circuit does not function as expected, check if all components share a common ground.
- Voltage Fluctuations: Unstable voltage readings may occur if the ground connection is loose or improperly connected.
- Overheating Components: Exceeding the current capacity of the Arduino UNO can cause components to overheat or fail.
Solutions and Tips for Troubleshooting
- Verify Connections: Ensure all ground connections are secure and properly soldered or connected.
- Use a Multimeter: Measure the voltage between the GND pin and other points in the circuit to confirm proper grounding.
- Check Power Supply: Ensure the power supply is stable and capable of providing sufficient current for all connected components.
- Avoid Ground Loops: In complex circuits, use a single ground point to prevent ground loops, which can introduce noise.
By following these guidelines, the GND pin on the Arduino UNO can be effectively utilized to ensure stable and reliable circuit operation.