How to Use ISD 1820: Examples, Pinouts, and Specs
Introduction
The ISD 1820 is a versatile voice recording and playback integrated circuit (IC) designed for simple audio storage and reproduction. It allows users to record audio messages of up to 20 seconds and play them back with ease. The IC features a built-in microphone input, speaker output, and minimal external components, making it ideal for compact and cost-effective audio solutions.
Explore Projects Built with ISD 1820
Explore Projects Built with ISD 1820
Common Applications
- Greeting cards with personalized audio messages
- Toys and novelty items with sound playback
- Voice reminders and alarms
- Educational and DIY electronics projects
- Simple audio playback systems
Technical Specifications
The ISD 1820 is designed for ease of use and offers the following key specifications:
| Parameter | Value |
|---|---|
| Operating Voltage | 2.4V to 5.5V |
| Maximum Recording Time | 20 seconds |
| Audio Storage | Non-volatile (retains data after power-off) |
| Input Type | Built-in microphone or external input |
| Output Type | Speaker output (8Ω recommended) |
| Playback Modes | Edge-triggered or level-triggered |
| Dimensions (Module) | ~38mm x 42mm |
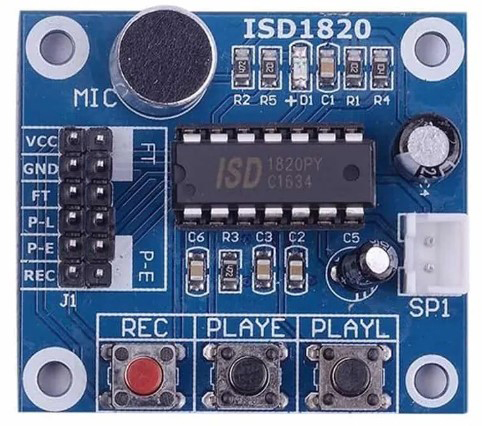
Pin Configuration and Descriptions
The ISD 1820 module typically includes the following pins:
| Pin Name | Pin Type | Description |
|---|---|---|
| VCC | Power Input | Connect to a 2.4V–5.5V power supply. |
| GND | Ground | Connect to the ground of the power supply. |
| REC | Input | Active-high pin to start recording. |
| PLAYE | Input | Active-high pin for edge-triggered playback (plays once per pulse). |
| PLAYL | Input | Active-low pin for level-triggered playback (plays while held low). |
| MIC+ | Input | Positive terminal of the built-in microphone. |
| MIC- | Input | Negative terminal of the built-in microphone. |
| SP+ | Output | Positive terminal for speaker connection. |
| SP- | Output | Negative terminal for speaker connection. |
| FT | Input | Feed-through mode for real-time audio pass-through from MIC to speaker output. |
Usage Instructions
How to Use the ISD 1820 in a Circuit
- Power Supply: Connect the VCC pin to a 3.3V or 5V power source and the GND pin to ground.
- Recording Audio:
- Press and hold the
RECpin (or button connected to it) to record audio via the built-in microphone. - Release the
RECpin to stop recording.
- Press and hold the
- Playback Audio:
- For edge-triggered playback, send a high pulse to the
PLAYEpin. - For level-triggered playback, hold the
PLAYLpin low to play the audio and release it to stop.
- For edge-triggered playback, send a high pulse to the
- Speaker Connection: Connect an 8Ω speaker to the
SP+andSP-pins for audio output. - Feed-Through Mode: Activate the
FTpin to pass live audio from the microphone to the speaker in real time.
Important Considerations and Best Practices
- Use a decoupling capacitor (e.g., 0.1µF) between VCC and GND to reduce noise.
- Avoid exceeding the maximum voltage rating of 5.5V to prevent damage to the IC.
- For better audio quality, use a high-sensitivity microphone and a properly rated speaker.
- Ensure proper grounding to minimize noise and interference in the audio signal.
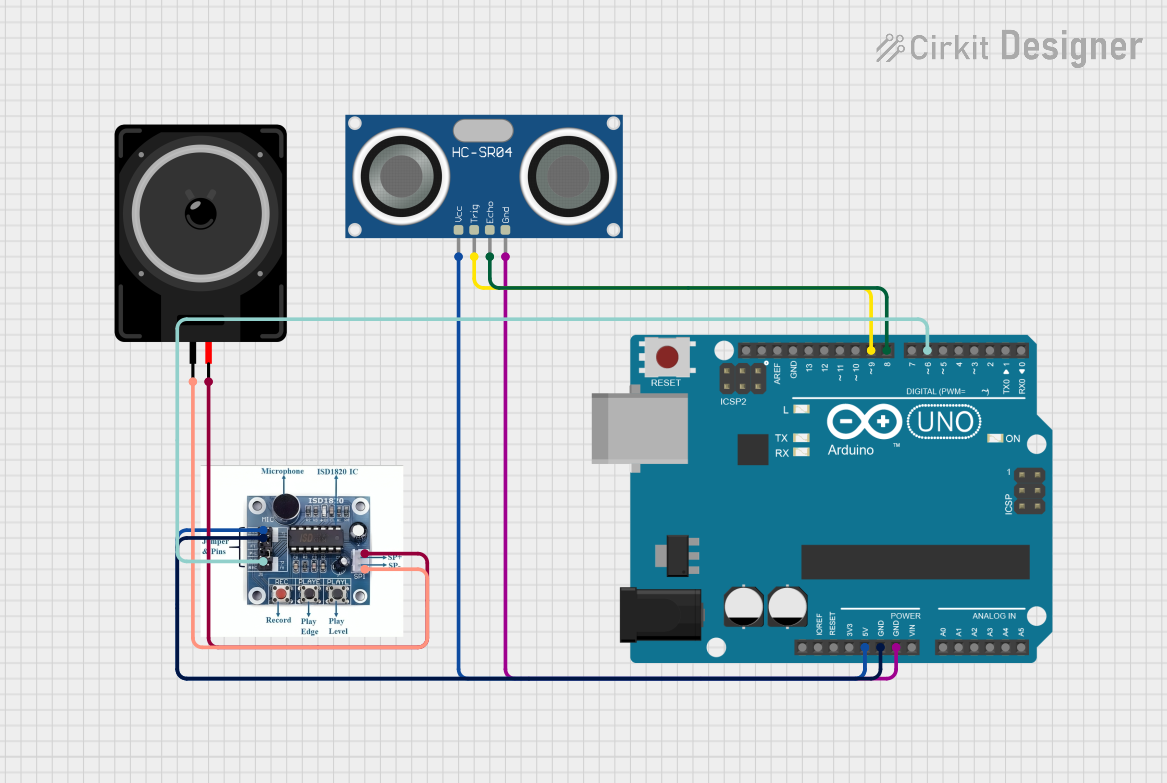
Example: Connecting ISD 1820 to Arduino UNO
The ISD 1820 can be controlled using an Arduino UNO for automated recording and playback. Below is an example code snippet:
// Pin definitions for ISD 1820 connections
const int recPin = 7;    // Connect to REC pin on ISD 1820
const int playEPin = 8;  // Connect to PLAYE pin on ISD 1820

void setup() {
  pinMode(recPin, OUTPUT);    // Set REC pin as output
  pinMode(playEPin, OUTPUT); // Set PLAYE pin as output
}

void loop() {
  // Record audio for 5 seconds
  digitalWrite(recPin, HIGH); // Start recording
  delay(5000);                // Wait for 5 seconds
  digitalWrite(recPin, LOW);  // Stop recording

  delay(2000);                // Wait for 2 seconds before playback

  // Play the recorded audio
  digitalWrite(playEPin, HIGH); // Trigger playback
  delay(1000);                  // Wait for playback to complete
  digitalWrite(playEPin, LOW);  // Stop playback

  delay(5000);                  // Wait before repeating the process
}
Notes:
- Ensure the Arduino's 5V pin is connected to the ISD 1820's VCC pin.
- Use a common ground between the Arduino and the ISD 1820 module.
Troubleshooting and FAQs
Common Issues and Solutions
No Sound During Playback:
- Ensure the speaker is properly connected to the
SP+andSP-pins. - Verify that the recording process was completed successfully.
- Check the power supply voltage (should be between 2.4V and 5.5V).
- Ensure the speaker is properly connected to the
Distorted Audio:
- Use a higher-quality microphone or speaker.
- Add a decoupling capacitor to reduce noise in the power supply.
Recording Does Not Start:
- Confirm that the
RECpin is receiving a proper high signal. - Check for loose connections or faulty wiring.
- Confirm that the
Playback Stops Abruptly:
- For level-triggered playback, ensure the
PLAYLpin remains low during playback. - Verify that the audio duration does not exceed 20 seconds.
- For level-triggered playback, ensure the
FAQs
Q: Can I use an external microphone with the ISD 1820?
A: Yes, you can connect an external microphone to the MIC+ and MIC- pins for better audio quality.
Q: Does the ISD 1820 retain recordings after power is turned off?
A: Yes, the ISD 1820 uses non-volatile memory to store recordings, so they are retained even after power loss.
Q: Can I extend the recording time beyond 20 seconds?
A: No, the ISD 1820 is limited to a maximum recording time of 20 seconds due to its internal memory constraints.
Q: What type of speaker should I use with the ISD 1820?
A: An 8Ω speaker is recommended for optimal performance.
By following this documentation, you can effectively integrate the ISD 1820 into your projects and troubleshoot common issues with ease.