How to Use Homelab PH sensor w Isolator : Examples, Pinouts, and Specs

Introduction
The Homelab PH Sensor w Isolator is a specialized electronic component designed for precise measurement of pH levels in various solutions. It is ideal for homelab applications, including water quality monitoring, hydroponics, aquariums, and chemical experiments. The built-in isolator ensures accurate readings by preventing interference from electrical noise, making it suitable for use in environments with other electronic devices.
This sensor is compatible with microcontrollers like Arduino and Raspberry Pi, making it a versatile choice for DIY projects and professional setups.
Explore Projects Built with Homelab PH sensor w Isolator
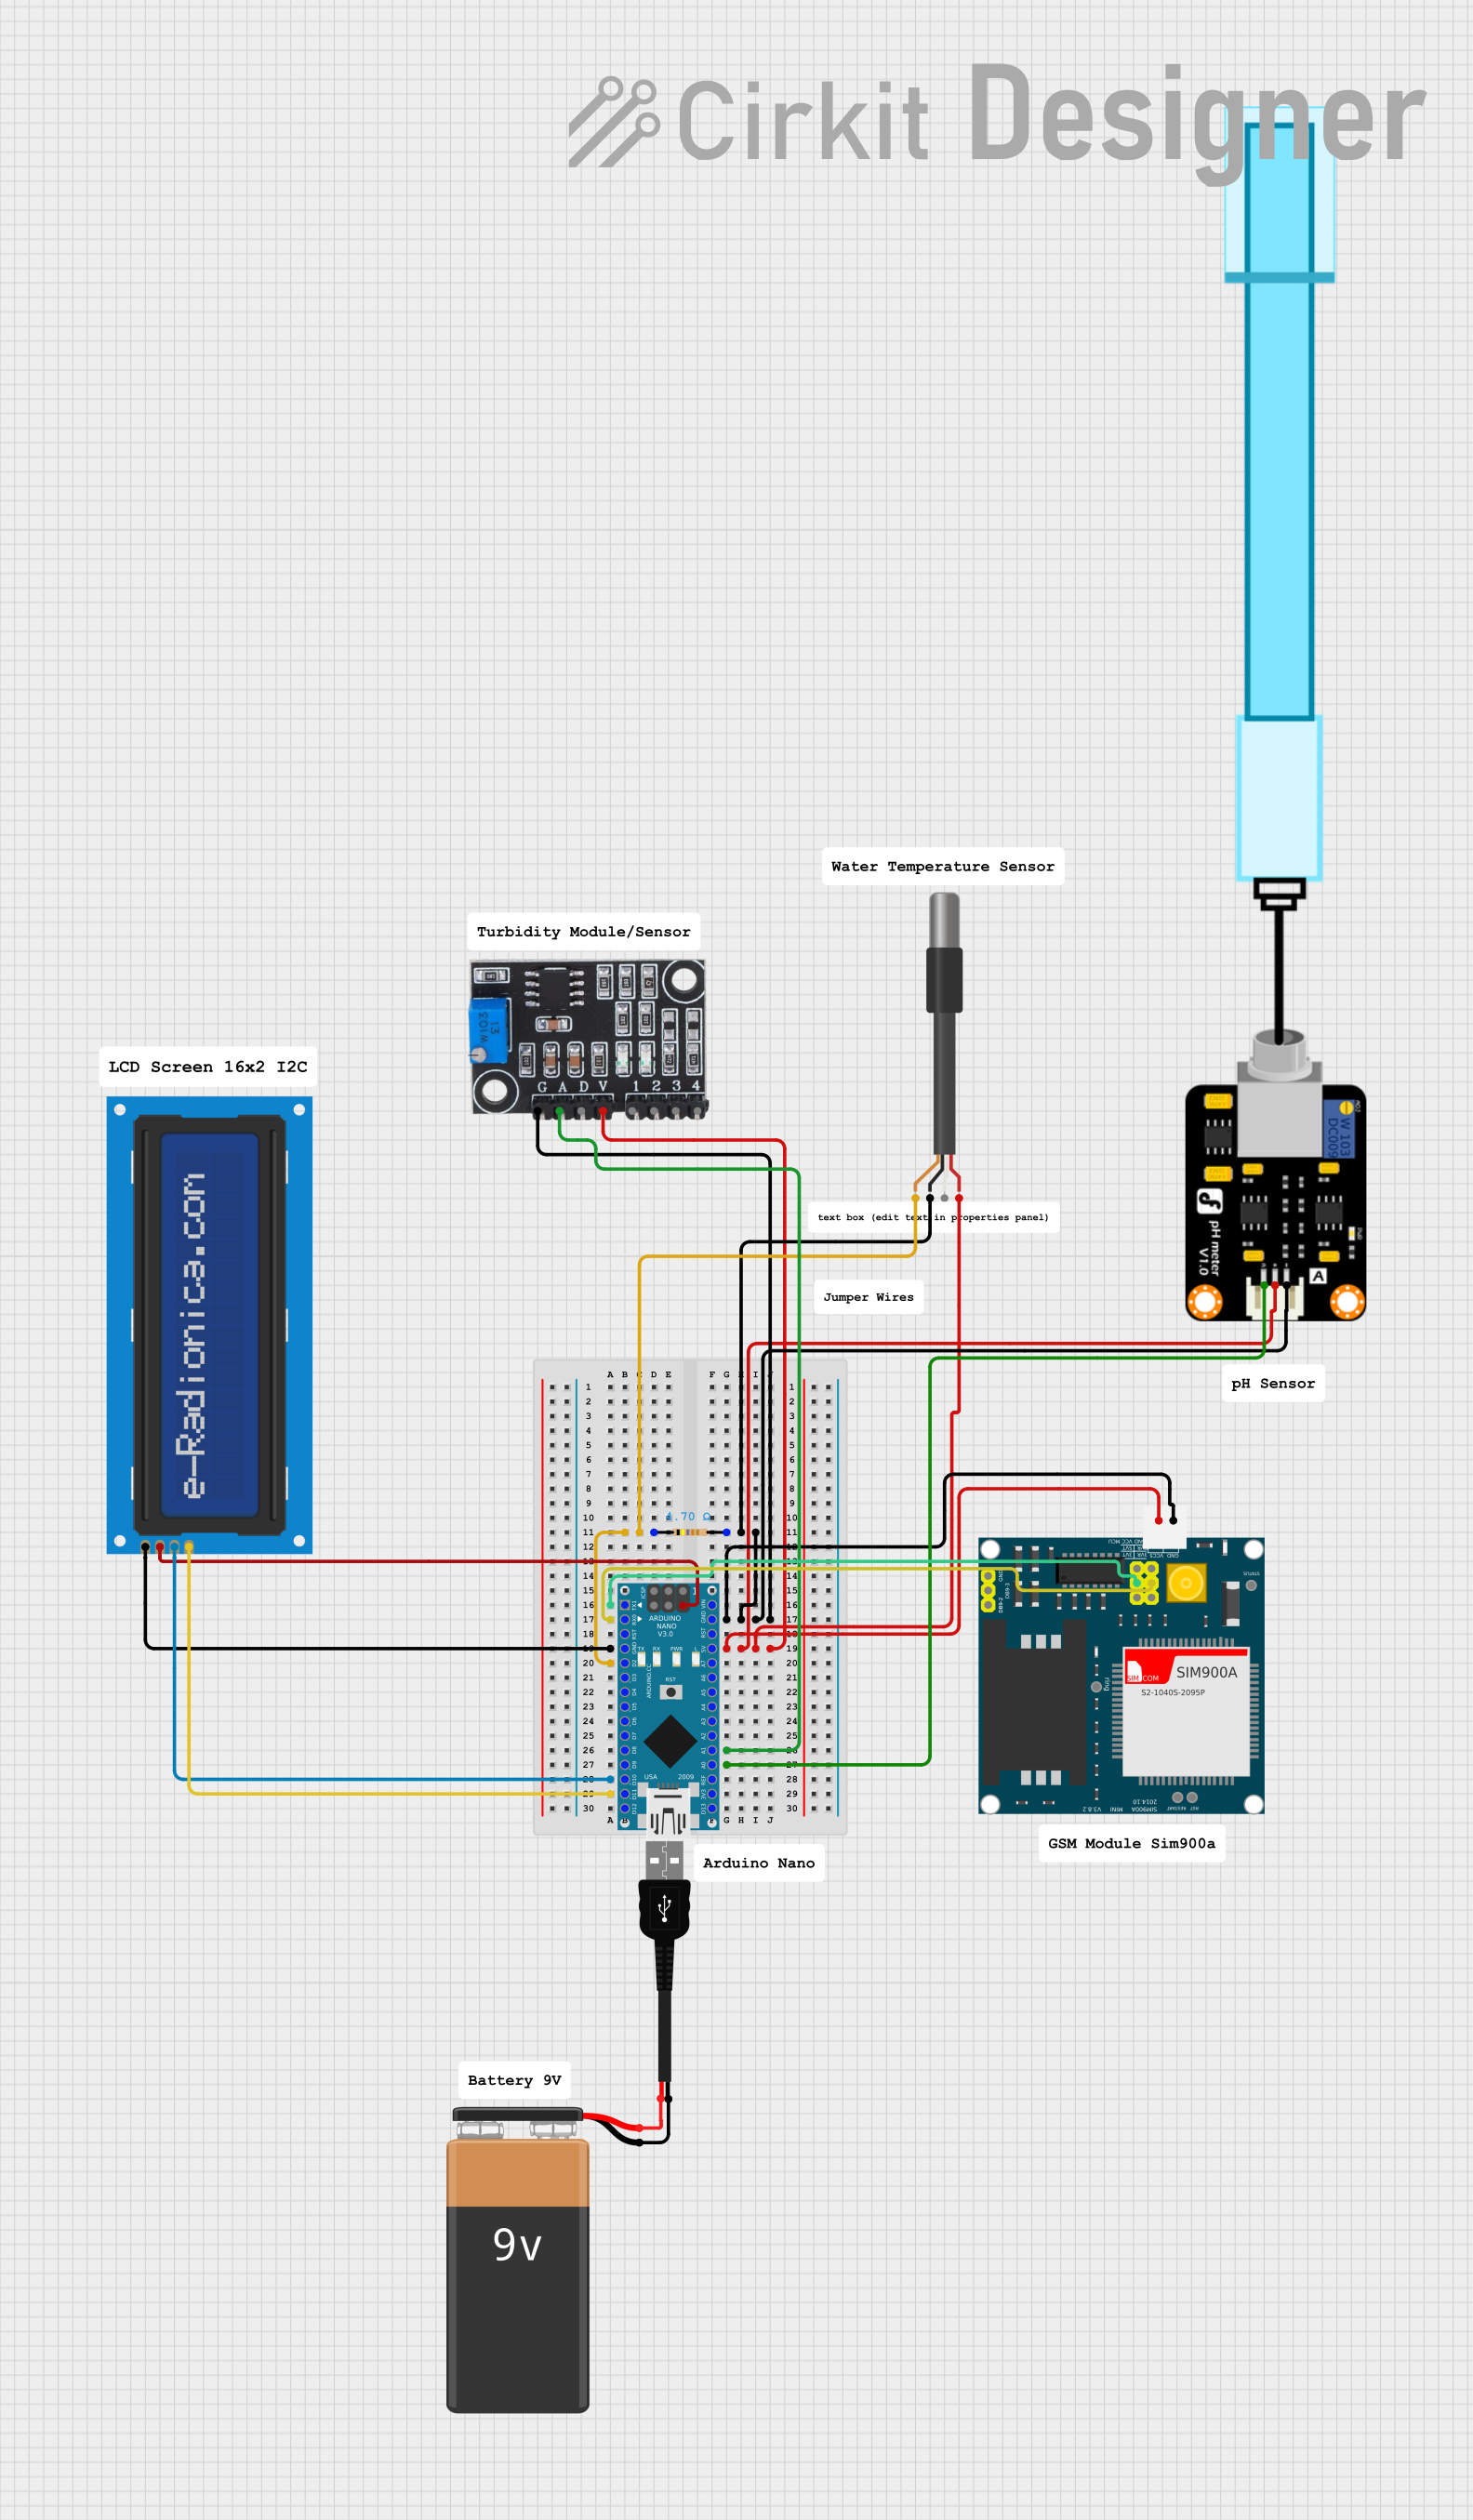
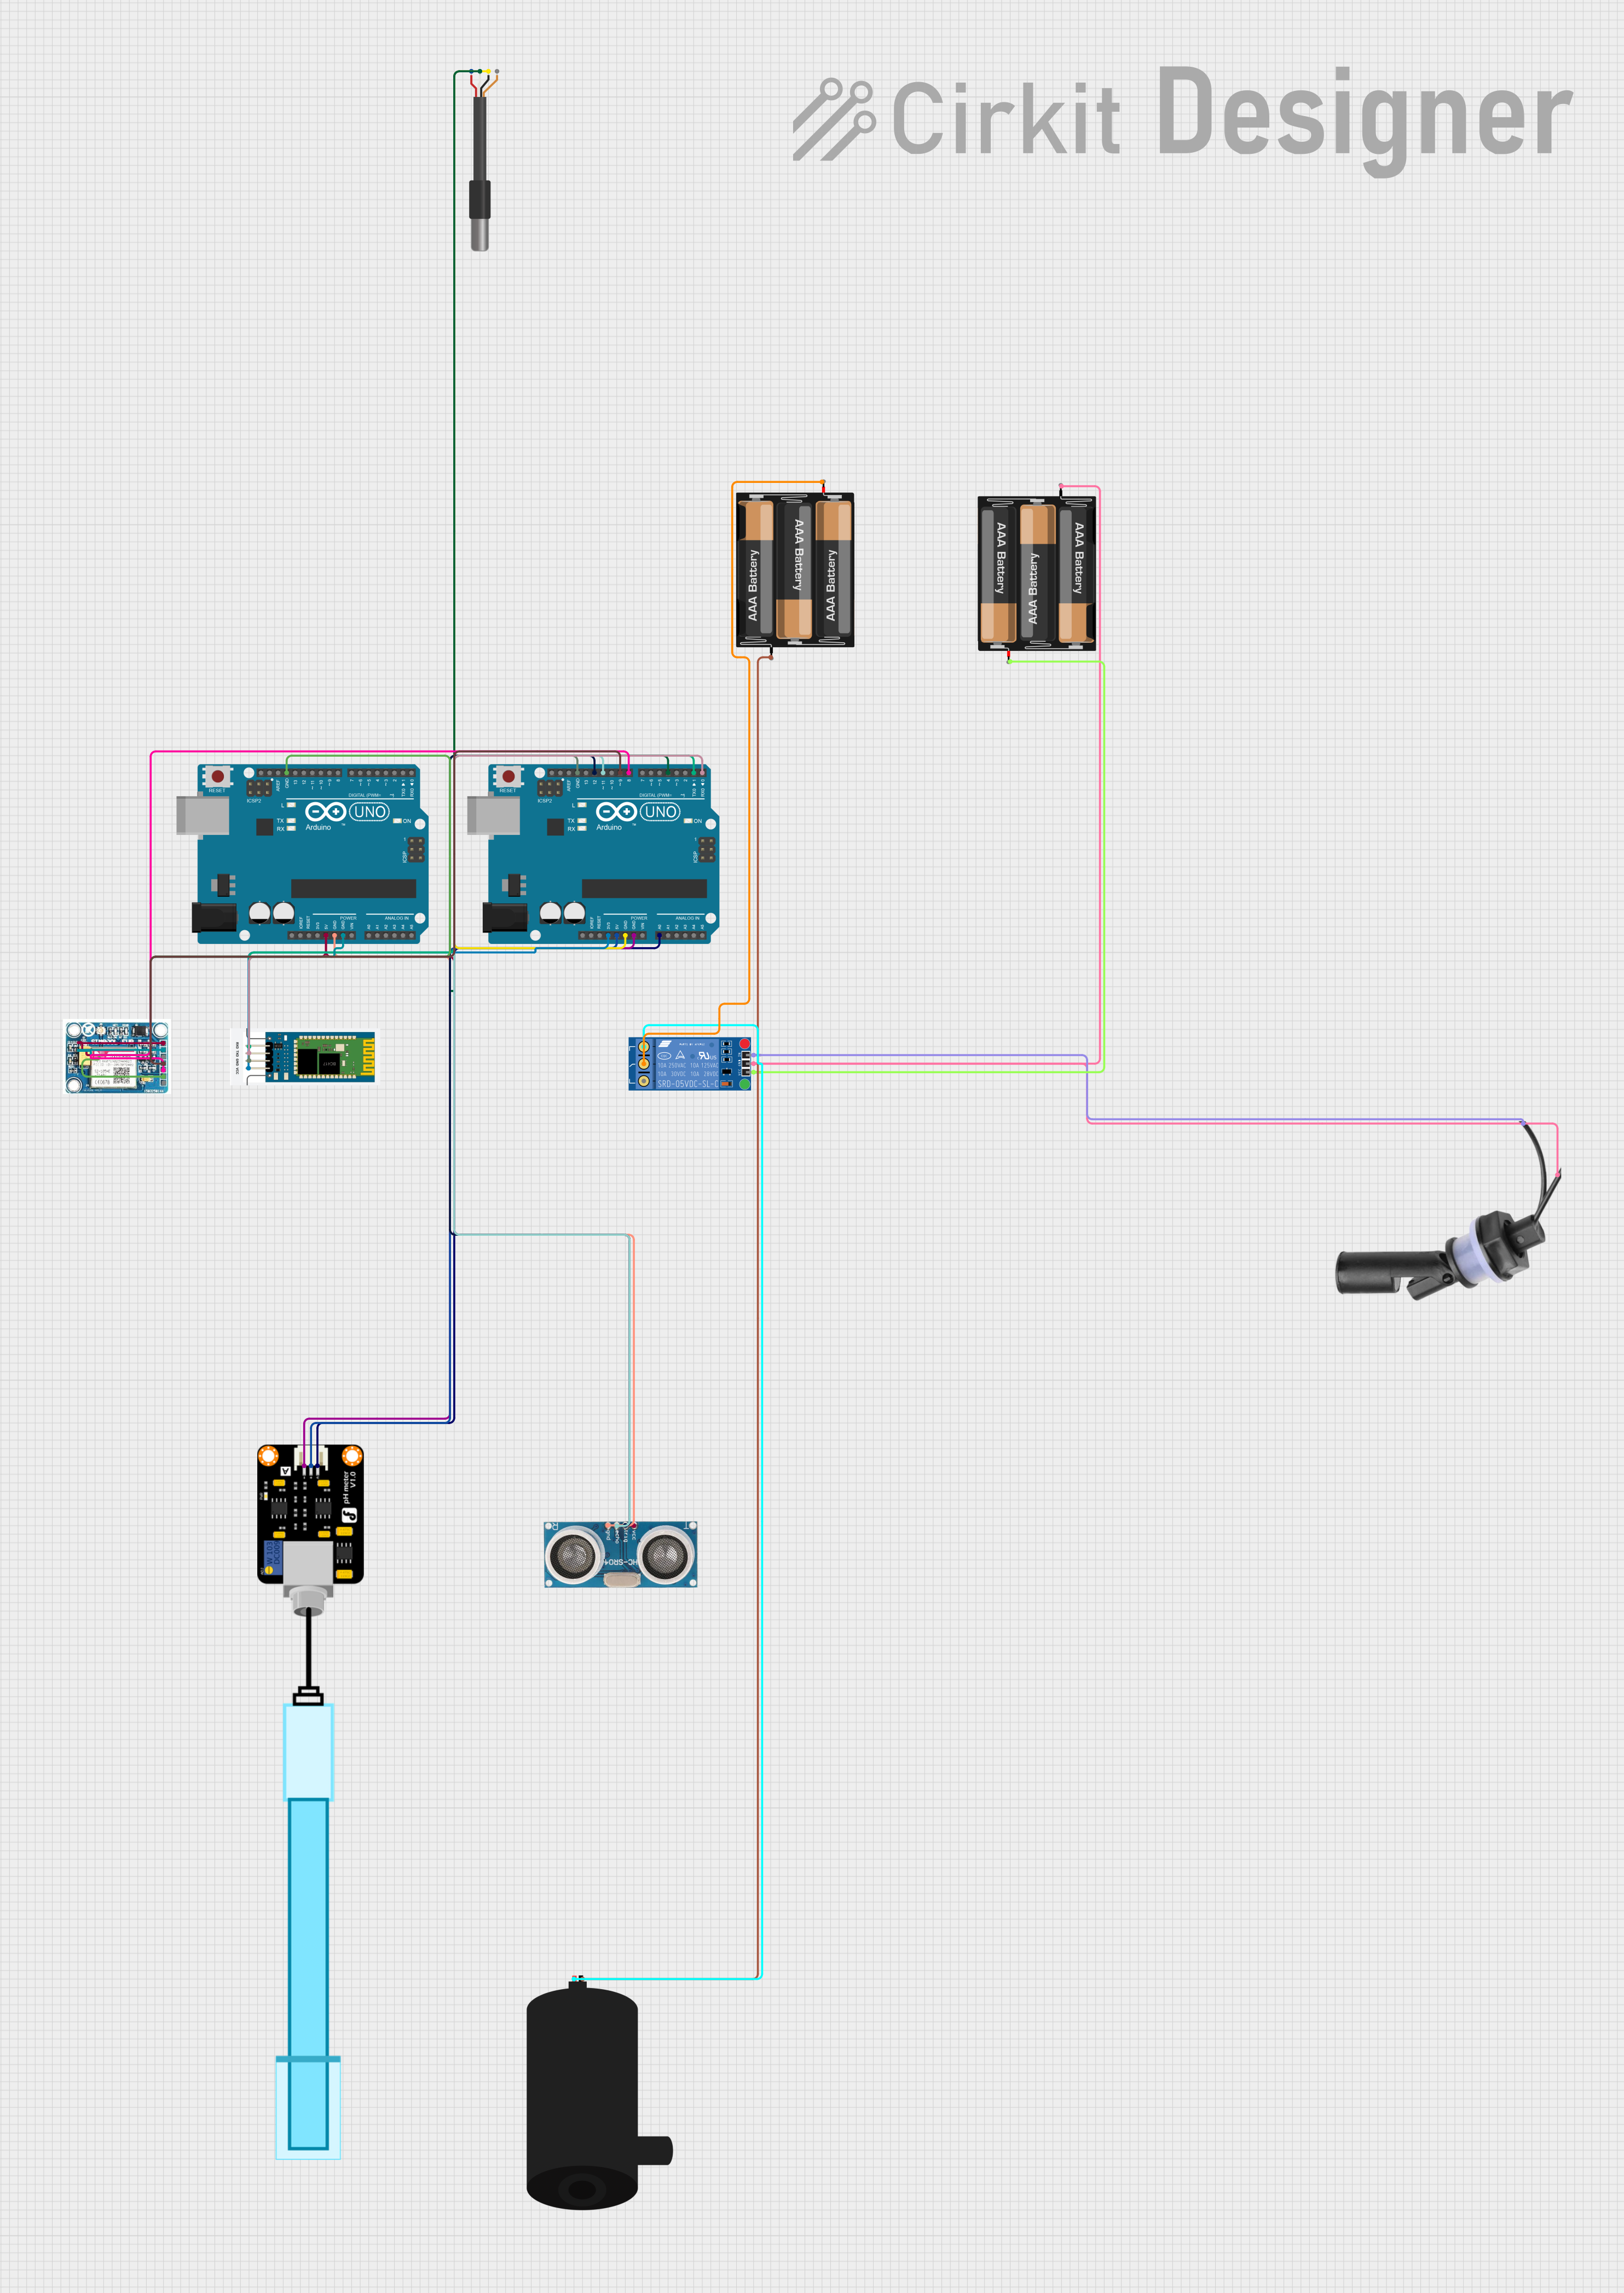
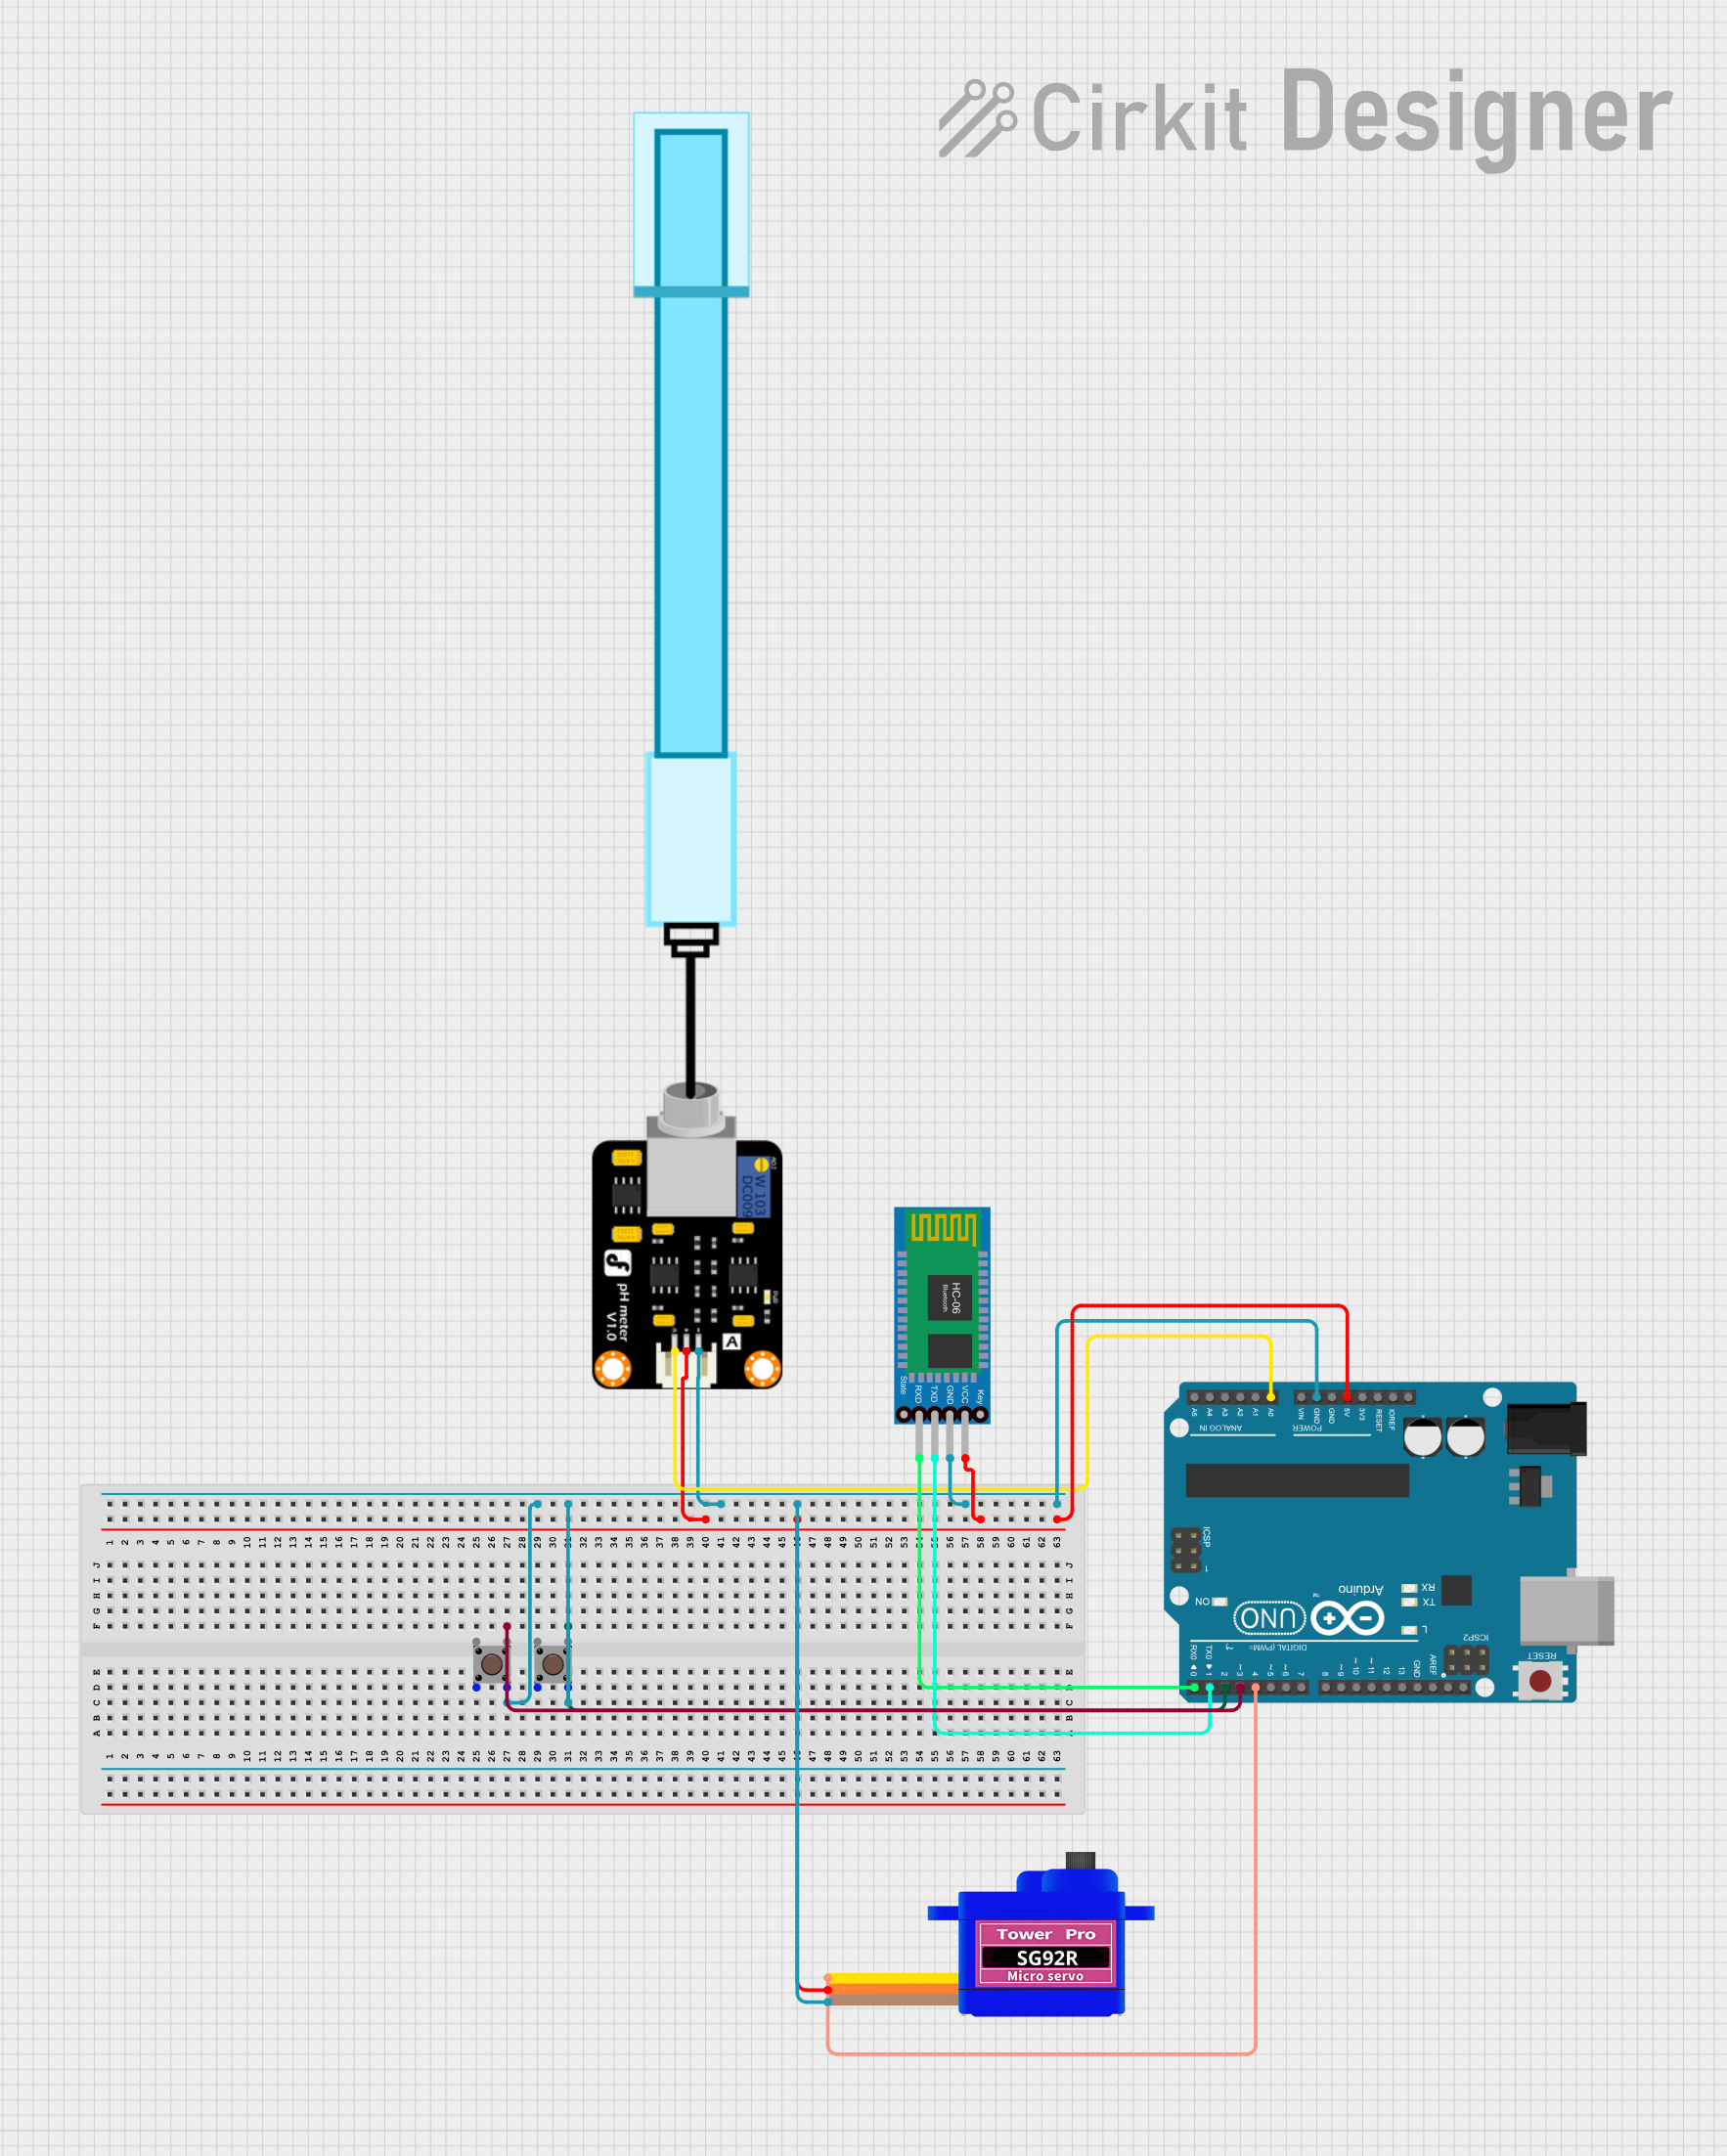
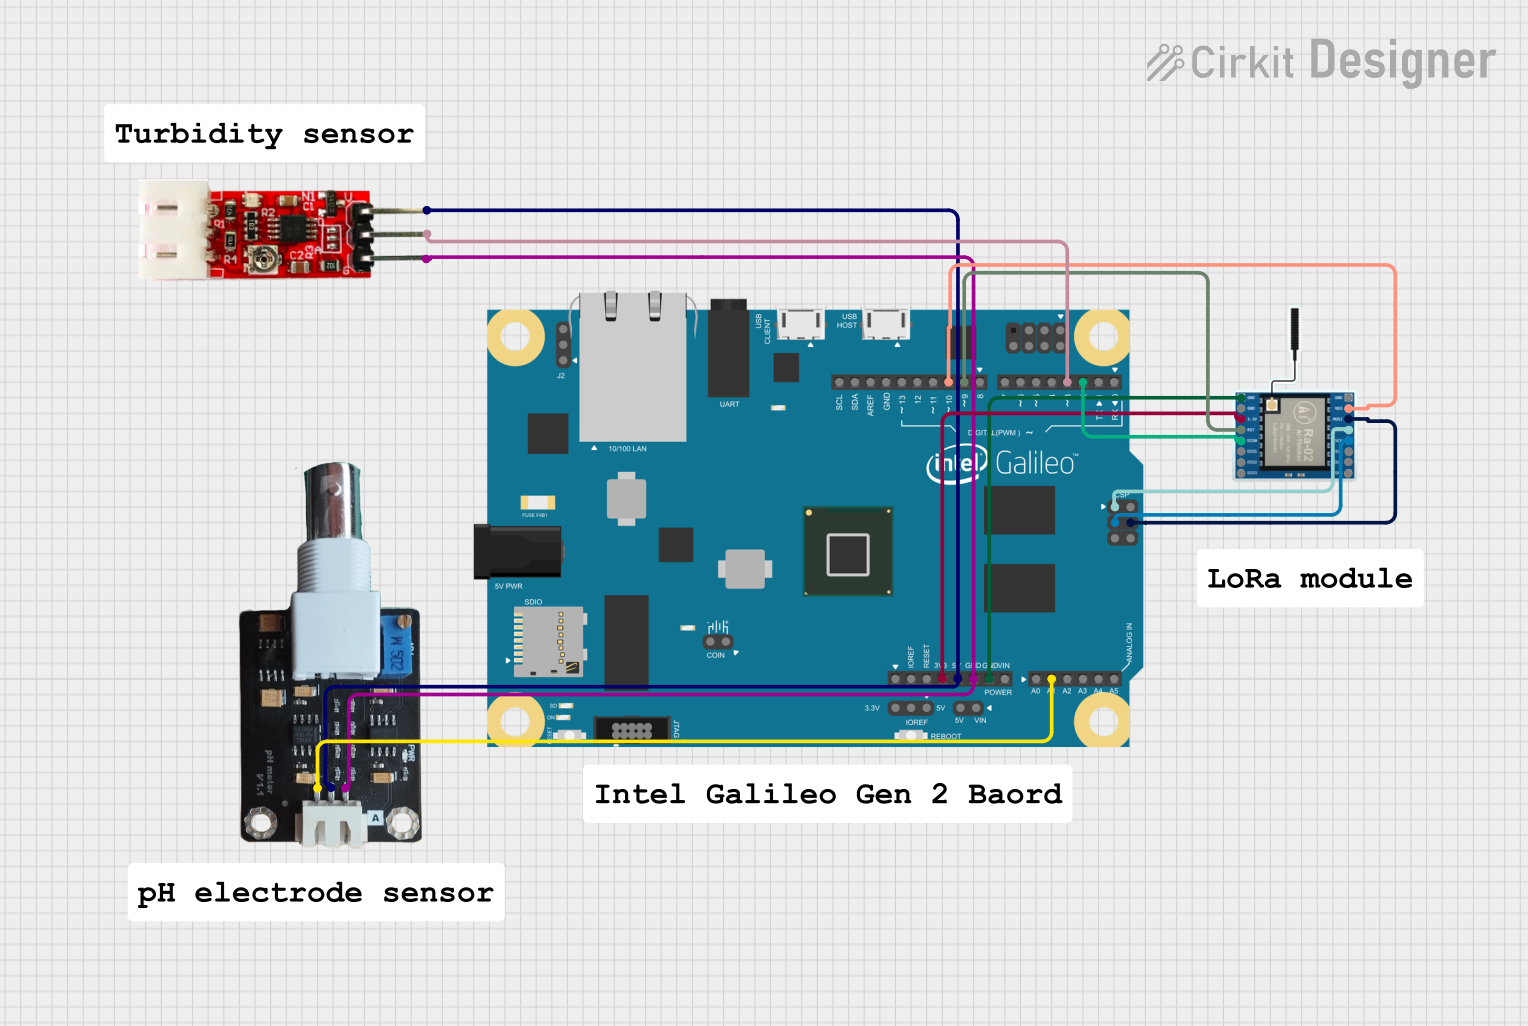
Explore Projects Built with Homelab PH sensor w Isolator
Technical Specifications
- Model: Homelab PH Sensor w Isolator
- Measurement Range: 0 to 14 pH
- Accuracy: ±0.1 pH
- Operating Voltage: 3.3V to 5V DC
- Output Signal: Analog (0-3V)
- Temperature Compensation: Yes (10°C to 50°C)
- Isolator Type: Galvanic isolation
- Connector Type: BNC for pH probe, 4-pin header for microcontroller
- Dimensions: 42mm x 32mm x 15mm
Pin Configuration and Descriptions
The Homelab PH Sensor w Isolator has a 4-pin header for interfacing with microcontrollers. The pinout is as follows:
| Pin Name | Description | Notes |
|---|---|---|
| VCC | Power supply input (3.3V to 5V DC) | Connect to the microcontroller's power pin. |
| GND | Ground | Common ground for the circuit. |
| AOUT | Analog output signal | Outputs a voltage proportional to the pH value. |
| NC | Not connected | Reserved for future use. |
Usage Instructions
Connecting the Sensor
- Power Supply: Connect the VCC pin to a 3.3V or 5V power source and the GND pin to the ground of your microcontroller.
- Signal Output: Connect the AOUT pin to an analog input pin on your microcontroller (e.g., A0 on Arduino).
- pH Probe: Attach the BNC connector to the included pH probe. Ensure the probe is clean and properly calibrated before use.
Calibration
- Prepare standard buffer solutions (e.g., pH 4.0, pH 7.0, and pH 10.0).
- Immerse the pH probe in the pH 7.0 buffer solution and adjust the onboard potentiometer until the output voltage corresponds to the expected value.
- Repeat the process with the pH 4.0 and pH 10.0 solutions to ensure accuracy across the range.
Sample Arduino Code
Below is an example of how to use the Homelab PH Sensor w Isolator with an Arduino UNO:
// Homelab PH Sensor w Isolator Example Code
// Reads pH value from the sensor and prints it to the Serial Monitor.

const int phPin = A0; // Analog pin connected to AOUT of the sensor
float voltage;        // Variable to store the sensor's output voltage
float phValue;        // Variable to store the calculated pH value

void setup() {
  Serial.begin(9600); // Initialize serial communication at 9600 baud
  pinMode(phPin, INPUT); // Set the pH pin as input
}

void loop() {
  voltage = analogRead(phPin) * (5.0 / 1023.0); // Convert analog reading to voltage
  phValue = 3.5 * voltage; // Convert voltage to pH value (calibration factor: 3.5)

  // Print the pH value to the Serial Monitor
  Serial.print("pH Value: ");
  Serial.println(phValue);

  delay(1000); // Wait for 1 second before the next reading
}
Best Practices
- Always rinse the pH probe with distilled water before and after use to prevent contamination.
- Store the pH probe in a storage solution when not in use to maintain accuracy and longevity.
- Avoid exposing the sensor to extreme temperatures or corrosive chemicals beyond its specified range.
Troubleshooting and FAQs
Common Issues
Inaccurate Readings:
- Cause: The pH probe is not calibrated.
- Solution: Recalibrate the sensor using standard buffer solutions.
No Output Signal:
- Cause: Incorrect wiring or insufficient power supply.
- Solution: Verify all connections and ensure the power supply meets the required voltage.
Fluctuating Readings:
- Cause: Electrical noise interference.
- Solution: Ensure proper grounding and avoid placing the sensor near high-frequency devices.
Sensor Not Responding:
- Cause: Damaged pH probe or isolator circuit.
- Solution: Replace the pH probe or inspect the isolator for damage.
FAQs
Q: Can I use this sensor with a Raspberry Pi?
A: Yes, but you will need an ADC (Analog-to-Digital Converter) module since the Raspberry Pi does not have built-in analog input pins.
Q: How often should I calibrate the sensor?
A: For best results, calibrate the sensor before each use or at least once a week during regular operation.
Q: What is the lifespan of the pH probe?
A: The pH probe typically lasts 1-2 years with proper care and maintenance.
Q: Can I submerge the entire sensor module in liquid?
A: No, only the pH probe is designed for immersion. The sensor module should remain dry.
By following this documentation, you can effectively use the Homelab PH Sensor w Isolator for accurate and reliable pH measurements in your projects.