How to Use Camera Caddx Ratel 2 1200TVL : Examples, Pinouts, and Specs
Introduction
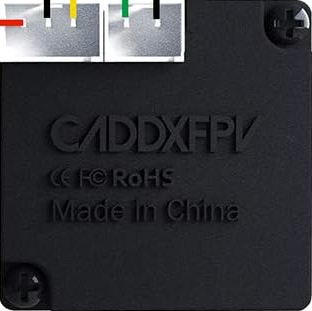
The Caddx Ratel 2 1200TVL is a high-performance FPV (First Person View) camera designed for drone racing, freestyle flying, and aerial photography. With its 1200TVL resolution, the camera delivers sharp and clear video transmission, making it an excellent choice for pilots who demand high-quality visuals. Its robust design ensures reliable performance in various lighting conditions, including low-light environments.
Explore Projects Built with Camera Caddx Ratel 2 1200TVL


Explore Projects Built with Camera Caddx Ratel 2 1200TVL
Common Applications and Use Cases
- FPV drone racing and freestyle flying
- Aerial photography and videography
- Surveillance and security systems
- Hobbyist and professional drone builds
Technical Specifications
The following table outlines the key technical details of the Caddx Ratel 2 1200TVL camera:
| Specification | Details |
|---|---|
| Manufacturer | Caddx |
| Model | Ratel 2 1200TVL |
| Resolution | 1200TVL |
| Image Sensor | 1/1.8" HDR Sensor |
| Lens | 1.66mm (FOV 165°) or 2.1mm (FOV 145°) |
| Signal System | PAL/NTSC (switchable) |
| Input Voltage | 5V - 40V |
| Power Consumption | ≤200mA @ 12V |
| Dimensions | 19mm × 19mm (micro size) |
| Weight | 5.9g |
| Minimum Illumination | 0.0001 Lux |
| Wide Dynamic Range (WDR) | Super WDR (HDR) |
| Operating Temperature | -20°C to 60°C |
| Video Output | Analog (CVBS) |
Pin Configuration and Descriptions
The Caddx Ratel 2 1200TVL camera features a 4-pin connector for power, video, and control. The pinout is as follows:
| Pin | Name | Description |
|---|---|---|
| 1 | GND | Ground connection |
| 2 | VCC | Power input (5V - 40V) |
| 3 | VIDEO | Analog video output |
| 4 | OSD | On-Screen Display (OSD) control input for camera settings |
Usage Instructions
How to Use the Component in a Circuit
- Power Connection: Connect the VCC pin to a power source within the range of 5V to 40V. Ensure the power supply is stable to avoid damage to the camera.
- Ground Connection: Connect the GND pin to the ground of your circuit or power source.
- Video Output: Connect the VIDEO pin to the video input of your FPV transmitter or display device.
- OSD Control: Use the OSD pin to connect the camera to an OSD controller or flight controller for adjusting camera settings.
Important Considerations and Best Practices
- Voltage Range: Ensure the input voltage is within the specified range (5V - 40V) to prevent damage.
- Mounting: Use appropriate mounting hardware to secure the camera to your drone or project. The camera is designed for micro-sized mounts (19mm × 19mm).
- Lighting Conditions: The camera performs exceptionally well in low-light conditions, but for optimal results, avoid direct exposure to intense light sources.
- Signal System: Switch between PAL and NTSC modes as needed to match your display or FPV system.
- Lens Protection: Keep the lens clean and free from scratches to maintain image quality.
Example: Connecting to an Arduino UNO
While the Caddx Ratel 2 1200TVL is primarily used in FPV systems, it can also be connected to an Arduino UNO for basic video signal processing. Below is an example of how to connect the camera to an Arduino UNO:
// Example: Reading video signal from Caddx Ratel 2 1200TVL with Arduino UNO
// Note: Arduino UNO cannot process analog video directly. This example assumes
// the use of an external video decoder module (e.g., LM1881) to extract sync signals.

const int videoSyncPin = 2; // Pin connected to the sync output of the video decoder

void setup() {
  pinMode(videoSyncPin, INPUT);
  Serial.begin(9600);
  Serial.println("Caddx Ratel 2 Video Signal Test");
}

void loop() {
  // Read the sync signal from the video decoder
  int syncSignal = digitalRead(videoSyncPin);

  // Print the sync signal state to the Serial Monitor
  Serial.print("Sync Signal: ");
  Serial.println(syncSignal);

  delay(100); // Delay for readability
}
Note: The Arduino UNO cannot directly process analog video signals. Use a video decoder module (e.g., LM1881) to extract sync signals or other data from the video output.
Troubleshooting and FAQs
Common Issues and Solutions
No Video Output
- Cause: Incorrect wiring or power supply issues.
- Solution: Verify all connections, ensure the power supply is within the specified range, and check the video cable for continuity.
Flickering or Distorted Video
- Cause: Signal interference or incorrect PAL/NTSC setting.
- Solution: Ensure proper shielding of video cables and switch to the correct signal system (PAL/NTSC).
Camera Overheating
- Cause: Prolonged use in high-temperature environments.
- Solution: Ensure adequate airflow around the camera and avoid operating in temperatures above 60°C.
OSD Menu Not Accessible
- Cause: OSD pin not connected or incorrect configuration.
- Solution: Verify the OSD pin connection and ensure the flight controller or OSD controller is configured correctly.
FAQs
Q1: Can the Caddx Ratel 2 be used with digital FPV systems?
A1: No, the Caddx Ratel 2 is an analog FPV camera and is not compatible with digital FPV systems like DJI or HDZero.
Q2: How do I switch between PAL and NTSC modes?
A2: Use the OSD menu to switch between PAL and NTSC modes. Refer to the camera's user manual for detailed instructions.
Q3: What is the field of view (FOV) of the camera?
A3: The FOV depends on the lens used. The 1.66mm lens provides a 165° FOV, while the 2.1mm lens provides a 145° FOV.
Q4: Is the camera waterproof?
A4: No, the Caddx Ratel 2 is not waterproof. Avoid exposing it to water or moisture.
Q5: Can I use this camera for non-drone applications?
A5: Yes, the camera can be used for other applications such as surveillance or robotics, as long as the power and video requirements are met.