How to Use Brazilian Socket: Examples, Pinouts, and Specs
Introduction
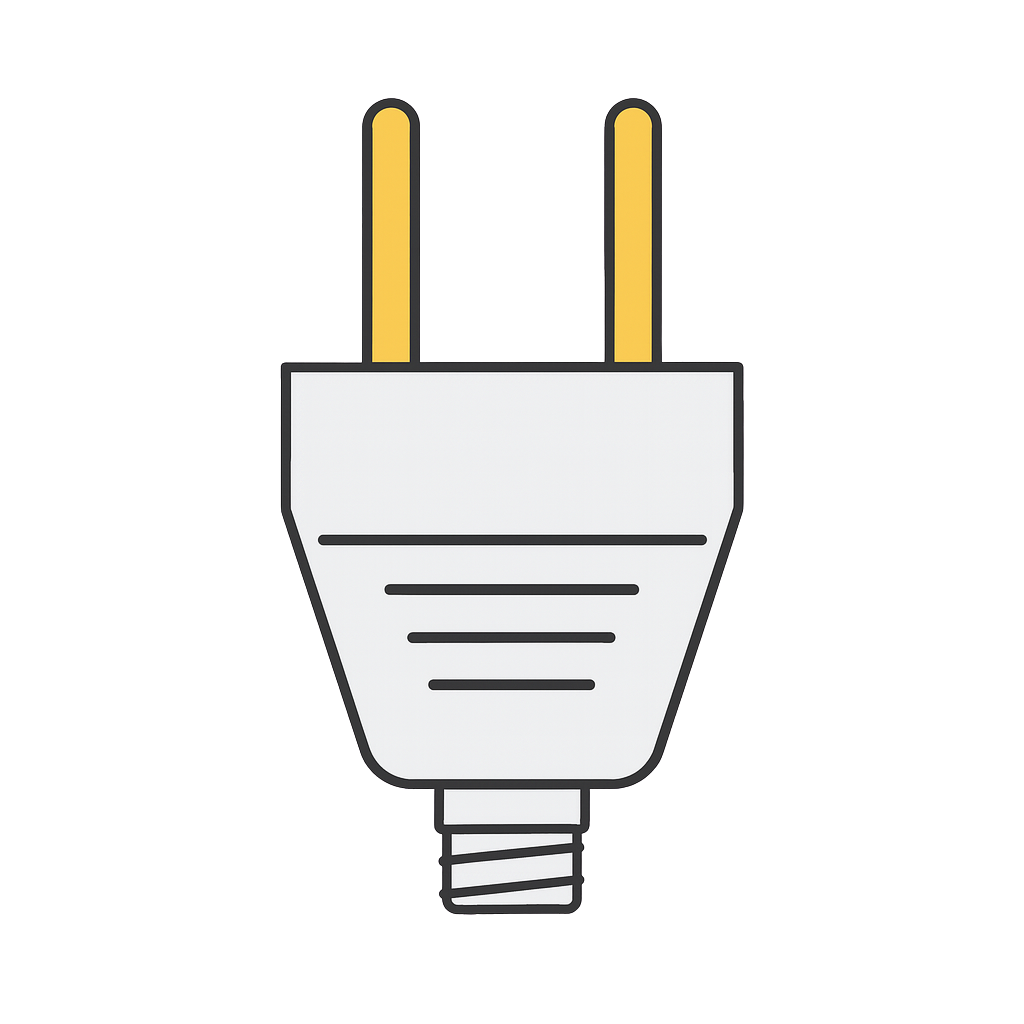
The Brazilian Socket is a type of electrical socket commonly used in Brazil, designed to comply with the NBR 14136 standard. It features a unique pin configuration to accommodate Type N plugs, ensuring compatibility with Brazilian electrical systems. This socket is engineered to provide safe and reliable electrical connections for a wide range of household and industrial appliances. Its design prioritizes safety, including features such as recessed contacts to prevent accidental shocks.
Explore Projects Built with Brazilian Socket


Explore Projects Built with Brazilian Socket
Common Applications and Use Cases
- Powering household appliances such as refrigerators, microwaves, and washing machines.
- Providing electrical connections for industrial equipment in Brazil.
- Used in residential, commercial, and industrial buildings to meet local electrical standards.
- Supporting devices with voltage ratings of 127V or 220V, depending on the region.
Technical Specifications
The Brazilian Socket is designed to meet the electrical and safety requirements of the Brazilian market. Below are its key technical details:
General Specifications
| Parameter | Value |
|---|---|
| Manufacturer | Generic |
| Part ID | Brazilian Socket |
| Standard Compliance | NBR 14136 |
| Supported Plug Type | Type N |
| Voltage Rating | 127V or 220V (region-specific) |
| Current Rating | 10A or 20A (model-specific) |
| Frequency | 50Hz or 60Hz |
| Material | Flame-retardant plastic |
| Safety Features | Recessed contacts, grounding |
Pin Configuration and Descriptions
The Brazilian Socket has three pin slots designed to accommodate Type N plugs. The pin configuration is as follows:
| Pin Number | Description | Function |
|---|---|---|
| 1 | Line (L) | Supplies live voltage to the device. |
| 2 | Neutral (N) | Completes the electrical circuit. |
| 3 | Ground (G) | Provides safety by grounding excess current. |
Usage Instructions
How to Use the Brazilian Socket in a Circuit
Installation:
- Ensure the socket is installed by a qualified electrician to comply with local electrical codes.
- Connect the Line (L), Neutral (N), and Ground (G) wires to the corresponding terminals on the socket.
- Use appropriate wire gauges based on the current rating (10A or 20A).
Connecting Devices:
- Insert a Type N plug into the socket, ensuring a snug and secure fit.
- Verify that the device's voltage and current ratings match the socket's specifications (127V/220V and 10A/20A).
Powering On:
- Turn on the power supply to the socket.
- Check for proper operation of the connected device.
Important Considerations and Best Practices
- Voltage Compatibility: Verify the voltage rating (127V or 220V) of the socket and the connected device to avoid damage.
- Grounding: Always ensure the ground connection is properly installed to enhance safety.
- Overloading: Do not exceed the current rating of the socket (10A or 20A) to prevent overheating or fire hazards.
- Environment: Avoid installing the socket in damp or wet locations unless it is specifically rated for such environments.
Arduino UNO Connection (Example)
While the Brazilian Socket is not directly connected to an Arduino UNO, it can be used in circuits involving relays to control high-power devices. Below is an example of using an Arduino UNO with a relay module to control a device connected to a Brazilian Socket.
/*
  Example: Controlling a device connected to a Brazilian Socket using a relay
  and Arduino UNO. Ensure proper isolation between the low-voltage Arduino
  circuit and the high-voltage socket.

  Components:
  - Arduino UNO
  - Relay module (5V)
  - Brazilian Socket
  - Device (e.g., lamp)
*/

const int relayPin = 7; // Pin connected to the relay module

void setup() {
  pinMode(relayPin, OUTPUT); // Set relay pin as output
  digitalWrite(relayPin, LOW); // Ensure relay is off at startup
}

void loop() {
  // Turn the relay on (device powered)
  digitalWrite(relayPin, HIGH);
  delay(5000); // Keep the device on for 5 seconds

  // Turn the relay off (device powered off)
  digitalWrite(relayPin, LOW);
  delay(5000); // Keep the device off for 5 seconds
}
Note: Always use a relay module with proper isolation and ensure safe handling of high-voltage connections.
Troubleshooting and FAQs
Common Issues Users Might Face
Device Not Powering On:
- Cause: Loose connection or incorrect wiring.
- Solution: Check the wiring and ensure the plug is securely inserted into the socket.
Overheating Socket:
- Cause: Overloading the socket beyond its current rating.
- Solution: Reduce the load by disconnecting some devices or use a higher-rated socket.
Frequent Tripping of Circuit Breaker:
- Cause: Short circuit or ground fault.
- Solution: Inspect the wiring for faults and ensure proper grounding.
Sparking When Plugging In Devices:
- Cause: Worn-out socket contacts or high inrush current.
- Solution: Replace the socket if contacts are damaged. Use devices with lower inrush current.
Solutions and Tips for Troubleshooting
- Always turn off the power supply before inspecting or working on the socket.
- Use a multimeter to verify voltage and continuity in the circuit.
- If unsure about installation or troubleshooting, consult a licensed electrician.
By following this documentation, users can safely and effectively use the Brazilian Socket in their electrical systems.