How to Use DIALL 2 input: Examples, Pinouts, and Specs
Introduction
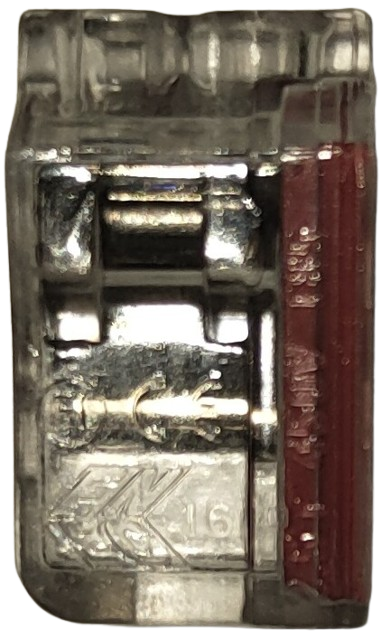
The DIALL 2 Input is a dual-input digital interface designed to enable seamless communication and data transfer between two separate digital devices. Manufactured by DIALL, this component is ideal for applications requiring reliable and efficient digital interfacing. It is commonly used in embedded systems, industrial automation, and IoT devices where multiple digital inputs need to be processed or controlled.
Explore Projects Built with DIALL 2 input

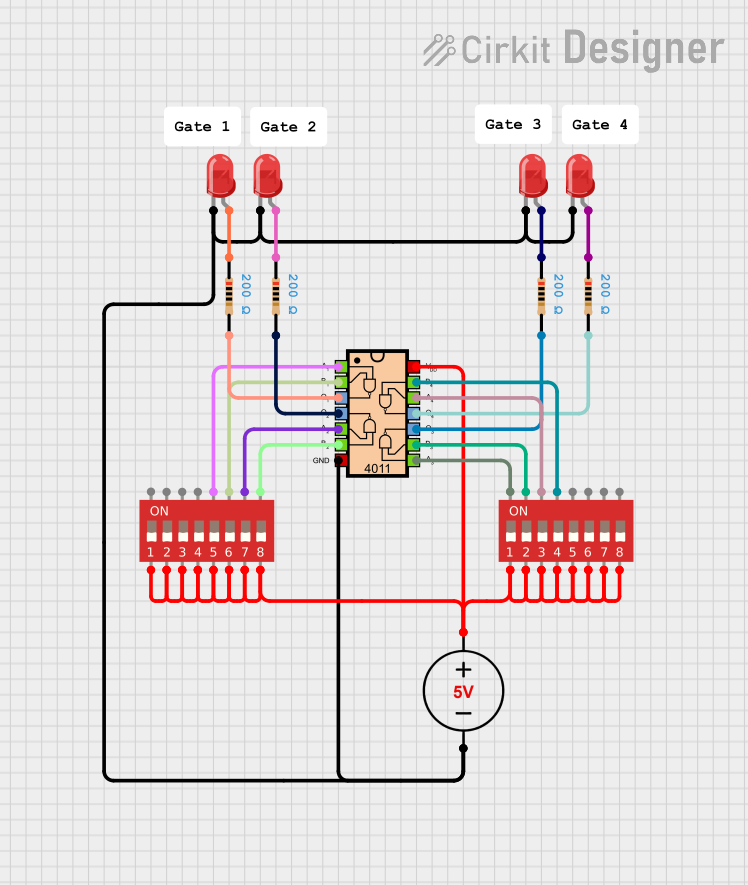
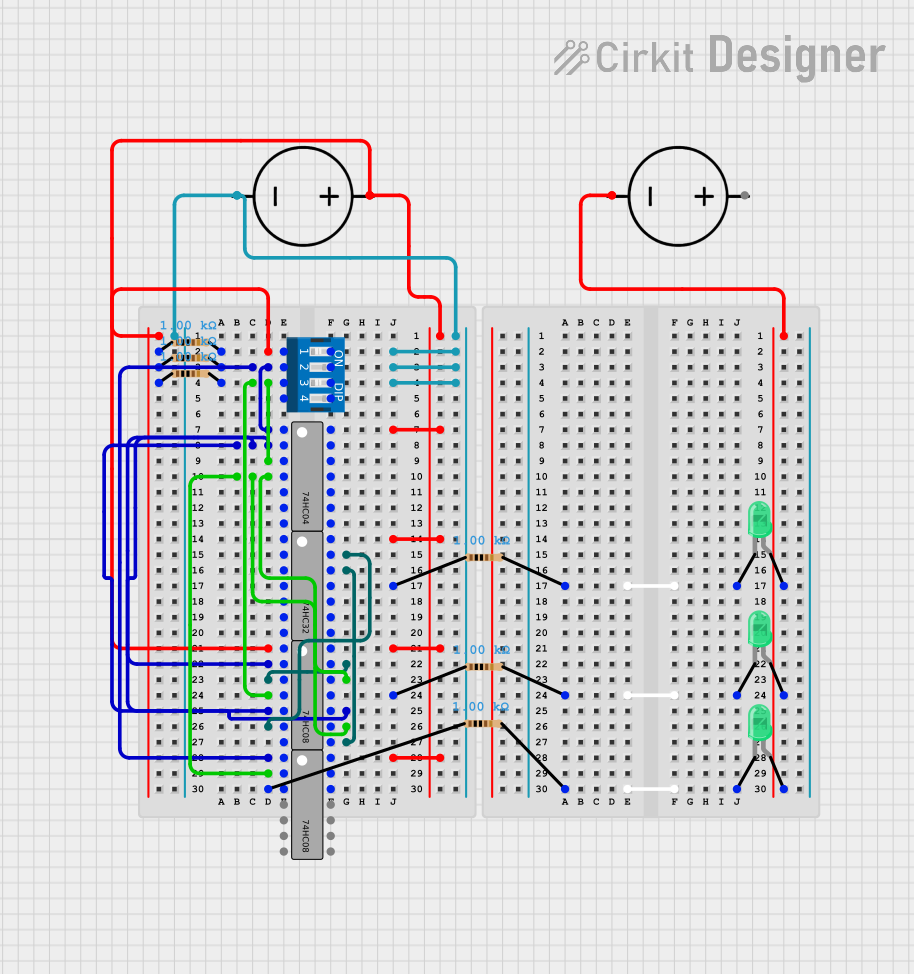

Explore Projects Built with DIALL 2 input
Common Applications and Use Cases
- Embedded Systems: Facilitates communication between microcontrollers and peripheral devices.
- Industrial Automation: Used in control systems to interface sensors or actuators.
- IoT Devices: Enables data transfer between connected devices in smart systems.
- Digital Signal Processing: Processes and routes digital signals in electronic circuits.
Technical Specifications
The DIALL 2 Input is designed with robust technical features to ensure compatibility and reliability in various applications.
Key Technical Details
| Parameter | Specification |
|---|---|
| Operating Voltage | 3.3V to 5V |
| Input Voltage Range | 0V to 5V |
| Input Logic Levels | Low: 0V to 0.8V, High: 2V to 5V |
| Maximum Input Current | 10mA per input |
| Communication Protocol | Digital (TTL/CMOS compatible) |
| Operating Temperature | -40°C to 85°C |
| Dimensions | 20mm x 15mm x 5mm |
Pin Configuration and Descriptions
The DIALL 2 Input has a simple pinout for easy integration into circuits.
| Pin Number | Pin Name | Description |
|---|---|---|
| 1 | VCC | Power supply input (3.3V to 5V) |
| 2 | GND | Ground connection |
| 3 | IN1 | Digital input 1 (accepts 0V to 5V signals) |
| 4 | IN2 | Digital input 2 (accepts 0V to 5V signals) |
| 5 | OUT1 | Output corresponding to IN1 |
| 6 | OUT2 | Output corresponding to IN2 |
Usage Instructions
The DIALL 2 Input is straightforward to use in digital circuits. Follow the steps below to integrate it into your project.
How to Use the Component in a Circuit
- Power the Component: Connect the
VCCpin to a 3.3V or 5V power source and theGNDpin to the ground of your circuit. - Connect Digital Inputs: Attach the digital signals to the
IN1andIN2pins. Ensure the input voltage levels are within the specified range (0V to 5V). - Read Outputs: The processed signals will be available at the
OUT1andOUT2pins, corresponding toIN1andIN2, respectively. - Interface with Microcontroller: Connect the output pins to a microcontroller or other digital device to process the signals further.
Important Considerations and Best Practices
- Voltage Compatibility: Ensure the input voltage levels match the operating voltage of the DIALL 2 Input to avoid damage.
- Input Signal Quality: Use clean and stable digital signals to prevent erroneous outputs.
- Decoupling Capacitor: Place a 0.1µF capacitor between
VCCandGNDto filter noise and stabilize the power supply. - Avoid Overcurrent: Do not exceed the maximum input current of 10mA per input.
Example: Connecting DIALL 2 Input to an Arduino UNO
Below is an example of how to connect and use the DIALL 2 Input with an Arduino UNO.
Circuit Connections
- Connect
VCCto the 5V pin on the Arduino. - Connect
GNDto the GND pin on the Arduino. - Connect
IN1andIN2to digital pins 2 and 3 on the Arduino, respectively. - Connect
OUT1andOUT2to LEDs or other output devices for testing.
Arduino Code
// Define input pins for DIALL 2 Input
const int input1 = 2; // IN1 connected to digital pin 2
const int input2 = 3; // IN2 connected to digital pin 3

// Define output pins for testing
const int output1 = 8; // OUT1 connected to digital pin 8
const int output2 = 9; // OUT2 connected to digital pin 9

void setup() {
  // Initialize input pins
  pinMode(input1, INPUT);
  pinMode(input2, INPUT);

  // Initialize output pins
  pinMode(output1, OUTPUT);
  pinMode(output2, OUTPUT);
}

void loop() {
  // Read the state of the inputs
  int state1 = digitalRead(input1);
  int state2 = digitalRead(input2);

  // Set the outputs based on the input states
  digitalWrite(output1, state1); // Output mirrors input1
  digitalWrite(output2, state2); // Output mirrors input2

  // Add a small delay to stabilize the loop
  delay(10);
}
Troubleshooting and FAQs
Common Issues and Solutions
No Output Signal:
- Cause: Incorrect power supply or loose connections.
- Solution: Verify that
VCCandGNDare properly connected and the power supply is within the specified range.
Erratic Output Behavior:
- Cause: Noisy or unstable input signals.
- Solution: Use pull-up or pull-down resistors on the input pins to stabilize the signals.
Component Overheating:
- Cause: Exceeding the maximum input current or voltage.
- Solution: Ensure input signals are within the specified voltage and current limits.
Arduino Not Responding to Inputs:
- Cause: Incorrect pin configuration in the code.
- Solution: Double-check the pin assignments in the Arduino sketch and ensure they match the hardware connections.
FAQs
Q1: Can the DIALL 2 Input handle analog signals?
A1: No, the DIALL 2 Input is designed for digital signals only. Use an ADC (Analog-to-Digital Converter) if you need to process analog signals.
Q2: What happens if I connect a 12V signal to the input pins?
A2: Connecting a voltage higher than 5V can damage the component. Always ensure input signals are within the 0V to 5V range.
Q3: Can I use the DIALL 2 Input with a 3.3V microcontroller?
A3: Yes, the DIALL 2 Input is compatible with both 3.3V and 5V systems.
Q4: Is the component suitable for high-speed data transfer?
A4: The DIALL 2 Input is optimized for standard digital interfacing and may not be suitable for high-speed data transfer applications.
By following this documentation, you can effectively integrate and troubleshoot the DIALL 2 Input in your projects.