How to Use hw-154: Examples, Pinouts, and Specs

Introduction
The HW-154 is a high-performance electronic component manufactured by Arduino, with the part ID "UNO." It is designed for use in a wide range of applications, offering reliable functionality and efficiency in circuit designs. This versatile component is commonly used in prototyping, educational projects, and embedded systems due to its ease of integration and robust performance.
Explore Projects Built with hw-154
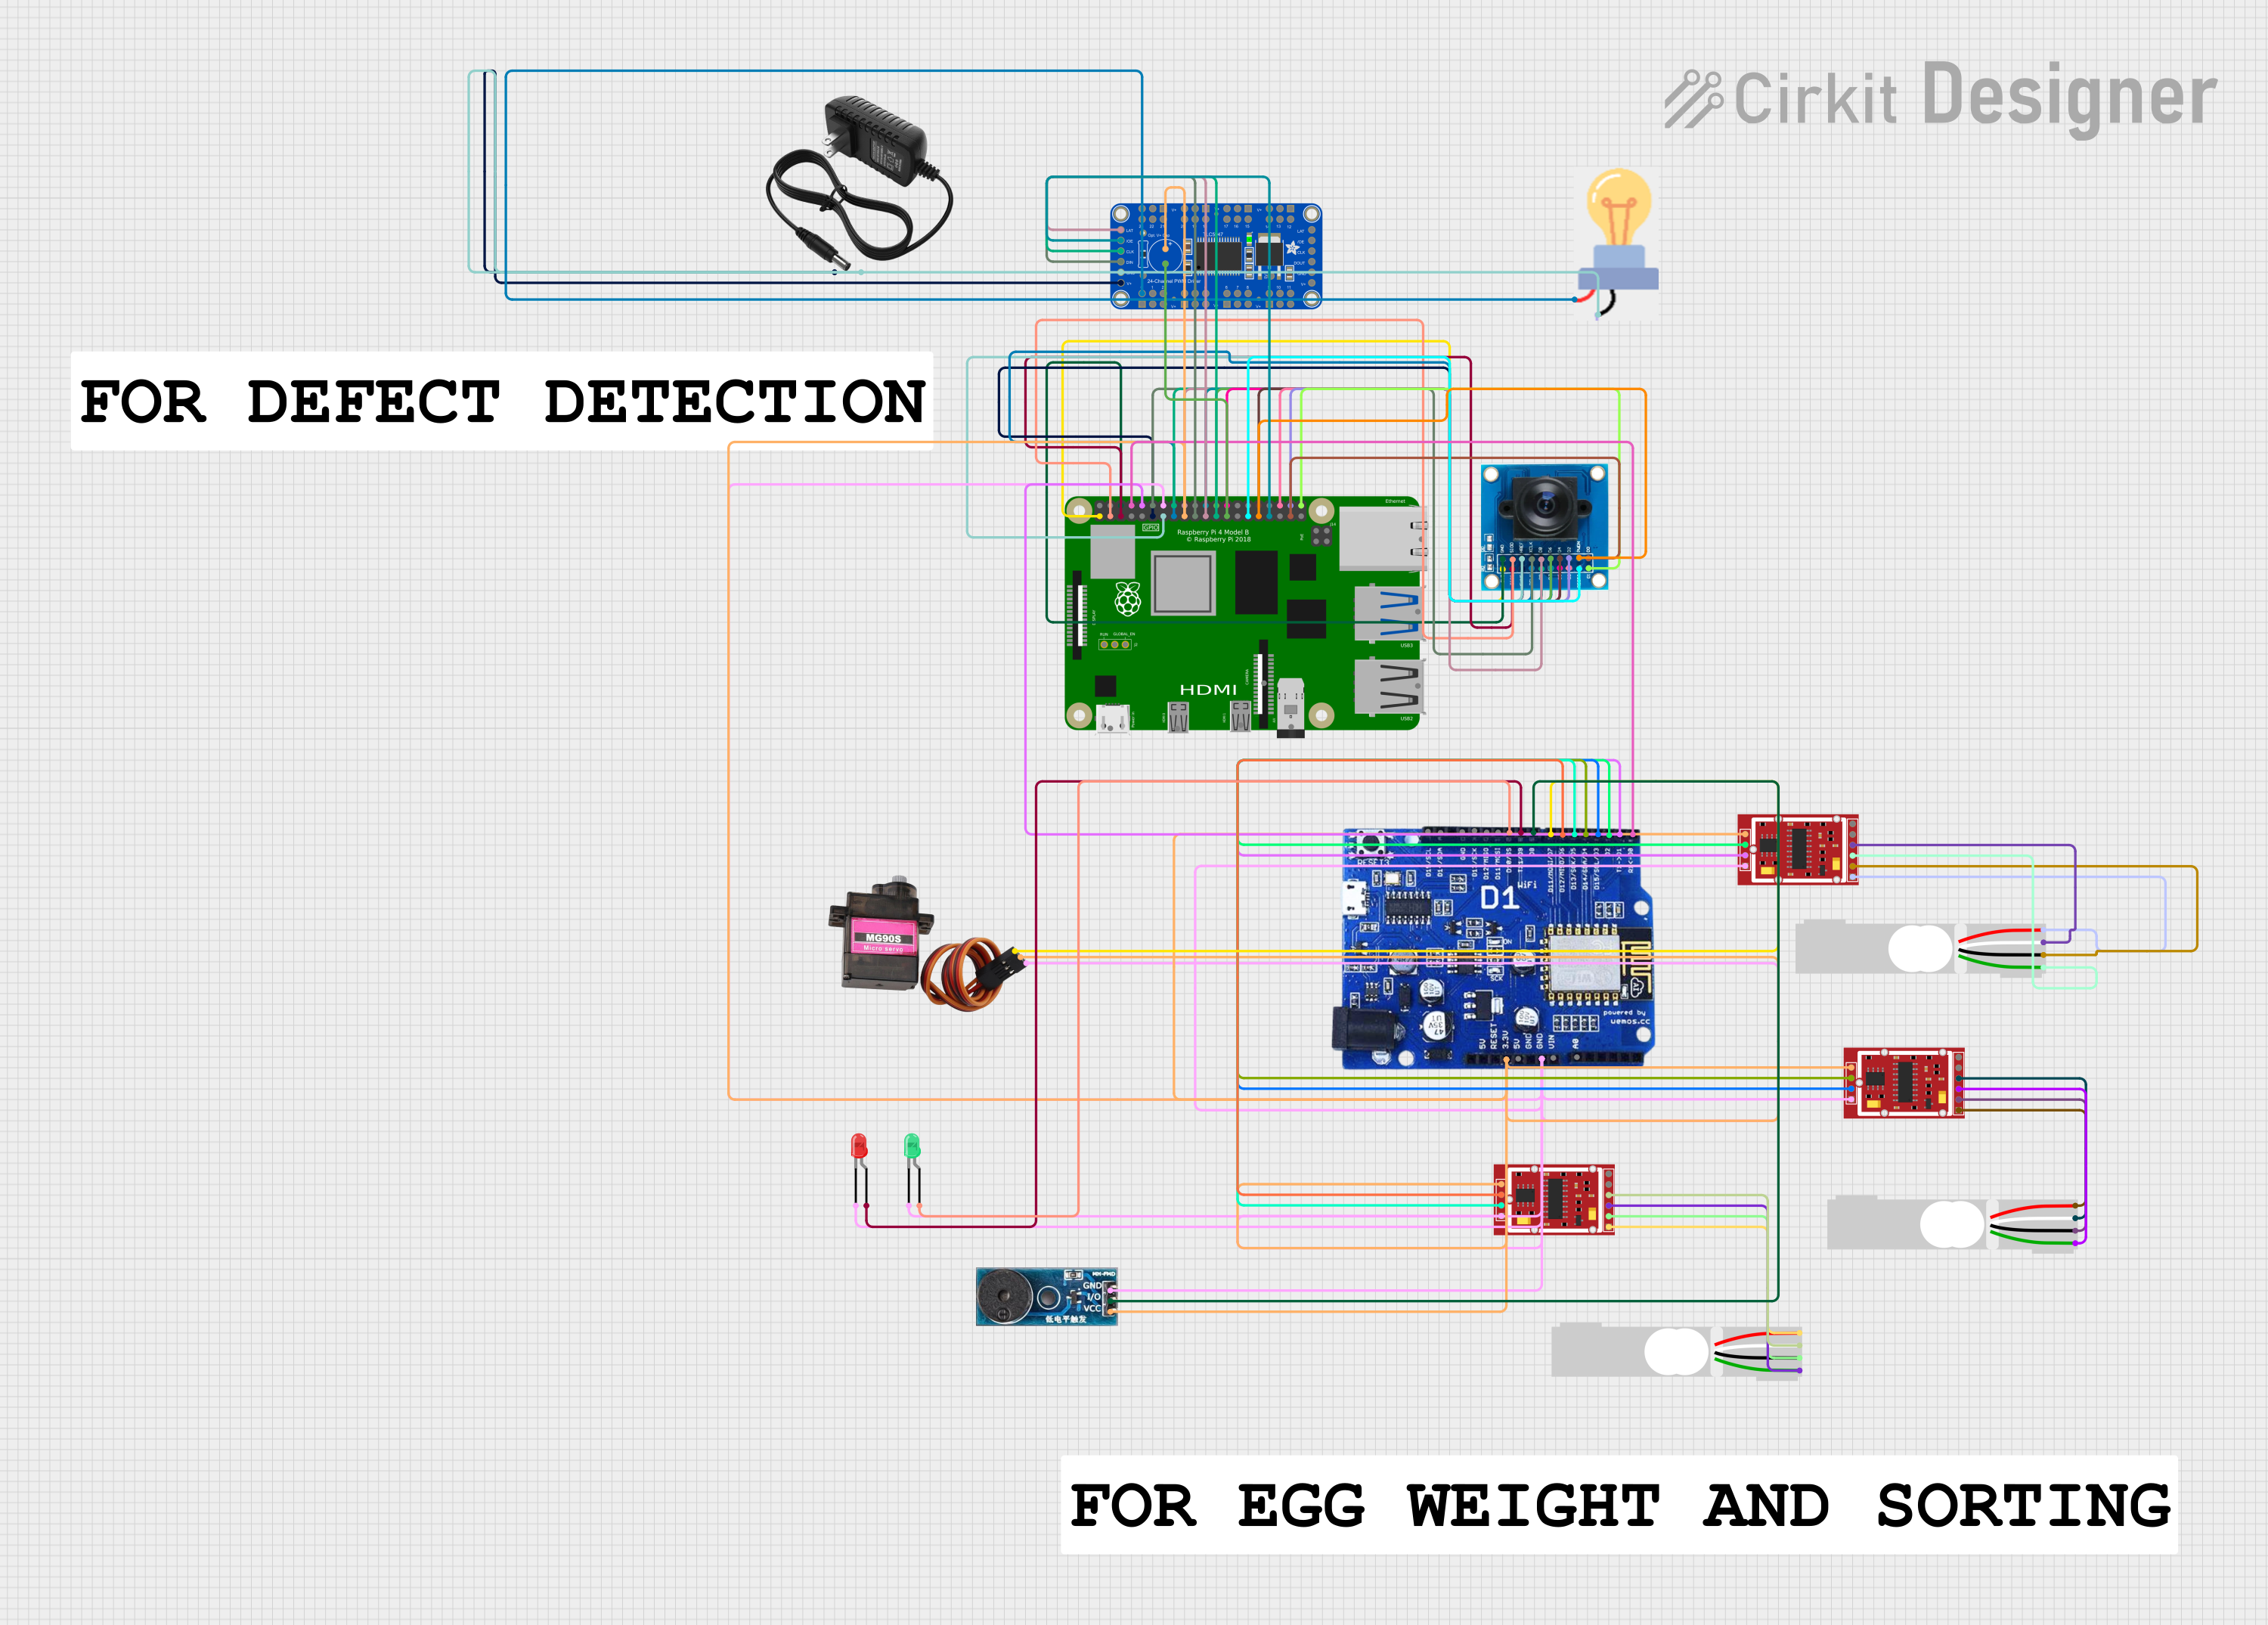
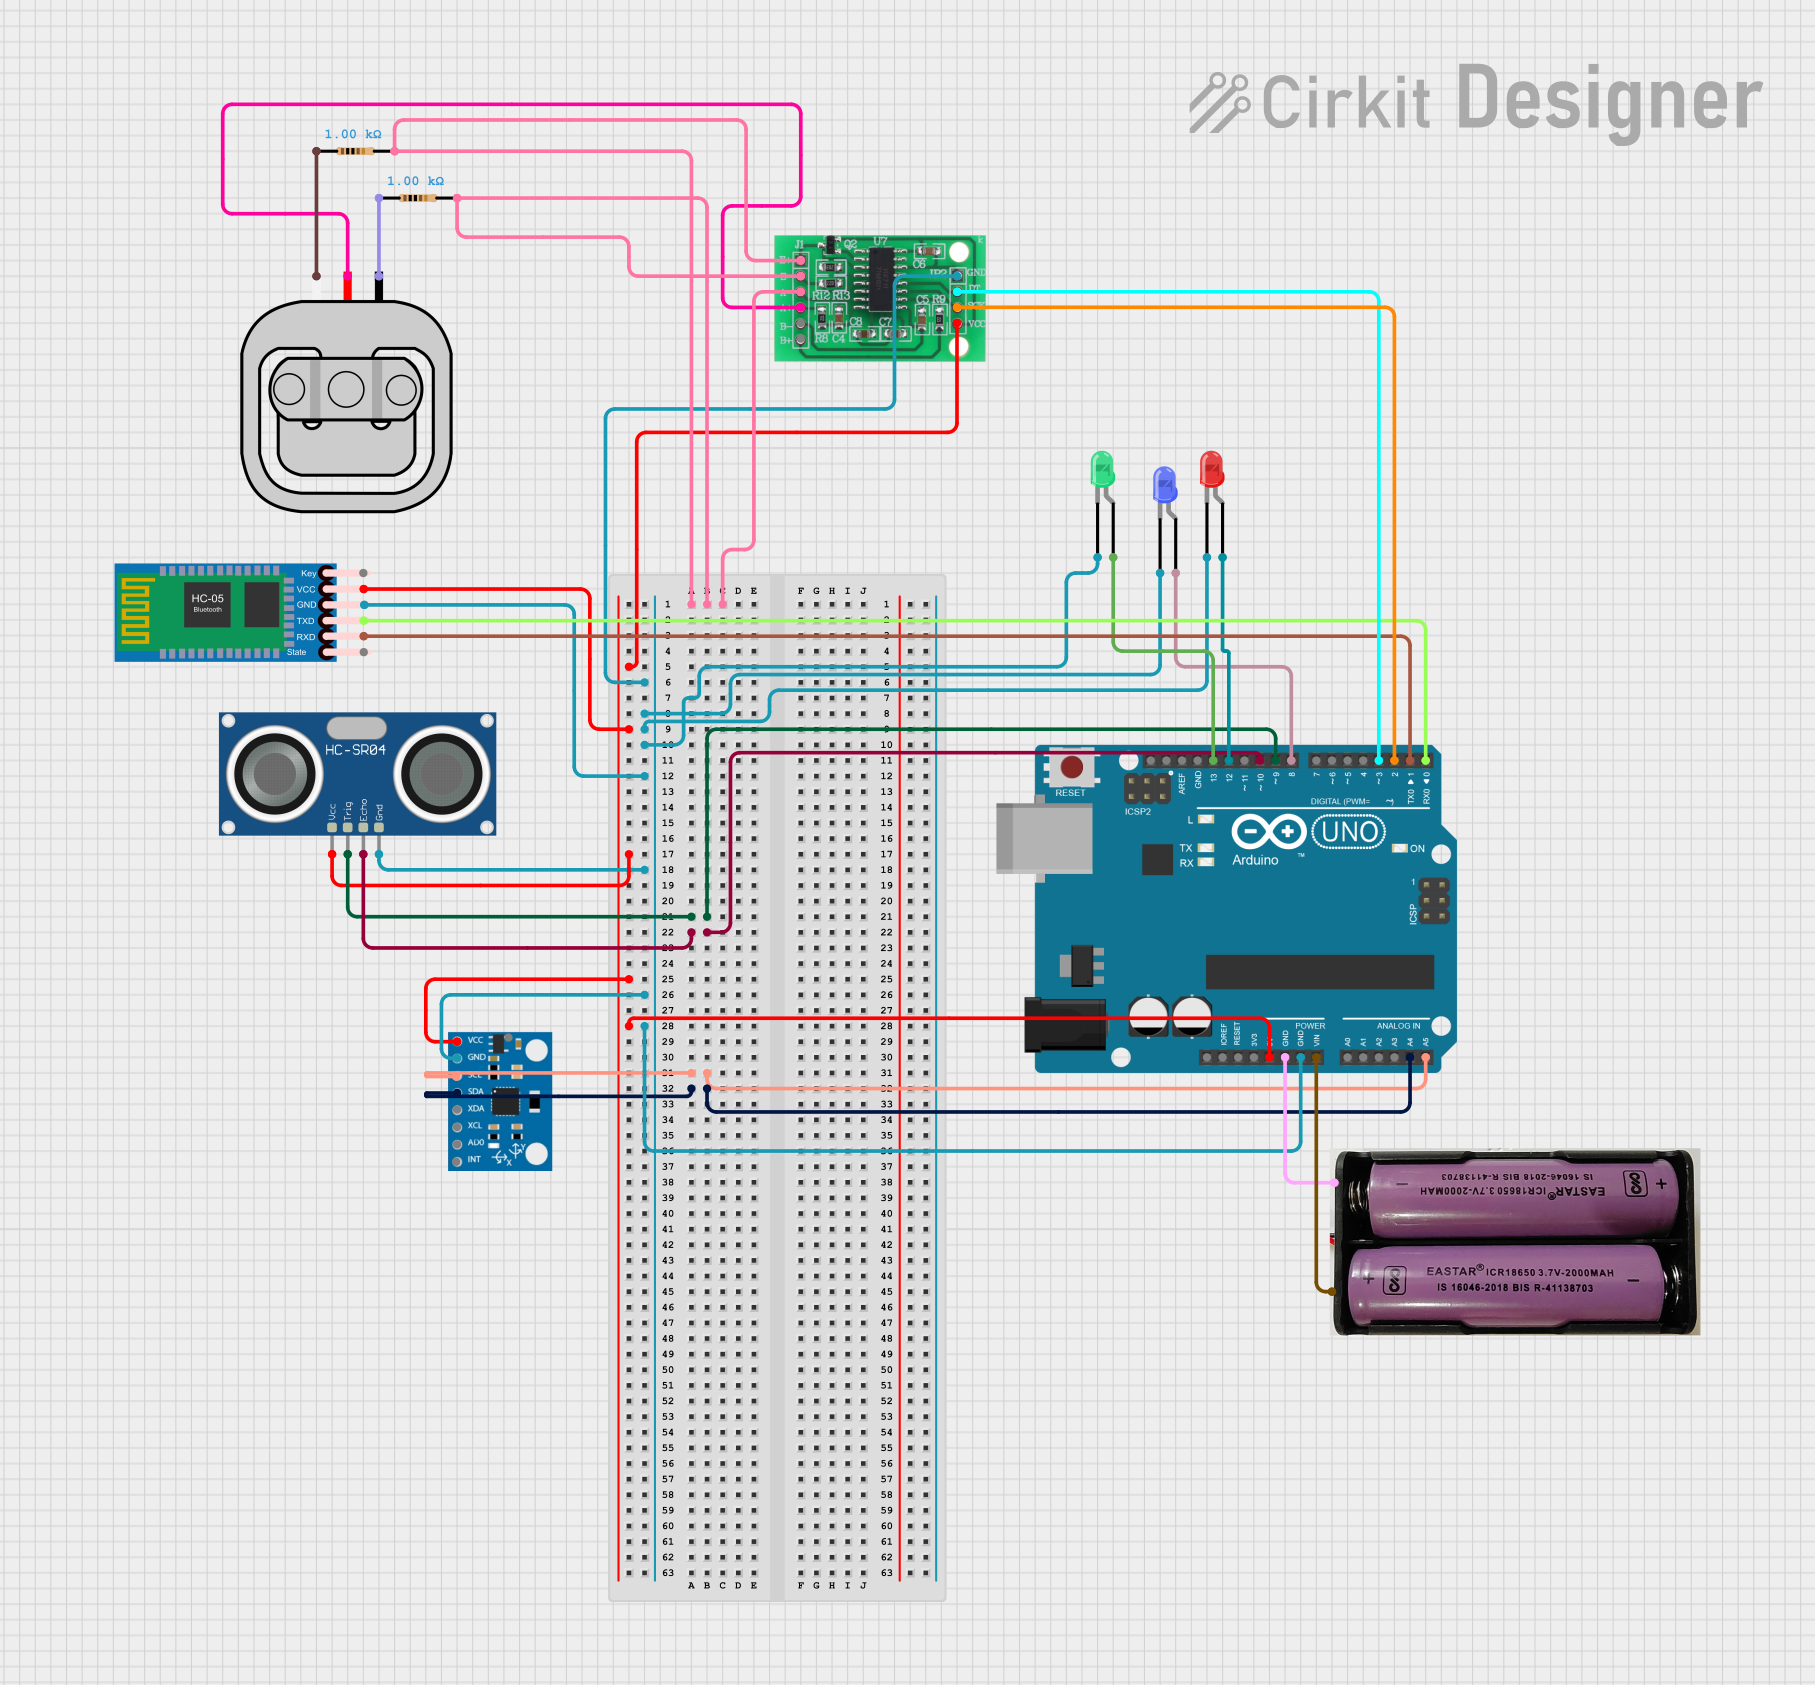
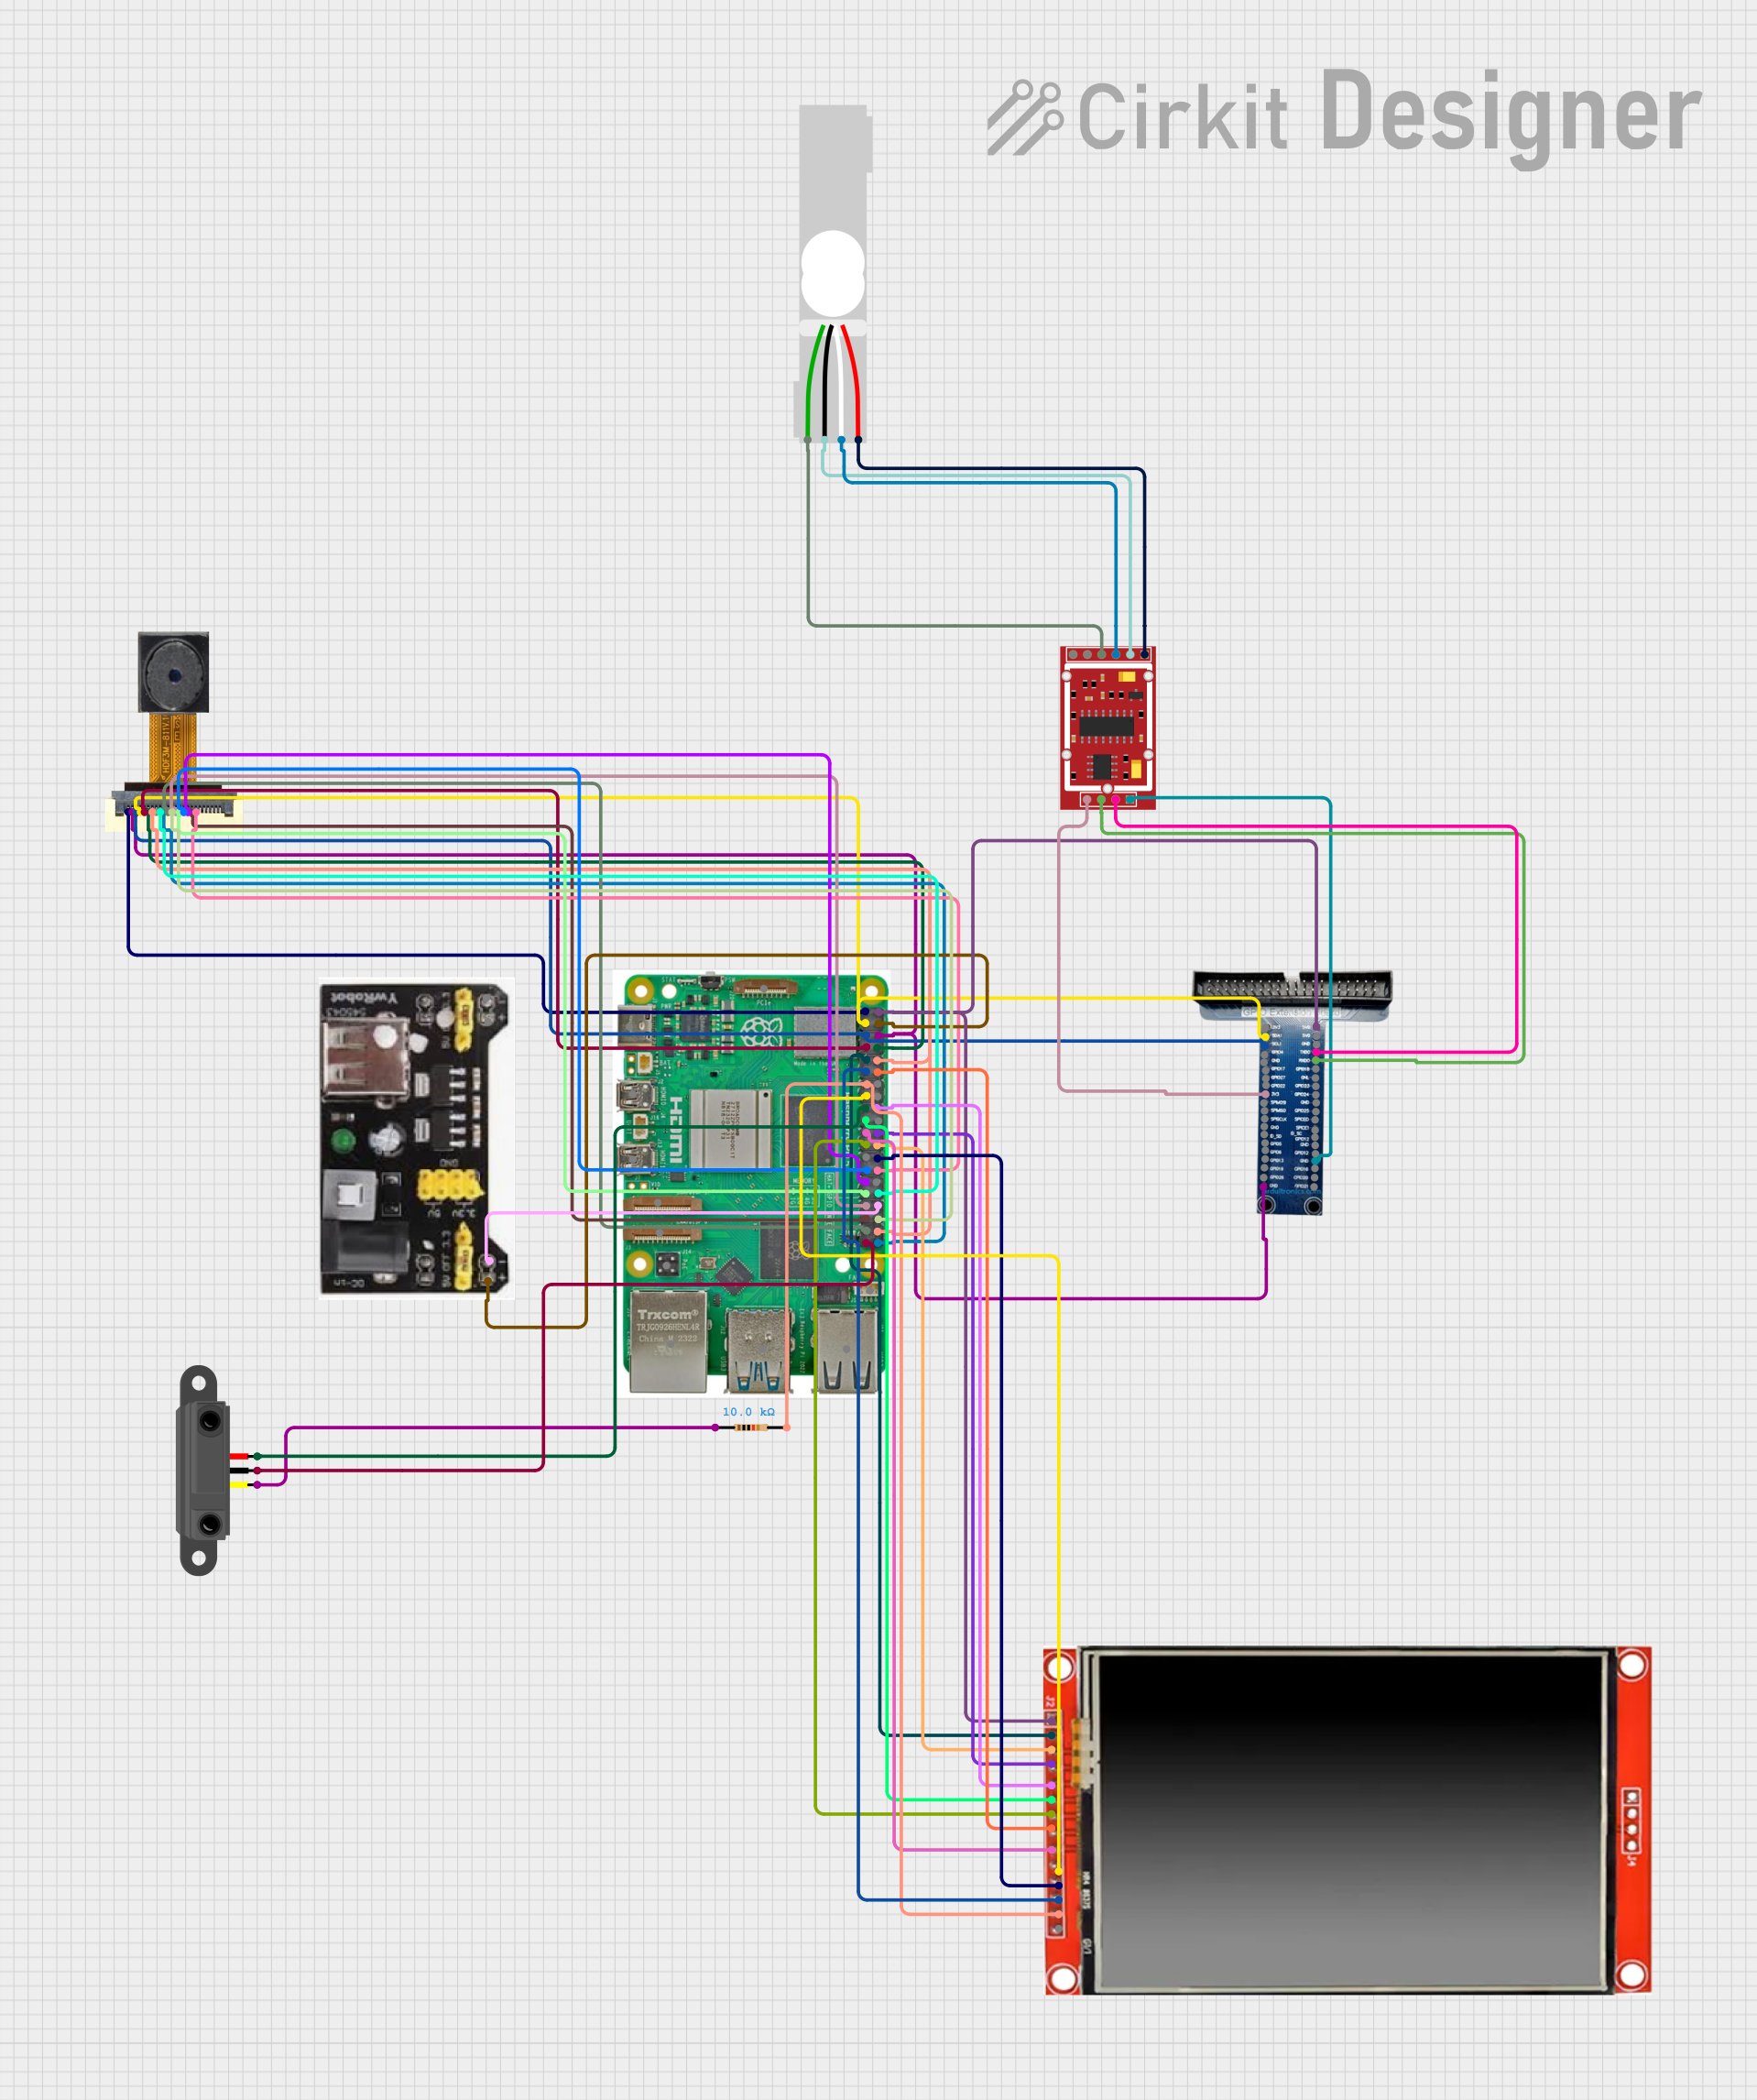

Explore Projects Built with hw-154
Common Applications and Use Cases
- Microcontroller-based projects
- Prototyping and testing circuits
- Educational electronics and STEM learning
- IoT (Internet of Things) devices
- Signal processing and control systems
Technical Specifications
The HW-154 is designed to meet the needs of both hobbyists and professionals. Below are its key technical details:
Key Technical Details
- Operating Voltage: 5V
- Input Voltage (recommended): 7-12V
- Input Voltage (limit): 6-20V
- Digital I/O Pins: 14 (6 of which provide PWM output)
- Analog Input Pins: 6
- DC Current per I/O Pin: 20 mA
- Flash Memory: 32 KB (0.5 KB used by bootloader)
- SRAM: 2 KB
- EEPROM: 1 KB
- Clock Speed: 16 MHz
Pin Configuration and Descriptions
The HW-154 features a standard pinout for easy integration into circuits. Below is the pin configuration:
| Pin | Name | Description |
|---|---|---|
| 1-14 | Digital I/O | General-purpose digital input/output pins. Pins 3, 5, 6, 9, 10, and 11 support PWM. |
| A0-A5 | Analog Input | Analog input pins for reading sensor data or other analog signals. |
| VIN | Voltage Input | Input voltage to the board when using an external power source (7-12V recommended). |
| GND | Ground | Ground connection for the circuit. |
| 5V | 5V Output | Regulated 5V output for powering external components. |
| 3.3V | 3.3V Output | Regulated 3.3V output for low-voltage components. |
| RESET | Reset | Resets the microcontroller. |
Usage Instructions
The HW-154 is straightforward to use in a variety of circuits. Below are the steps and best practices for integrating it into your project.
How to Use the HW-154 in a Circuit
Powering the Component:
- Connect the VIN pin to an external power source (7-12V recommended) or use the USB connection for power.
- Ensure the GND pin is connected to the ground of your circuit.
Connecting Digital and Analog Pins:
- Use the digital I/O pins for controlling LEDs, relays, or other digital devices.
- Use the analog input pins (A0-A5) to read sensor data or other analog signals.
Programming the Component:
- Connect the HW-154 to your computer via USB.
- Use the Arduino IDE to write and upload code to the component.
Important Considerations and Best Practices
- Avoid exceeding the maximum current rating of 20 mA per I/O pin to prevent damage.
- Use appropriate resistors when connecting LEDs or other components to the digital pins.
- Ensure proper grounding to avoid noise or instability in your circuit.
- When using PWM pins, ensure the connected device supports PWM signals.
Example Code for Arduino UNO
Below is an example code snippet to blink an LED connected to pin 13 of the HW-154:
// Example code to blink an LED on pin 13
// Ensure the LED is connected with a resistor to avoid overcurrent

void setup() {
  pinMode(13, OUTPUT); // Set pin 13 as an output
}

void loop() {
  digitalWrite(13, HIGH); // Turn the LED on
  delay(1000);            // Wait for 1 second
  digitalWrite(13, LOW);  // Turn the LED off
  delay(1000);            // Wait for 1 second
}
Troubleshooting and FAQs
Common Issues and Solutions
The component is not powering on:
- Ensure the VIN pin is receiving the correct voltage (7-12V recommended).
- Check the USB connection if powering via USB.
Digital pins are not responding:
- Verify that the pins are correctly configured as input or output in the code.
- Check for loose or incorrect wiring.
Analog readings are unstable:
- Ensure proper grounding in the circuit.
- Use decoupling capacitors near the analog input pins to reduce noise.
The component is overheating:
- Check for overcurrent on the I/O pins.
- Ensure the input voltage does not exceed the recommended range.
FAQs
Q: Can I power the HW-154 with a 9V battery?
A: Yes, you can connect a 9V battery to the VIN pin, as it falls within the recommended input voltage range (7-12V).
Q: How do I reset the HW-154?
A: Press the RESET button on the board or connect the RESET pin to GND momentarily.
Q: Can I use the HW-154 with 3.3V sensors?
A: Yes, the HW-154 provides a 3.3V output pin for powering low-voltage sensors.
By following this documentation, you can effectively integrate the HW-154 into your projects and troubleshoot common issues with ease.