How to Use Chargeur intelligent de batterie Li-ion 54.6V 5a, 48V: Examples, Pinouts, and Specs
Introduction
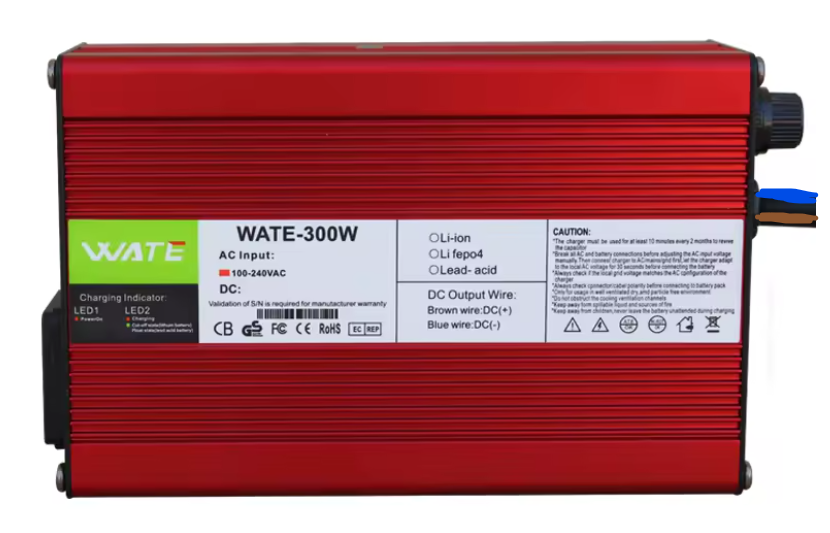
The Chargeur intelligent de batterie Li-ion 54.6V 5A, 48V (Manufacturer: WATE-300W, Part ID: Battery 48V 13s) is a high-performance battery charger designed for 48V lithium-ion battery packs. It is specifically tailored for 13-series (13s) Li-ion battery configurations, providing a maximum output voltage of 54.6V and a charging current of 5A. This charger incorporates intelligent charging algorithms to ensure safe, efficient, and reliable charging while extending battery life.
Explore Projects Built with Chargeur intelligent de batterie Li-ion 54.6V 5a, 48V


Explore Projects Built with Chargeur intelligent de batterie Li-ion 54.6V 5a, 48V
Common Applications and Use Cases
- Electric bicycles (e-bikes) and scooters
- Energy storage systems (ESS)
- Solar power systems with Li-ion battery banks
- Uninterruptible power supplies (UPS)
- Robotics and industrial equipment
Technical Specifications
Key Technical Details
| Parameter | Specification |
|---|---|
| Input Voltage Range | 100-240V AC, 50/60Hz |
| Output Voltage | 54.6V DC (for 48V Li-ion batteries) |
| Output Current | 5A |
| Battery Configuration | 13-series (13s) Li-ion cells |
| Charging Algorithm | CC-CV (Constant Current - Constant Voltage) |
| Efficiency | ≥ 90% |
| Operating Temperature | -10°C to 40°C |
| Storage Temperature | -20°C to 60°C |
| Dimensions | 180mm x 90mm x 60mm |
| Weight | ~1.2 kg |
| Safety Features | Overvoltage, overcurrent, short-circuit, and over-temperature protection |
Pin Configuration and Descriptions
The charger has a simple interface with the following connectors:
| Pin/Connector | Description |
|---|---|
| AC Input | Standard AC power input (100-240V) |
| DC Output | Positive (+) and Negative (-) terminals for battery connection |
| LED Indicator | Multi-color LED for charging status |
LED Indicator Status
| LED Color | Status Description |
|---|---|
| Red | Charging in progress |
| Green | Charging complete |
| Flashing Red | Fault detected (e.g., overvoltage, short-circuit) |
Usage Instructions
How to Use the Component in a Circuit
Connect the Charger to the Battery:
- Ensure the battery pack is a 13-series (13s) Li-ion configuration with a nominal voltage of 48V.
- Connect the charger's DC output terminals to the battery pack, ensuring correct polarity (Positive to Positive, Negative to Negative).
Power On the Charger:
- Plug the AC input cable into a standard wall outlet (100-240V AC).
- The LED indicator will light up red, indicating that charging has started.
Monitor the Charging Process:
- The charger will operate in CC (Constant Current) mode initially, delivering 5A to the battery.
- As the battery approaches full charge, the charger will switch to CV (Constant Voltage) mode, reducing the current gradually.
- When the LED turns green, the battery is fully charged.
Disconnect the Charger:
- Unplug the charger from the wall outlet before disconnecting it from the battery.
Important Considerations and Best Practices
- Battery Compatibility: Only use this charger with 13s Li-ion battery packs. Using it with incompatible batteries may result in damage or safety hazards.
- Ventilation: Ensure adequate ventilation around the charger during operation to prevent overheating.
- Polarity Check: Always verify the polarity of the connections before powering on the charger.
- Storage: Store the charger in a cool, dry place when not in use.
Arduino Integration Example
While this charger is not directly connected to an Arduino, you can monitor the charging process using an Arduino and a voltage sensor. Below is an example code snippet to read the battery voltage:
// Arduino code to monitor battery voltage during charging
const int voltagePin = A0; // Analog pin connected to voltage sensor
const float voltageDividerRatio = 11.0; // Adjust based on your voltage divider

void setup() {
  Serial.begin(9600); // Initialize serial communication
  pinMode(voltagePin, INPUT); // Set voltage pin as input
}

void loop() {
  int sensorValue = analogRead(voltagePin); // Read analog value
  float batteryVoltage = (sensorValue * 5.0 / 1023.0) * voltageDividerRatio;

  // Print the battery voltage to the Serial Monitor
  Serial.print("Battery Voltage: ");
  Serial.print(batteryVoltage);
  Serial.println(" V");

  delay(1000); // Wait for 1 second before the next reading
}
Note: Use a voltage divider circuit to step down the battery voltage to a safe range for the Arduino's analog input (0-5V).
Troubleshooting and FAQs
Common Issues Users Might Face
Charger LED Does Not Turn On:
- Cause: No power supply or faulty AC input connection.
- Solution: Check the wall outlet and ensure the AC input cable is securely connected.
LED Flashes Red:
- Cause: Fault detected (e.g., overvoltage, short-circuit, or overheating).
- Solution: Disconnect the charger and inspect the battery connections. Allow the charger to cool down if overheating is suspected.
Battery Does Not Charge Fully:
- Cause: Battery capacity mismatch or degraded battery cells.
- Solution: Verify the battery's capacity and health. Ensure it is a 13s Li-ion pack.
Charger Overheats:
- Cause: Poor ventilation or high ambient temperature.
- Solution: Operate the charger in a well-ventilated area and avoid using it in extreme temperatures.
Solutions and Tips for Troubleshooting
- Always check the battery pack's specifications to ensure compatibility with the charger.
- Use a multimeter to verify the output voltage and current of the charger if issues persist.
- If the charger fails to operate after troubleshooting, contact the manufacturer or authorized service center for assistance.