How to Use CONTROLLER HD W60: Examples, Pinouts, and Specs
Introduction
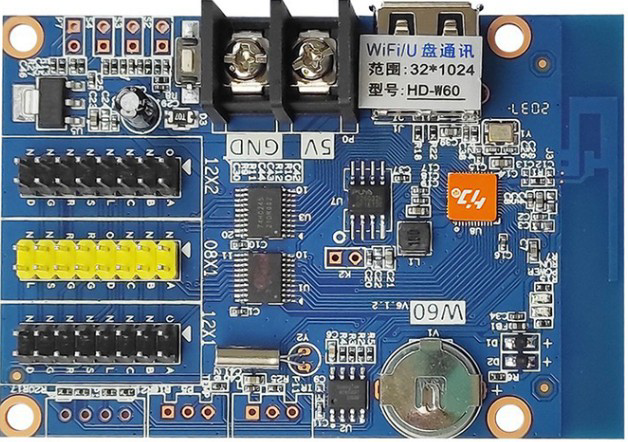
The CONTROLLER HD W60 is a high-definition controller designed for managing and interfacing with various electronic devices. It is widely used in automation and control systems due to its robust performance, versatility, and ease of integration. This component is ideal for applications requiring precise control, such as industrial automation, robotics, and smart home systems. Its compatibility with a variety of sensors, actuators, and communication protocols makes it a popular choice for both hobbyists and professionals.
Explore Projects Built with CONTROLLER HD W60


Explore Projects Built with CONTROLLER HD W60
Technical Specifications
The CONTROLLER HD W60 is engineered to deliver reliable performance under demanding conditions. Below are its key technical specifications:
General Specifications
| Parameter | Value |
|---|---|
| Operating Voltage | 5V DC |
| Input Voltage Range | 4.5V - 5.5V |
| Maximum Current | 500mA |
| Communication Protocols | UART, I2C, SPI |
| Operating Temperature | -20°C to 85°C |
| Dimensions | 50mm x 30mm x 10mm |
Pin Configuration
The CONTROLLER HD W60 features a 10-pin interface for easy integration. Below is the pinout description:
| Pin Number | Pin Name | Description |
|---|---|---|
| 1 | VCC | Power supply input (5V DC) |
| 2 | GND | Ground connection |
| 3 | TX | UART Transmit pin |
| 4 | RX | UART Receive pin |
| 5 | SCL | I2C Clock line |
| 6 | SDA | I2C Data line |
| 7 | MOSI | SPI Master Out Slave In |
| 8 | MISO | SPI Master In Slave Out |
| 9 | SCK | SPI Clock |
| 10 | RESET | Reset pin for the controller |
Usage Instructions
To use the CONTROLLER HD W60 in a circuit, follow these steps:
- Power Supply: Connect the VCC pin to a stable 5V DC power source and the GND pin to the ground of your circuit.
- Communication Interface: Choose the appropriate communication protocol (UART, I2C, or SPI) based on your application. Connect the corresponding pins (e.g., TX/RX for UART, SCL/SDA for I2C, or MOSI/MISO/SCK for SPI) to your microcontroller or host device.
- Reset: Optionally, connect the RESET pin to a push-button or microcontroller GPIO for manual or software-based resets.
- Peripheral Connections: Attach sensors, actuators, or other devices to the controller as needed, ensuring compatibility with the selected communication protocol.
Important Considerations
- Ensure the input voltage does not exceed the specified range (4.5V - 5.5V) to avoid damaging the controller.
- Use pull-up resistors for I2C lines (SCL and SDA) if they are not already integrated into your circuit.
- Keep communication lines as short as possible to minimize noise and signal degradation.
- If using SPI, ensure proper configuration of the master and slave devices, including clock polarity and phase settings.
Example: Connecting to an Arduino UNO
Below is an example of how to connect the CONTROLLER HD W60 to an Arduino UNO using the I2C protocol:
Wiring
| CONTROLLER HD W60 Pin | Arduino UNO Pin |
|---|---|
| VCC | 5V |
| GND | GND |
| SCL | A5 |
| SDA | A4 |
Arduino Code
#include <Wire.h> // Include the Wire library for I2C communication

#define DEVICE_ADDRESS 0x40 // Replace with the actual I2C address of the controller

void setup() {
  Wire.begin(); // Initialize I2C communication
  Serial.begin(9600); // Start serial communication for debugging
  Serial.println("Initializing CONTROLLER HD W60...");
}

void loop() {
  Wire.beginTransmission(DEVICE_ADDRESS); // Start communication with the controller
  Wire.write(0x01); // Example command to send to the controller
  Wire.endTransmission(); // End communication

  delay(1000); // Wait for 1 second before sending the next command
}
Troubleshooting and FAQs
Common Issues
Controller Not Responding
- Cause: Incorrect wiring or communication protocol mismatch.
- Solution: Double-check all connections and ensure the correct protocol is selected.
Overheating
- Cause: Input voltage exceeds the specified range.
- Solution: Verify the power supply voltage and ensure it is within 4.5V - 5.5V.
Communication Errors
- Cause: Noise or interference on communication lines.
- Solution: Use shorter wires and, if necessary, add decoupling capacitors near the controller.
FAQs
Q: Can the CONTROLLER HD W60 operate at 3.3V?
A: No, the controller requires a 5V DC power supply for proper operation.Q: What is the maximum communication speed for I2C?
A: The CONTROLLER HD W60 supports I2C speeds up to 400kHz.Q: Is the controller compatible with 3.3V logic devices?
A: Yes, the communication pins are 3.3V logic compatible, but the power supply must still be 5V.
By following this documentation, you can effectively integrate the CONTROLLER HD W60 into your projects and troubleshoot any issues that arise.