Cirkit Designer Logo
Cirkit Designer
Your all-in-one circuit design IDE
Home / 
Component Documentation

How to Use SCD41: Examples, Pinouts, and Specs

Image of SCD41
Cirkit Designer LogoDesign with SCD41 in Cirkit Designer

Introduction

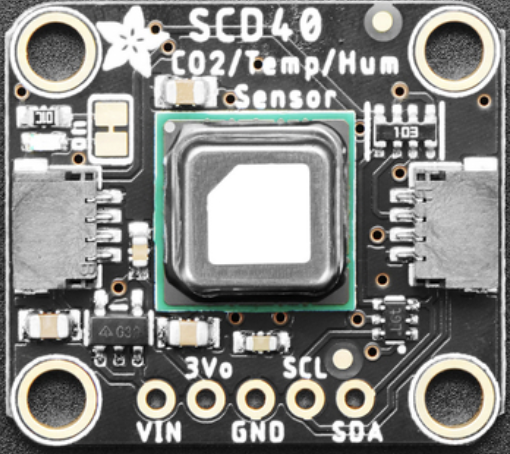
The SCD41 is a high-precision sensor designed for accurate measurement of humidity and temperature. This sensor is an ideal choice for environmental monitoring, HVAC systems, and smart home applications due to its compact form factor and reliability. The SCD41 utilizes a fully calibrated digital output, which makes it easy to integrate with various microcontrollers, including the popular Arduino platform.

Explore Projects Built with SCD41

Use Cirkit Designer to design, explore, and prototype these projects online. Some projects support real-time simulation. Click "Open Project" to start designing instantly!
ESP32-S3 GPS and Wind Speed Logger with Dual OLED Displays and CAN Bus
Image of esp32-s3-ellipse: A project utilizing SCD41 in a practical application
This circuit features an ESP32-S3 microcontroller interfaced with an SD card module, two OLED displays, a GPS module, and a CAN bus module. The ESP32-S3 records GPS data to the SD card, displays speed on one OLED, and shows wind speed from the CAN bus on the other OLED, providing a comprehensive data logging and display system.
Cirkit Designer LogoOpen Project in Cirkit Designer
A-Star 32U4 Mini and I2C LCD Screen Battery-Powered Display
Image of lcd disolay: A project utilizing SCD41 in a practical application
This circuit features an A-Star 32U4 Mini microcontroller connected to a 16x2 I2C LCD screen. The microcontroller provides power and ground to the LCD, and communicates with it via the I2C protocol using the A4 (SDA) and A5 (SCL) pins.
Cirkit Designer LogoOpen Project in Cirkit Designer
ESP32 and I2C LCD Display for Data Visualization
Image of layar20x4I2C: A project utilizing SCD41 in a practical application
This circuit consists of an ESP32 Devkit V1 microcontroller connected to a 20x4 I2C LCD display. The ESP32 controls the LCD via I2C communication, with the SCL and SDA lines connected to GPIO pins D22 and D21, respectively, and provides power and ground connections to the display.
Cirkit Designer LogoOpen Project in Cirkit Designer
I2C LCD Display Module with Power Supply Interface
Image of J8 +j22 lcd closeup: A project utilizing SCD41 in a practical application
This circuit interfaces a 20x4 I2C LCD display with a power source and an I2C communication bus. The LCD is powered by a 4.2V supply from a connector and communicates via I2C through another connector, which provides the SCL and SDA lines as well as ground.
Cirkit Designer LogoOpen Project in Cirkit Designer

Explore Projects Built with SCD41

Use Cirkit Designer to design, explore, and prototype these projects online. Some projects support real-time simulation. Click "Open Project" to start designing instantly!
Image of esp32-s3-ellipse: A project utilizing SCD41 in a practical application
ESP32-S3 GPS and Wind Speed Logger with Dual OLED Displays and CAN Bus
This circuit features an ESP32-S3 microcontroller interfaced with an SD card module, two OLED displays, a GPS module, and a CAN bus module. The ESP32-S3 records GPS data to the SD card, displays speed on one OLED, and shows wind speed from the CAN bus on the other OLED, providing a comprehensive data logging and display system.
Cirkit Designer LogoOpen Project in Cirkit Designer
Image of lcd disolay: A project utilizing SCD41 in a practical application
A-Star 32U4 Mini and I2C LCD Screen Battery-Powered Display
This circuit features an A-Star 32U4 Mini microcontroller connected to a 16x2 I2C LCD screen. The microcontroller provides power and ground to the LCD, and communicates with it via the I2C protocol using the A4 (SDA) and A5 (SCL) pins.
Cirkit Designer LogoOpen Project in Cirkit Designer
Image of layar20x4I2C: A project utilizing SCD41 in a practical application
ESP32 and I2C LCD Display for Data Visualization
This circuit consists of an ESP32 Devkit V1 microcontroller connected to a 20x4 I2C LCD display. The ESP32 controls the LCD via I2C communication, with the SCL and SDA lines connected to GPIO pins D22 and D21, respectively, and provides power and ground connections to the display.
Cirkit Designer LogoOpen Project in Cirkit Designer
Image of J8 +j22 lcd closeup: A project utilizing SCD41 in a practical application
I2C LCD Display Module with Power Supply Interface
This circuit interfaces a 20x4 I2C LCD display with a power source and an I2C communication bus. The LCD is powered by a 4.2V supply from a connector and communicates via I2C through another connector, which provides the SCL and SDA lines as well as ground.
Cirkit Designer LogoOpen Project in Cirkit Designer

Technical Specifications

Key Technical Details

  • Measurement Range (Humidity): 0 to 100% RH
  • Measurement Range (Temperature): -10°C to 60°C
  • Accuracy (Humidity): ±2% RH
  • Accuracy (Temperature): ±0.2°C
  • Interface: I2C
  • Supply Voltage: 3.3 V
  • Average Current Consumption: 5 mA
  • Peak Current Consumption: 50 mA during measurement
  • Dimensions: 10.1 x 10.1 x 6.5 mm

Pin Configuration and Descriptions

Pin Number Name Description
1 VDD Supply voltage (3.3V)
2 GND Ground
3 SDA I2C Data
4 SCL I2C Clock
5 SEL Interface select (connect to GND for I2C)
6 NC No Connection (do not connect)

Usage Instructions

Integration with a Circuit

To use the SCD41 sensor in a circuit:

  1. Connect the VDD pin to a 3.3V power supply.
  2. Connect the GND pin to the ground of the power supply.
  3. Connect the SDA and SCL pins to the I2C data and clock lines, respectively.
  4. Ensure the SEL pin is connected to GND to select the I2C interface.

Best Practices

  • Use pull-up resistors on the I2C lines (typically 4.7kΩ to 10kΩ).
  • Keep the sensor away from direct sunlight and heat sources to prevent measurement errors.
  • Ensure good airflow around the sensor for accurate humidity readings.
  • Avoid physical contact with the sensor element to prevent contamination and damage.

Arduino Code Example

#include <Wire.h>

// SCD41 I2C address
#define SCD41_I2C_ADDRESS 0x62

// Function prototypes
void setupSCD41();
void readSensorData(float &humidity, float &temperature);

void setup() {
  Serial.begin(9600);
  Wire.begin();
  setupSCD41();
}

void loop() {
  float humidity = 0.0;
  float temperature = 0.0;

  readSensorData(humidity, temperature);

  Serial.print("Humidity: ");
  Serial.print(humidity);
  Serial.print("%, Temperature: ");
  Serial.print(temperature);
  Serial.println("C");

  delay(2000); // Wait for 2 seconds before reading again
}

void setupSCD41() {
  // Add setup code specific to SCD41 initialization if required
}

void readSensorData(float &humidity, float &temperature) {
  // Add code to trigger measurement and read data from the SCD41 sensor
  // This is a placeholder function. Actual implementation will depend on the
  // specific library used for the SCD41 sensor.
}

Troubleshooting and FAQs

Common Issues

  • Inaccurate Readings: Ensure the sensor is not exposed to direct sunlight or heat sources. Check for proper airflow around the sensor.
  • No Data on I2C: Verify connections and pull-up resistors on the I2C lines. Check if the SEL pin is correctly connected to GND.
  • Sensor Not Detected: Ensure that the sensor's I2C address is correct and that there are no address conflicts on the I2C bus.

FAQs

Q: Can the SCD41 be used with a 5V microcontroller? A: Yes, but level shifters should be used on the I2C lines to protect the 3.3V logic of the SCD41.

Q: How often should the sensor be calibrated? A: The SCD41 comes factory-calibrated. However, recalibration is recommended if the sensor is used in environments with extreme conditions or after a long period of operation.

Q: Is the SCD41 waterproof? A: No, the SCD41 is not waterproof. It should be protected from condensation and other sources of water.

For further assistance, consult the manufacturer's datasheet and application notes.