How to Use BME280: Examples, Pinouts, and Specs
Introduction
The BME280 is a high-precision digital sensor designed to measure temperature, humidity, and atmospheric pressure. Manufactured by Adafruit, this sensor is widely used in weather stations, Internet of Things (IoT) applications, and environmental monitoring systems. Its compact size, low power consumption, and high accuracy make it an ideal choice for both hobbyists and professionals.
Explore Projects Built with BME280
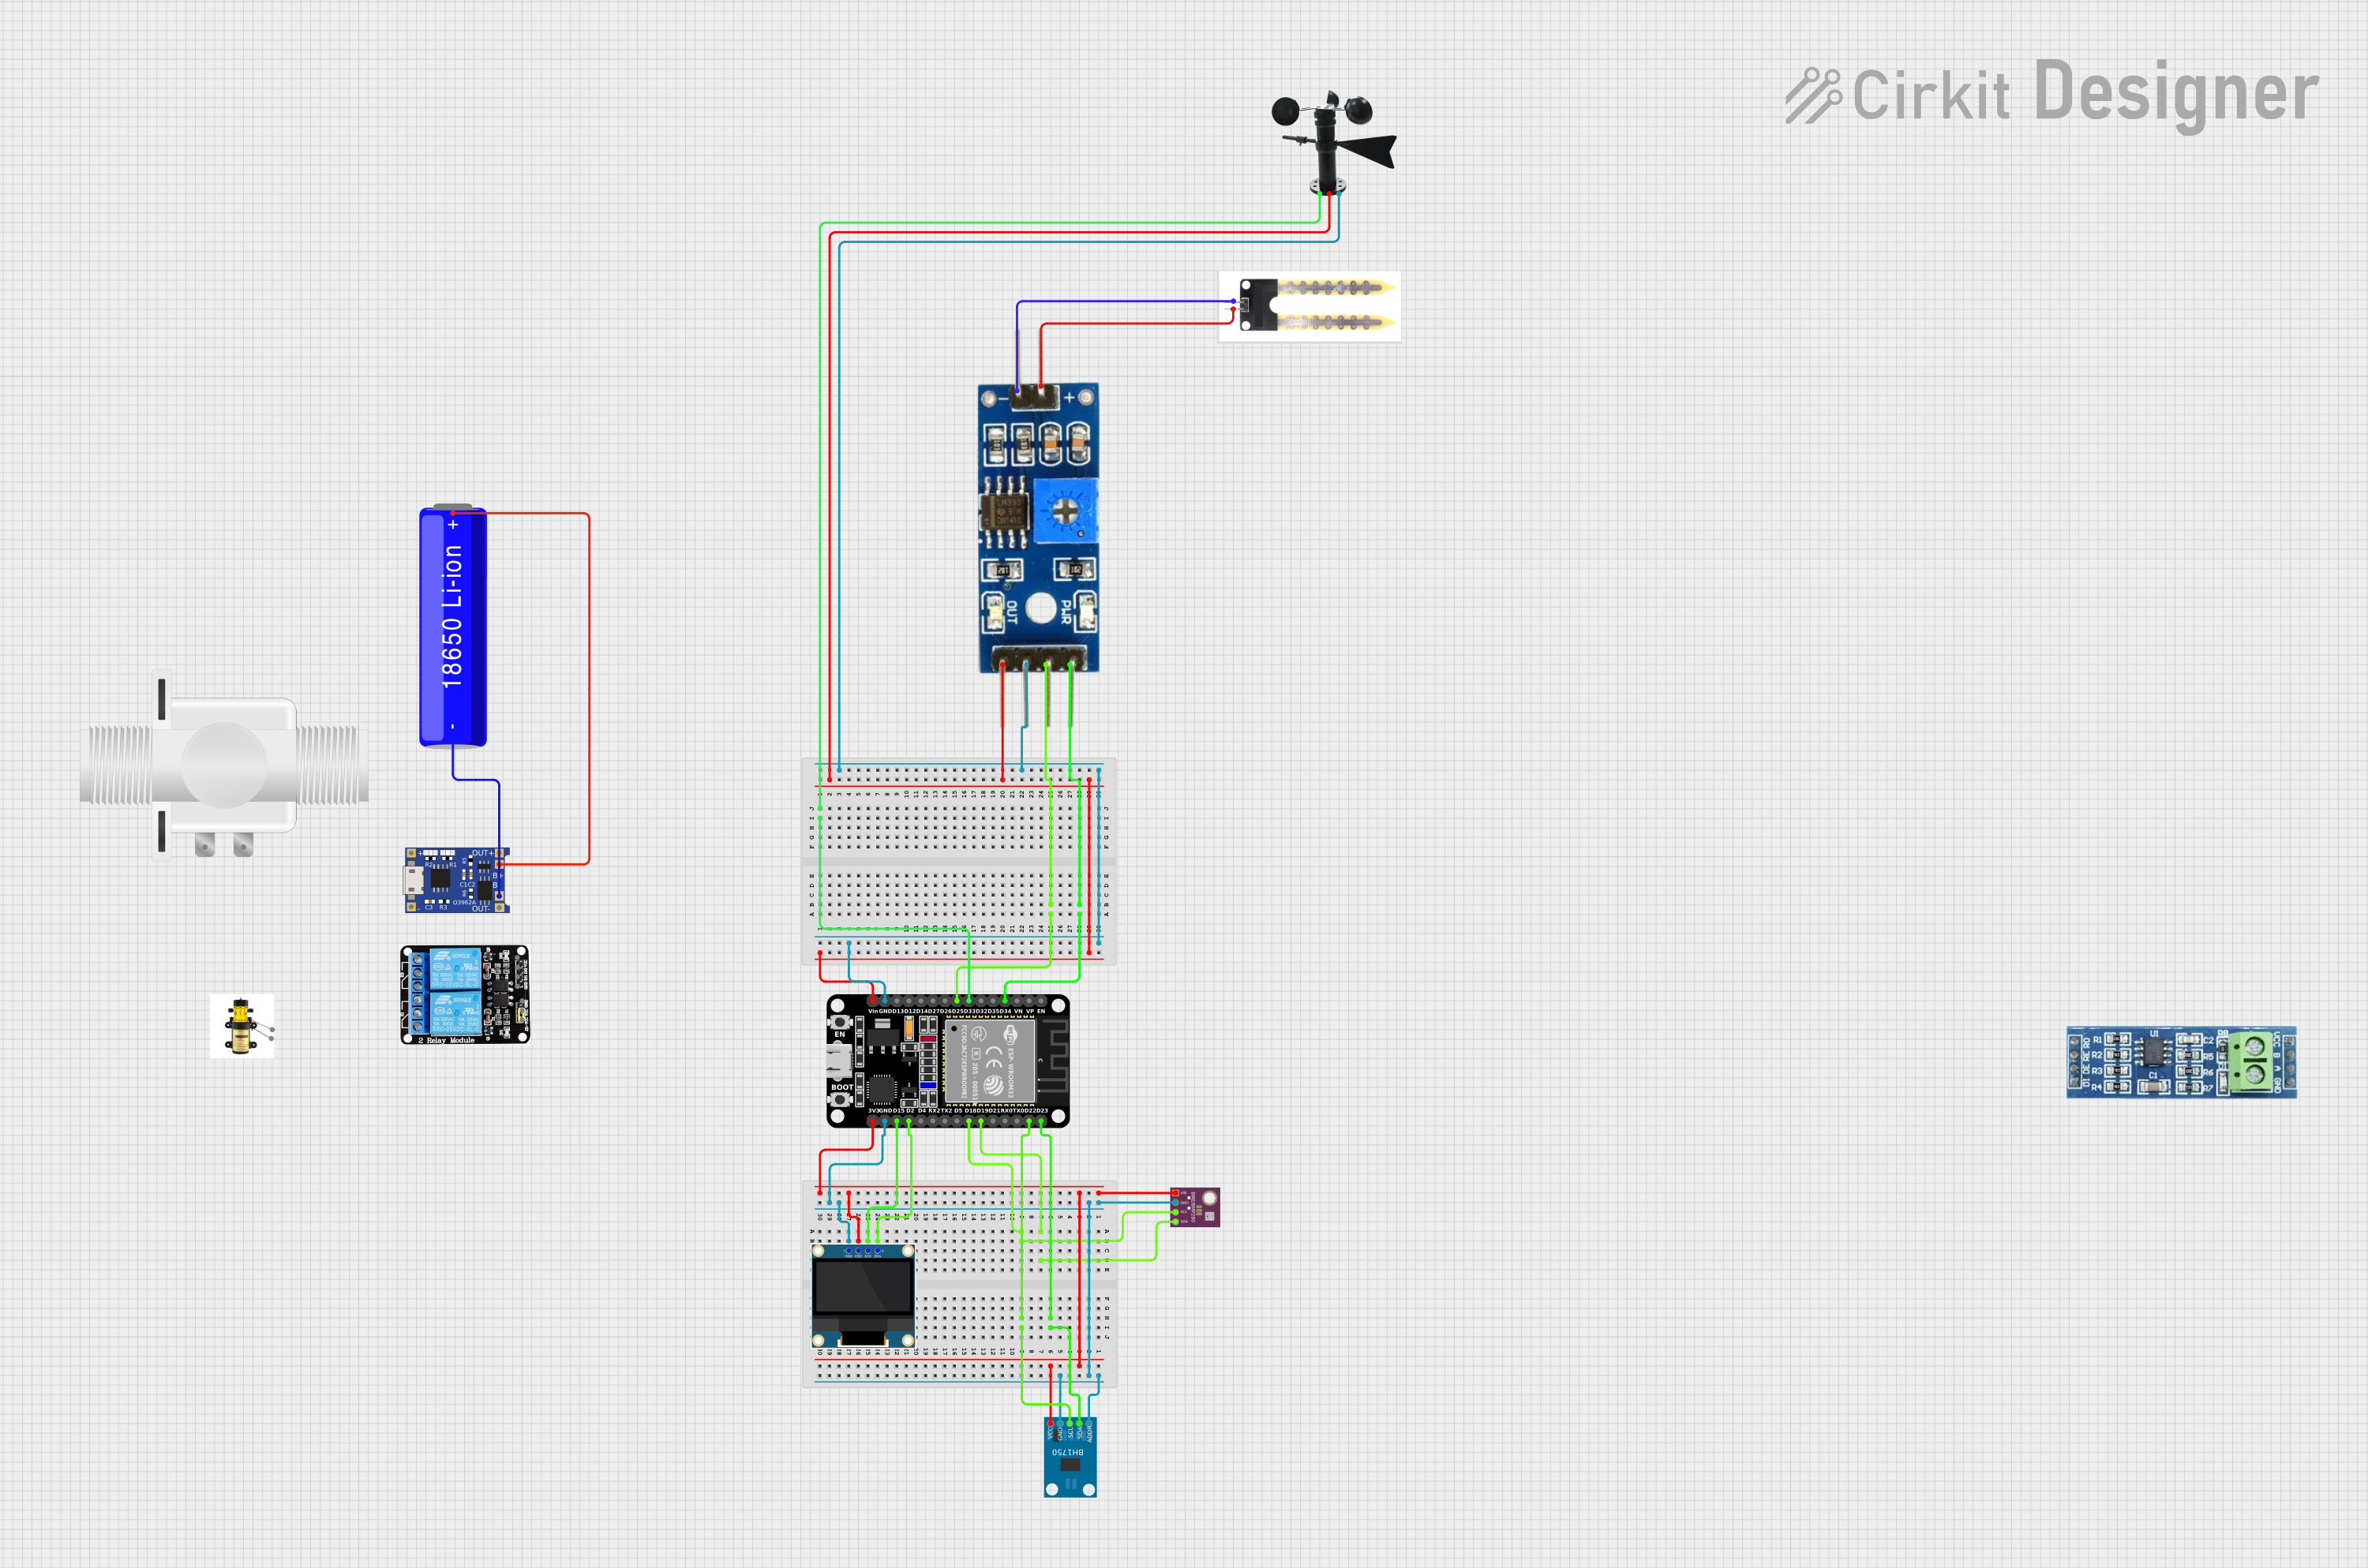
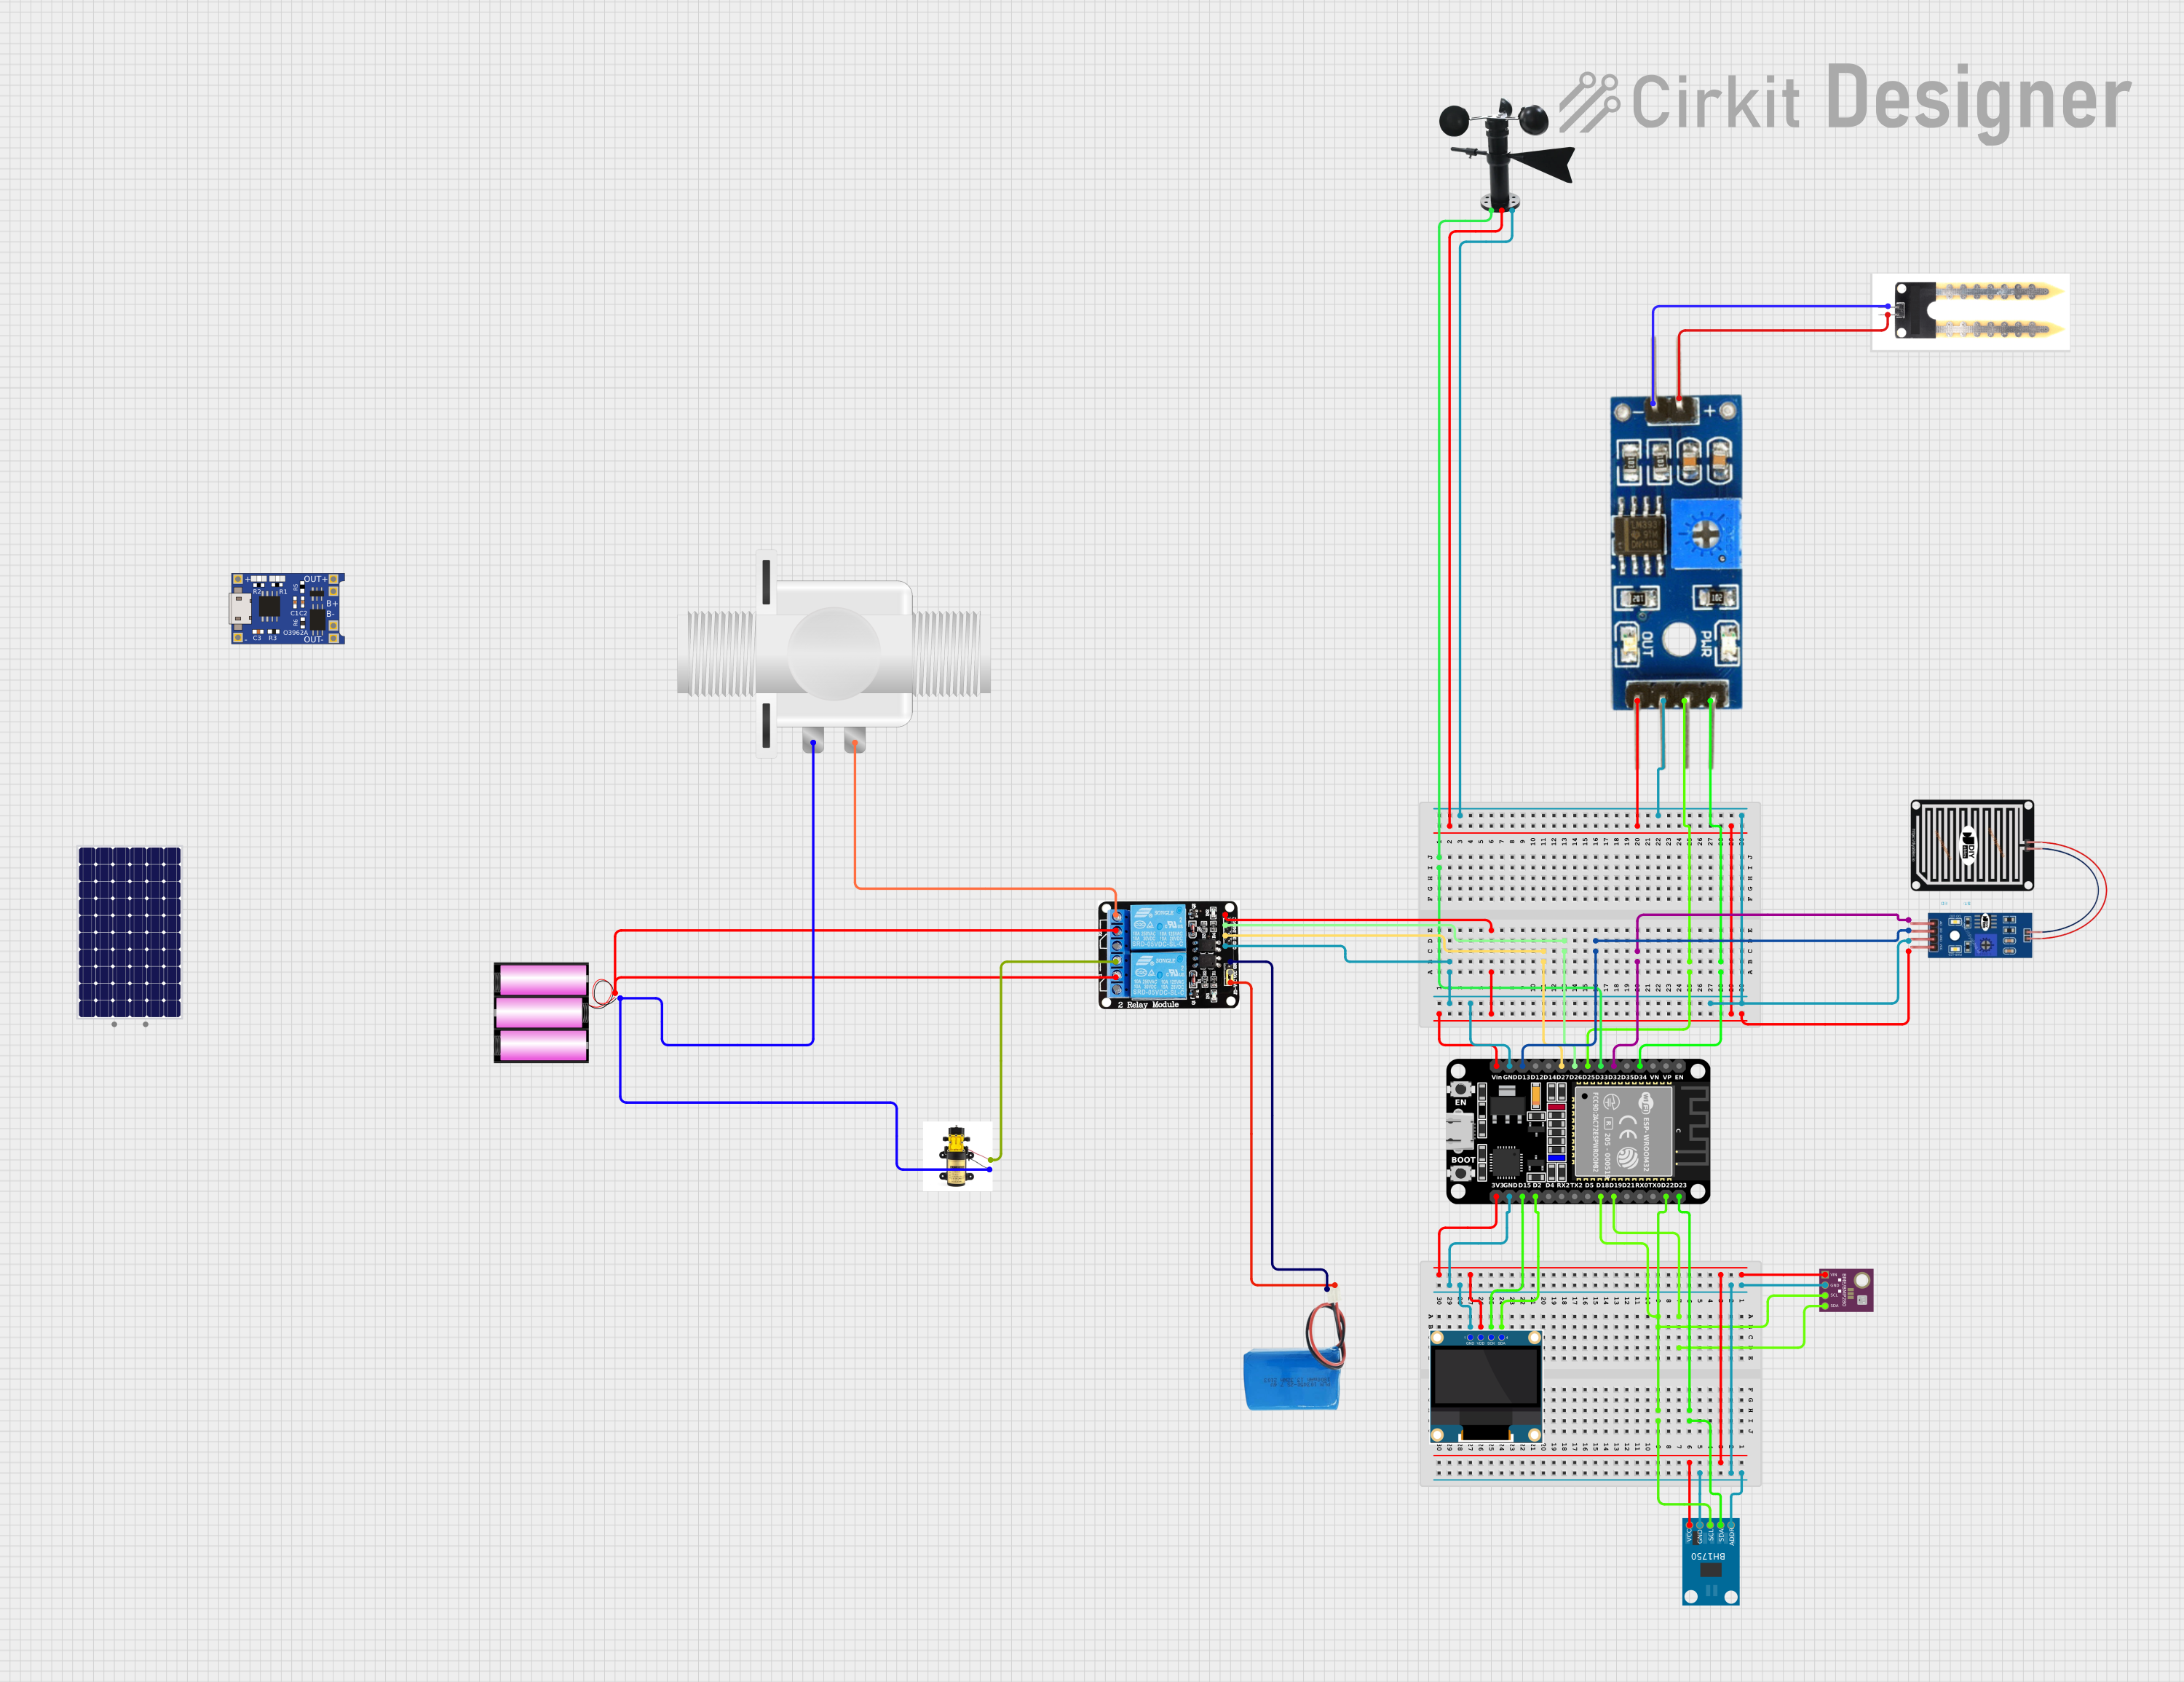
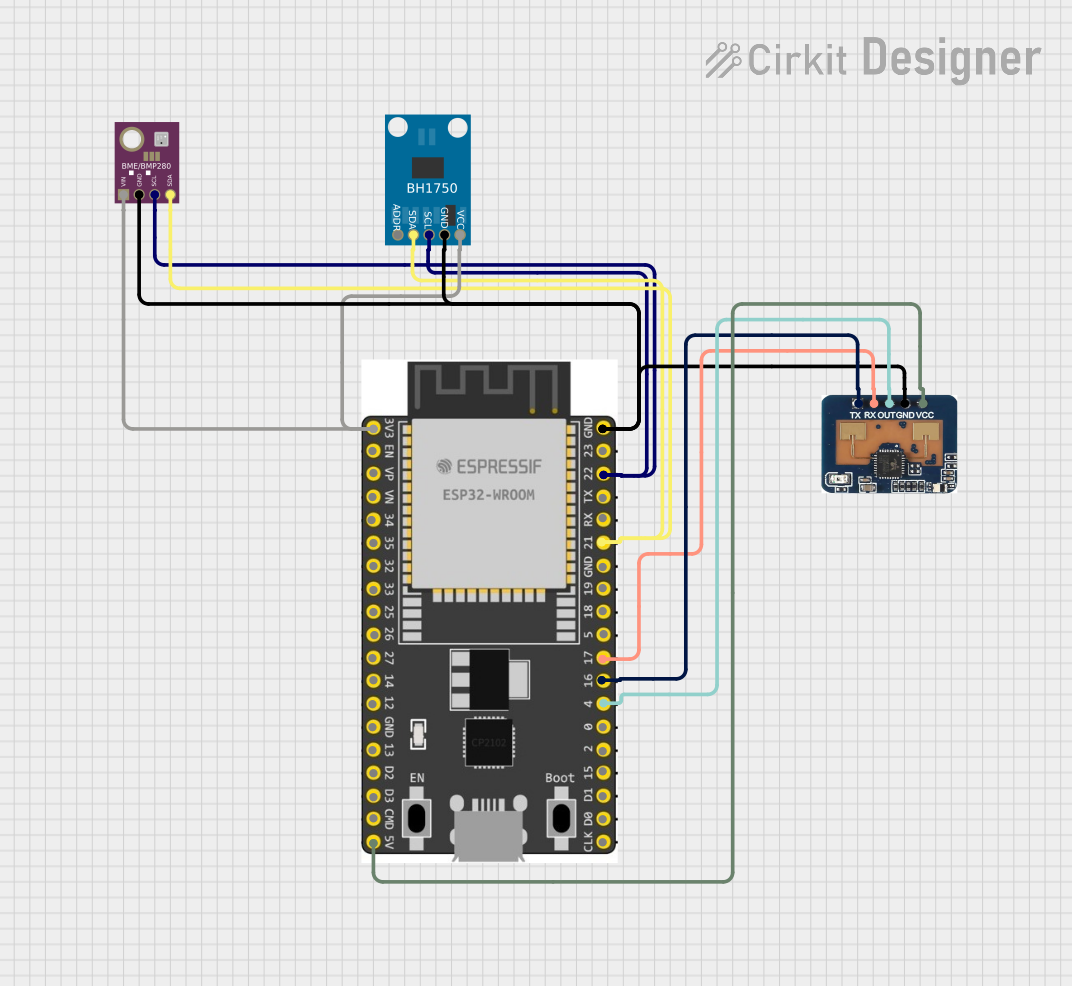
Explore Projects Built with BME280
Common Applications
- Weather monitoring systems
- IoT devices for environmental sensing
- Altitude measurement in drones and GPS systems
- HVAC (Heating, Ventilation, and Air Conditioning) control
- Indoor air quality monitoring
Technical Specifications
The BME280 sensor offers excellent performance and versatility. Below are its key technical details:
| Parameter | Value |
|---|---|
| Supply Voltage | 1.8V to 3.6V |
| Interface | I2C (up to 3.4 MHz) or SPI (up to 10 MHz) |
| Temperature Range | -40°C to +85°C |
| Temperature Accuracy | ±1.0°C |
| Humidity Range | 0% to 100% |
| Humidity Accuracy | ±3% RH |
| Pressure Range | 300 hPa to 1100 hPa |
| Pressure Accuracy | ±1 hPa |
| Power Consumption | 3.6 µA (in normal mode) |
| Dimensions | 2.5 mm x 2.5 mm x 0.93 mm |
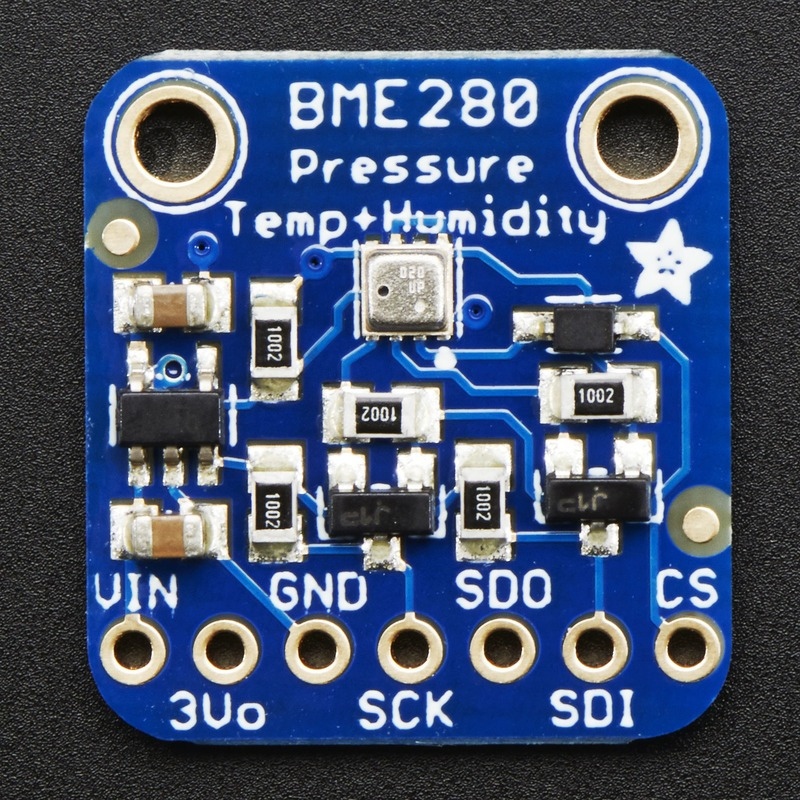
Pin Configuration
The BME280 sensor typically comes in a breakout board format. Below is the pinout for the Adafruit BME280 breakout board:
| Pin | Name | Description |
|---|---|---|
| 1 | VIN | Power supply input (3.3V or 5V compatible) |
| 2 | GND | Ground connection |
| 3 | SCL | I2C clock line (or SPI clock in SPI mode) |
| 4 | SDA | I2C data line (or SPI MOSI in SPI mode) |
| 5 | CS | Chip select (used in SPI mode, connect to GND for I2C) |
| 6 | SDO | SPI MISO (or I2C address selection) |
Usage Instructions
The BME280 can be used in either I2C or SPI communication mode. Below are the steps to integrate the sensor into a circuit and use it with an Arduino UNO.
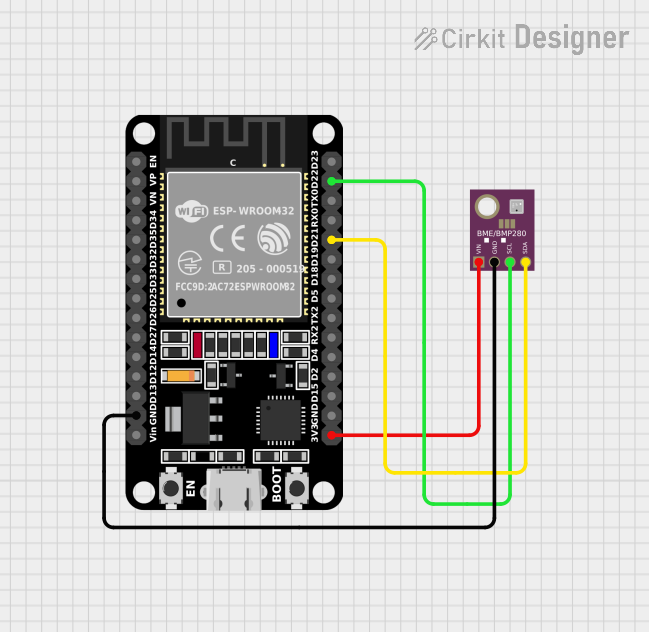
Connecting the BME280 to an Arduino UNO (I2C Mode)
Wiring:
- Connect the
VINpin of the BME280 to the 5V pin on the Arduino. - Connect the
GNDpin of the BME280 to the GND pin on the Arduino. - Connect the
SCLpin of the BME280 to the A5 pin on the Arduino (I2C clock line). - Connect the
SDApin of the BME280 to the A4 pin on the Arduino (I2C data line). - Leave the
CSpin unconnected or tied to GND for I2C mode. - Leave the
SDOpin unconnected or tied to GND for the default I2C address (0x76).
- Connect the
Install Required Libraries:
- Open the Arduino IDE and go to Sketch > Include Library > Manage Libraries.
- Search for "Adafruit BME280" and install the library.
- Also, install the "Adafruit Sensor" library if not already installed.
Example Code: Use the following code to read temperature, humidity, and pressure from the BME280:
#include <Wire.h>
#include <Adafruit_Sensor.h>
#include <Adafruit_BME280.h>

// Create an instance of the BME280 sensor
Adafruit_BME280 bme;

void setup() {
  Serial.begin(9600);
  while (!Serial); // Wait for the serial monitor to open

  // Initialize the BME280 sensor
  if (!bme.begin(0x76)) {
    Serial.println("Could not find a valid BME280 sensor, check wiring!");
    while (1);
  }
}

void loop() {
  // Read and print temperature, humidity, and pressure
  Serial.print("Temperature = ");
  Serial.print(bme.readTemperature());
  Serial.println(" °C");

  Serial.print("Humidity = ");
  Serial.print(bme.readHumidity());
  Serial.println(" %");

  Serial.print("Pressure = ");
  Serial.print(bme.readPressure() / 100.0F); // Convert Pa to hPa
  Serial.println(" hPa");

  Serial.println();
  delay(2000); // Wait 2 seconds before the next reading
}
Important Considerations
- Power Supply: Ensure the sensor is powered within its operating voltage range (1.8V to 3.6V). The Adafruit breakout board includes a voltage regulator, allowing it to be powered with 3.3V or 5V.
- I2C Address: The default I2C address is
0x76. If theSDOpin is connected toVCC, the address changes to0x77. - Pull-Up Resistors: The breakout board includes pull-up resistors for the I2C lines. If multiple I2C devices are connected, ensure there are no conflicts with other pull-up resistors.
Troubleshooting and FAQs
Common Issues
Sensor Not Detected:
- Cause: Incorrect wiring or I2C address mismatch.
- Solution: Double-check the connections and ensure the
SDOpin is configured correctly for the desired I2C address.
Incorrect Readings:
- Cause: Environmental factors such as rapid temperature changes or condensation.
- Solution: Allow the sensor to stabilize in the environment before taking readings.
Arduino Freezes or Crashes:
- Cause: Insufficient power supply or incorrect library usage.
- Solution: Ensure the Arduino is powered properly and the required libraries are installed.
FAQs
Can the BME280 be used with 5V logic? Yes, the Adafruit breakout board includes level-shifting circuitry, making it compatible with 5V logic.
What is the difference between I2C and SPI modes? I2C uses fewer pins and is easier to set up, while SPI offers faster communication speeds.
How do I calibrate the sensor? The BME280 is factory-calibrated, so no additional calibration is required for most applications.
Can the BME280 measure altitude? Yes, altitude can be calculated using the pressure readings and a reference sea-level pressure value.