How to Use Seeed Studio XIAO Sense: Examples, Pinouts, and Specs
Introduction
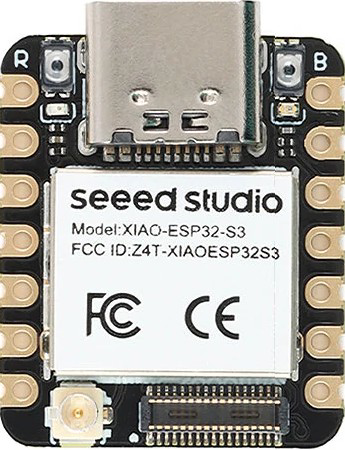
The Seeed Studio XIAO Sense is a compact and versatile microcontroller board designed for IoT applications and rapid prototyping. It features a rich set of onboard sensors, including temperature, humidity, and motion sensors, making it ideal for projects that require environmental monitoring, motion detection, or other sensor-based functionalities. Its small form factor and powerful capabilities make it a popular choice for developers and hobbyists alike.
Explore Projects Built with Seeed Studio XIAO Sense


Explore Projects Built with Seeed Studio XIAO Sense
Common Applications and Use Cases
- IoT devices for environmental monitoring
- Wearable technology
- Motion detection and gesture recognition
- Smart home automation
- Rapid prototyping for sensor-based projects
Technical Specifications
The Seeed Studio XIAO Sense is based on the Nordic nRF52840 microcontroller and includes several onboard sensors. Below are the key technical details:
Microcontroller Specifications
| Parameter | Value |
|---|---|
| Microcontroller | Nordic nRF52840 |
| Core | ARM Cortex-M4F, 64 MHz |
| Flash Memory | 1 MB |
| RAM | 256 KB |
| Operating Voltage | 3.3V |
| Input Voltage | 5V (via USB-C) |
| Interface | I2C, SPI, UART, GPIO, PWM |
Onboard Sensors
| Sensor Type | Model/Function |
|---|---|
| Temperature & Humidity | SHT40 |
| Motion (6-axis IMU) | LSM6DS3TR-C |
Pin Configuration
The Seeed Studio XIAO Sense has a total of 14 pins, including power, analog, and digital pins. Below is the pinout description:
| Pin Number | Pin Name | Function |
|---|---|---|
| 1 | 3.3V | Power output (3.3V) |
| 2 | GND | Ground |
| 3 | A0/D0 | Analog input/Digital I/O |
| 4 | A1/D1 | Analog input/Digital I/O |
| 5 | D2 | Digital I/O |
| 6 | D3 | Digital I/O |
| 7 | D4 | Digital I/O |
| 8 | D5 | Digital I/O |
| 9 | SDA | I2C Data |
| 10 | SCL | I2C Clock |
| 11 | RX | UART Receive |
| 12 | TX | UART Transmit |
| 13 | USB-C | Power and data communication |
| 14 | RST | Reset |
Usage Instructions
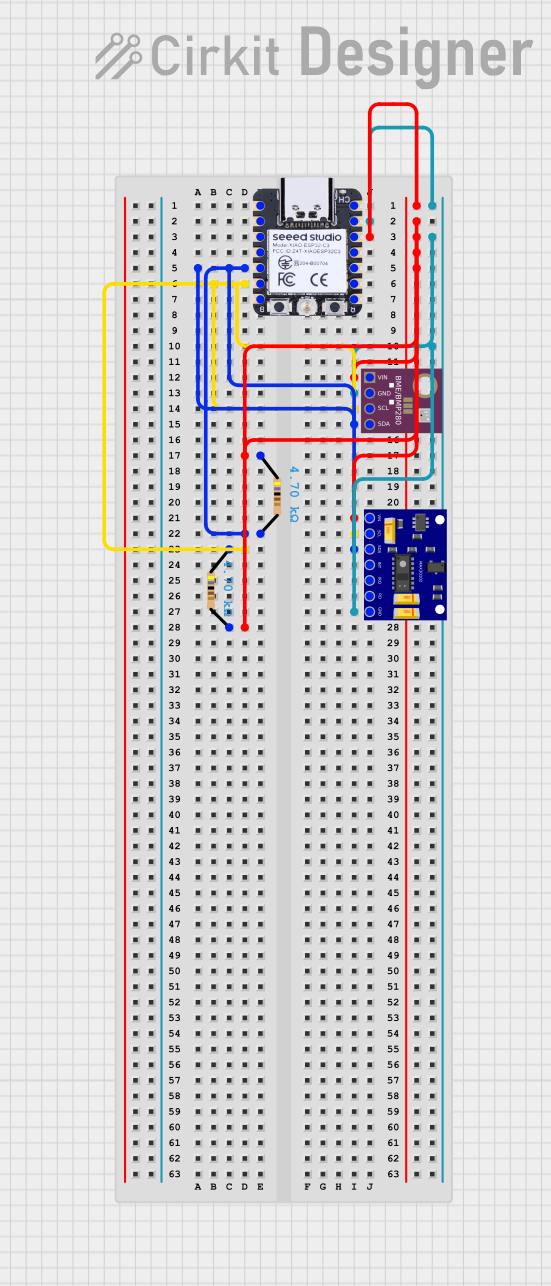
How to Use the Seeed Studio XIAO Sense in a Circuit
- Powering the Board: Connect the board to a 5V power source using the USB-C port. The onboard voltage regulator will step down the voltage to 3.3V.
- Connecting Sensors: The onboard sensors (SHT40 and LSM6DS3TR-C) are pre-wired and accessible via I2C. Use the SDA and SCL pins for additional I2C devices if needed.
- Programming: The board is compatible with the Arduino IDE, CircuitPython, and other development environments. Use the USB-C port to upload code.
Important Considerations and Best Practices
- Voltage Levels: Ensure that external components connected to the GPIO pins operate at 3.3V logic levels to avoid damaging the board.
- Heat Management: Avoid exposing the board to high temperatures, as this may affect the accuracy of the onboard sensors.
- Sensor Calibration: For precise measurements, consider calibrating the sensors in your specific environment.
Example Code for Arduino IDE
Below is an example of how to read data from the onboard temperature and humidity sensor (SHT40) using the Arduino IDE:
#include <Wire.h>
#include "Adafruit_SHT4x.h"

// Create an instance of the SHT40 sensor
Adafruit_SHT4x sht40 = Adafruit_SHT4x();

void setup() {
  Serial.begin(115200); // Initialize serial communication at 115200 baud
  while (!Serial) delay(10); // Wait for the serial monitor to open

  // Initialize the SHT40 sensor
  if (!sht40.begin()) {
    Serial.println("Failed to find SHT40 sensor!");
    while (1) delay(10); // Halt if sensor initialization fails
  }
  Serial.println("SHT40 sensor initialized.");
}

void loop() {
  sensors_event_t humidity, temp;

  // Get temperature and humidity readings
  if (sht40.getEvent(&humidity, &temp)) {
    Serial.print("Temperature: ");
    Serial.print(temp.temperature);
    Serial.println(" °C");

    Serial.print("Humidity: ");
    Serial.print(humidity.relative_humidity);
    Serial.println(" %");
  } else {
    Serial.println("Failed to read from SHT40 sensor.");
  }

  delay(2000); // Wait 2 seconds before the next reading
}
Notes on the Code
- Install the
Adafruit_SHT4xlibrary via the Arduino Library Manager before running the code. - Ensure the board is selected as "Seeed XIAO nRF52840 Sense" in the Arduino IDE.
Troubleshooting and FAQs
Common Issues and Solutions
The board is not detected by the computer:
- Ensure the USB-C cable supports data transfer (not just charging).
- Check if the board is in bootloader mode by double-pressing the reset button.
Sensor readings are inaccurate:
- Verify that the board is not exposed to extreme environmental conditions.
- Allow the sensors to stabilize for a few seconds after powering on.
Code upload fails:
- Confirm that the correct board and port are selected in the Arduino IDE.
- Double-press the reset button to enter bootloader mode and try uploading again.
FAQs
Q: Can I use the Seeed Studio XIAO Sense with CircuitPython?
A: Yes, the board is compatible with CircuitPython. You can install the CircuitPython firmware and use libraries like adafruit_sht4x and adafruit_lsm6ds for sensor interaction.
Q: What is the maximum current output of the 3.3V pin?
A: The 3.3V pin can supply up to 200 mA, which is sufficient for most low-power peripherals.
Q: Can I connect external sensors to the board?
A: Yes, you can connect additional sensors via the I2C, SPI, or GPIO pins, as long as they operate at 3.3V logic levels.
This concludes the documentation for the Seeed Studio XIAO Sense. For further assistance, refer to the official Seeed Studio documentation or community forums.