How to Use Df robot: Examples, Pinouts, and Specs
Introduction
The DF Robot is a versatile mobile robot platform designed for a wide range of applications. It is equipped with sensors, actuators, and a programmable microcontroller, making it ideal for tasks such as obstacle avoidance, line following, and autonomous navigation. Its modular design allows for easy customization and integration with additional components, making it suitable for both beginners and advanced robotics enthusiasts.
Explore Projects Built with Df robot

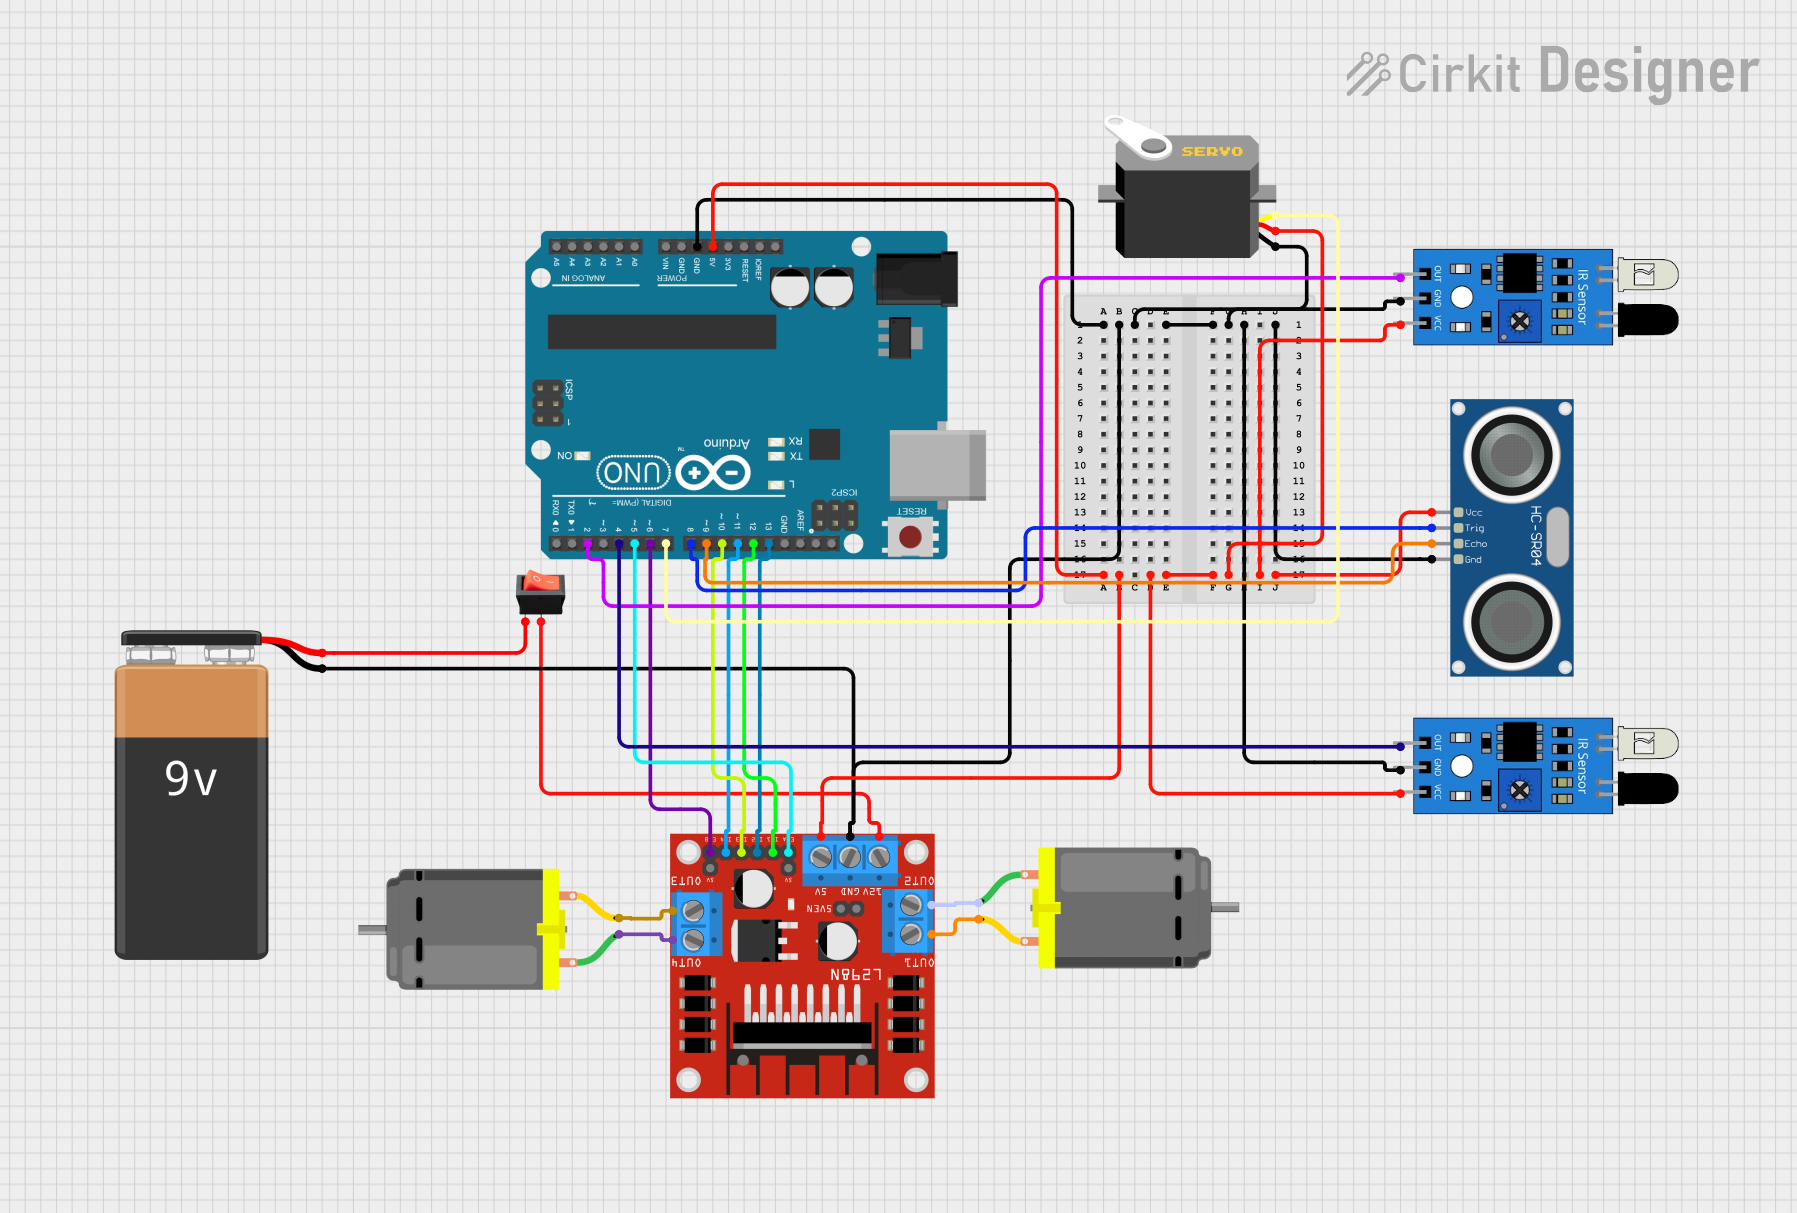
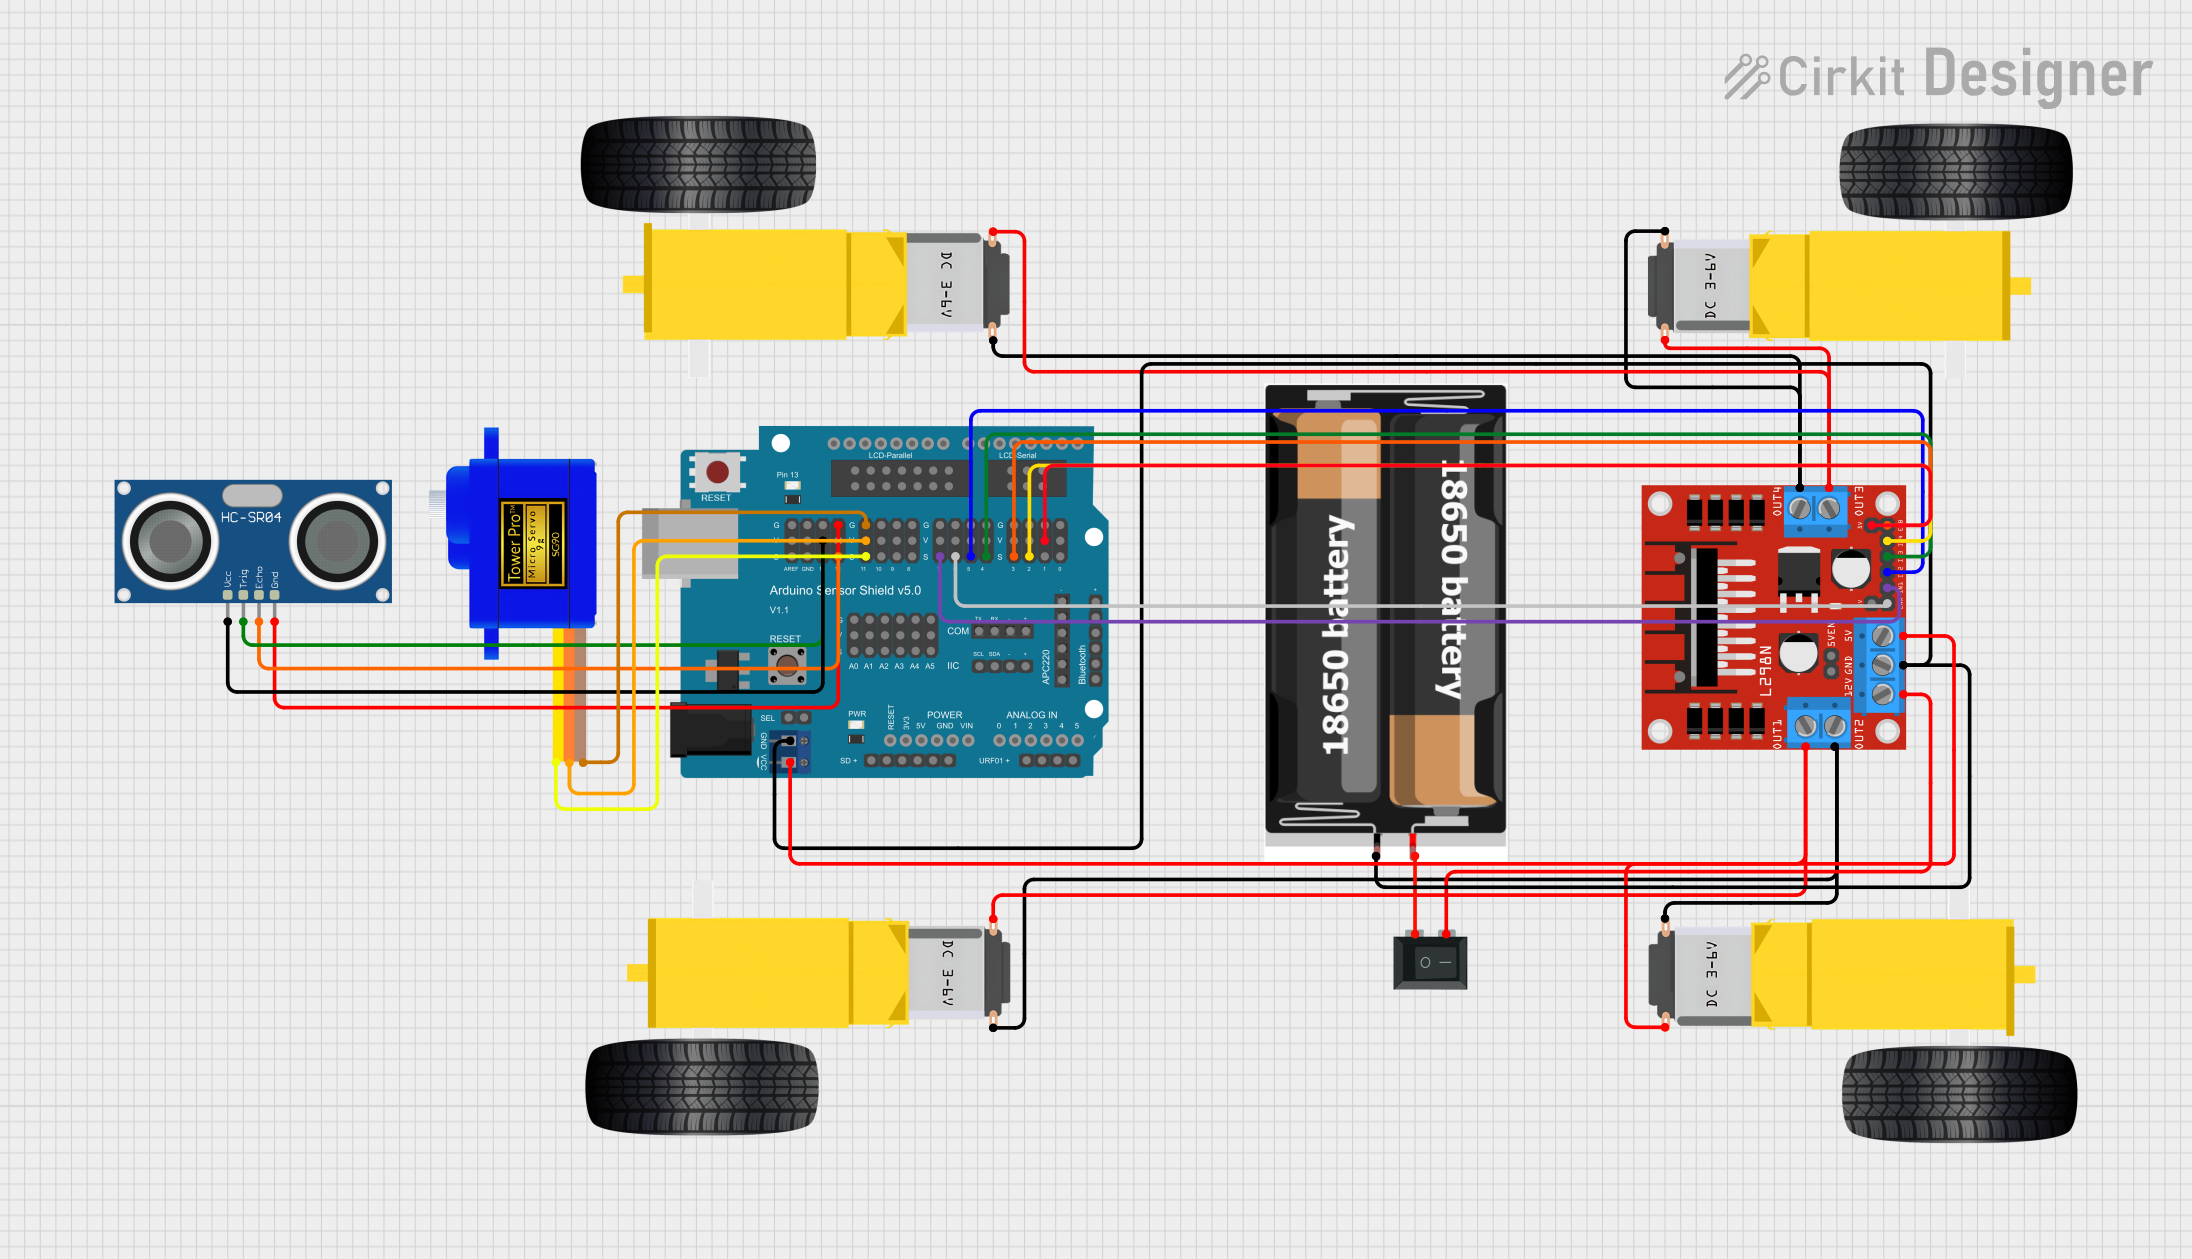
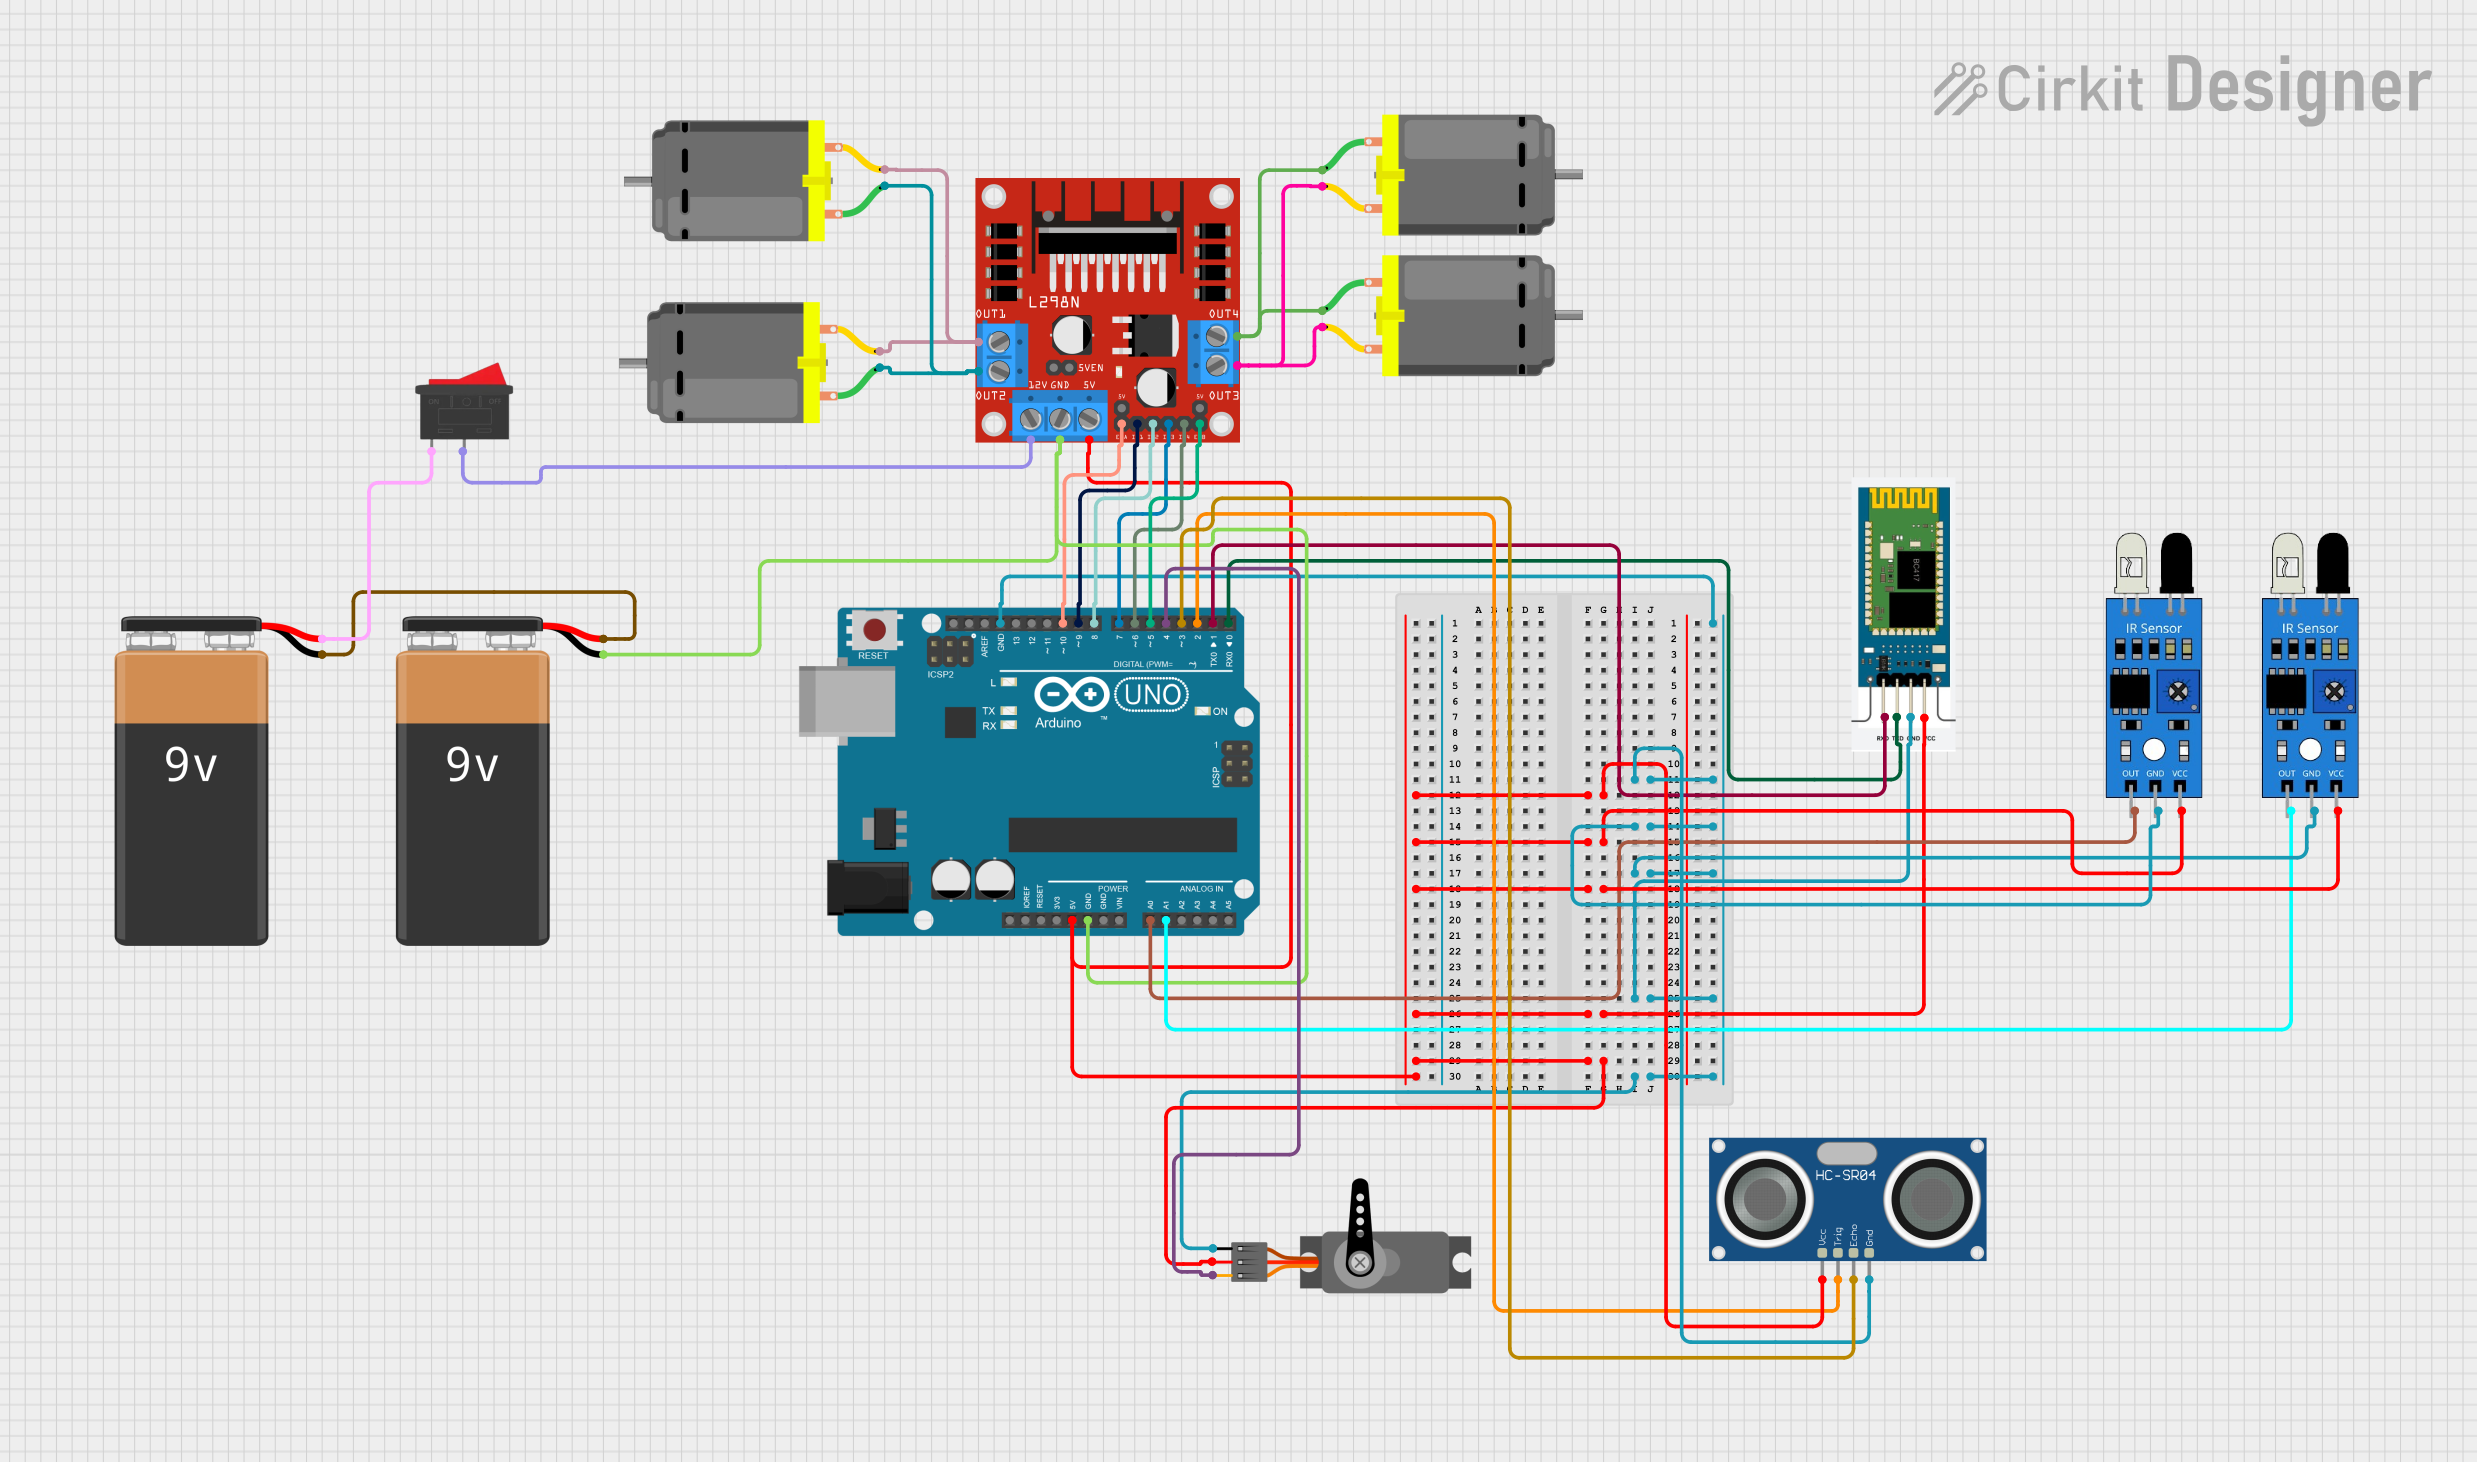
Explore Projects Built with Df robot
Common Applications and Use Cases
- Obstacle Avoidance: Navigating around objects using ultrasonic or infrared sensors.
- Line Following: Following a predefined path using line-tracking sensors.
- Autonomous Movement: Performing tasks without human intervention.
- STEM Education: Teaching robotics, programming, and electronics.
- Prototyping: Developing and testing robotic systems for research or commercial use.
Technical Specifications
The DF Robot platform typically includes the following components and specifications. Note that specific models may vary slightly.
General Specifications
- Power Supply: 6V to 12V DC (via battery or external power source)
- Microcontroller: Arduino-compatible board (e.g., ATmega328P)
- Motors: Two DC motors with encoders (for precise movement control)
- Sensors: Ultrasonic sensor, line-tracking sensors, and optional IR sensors
- Communication: UART, I2C, and SPI interfaces
- Chassis Material: Durable plastic or metal
- Dimensions: Varies by model (e.g., 170mm x 140mm x 60mm)
Pin Configuration and Descriptions
The DF Robot's microcontroller board typically includes the following pin configuration:
Microcontroller Pinout Table
| Pin | Function | Description |
|---|---|---|
| D0-D1 | UART (RX, TX) | Serial communication pins for connecting to a PC or other devices. |
| D2-D7 | Digital I/O | General-purpose digital input/output pins. |
| D8-D9 | Motor Control | PWM pins for controlling motor speed and direction. |
| A0-A5 | Analog Input | Analog pins for reading sensor data (e.g., line-tracking or ultrasonic sensors). |
| VIN | Power Input | External power input (6V-12V DC). |
| GND | Ground | Common ground for the circuit. |
| 5V/3.3V | Power Output | Provides regulated 5V or 3.3V for sensors and modules. |
Sensor Pinout Table (Example: Ultrasonic Sensor)
| Pin | Function | Description |
|---|---|---|
| VCC | Power | Connect to 5V or 3.3V power supply. |
| GND | Ground | Connect to the ground of the circuit. |
| TRIG | Trigger | Sends an ultrasonic pulse to measure distance. |
| ECHO | Echo | Receives the reflected ultrasonic pulse. |
Usage Instructions
How to Use the DF Robot in a Circuit
- Power the Robot: Connect a 6V-12V DC power source to the VIN and GND pins.
- Connect Sensors: Attach sensors (e.g., ultrasonic or line-tracking) to the appropriate pins.
- Program the Microcontroller: Use the Arduino IDE to upload code to the robot's microcontroller.
- Test the Robot: Place the robot on a flat surface and observe its behavior.
Important Considerations and Best Practices
- Power Supply: Ensure the power source matches the voltage and current requirements of the robot.
- Sensor Placement: Position sensors correctly for optimal performance (e.g., ultrasonic sensor facing forward).
- Motor Calibration: Calibrate the motors to ensure straight-line movement.
- Code Optimization: Write efficient code to minimize delays and improve responsiveness.
- Safety: Avoid running the robot near edges or obstacles that could damage it.
Example Code for Obstacle Avoidance (Arduino UNO)
// Example code for DF Robot obstacle avoidance using an ultrasonic sensor
#define TRIG_PIN 7  // Pin connected to the TRIG pin of the ultrasonic sensor
#define ECHO_PIN 6  // Pin connected to the ECHO pin of the ultrasonic sensor
#define MOTOR_LEFT 9  // PWM pin for the left motor
#define MOTOR_RIGHT 10 // PWM pin for the right motor

void setup() {
  pinMode(TRIG_PIN, OUTPUT); // Set TRIG pin as output
  pinMode(ECHO_PIN, INPUT);  // Set ECHO pin as input
  pinMode(MOTOR_LEFT, OUTPUT); // Set left motor pin as output
  pinMode(MOTOR_RIGHT, OUTPUT); // Set right motor pin as output
  Serial.begin(9600); // Initialize serial communication
}

void loop() {
  long duration, distance;

  // Send a 10-microsecond pulse to the TRIG pin
  digitalWrite(TRIG_PIN, LOW);
  delayMicroseconds(2);
  digitalWrite(TRIG_PIN, HIGH);
  delayMicroseconds(10);
  digitalWrite(TRIG_PIN, LOW);

  // Measure the duration of the ECHO pulse
  duration = pulseIn(ECHO_PIN, HIGH);

  // Calculate distance in centimeters
  distance = duration * 0.034 / 2;

  // Print the distance to the Serial Monitor
  Serial.print("Distance: ");
  Serial.print(distance);
  Serial.println(" cm");

  // Control motors based on distance
  if (distance < 20) {
    // Stop motors if an obstacle is detected
    analogWrite(MOTOR_LEFT, 0);
    analogWrite(MOTOR_RIGHT, 0);
  } else {
    // Move forward if no obstacle is detected
    analogWrite(MOTOR_LEFT, 150); // Adjust speed as needed
    analogWrite(MOTOR_RIGHT, 150);
  }

  delay(100); // Short delay for stability
}
Troubleshooting and FAQs
Common Issues and Solutions
Robot Not Moving:
- Cause: Insufficient power supply.
- Solution: Check the battery or power source and ensure it meets the voltage/current requirements.
Sensors Not Responding:
- Cause: Incorrect wiring or loose connections.
- Solution: Verify the sensor connections and ensure they are securely attached to the correct pins.
Erratic Movement:
- Cause: Uncalibrated motors or uneven surface.
- Solution: Calibrate the motors and test the robot on a flat, smooth surface.
Code Upload Fails:
- Cause: Incorrect COM port or board selection in the Arduino IDE.
- Solution: Ensure the correct board and port are selected in the Arduino IDE settings.
FAQs
Can I add more sensors to the DF Robot? Yes, additional sensors can be added using the available I/O pins, provided the power supply can support them.
What programming languages are supported? The DF Robot's microcontroller is Arduino-compatible, so it supports C/C++ via the Arduino IDE.
How do I improve battery life? Use a higher-capacity battery and optimize the code to reduce power consumption (e.g., by minimizing delays).
This documentation provides a comprehensive guide to using the DF Robot effectively. For further assistance, refer to the official DF Robot website or community forums.